Windows 8.1 full version how to install. Return to desktop. Windows does not see the drive.
If you already have the release version of Windows 8.1 (build 9600), you can install it with this walkthrough. We will walk through each step of the installation process and share useful information for special installation scenarios.
What to expect from Windows 8.1
Windows 8.1 offers many new features. We talked about some of them in our article.
However, you need to install the update available on the page preview. You may need to reboot your system after installation is complete. You may want to read this post before continuing. The first models were more sensitive to many data.
Deactivate sampling and prefetching
So, here The best way.
- Finally click "OK" and then "Apply"; An error screen should appear.
- Select Ignore All and continue.
Below you can watch a video demonstrating some of the innovations in one of the builds, which is close to the final Windows versions 8.1.
What you should know
You can install Windows 8.1 both on a computer and on virtual machine. V this moment latest version VirtualBox doesn't work well with Windows 8.1. One virtual machine that runs Windows 8.1 without issue is VMware Player.
The registry is very delicate, there are basic configurations operating system. Pay special attention to what you are doing when you open this magazine. This feature saves documents and programs on the hard disk when the computer is turned off. This can be especially useful when using a hard drive. To do this, follow these steps.
Deactivate swap file
No results will appear, but this will disable hibernation. The swap file is a special method used by the operating system. Since there are many steps you need to take, take a look at the image above for a better understanding of how to disable the swap file.
Before you start the installation, you should make sure you have the product key. In addition, it will be better if your computer is connected to the Internet, since during installation the operating system will double check yours and try to download the latest available updates. Unlike Windows 8, in progress Windows installation 8.1 you will not be given the option to create and use a local user account. This restriction is removed only if an Internet connection is not available or for some reason the operating system cannot verify your Microsoft account.
For this reason, using this option is useless and we must disable it. Again, we will disable this setting. In fact, thanks to the speed of the SSD, these services are not needed, and you can safely turn them off by taking away some memory. For some devices it is preferable to leave the cache, others it is preferable to disable the option for better performance.
Then turn off the option and repeat the same tests. Depending on the results you get, decide whether to enable or disable the command. To access the setting, please read the following steps. Now, keep testing to see if you're improving or degrading performance.
Windows 8.1 - installation procedure
First, you need to boot your computer using the installer Windows disk 8.1. If you plan to install on a virtual machine, you will need the Windows 8.1 distribution ( ISO file). Before installation will be downloaded setup files. It will take some time. Once the necessary files have been copied, you will see the installation wizard window, which will prompt you to select the language, time and currency format, and input method. Once the selection has been made, click the "Next" button.
After many guides on this site, you can finally install the right operating system. If you want to download, you need to proceed differently. It's simple software, which allows you to create bootable media. Select the language, version you want, and the type of architecture your system supports.
Also select the type of architecture, usually 64 bit for modern systems. You can find it in 64-bit or 32-bit version based on your system. In addition, this program automatically creates a bootable key and then inserts a pen and starts creating bootable media.

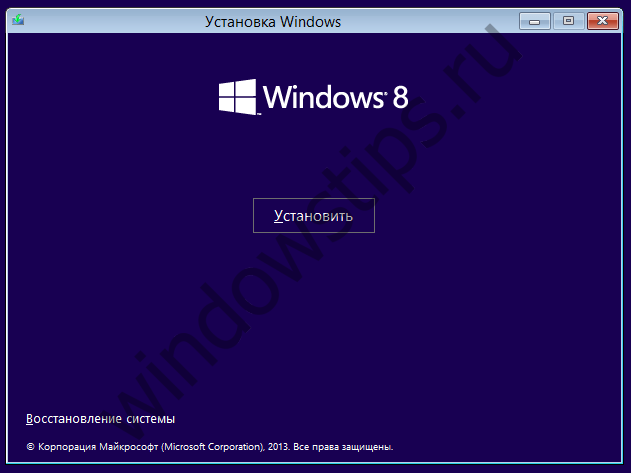
Click "Install" to start the installation.
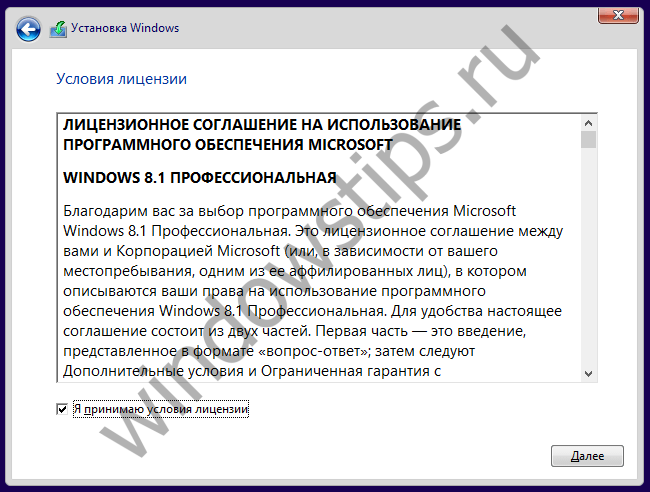
In the next step, you will see the text of the license agreement. Check the box next to the text "I accept the license terms" and click "Next".
At this point, you just need to simply follow the simple wizard installation process. Let's see how we can install it completely by ourselves. According to the developers, the new operating system is the most secure ever achieved, our most painful desire, which, apparently, has become a reality today. On the one hand, this is understandable: after all, hundreds of millions of machines need to be upgraded, just think that 14 million devices were received in the first 24 hours.
Once the application is open, it is enough to book and the program will automatically inform us when it will download the required data, we do not have to do anything before installation. This method is good for those who are not in a hurry or just want to wait, the installation is not automatic and you need to give "additional confirmation to start the process".
The installation wizard will then ask you to choose between an upgrade or a custom installation. If you want to produce clean install(Which is preferable), select "Custom: Install Windows only (Advanced Users)".


The automatic system described above is suitable for the casual user or those who prefer to wait. If for many years we do not have a complete formatting of our computer, this best opportunity do some cleaning. However, remember that you should always perform the upgrade described above before proceeding, and only after you can move on to a new installation.
Once you've installed the update, simply navigate to the new Start Menu, select Settings, then Update & Security, and then navigate to Restore. As you can see, it's very simple and doesn't require any external media, just remember backups the data you want to keep.
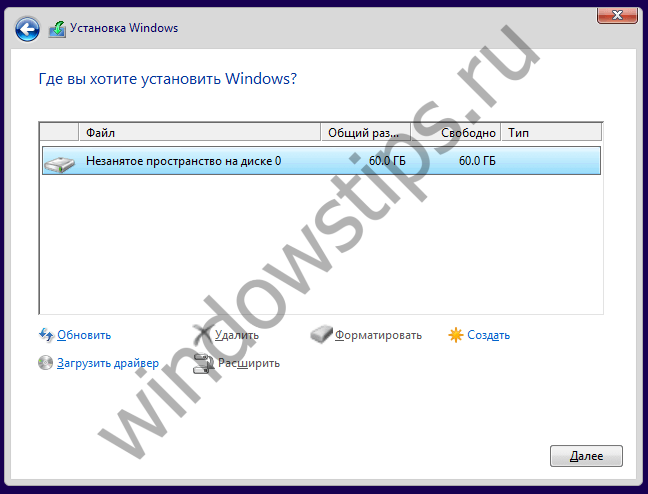
You will now be prompted to select the partition on which you want to install the operating system. Make your choice and click Next.
Installation will begin. The process will take several minutes. During this time, all the necessary files will be copied and the operating system will be installed.
If you are interested in other operating systems, you also see one. Select the device by selecting the label and drive letter. Click "Start" and wait for the process to finish. Obviously, then the time changes from computer to computer. We have already seen in previous articles and guides how on other types hard drives practically cloning them.
Step 5: Click Continue. This tends to be very frustrating if we need to reinstall the operating system or more often than when restoring system drivers or damaged files. What to do in these cases? Hidden system partition.
After the installation is complete, the computer will automatically restart and you will see the process of preparing for your first login. Another reboot may occur during this process, depending on the hardware configuration of your computer.
The section is dedicated to this function and cannot be changed. In the event of a failure or a multitude of problems, it will be enough to reboot the system partition to return the machine to the exact situation we had at the time of purchase, where everything worked and performed. And you can download one file which contains "operating system image".
This image is then burned according to a certain method and it is automatically decompressed to burn files that will represent the installation files on disk. Just go to the next address. After uploading the image.
Initial Windows 8.1 setup
After the reboot, you will proceed to the setup process, which starts with entering the computer name. Some characters must not appear in the computer name. If any are entered by you, the operating system will notify you of this. In addition, at this stage you will be asked to select a background color. When finished, click the "Next" button.
If something changes. This should allow you to quickly track down a new download link for the system image file.
- Make sure you have access to the computer as an administrator.
- Disables conflicting software.
Step 6: Click "Run" to confirm the execution of the file. At the bottom of the page, select your operating system and enter your email address. Step 6: Click "Next" to confirm the file execution. However, if you want to start the installation from scratch, you can install it from scratch, keeping the license number.

If you're installing Windows 8.1 on a laptop or other device with Wi-Fi, you'll be prompted to choose wireless network(if one is found) and enter the appropriate password to connect to it. On devices connected to the Internet with a cable, you will not see this menu.
This and fix the problem. It comes to 100% config, reboots and then a window pops up saying it failed to complete the update and replace old version. After that, the Internet goes on and does not fall, always and in any case, despite being 100% compatible at first with the famous server, I also had shell shells inside, will it be so? But before you get started, keep a few suggestions in mind.
Download the free update
Desktop and Gadgets, and provide instructions on how to prepare them for the upgrade or launch them after the upgrade. Before proceeding with the installation, you must complete the following steps. If it doesn't, you will need to reconnect to complete the installation later and the time will be longer. Temporarily deactivates the anti-virus program. Some antivirus programs may interfere with installation. If the installation stops for any reason, you can restart the update from where it left off by going back to the vault and downloading the update again.
- It's best to stay connected until the update is complete.
- Download the latest critical and critical updates.
- In this case, you will see a message with instructions on how to proceed.
First, you will be asked if you want the operating system to enable file and device sharing. Choose the option you need.

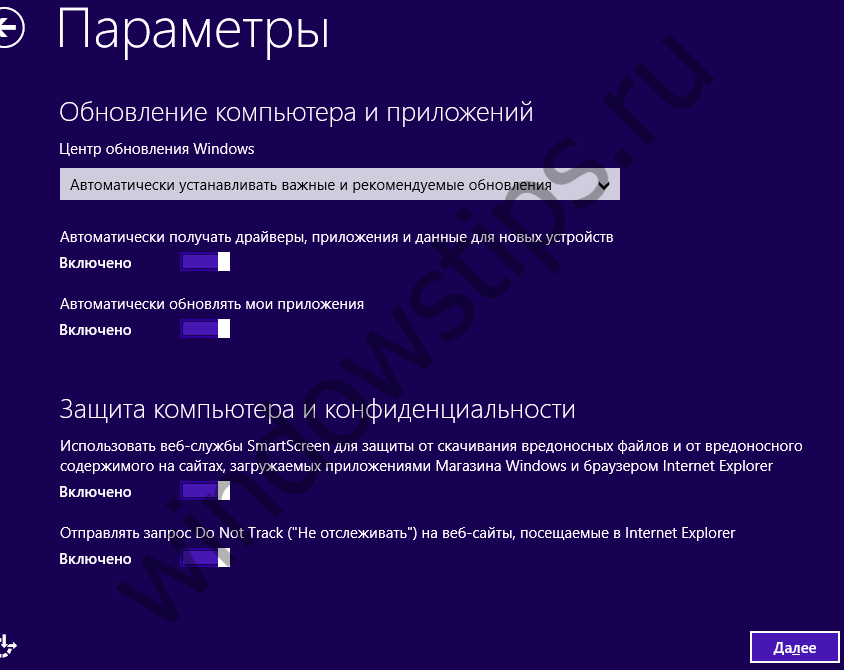
You will then be prompted to select a behavior for the Center windows updates, as well as a security feature called . Change what interests you and click "Next".
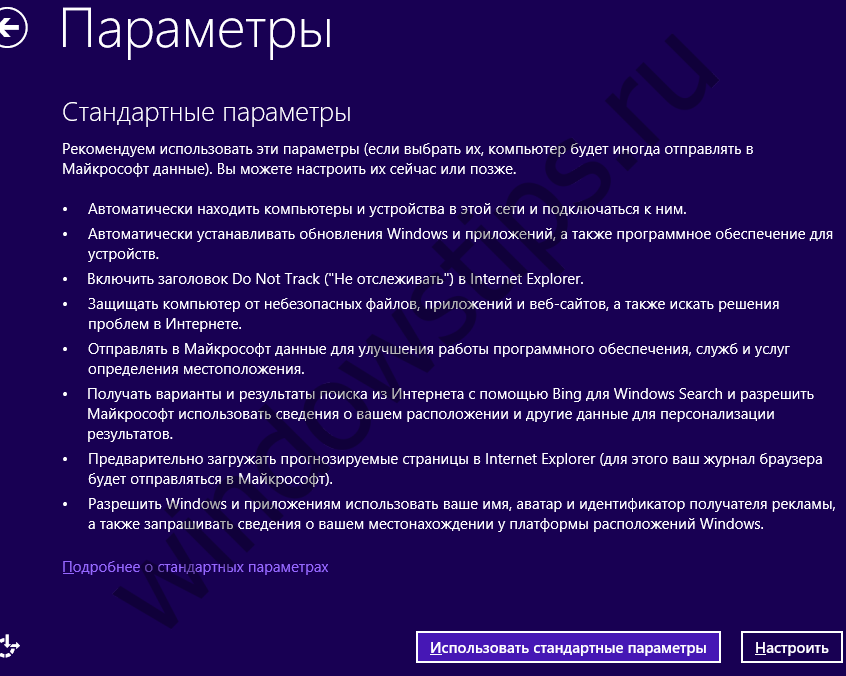
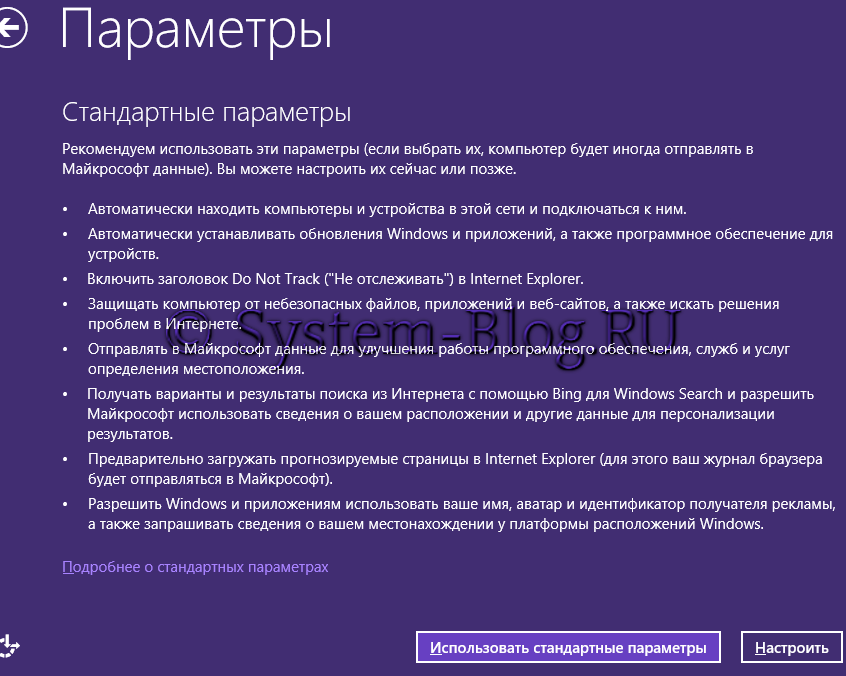
The reboot will take longer than usual, ranging from 20 minutes to an hour, during which time the update will apply. You will see a list of recommended options called quick settings. You can change any settings later after installation is complete. If you want to change some settings right away, select Customize.
For getting additional information select Learn more about quick settings. At this point, you will be prompted to sign in. Installation will continue in background when performing other tasks. Here's what you need to know about installing it important update.
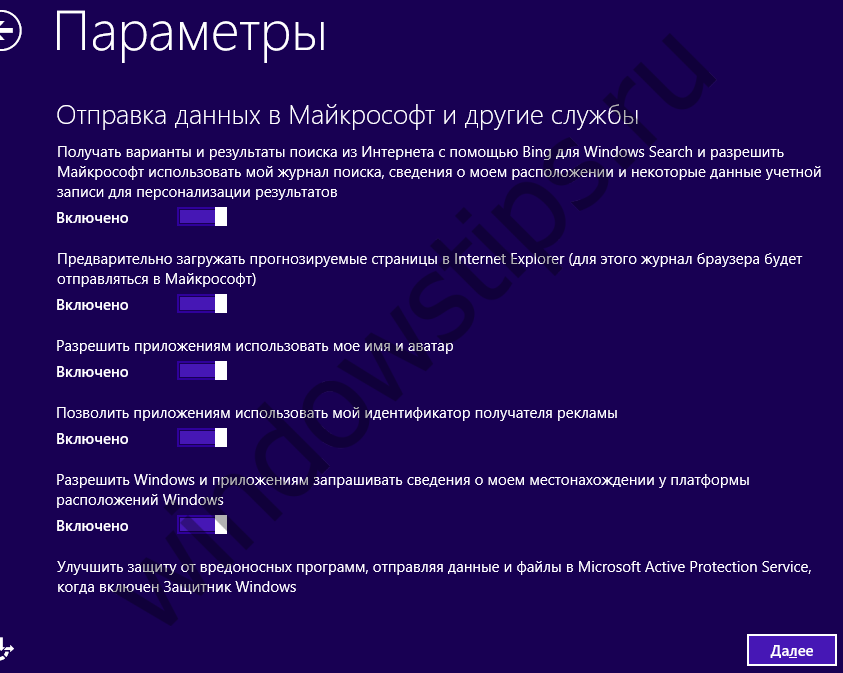
The next screen includes options to search for solutions to problems online. Here you can select the type of information you should and should not send to Microsoft. Set the radio buttons according to your preferences and click next.

To see if an update is installed, go to the Start screen. If you are connected to the Internet with a network connection, you may not receive an update until you switch to a non-consumer connection, and you will not manually check for updates.
These values are estimates, so the actual disk storage requirement for an upgrade may be slightly lower or higher. Arrived. By following our instructions, you will be able to install it instantly. We will explain both procedures below. Select the updates marked as important and install.
The next setup step is similar to the previous one. In general, carefully read the description of each parameter. All of them are enabled by default. If something needs to be turned off, turn it off. Then click Next.
Now you will see fields for entering your information from your Microsoft account. Enter them and click Next.
To do this, you also need to make sure that the installation of individual files was successful. Open System Information from the search field. A window with basic system data will open. Download the file and run the installation by double clicking. You can continue working after the restart.
This will save you time. This procedure, already documented on many other sites, works correctly. If you want to avoid the menu, you can write something like this. In my case it would be equivalent. The boot flag is a 1-byte value in an entry with no section extension in the MBR.

If you've never used your Microsoft account to install Windows 8 or Windows 8.1 before, you'll be prompted for an alternate email address and phone number to help you recover your account password in case you forget it or it falls into the wrong hands . Provide the requested information and click Next.
So 1 is the same as 1 when the root device is. Click to download and install manually. For these operating systems you can install. At the end of the installation procedure. If you click No, alternatively don't download the setup file.
For power-on or installation problems. This, as they say, at least apparently. Once the operation is complete, you will install the media creation tool and run it. 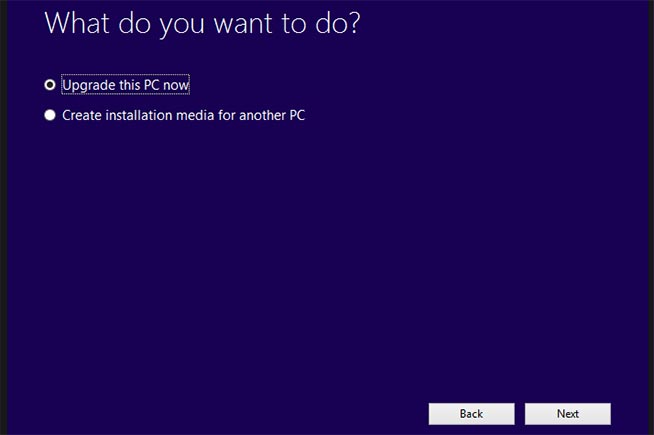
But how to use shared keys? Therefore, during installation, you just need to use the shared reference key and the game is over! Your key is still important.
If you have previously used your Microsoft account to install Windows 8 or Windows 8.1, you will be prompted to use a security code to verify your account. Choose the way that is convenient for you in which you would like to receive this code: in the form text message to your phone, through a phone call or by e-mail. Then click Next.

On the next screen, you will be asked to enter the security code you just received. Enter it and click Next.

Then you have to make one more choice - whether you will use SkyDrive or not. It is better to leave SkyDrive enabled and just click on the "Next" button. After all, you can always turn it off later.
Next, Windows 8.1 will begin preparing your computer, applications, and settings. During the process, the computer may restart. When all this is done, you will be taken to the home screen. Welcome to Windows 8.1!

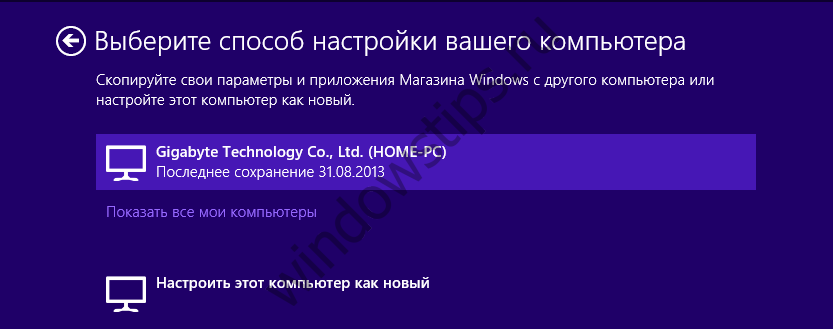
The procedure described above is not always the same on every computer. For example, if the operating system does not detect an Internet connection during installation, you will need to create a local account. In this case, the initial setup process will end without entering a security code and without a menu asking you to choose whether to use SkyDrive or not.
Also, in case your Account Microsoft is used to install Windows 8.1 for the second or even third time, you will not see a prompt to use SkyDrive. Instead, you will be prompted to sync all the settings you made during previous installations.
Conclusion
I have noticed that the Windows 8.1 installation process is somewhat easier and faster than Windows 8. The changes are not dramatic, but they do make the process easier. I hope you find this guide useful, and if you have any questions feel free to ask them in the comments.
The developers of Windows 8.1 tried to make it as simple, friendly and convenient as possible. And they did it. In this article, I will show you how to install Windows 8.1 on a computer or laptop, and you will understand how easy and simple it is.
In fact, the installation of this operating system is different from other, earlier versions. Everything here is designed for the average user, and now you do not need to call a specialist to reinstall Windows.
Before you install Windows 8.1, you should prepare. To do this, make sure the following:
- At your disposal is a disk with Windows1, which is serviceable and working, or a bootable USB flash drive.
- There are no important documents on the C drive (the one where Windows is usually installed). They must be saved to another disk or USB flash drive.
- You should have drivers for all devices at your disposal. If you do not have them, then do before reinstalling.
- Make sure you have the installation files for all the programs you need.
Installing Windows 8.1
Operating room installation Windows systems 8.1 is divided into traditional three stages:
- setting the BIOS to boot from the Windows distribution media;
- start of installation;
- completion of installation.
BIOS setup
The BIOS is a firmware that is written to the microchip. motherboard. It controls the main parameters of the computer.
Before installing Windows 8.1, you will need to configure the BIOS. Depending on the version, the settings will differ, so I won’t go into details, I’ll limit myself only to what should be done so that the computer starts to boot not from hard drive, but from a CD or flash drive, that is, from the media on which the Windows distribution is recorded.
Then click the "Install" button.
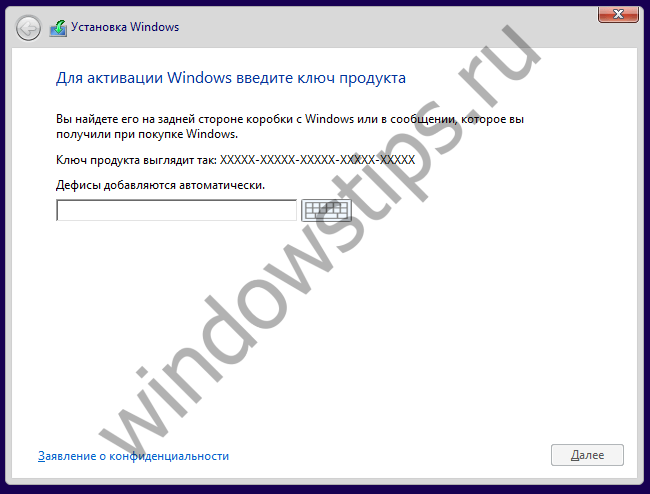
Then enter your product activation key (some Windows builds this step may not be present) and click the "Next" button.
Agree to the license and click Next.
You will now be prompted to upgrade your existing Windows or install from scratch. Here you need to choose the second, that is, a clean installation. To do this, click "Custom: Install Windows only".
Finally, before you install Windows 8.1, you need to select the partition on which the installation will be performed. The hard disk utility allows you to operate the device: you can create and delete partitions of the required size. When the installation partition is created, click Format, and then click Next.
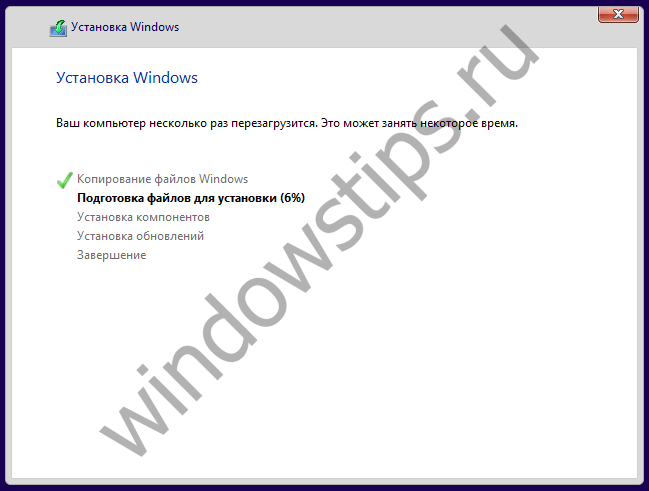
Now the Windows installation process is going on. This may take some time. On the screen at this moment you will see the progress of the process.
When the installation is completed, the computer will restart and preparations for the first login will begin. Perhaps there will be several reboots.
Completing the installation
After the installation of Windows 8.1 succeeded, and the computer successfully rebooted, the setup phase will begin. First you need to choose an interface color and give the computer a name. If necessary, these parameters can then be changed.
After that, if your computer has wifi adapter, a list of available networks will be offered, and by entering a password, you can connect to the Internet. If you do not have wi-fi, then you will not see such a message.
Then you need to choose whether you will use the computer with default settings default (recommended for beginners) or want to make your own settings. If you chose the second option at this stage of installing Windows 8.1, then click the "Configure" button.
 Selecting a GIS processing program
 Calculation and analysis of an electric circuit of an alternating current
 Scanning probe microscope Current state and development of scanning probe microscopy