How to set up a unique signature in Yandex mail. Video to help. How to insert a picture in an email in the text itself and in an attached file How to insert a card in an email
Step 1. Registration in Yandex.
To use the Yandex mapping service, first of all, we need to register and receive an email address @yandex.ru. If you already have an email on Yandex, you can use your username and password to log in and skip this step.
If there is no mailbox on Yandex yet, you need to get it. To do this, open the address http://passport.yandex.ru/ and click the "Register" link on the page.
We fill out the proposed registration form - enter the first name, last name, select the login and click the "Next" button.

We also fill out the following form - come up with a password and secret question, enter the characters from the picture and click the "Register" button.
Step 2. Creating a map using the constructor.
After we have registered and logged into the Yandex system, we open the route map constructor at http://api.yandex.ru/maps/tools/constructor/

Select the desired area on the map using the zoom in/zoom out and drag tool. When the desired fragment of the map is selected, press the "Set points" button and click on the place that we want to mark on the map.
In the pop-up window, enter a description, for example, "Office of the company", select the label design style and click the "OK" button. In addition to your office, by setting additional marks on the map, you can also mark other objects that can help in orientation. In addition, the map window can be reduced and enlarged in size by dragging it by the green triangle in the lower right corner.
When editing is completed, click on the gray block “2 View”, where you can see how the map will look on the site. If everything suits, then go to the block "3 Embed Code".
Here we enter the current address of the site where the card will be used, read and accept the user agreement, and then click on the big green button “Get card code”. Select and copy the resulting code (press Ctrl + C on the keyboard).
Step 3 Inserting a map into a website.
We go to the site management system. If KasperCMS 5 is used, then select Feedback > Location map in the top menu

In the window that opens, paste the received code into the "HTML code" field and click the "Save" button. Now go to the page feedback your site and look at the result.
If you use another content management system (not KasperCMS 5) or you need to insert a map on an arbitrary page, then this can also be done. Open the page in edit mode source and paste the code received from Yandex in the place on the page where you want to place the map.
If you need to change the size of the map on the site, then you can edit the following line in the code (it is located almost at the very bottom of the code):
The value after the "width :" parameter indicates the width of the map, and after the "height :" parameter, the height of the map. The value can be set in percentage or pixels.
For example, if you set the value width: 100%, then the map will stretch to the entire width of the page (to all 100%). If you set the value height :350px , then the map will have a height of 350 pixels.
Hello. Any Internet user has probably sent or received e-mails at least once in their life. We may maintain personal or business correspondence, receive messages from interesting Internet resources that you have subscribed to, notifications of a different nature, and much more. In a word, correspondence through electronic messages plays one of the important roles in the life of the Internet user.
And there are cases when we need to insert a picture into the text of the letter, whether it is a greeting card or just a photo (picture). Do not attach photos to the letter as files, namely, insert them into the text of the letter in order to somehow decorate appearance letters. This is what we will do today.
We will look at this process on popular email services, as well as email clients: The Bat and Mozilla Thunderbird. On the latter you will find several articles on our website in the category Useful software -> For computer.
How to insert an image into the body of a letter on yandex.ru
I suggest you start with Yandex. We go into our mailbox. How to create it, read here. We press the button Write
Next, a window for writing a new letter will open. Fill in the standard fields: to whom, subject. We write any text you need. And in the middle of the letter we want to insert a picture. How to do it? If we just transfer the image to the body of the letter, then it will be loaded as an attached file.

And we need the image to fit into the text. To do this, go to the design mode. To switch to this mode, click to the right of the letter text field " Issue a letter»

Now a panel for text formatting has appeared in the letter window: bold, italic, left, right, middle. You can set the text color, background color, etc. Very similar to the standard Word panel

Now let's try to put our picture in the text of the letter. We first put the cursor in the place where we will put the image, then open the folder with the photo and simply drag it into the letter's window, to the place where the cursor is. And as you can see, the picture was successfully installed.

Now select our image by clicking on it with the mouse. Markers appeared around the picture, by moving which we can reduce or increase it in size. However, remember that as the size of the picture increases, its quality deteriorates.
We can also put the photo in the middle of the letter, on the left edge, in this case, the text will wrap around it on the right. Or we will make it right-aligned, the text will flow around on the left side accordingly. We can also put a link on the image by clicking on the corresponding button.
This way you can add multiple pictures to your email. And then click on the button Send' to send the email to the recipient. As you can see, there is nothing complicated. Move on.
How to insert an image into an email in Google Mail
Open your mailbox on google. If you do not have mail there yet, then you are here. Click on the button " Write”, enter the text, then set the cursor to the right place, open the folder with the photo and calmly transfer it to the letter.

The image is where we wanted it to be. Here, as it turned out, it is much easier to insert a picture than in Yandex.
Here you can also change the size of the image. To do this, select it and use the markers to resize it.

Or use the panel where you can specify the desired size: small, optimal or original.
To align the image in the middle, right edge, open the formatting panel and select the desired alignment option.

Unfortunately, for some reason here the picture does not wrap around text when aligned to the left or right. After that, you can send a letter to the addressee. Move on.
All companies (especially their directors) want to stand out from the rest with their unique style. And emails are no exception. But many email clients and services provide the ability to change only the signature in the letter. Well, everyone does it, but what if you need to write such a letter:
Provided that corporate mail is deployed on the free Yandex or Mail.ru platform (we don’t take Gmail for business into account, because it hasn’t been free for a long time), the task becomes quite laborious, but it can be solved!
So, first of all, you need to draw a design future letter. It is important to note that the design should be no more than 640 pixels wide and take into account the “stretching” of the email body. This rule will allow you to view your letters on the screens of even the smallest personal devices without horizontal scrolling (we are not talking about mobile browsers).
After, you need to compose a letter. A lot of articles have been written about the rules for the layout of e-mail letters, and it will not be difficult to find them. After layout, we advise you to make sure that most mail services and clients perceive the letter template adequately. First of all, you should check for:
- Yandex - mail;
- mail.ru mail;
- Gmail mail;
- Mozilla Thunderbird;
- The Bat;
- Microsoft Outlook.
Everything is in order with the layout of the letter, so we proceed to the magical rituals.
Of all the mail services and programs on this moment only Mozilla Thunderbird and Microsoft Outlook support inserting letters in HTML format. But all users in your company "categorically trust" Yandex - mail (or mail.ru), and the director himself refuses to switch to incomprehensible programs when he has been sending letters with his favorite Star Wars theme for more than a year. And Yandex does not support inserting letters in HTML format. How to be?
I'm going for the trick.
Installing and configuring Mozilla Thunderbird on the account the employee we want.
Be sure to specify data transfer via IMAP - a protocol for incoming mail, for outgoing SMTP - a protocol. This manipulation will allow you to download mail in Mozilla Thunderbird without deleting it on Yandex servers and automatically update sent letters from Mozilla Thunderbird on Yandex servers.
This feature will help us create a letter template in Mozilla Thunderbird in HTML format and automatically upload it to one of the folders in Yandex mail.
Paste the HTML code into the email and save it as a template in Thunderbird:

After 1-2 minutes, the folder we need appears in Yandex template, which contains the letter we made up. This template can be corrected and saved in the form we need in Yandex mail itself:

When creating a new letter, calling the template is not difficult - click on the green link "Sample" and load the required option. You can view all the templates we created in the folder of the same name, which is nested in the folder "Drafts".
Problem: pictures are not displayed in the letter template on the receiving side.
Yes, there is such a problem. If you upload images from a third-party site (for example, from your company's site), then the images will not be displayed at the addressee. This problem can be solved in two ways:
- Upload pictures used in letter layout to Yandex disk (if you send mail from Yandex, or to the Mail.ru cloud if you send mail from mail.ru). Next, specify direct links to these images in services. Please note that the link you specified should open the picture and nothing more.
- It is possible to load an image into the body of the letter itself by re-encoding it to base 64. Next, insert the image code in base 64 format into the tags

The best option is to convert the image to base 64 code - less mouse movements, more reliability (the image will not be deleted from Yandex disk, it is already attached to the letter itself).
Mission accomplished. Thunderbird can be removed. The director and employees are happy - now their letters are not at all the same as everyone else's.
Hello. Any Internet user has probably sent or received e-mails at least once in their life. We can conduct personal or business correspondence, receive messages from interesting Internet resources to which we have subscribed, notifications of a different nature, and much more. In a word, correspondence by electronic messages plays one of the important roles in the life of an Internet user.
And there are cases when we need to insert a picture into the text of the letter, whether it is a greeting card or just a photo (picture). Do not attach photos to the letter as files, namely, insert them into the text of the letter in order to somehow decorate the appearance of the letter. This is what we will do today.
We will look at this process on popular email services, as well as email clients: The Bat and Mozilla Thunderbird. On the latter you will find several articles on our website in the category Useful software -> For computer.
How to insert an image into the body of a letter on yandex.ru
I suggest you start with Yandex. Let's go to our mailbox. How to create it. We press the button Write
Next, a window for writing a new letter will open. Fill in the standard fields: to whom, subject. We write any text you need. And in the middle of the letter we want to insert a picture. How to do it? If we just transfer the image to the body of the letter, then it will be loaded as an attached file.

And we need the image to fit into the text. To do this, go to the design mode. To switch to this mode, click to the right of the letter text field " Issue a letter»

Now a panel for text formatting has appeared in the letter window: bold, italic, left, right, middle. You can set the text color, background color, etc. Very similar to the standard Word panel

Now let's try to put our picture in the text of the letter. We first put the cursor in the place where we will put the image, then open the folder with the photo and simply drag it into the letter's window, to the place where the cursor is. And as you can see, the picture was successfully installed.

Now select our image by clicking on it with the mouse. Markers appeared around the picture, by moving which we can reduce or increase it in size. However, remember that as the size of the picture increases, its quality deteriorates.
We can also put the photo in the middle of the letter, on the left edge, in this case, the text will wrap around it on the right. Or we will make it right-aligned, the text will flow around on the left side accordingly. We can also put a link on the image by clicking on the corresponding button.
This way you can add multiple pictures to your email. And then click on the button Send' to send the email to the recipient. As you can see, there is nothing complicated. Move on.
How to insert an image into an email in Google Mail
Open your mailbox on google. If you don't have mail there yet, then you. Click on the button " Write”, enter the text, then set the cursor to the right place, open the folder with the photo and calmly transfer it to the letter.
The image is where we wanted it to be. Here, as it turned out, it is much easier to insert a picture than in Yandex.
Here you can also change the size of the image. To do this, select it and use the markers to resize it.

Or use the panel where you can specify the desired size: small, optimal or original.
To align the image in the middle, right edge, open the formatting panel and select the desired alignment option.
Unfortunately, for some reason here the picture does not wrap around text when aligned to the left or right. After that, you can send a letter to the addressee. Move on.
How to insert a picture in a letter on mail.ru
Going to the mailbox from mail.ru, click Write a letter.
While adding images to a letter on this service, such an interesting picture was discovered. If we add using the browser Mozilla Firefox, then everything is fine. The picture is in the right place.

But when using Google browser Chrome and Yandex Browser, the picture is downloaded automatically to your computer and opens in a new browser tab. How to be?
1 way - go to Firefox browser and from there add pictures to the letter.
Method 2 - attach these pictures to the letter as files, then the recipient will see the text itself, and below it the pictures.
3 way - write a letter with pictures in the Word editor, save to a file, and then attach the file to the letter.
Method 4 is a little more difficult. We go to My World, the Photos section, upload the desired photo to any album, open it, click right click on it and from the context menu select Copy Image

After that, we go to our mail, create a new letter and insert our image in the right place using context menu or keyboard shortcut Ctrl + V

That's it, our image has successfully entered the letter. Just remember, if you delete a picture from My World, it will also disappear from your email.
We have discussed how to insert an image into a letter in popular email services. Now let's see how to insert pictures into emails using The Bat and Mozilla Thunderbird email clients.
Inserting pictures into a client letter The Bat
Those who use this email client to receive and send letters have probably noticed that inserting pictures into a letter is also impossible - pictures are saved as attached files. It doesn't really suit us. In order for the image to be inserted into the letter, you only need to change the format of the letter. To do this, in the lower part of the window for creating a new letter, change the letter format to HTML/Plain Text

After that, the pictures will be freely inserted into the letter.

You can also resize a photo, change its location using the format bar. After creating the letter, you can send it to the recipient.
Inserting images in the Mozilla Thunderbird email client
In this, inserting pictures is simple and easy. Create and drag the desired image into our letter text

That's all, perhaps, for today. We will finish. Hope everything works out for you. Good luck and see you soon!
For recognition - forgiveness, for concealment - there is no pardon. Better sin is open than secret.
Peter the Great
Hello dear friends! In the life of an active and busy person, there is often not enough time for very important moments in communication. One of them is farewell to the interlocutor. But, fortunately, modern progress is designed to optimize our activities. And today I will tell you how to set up a signature in Yandex mail.
Signature Importance
In fact, you can simply write a different text for each letter, sign without repeating yourself, in an effort to be more original. But for a business and busy person, this is often an unaffordable luxury.
For example, if you are conducting business correspondence via e-mail, then it is necessary to indicate in each message contact information so that a client or partner can always quickly remember who you are and how to contact you urgently ().
The interlocutor should always have your contact in sight. And, of course, the message should end at least with the classic, but true: "With respect, Ivanov Ivan Ivanovich." Next, the company name, position, phone number, office address, etc. Therefore, it is very convenient when all the default information is already in the message.
Instructions for creating
Now, I think, there should be no doubt that a signature is needed. We are faced with the following question. So, how to set up a signature as conveniently and efficiently as possible - let's figure it out. It is actually very simple to do this, but it is possible that I will reveal some of the nuances and secrets of this function that were previously unknown to you.
In the upper right corner of the Yandex mail screen, there is a gear-shaped icon that opens "all settings". In this menu, you need to select the item “Personal data, signature, portrait”.

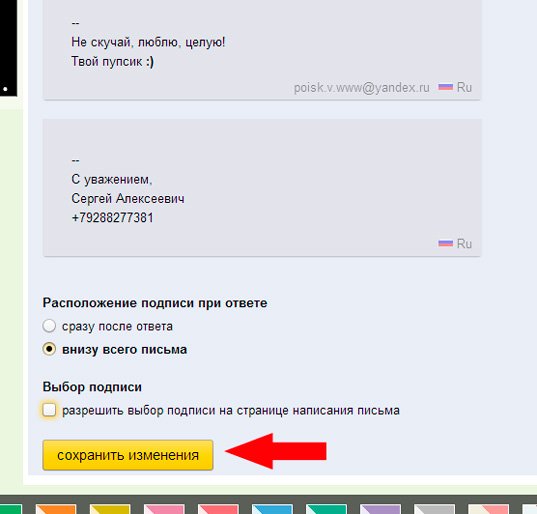
Here you are at the target. Find the "Add signature" button, click on it and in the text window you can enter the data you need. You can attach a signature to your address by checking the box just below. Next, there is an item for choosing the location of the signature in the message: immediately after the answer or at the bottom of the entire letter.
You can create several such farewells, for example, for different type letters or interlocutors. In the same menu, it is easy to edit or delete existing signatures. On each of them there is a sign of a pencil and a trash can for the corresponding operation.
Replacing the farewell is also very simple - after adding the content, you can click on the option automatically attached to the letter, then on the arrow that appears on the side of it, and you will see a choice of the signatures you have saved. Choose the one you want and you're done!
But that's not all. Your saved goodbye can also be made original using the text editing function. At the top of the window for entering the content of your signature, there are buttons for highlighting text, choosing font size and style, inserting quotes, background, alignment, etc.
Of particular interest may be the function of adding an image. A caption with a picture will clearly attract the attention of your interlocutor. Here you can add your business card or make sure that messages always have your company logo (). In principle, the choice is limited only by your imagination.

It is worth paying attention to the fact that by clicking on the "add image" button, you can only enter or copy a link to it there. If you need to attach a picture or logo directly from the computer's memory, you can drag it with the mouse to the text box.

Suppose you decide to leave only the text, and want to hide the image. Then in the message box, on the right side of the text editing panel, turn on the "no decoration" button. While this feature is enabled, any added formatting is not displayed.
It turns out that the Yandex mail signature editor provides a lot of opportunities!
In communication, you should never forget about the rules of good manners, because it is the interaction with the interlocutor that affects how he will treat us in the future.
Often, people treat us the same way we treat them. In a letter, the rule of good manners is not only a greeting, but, of course, a farewell. So don't forget to pay due attention to your signature.
Video instruction for adding a signature
Well, now we have figured out how to facilitate and optimize your communication in Yandex mail. Be sure to create a signature for yourself that can interest and attract the interlocutor, because this can already play a positive role in your affairs.
Don't forget to subscribe to updates in the group In contact with and stay tuned! Goodbye friends!
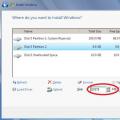 Preparing Your Computer Hard Drive for Windows XP Installation
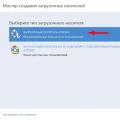 How to restore the system using the Acronis image?
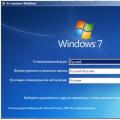 Windows 7 with uefi support