How to change the location of the browser cache. Transferring the yandex browser cache to another drive. Speed up Firefox. Find out the size and location of the browser cache from Google. Removing connection points
Android OS users are faced with a lack of internal space over time, which makes it difficult to download and receive files via Bluetooth, and makes it impossible to install new applications. The reason lies in games and programs for which 8 or 16 GB drives are not enough. The solution to the problems is to move the application cache to the SD memory card in one of two available ways.
System move cache
The first and most accessible way for a novice user to transfer the cache to an SD card is system transfer. Migrates part of the application, including massive files. To do this, go to the device settings, then the "Programs" item. A new window will display a list of all installed applications, enter what is taking up a lot of disk space and find the "Move to SD Card" button. Clicking on it will automatically transfer the cache from internal storage to an external (if the memory is divided into 2 sections) or to a microSD card.
Similar actions are performed using third-party utilities, for example AppMgr III (App 2 SD). It does not require Root rights, but it will open up a couple of additional functions. The principle of operation is no different from the standard one, only batch actions are available here, the cache is transferred and cleared in one click, roaming applications are displayed.
At the same time, not all devices support system data transfer. In them, the internal and external memory are one whole, and access to the microSD card is blocked. But even if your smartphone or tablet does not lack this function, some applications are not transferred, since the developer did not add it. In addition, after the transfer, some games will take longer to load due to the slow map. Therefore, make sure that the speed of the flash drive is at least 6th grade.
Mounting cache folders
The second way is to mount folders. Physically, the cache is stored on a microSD, and in the device's memory only the images necessary for correct work... At its core, it is like shortcuts in Windows, files are stored on one local drive, but they can be accessed from another. Actions are performed using the FolderMount application (Root rights are required, otherwise the program will not work). The mounting process is simple and consists of several steps in which two folders will be linked together.
- Open the application and click on the plus button.
- In the window that appears, fill in the information in three fields:
- "Name" - the name of the mounted folder (not necessarily exact).
- "Source" - the path to the folder whose data you want to move.
- "Purpose" - the path to the folder on the MicroSD, where the transferred data will be stored.
- We confirm the choice and agree with the warning about the transfer of files, we are waiting for the end of the operation.
- Activate the mount by pressing the pin button. After that, the files of both folders are linked.
Note, file managers will report on identical files in your linked folders. In reality, the information is contained only on MicroSD, and in internal memory images. To uninstall an application whose cache has been moved to a memory card, first unmount the folder. To do this, click on the pin of the previously linked pair, then long press, after which the basket shortcut will appear. The data will be moved to the original directory and deleted.
The free version of FolderMount is limited compared to the PRO, and offers 3 mount points. But even this is enough to free up space from the heaviest applications.
Was the article useful to you?
Rate it - support the project!
If you, like most other people, spend a lot of time on the Internet, willy-nilly, you have to learn some tricks, bypass various tricks, that is, do various actions aimed at optimizing the network.
One such trick is migrating the firefox cache. For this, a wide variety of prerequisites are possible: for example, for optimization free space. Alternatively, the cache can be migrated to HDD in order to extend the life of the solid state drive. In general, there are a lot of reasons, and if you have a desire or need to transfer the cache in the Mozilla browser, I will tell you how.
How to transfer the cache
To transfer the firefox cache, you need to do the following:
- first close your Mozilla web browser;
- now we need to get into the control of the computer. To do this, you need to go to the start menu, and then click on the "Run" line. An alternative option is to use the key combination + [R];
- a window appeared in which you need to enter "% appdata% \ Mozilla \ Firefox \ Profiles" (without quotes), and then click;
- a directory with a name called [name] .default opens, which is actually your profile folder in this web browser. You need to copy it to where you would like to see it;
- reopen computer management (remember, with the combination + [R]), but now in the window that appears, you need to enter "% appdata% \ Mozilla \ Firefox \ profiles.ini" (without quotes), then -;
- after these actions "profiles.ini", where you need to specify the path where you moved your cache. Outwardly, everything should look like the screenshot below.
Browser explanations
Now you need to "inform" your computer that you have moved the cache to another location.
Designed to speed up the loading of the pages you visit. Fragments of sites are written to it, and when you return to them, there is no need to reload large amounts of data, because they are already in the cache on the hard disk. Most browsers have automatic control the amount of this storage in order not to overload the system resource. Thus, only as much memory will be allocated as the computer can afford.
To speed up the browser, it makes sense to move the cache to another disk.
But sometimes computers use SSD instead of HDD as the system one, which, as you know, has a very limited write / rewrite resource. And while surfing, the browser constantly records information, replacing the old one with a new one when the allocated space is exhausted. In this case, it makes sense to move the browser cache to another disk or to RAM (RAM disk).
Transferring to another hard drive
Browser cache migration Google chrome to another disk, the easiest way is as follows:
- Find the folder on your computer where the cache is stored:
- To get started, go to the AppData folder, which is located on the system disk in the folder under the name of the username.
- In AppData, go to Local, then Google, Chrome, User Data, Default, and the required Cache folder will be in it.

- Run a command prompt, preferably as an administrator.
- Enter the mklink command, followed by a space separated: / D "whole original path" "whole new path".
All of these steps must be performed with Google Chrome closed. To transfer google cache Chrome to ramdisk, you must first create a virtual disk in random access memory using a special application, and then proceed exactly according to the above instructions. The procedure for creating a ramdisk will be discussed below, since it is relevant for all Internet browsers.
ATTENTION. Transferring the Yandex Browser cache is similar to the procedure for Google Chrome. The only difference is that in the AppData folder you need to find the Yandex folder, and in it Yandex Browser and then just as User Data, Default and Cache.
In Opera, actions are performed similarly to Yandex and Google Chrome:
- Search AppData \ Local for Opera Software.
- Open Opera Stable, it will contain Cache.
- Copy it to a new location, then click right click by the Opera shortcut.
- Put in the line "Object" after opera \ launcher.exe exactly the same command as for Chrome.
IMPORTANT. If Opera is the default browser, then symbolic links must also be placed. You can do it from command line as described above.
Instructions for transferring browser cache files Mozilla Firefox slightly different from the previous ones:

Transfer to RAM
As mentioned earlier, sometimes it makes sense to move the browser cache not just to another disk, but to a virtual RAM disk. You can create it using one of the many special applications. Consider transferring a cache to a RAM disk using the RAM Disk program as an example:

After completing these steps, you can transfer the cache from any browser to a RAM disk by analogy with the instructions above. The important question here is how much space from your RAM are you willing to allocate for the cache. Agree, acting at random is inconvenient and unwise. After all, there are other programs on the computer that need RAM, and their performance should not be affected.
The Primo Ramdisk program solves this dilemma. It allows you to create a dynamic RAM disk. The bottom line is that you yourself only determine the maximum disk volume, and the program itself decides how much you can give to the browser at the moment based on system indicators. The disadvantage of the application is that it is paid.
Thus, the cache transfer algorithm is similar in all types of browsers. First, you copy the data folder to a new location. After that, you explain to the system and the program that the path has changed. Likewise, transferring to a RAM disk. Just register the path to it in the settings. It is known that the RAM is reset to zero after the computer is turned off. But in the case of virtual RAM, you can save the image during a power outage. Or do not save, then it turns out that your cache is automatically cleared at shutdown. Leave your comments if you are faced with the difficulties of changing the storage of cache data, and how you managed to solve them.
Somehow about a year ago I had a computer that I could take with me on the sofa - that is, a laptop. The laptop was chosen purely for work, one of the requirements for choosing was good performance. The Intel Core i3 processor seemed to be sufficient in terms of performance.
But, at first, the nimble laptop began to annoy me more and more with its slowness. Not that he was stupid, freezing and the like - no, he just worked evenly slowly. This was especially noticeable if you worked at a "full-size" computer with a fast hard drive, and then change to a laptop. The reason for this was the slow laptop hard drive. And this is not a problem specifically with my laptop, this is a problem with all laptops, because they have slow hard drives with a rotation speed of 5400 rpm.
One day it got to me, and it was decided to buy an SSD. And the fastest was chosen. After analyzing the occupied space on the C: drive and finances, it was decided to take a 64 GB SSD. And given that with a small volume of most solid-state drives, the speed drops in proportion to the decrease in capacity, the range of selectable models quickly narrowed. The choice fell on the Samsung 830.
The drive problem is not known per se. Sometimes the problem unfolds after a while. In other cases, the system reboots. However, this is usually done in order to move the specified directories to a different partition on a different drive in order to improve performance. If there is a warning to be careful, read it and accept it. These steps did the trick for me. Hope this helps someone too.
All browsers are designed to record internet browsing history, cache files, and temporary files by default. And that would be a direct way to use it to go back to where they left the last time they close the browser window. Keep reading and you will find solutions. After a quick scan, deep scan will automatically search for more files.
But how to insert an SSD into a laptop that has no room for a second hard drive? I immediately dismissed the option of completely replacing the HDD with an SSD. A quick "googling" led to the fact that there are still ways - instead of a DVD, which is unnecessary today, put an SSD. I was not the first with such questions, and I quickly found that some adapter was needed in which the hard drive fits and is inserted instead of the drive. On ebay.com was found required adapter... The lot was called “Universal 9.5mm 2.5” SATA 2nd HDD Hard Driver Caddy For CD DVD Optical Bay. ”It cost just over eight dollars.
Transferring to another hard drive
You will be shown a warning that you must accept, and then you will see a long list of preferences, sorted alphabetically. There are three main types of preference variables shown here: integer, boolean, and string variables. Before making any changes here, please read the information on the previous page and, importantly, read all important notes carefully before attempting to customize About: Configuration.
Editing the INI file
If set to 0, text queries are not case sensitive, if set to 1, they are case sensitive. The slide will close the window faster if it is inactive. The default is every 12 hours. The number of backups created is controlled by this parameter; a value of 0 disables automatic backing up of bookmarks, and a value of -1 removes the limit on the number of allowed backups which is not recommended. The default is 0, which means that compression is disabled.
After almost a month of waiting, the newly purchased SSD was inserted into the adapter, and the adapter was already in the laptop. Of course, the adapter cover is not quite like that of the native drive, it turned out not completely imperceptible, but quite tolerable.
The new-fangled Windows 8 was installed on a brand new hard drive, everything flew and I was just fabulously glad that my laptop had practically found a second life. There was no limit to my joy until I started monitoring programs for the remaining life of the SSD. In particular, the SSD Ready program predicted the rest of my SSD's life in six months. This somehow did not please me at all. I began to read and think why so.
A value between 1 and 9 enables compression, with the higher the value, the greater the compression of the data, but can become potentially slower to scan. This setting determines the maximum amount of space they can take up in the offline cache. It is best to enable them for faster site identification. If set to True, image placeholders will be displayed until the images on the page are fully loaded. Both parameters have a default value of 3, but you can increase or decrease it as desired.
It turned out that everything was simple - the main load on the hard drive was ... Google Chrome! I never thought that a monster of a huge corporation would harm my hard drive so much.
Chrome is constantly writing something to the cache. Almost continuously. Here every 2 seconds
c: \ Users \ User \ AppData \ Local \ Google \ Chrome \ User Data \ Default \ Cache \
There is also a folder where the cache of the online video that you are watching is written. This folder is called Media Cache
They also write icons, history and all that. In the end, I came to the conclusion that the User Data folder is just constantly changing, writing-reading files and killing my SSD.
The default is almost instantaneous, but it can be decreased to 0 to make it instant, or increased to a higher value to delay its occurrence or effectively disable it. By default, this is a history of 3 recently closed windows, however you can change the value here to increase or decrease the number of held windows. By default, the feature is enabled and automatically restores the last session after a failure. disable this feature by setting the value to 0 or you can set the number of crashes to be resolved before the automatic session recovery feature starts working.
A quick analysis of the Internet made it clear that Chrome engineers are not at all inconvenienced by this, because chromium has practically no settings for this part. The settings can be forcibly applied by adding a parameter to the shortcut, and then you must start Chrome through this shortcut, otherwise it will start without parameters. The same dances with a tambourine and firelis. But with Opera everything is simpler - set it in the settings without a cache, and that's it.
For example, a value of 3 allows three crashes per line before the last session is automatically recovered. A value of 0 only displays the close button on the active tab; 1 shows it in all open tabs; 2 causes no closed buttons to be displayed at all; and 3 displays one close button at the end of the tab bar. If set to True, which is the default, your tab bar will appear where the title bar used to be. The default is 140, and the lower the value, the more likely the close button will appear on the tab, but it can also copy some of the text in the tab title.
It was decided to disable this damn Chrome cache so that it doesn't write anything to disk at all. Add the "--disk-cache-size = 1 --media-cache-size = 1" parameter to the Google Chrome launch shortcut. And lo and behold! The cache is not written, and the browser ... does not fly and works rather poorly. It is especially noticeable when you open chrome with 30 open tabs, when it reloads everything. Well, we also did not get rid of the records at all - something like icons and history was still written to disk.
The default is 20 and can be raised or lowered, but it will also be affected by the amount of visible space on your desktop. The default is 12, but if you find that the value is excessive, you can lower the value here. The next page provides an alphabetical list of useful information about: Configuration settings.
Adding an entry to add-ins
It is a popular music streaming service that is available as a free and premium service for most operating systems. The service uses a cache on the host system, which can fill up quite quickly depending on how actively the service is being used.
The second solution to the problem was to transfer the folder with the User Data chrome profile settings to the HDD. This would certainly solve all the problems, but why did I buy an SSD?
The next option, in my humble opinion, solved all my problems. I decided to use RAM Drive - i.e. keep everything in RAM, and only write to the hard drive when you turn it off. Considering that my laptop is either turned on or in standby mode, it will be very rare to write when it is turned off. Of the programs I liked, I opted for Qsoft RAMDisk. Installed as a driver. In the properties, I chose the size of the disk, the file system, where to write on shutdown. I allocated 512 MB for the disk (I think a reasonable minimum of 128 MB).
While this may not be an issue for most users, it may be for some, as the service uses up to 10% of the free disk space on the primary hard drive for caching. Because of this, it can grow. If you have 20 GB free space, the cache can take up to 2 gigabytes, if you have 200 GB of free space, it may take up to 20 gigabytes, etc.
Note. If you use this feature, you may not need to clear it completely. To resize your cache, follow these steps. You have two options when it comes to cache size. You can set it dynamically to 10% free disk space or choose a fixed maximum size for it. To do this, go to the "use no more" option and use the slider to set a fixed maximum cache size. This size can range from 1 gigabyte to 100 gigabytes.
It was possible to transfer just the cache folder, it was possible to add the Media Cache folder to it, but I decided to completely get rid of all sorts of records, and completely transfer the entire User Data folder.
It was possible again to specify in the parameters of the shortcut --user-data-dir = "path to the ram-disk" to redirect the storage of the profile, it could be written in the registry, but when launched without a shortcut or updated, all this would not work. I started thinking how to do this so that I could not change anything to redirect. And then I remembered about symbolic links!
1 gigabyte cache can store about 200 songs. If it runs out of space, the least played songs will be automatically deleted and replaced with new tracks. You can use the same menu for this. This can be useful if your primary hard drive or partition is running low on space. Just move the cache to another drive and you're good to go.
Please note that the existing cache will be automatically moved to the new location so you don't lose access to any offline tracks. Removing the cache to free up disk space is another thing you might want to consider, especially if you are not saving songs for offline listening.
The Link Shell Extension utility was downloaded, with the help of which I actually created a "shortcut" in the place of the User Data folder, a link that led to my RAM disk. Those. there was nothing on the disk, entering the User Data folder we were immediately redirected to the RAM disk. And what is the plus of such a solution - neither the system nor Chrome saw any trick.
Chrome started to work even faster than it was on the SSD. Very fast. Now I probably even recommend everyone to at least put the chrome cache on a small RAM disk. For me personally, it's a mystery why engineers do not pay attention to the problem of the fact that chrome writes a lot and often. The reliability of the information is good, but not at the cost of killing the hard drive!
Other ways to move your profile
You can find the location in your caching settings. Just delete all files and folders inside the repository.
- The Browse For Folder dialog box appears.
- Select the folder containing the folder you copied.
Create a new profile and copy it over it
Create a new profile and transfer old data
- Create a new profile in the desired location.
- This will create a default profile.
As a result of the manipulations done, chrome flies on me, and writes all its nasty things to the RAM. The SSD is happy and happy with its long life remaining.
To speed up the loading of pages, the Google Chrome browser caches their content: images, js-scripts, css-styles. All this accumulates on the hard drive and grows in size to hundreds of megabytes, if not more. Therefore, we have already considered and. You cannot completely disable caching in Chrome; Google suggests using incognito mode instead.
You can use this page to send files to anyone. When the other person clicks on the link, the transfer will begin. Save the browser page until the file is transferred. New functionality makes this even easier. Once the user is in your contact list, you can send them a notification by clicking on their name.
Other uses for this scheme
Install RAMDisk and run the Start menu in the folder of the same name RAMDisk Configuration Utility... We select the advanced mode ( View - Advanced)
In the main window Settings in line Disk Size set the required size of the virtual disk: it is important to find the golden mean here, you do not need to specify 100 MB or 2 GB. Here we choose file system FAT32 Partition and type Windows Boot Sector... Push the button Start RAMDisk and are waiting for the end of the launch.
The receiver will receive a regular zip file. The file will start playing before the download is complete, but the best thing is that the file is not saved to your hard drive, so you don't have to worry about it, just play in your browser. What is the upload to the cloud option?
In the event that the issuer does not want to keep the browser open, we suggest uploading the file to our server. Thus, the issuer can download the file and close the browser. After that, the recipient user will be able to download the file from our server. How do contacts work?
After two users exchange the file, they will appear in the contact list of each of them. For this to happen, users must register. So what we're going to do is give you some tips or "tips" so that each one applies the ones that you deem appropriate when using them.

After that, go to the tab Load / Save and put jackdaws for Load Disk Image at Startup and Save Disk Image at Shutdowm... This means that when the computer is turned off, the image of our created virtual disk from RAM will be saved to the hard disk, and when the computer is turned on, it will be loaded back into RAM without losing data.
From the top menu select File and Save Settings to save the settings. Then stop the virtual disk with the button Stop RAMDisk and after a few seconds start it again with the button Start RAMDisk, thereby rebooting the disk.

Half of the work is done. Now we need to tell Chrome about its new cache location. To do this, some advise to open Shortcut properties browser and in line An object add a space --disk-cache-dir = "H: \ Cache"(here H: \ Cache is the created virtual disk in RAM). This method can be used if, for example, every time you launch the browser through a shortcut on the desktop. If the program opens in a different way, for example, automatically when a 3G modem is inserted into a laptop, then Chrome's exe will be loaded without the specified parameters for the shortcut.
In order not to be limited by half measures and do everything humanly, you can deceive Chrome by creating a link. For this we need a free utility Link Shell Extension(can be downloaded from the developer's page).
Download, install and run the Link Shell Extension, the utility also has Russian. We do not need the program window itself. What is needed, the program added to the context menu of the right mouse button.
We open My computer and going to the created virtual disk, we created it as Local drive H.

Create a folder on this disk Cache and click on it with the right mouse button. In the opened context menu choose Remember link source.
Then we go to the directory:
c: \ Users \ YOUR_USER_NAME \ AppData \ Local \ Google \ Chrome \ User Data \ Default \
Since the AppData folder is usually hidden, you can open Start - Run and insert the following path for a quick jump:
% userprofile% \ local settings \ application data \ google \ chrome \ user data \ default \
Here, with the browser closed, delete the folder Cache, then do a right-click and select Place as - Symbolic link thus inserting the shortcut. Thus, Chrome will access the Cache folder in its usual way and not suspect that it is actually in RAM. At the same time, it is still necessary to perform periodically, not allowing its volume to grow larger than the size of the virtual disk in RAM.
If desired, you can do the same not only for the cache folder, but for the entire folder User Data which includes Cache. Thus, you can move all your user data that Chrome works with in RAM: history, cookies, extension data, etc.
Budget Windows tablets and transformers often come with a very small storage device, which ultimately limits the user when installing programs or storing the desired content. In the article about we have already figured out how you can increase the amount of free space on the C drive. However, the methods described in it allow you to get rid of temporary files only once. In this guide, you will learn how to transfer system folders with the cache to another disk, so that you no longer have to worry about the need to constantly clear them.
Moving temporary files to another drive in Windows 10
Let's note a few things right away:
- Using the described method can reduce the performance of programs. For example, the read and write speed of an SD card is usually lower than an SSD, so when transferring temporary files from an SSD to an SD card, various software may run slower.
- We will consider the operation in Windows 10, but the above method will work also in Windows 7 and Windows 8.
By default, there are two types of folders with temporary files on the system disk:
- % WINDIR% \ Temp (C: \ Windows \ Temp)... This directory is common for everyone accounts computer.
- % Temp% (C: \ Users \ username \ AppData \ Local \ Temp)... This folder is created separately for each user (accordingly, there can be several of them). Usually, programs store temporary files in it, since the cache can be different for different accounts.
The user has the ability to customize the addresses of these folders (their location), including transferring them to another drive. This is done as follows:
Thus, you can stop the constant clogging of the system disk with temporary program files and Windows itself. This can have a significant impact on the amount of free space, since the cache size of some applications, for example, Google Chrome, often reaches several hundred megabytes.
 Alternatives to Replace Microsoft Office Visio Command Line Key
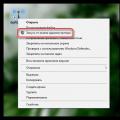 Mhotspot installation and setup Computer did not restart after installation
 A tale of three buttons. Column by Evgeny Zobnin. We get customizable on-screen buttons Home, Back and Menu on any Android device (Floating Soft Keys) Assigning buttons on the phone