MacBook not charging? Solution to the problem. Do I need to unplug the MacBook from the outlet or how to properly charge Apple laptops How to charge a MacBook from an external battery
Fair, not too high or too low. There should be prices on the Service website. Necessarily! without "asterisks", clear and detailed, where it is technically possible - the most accurate, final.
If spare parts are available, up to 85% percent of complex repairs can be completed in 1-2 days. Modular repairs take much less time. The site indicates the approximate duration of any repair.
Warranty and Liability
A warranty should be given for any repair. Everything is described on the site and in the documents. A guarantee is self-confidence and respect for you. A 3-6 month warranty is good and enough. It is needed to check the quality and hidden defects that cannot be detected immediately. You see honest and realistic terms (not 3 years), you can be sure that you will be helped.
half success in Apple repair- this is the quality and reliability of spare parts, so a good service works directly with suppliers, there are always several reliable channels and a warehouse with proven spare parts for current models so that you do not have to waste extra time.
Free diagnostics
This is very important and has already become a rule of good form for the service center. Diagnosis is the most difficult and important part of the repair, but you should not pay a dime for it, even if you do not repair the device after it.
Service repair and delivery
Good service appreciates your time, therefore offers free shipping. And for the same reason, repairs are carried out only in the workshop of the service center: it can be done correctly and according to technology only at a prepared place.
Convenient schedule
If the Service works for you, and not for itself, then it is always open! absolutely. The schedule should be convenient in order to be in time before and after work. Good service works on weekends and holidays. We are waiting for you and working on your devices every day: 9:00 - 21:00
The reputation of professionals consists of several points
Age and experience of the company
Reliable and experienced service is known for a long time.
If a company has been on the market for many years, and it has managed to establish itself as an expert, they turn to it, write about it, recommend it. We know what we are talking about, since 98% of incoming devices in the SC are restored.
We are trusted and passed on complex cases to other service centers.
How many masters in the directions
If you are always waiting for several engineers for each type of equipment, you can be sure:
1. there will be no queue (or it will be minimal) - your device will be taken care of immediately.
2. you give away macbook repair an expert in the field of Mac repairs. He knows all the secrets of these devices
technical literacy
If you ask a question, the specialist must answer it as accurately as possible.
To give you an idea of what you need.
Will try to solve the problem. In most cases, from the description, you can understand what happened and how to fix the problem.
The MagSafe power adapter in the MacBook is more convenient to use than similar solutions from PC manufacturers, due to the magnetic attachment, which has repeatedly saved my Mac from visiting service center. However, many owners of Apple computers may notice that sometimes MagSafe does not work quite correctly - the adapter is connected to both the network and the laptop, but the device does not charge. Fortunately, there is a solution to this problem, however, it consists of three stages.
Check power supply
The most banal decision is often the most correct one. It happens that the power adapter seems to be connected to the outlet, but for some reason it refuses to work. In this case, it is necessary, first of all, to check the density of the contact and the power source, but it is better to generally try to connect it to another outlet. This is especially true for household extension cords, with which MagSafe is not very friendly.
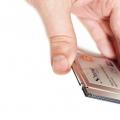
Check the MagSafe port for foreign objects
Even a simple clump of dust can get in the way of successfully charging your MacBook. At first glance, the adapter will be connected to the laptop, however, the presence of a foreign object will prevent their tight contact for correct operation. Therefore, be sure to check the computer port and, just in case, free it from dirt and dust - for this it is best to use an ordinary toothpick, but not a needle.

Reboot SMC
If you successfully completed the previous two points, but the problem still remains, you will have to restart the system management controller. For MacBook Air, Pro and Retina with non-removable rechargeable batteries this is not at all difficult to do.

If after that MagSafe still refuses to charge your MacBook, then the problem is either in a damaged cable or directly in motherboard the computer itself. In this case, it is better to try connecting a different power adapter to the laptop and only then contact the service center.
Sourced from www.osxdaily.com

Long trips are a painful thing for a gadget lover. If you can easily charge your favorite iPhone from a car cigarette lighter or a compact external battery, and the iPad is a tenacious thing in itself, then things are more complicated with laptops. With active use, they also need constant power, and in general they are more eager for electricity, which is already here.

The solution could be Charger designed to work with a standard cigarette lighter socket. Deppa has one and is designed to keep a Macbook Air or Pro with MagSafe 2 running at up to 75 watts.

"" is extremely safe - the maximum strength of the output current is 4.6A. However, given the build quality of the product from Deppa, to “get acquainted” with electricity from the user car charger still won't work.

The operation of the power supply is extremely simple. We insert the plug into the cigarette lighter, MagSafe - into the corresponding port of the MacBook. Actually, everything.

compact block charging is easy to throw in a bag to take with you, and there will always be a place for it in the “glove box” - if there is a desire to “feed” a dead laptop, you can always realize this very desire.

A cable noticeably more than a meter long will allow you to work calmly at a laptop, sitting in the back seat of a car, but at the same time not to entangle innocent fellow travelers with an abundance of laces that accompany the operation of an automobile voltage converter - can also be considered a noticeable plus.
In the case of long trips by car, when the socket is far away, there is no inverter, and there is a noticeable amount of work on the computer, Deppa ULTRA book Car charger is an indispensable gadget. 1,589 rubles is not the money that you should put in a piggy bank, but deny yourself such road comfort.
If you find that the battery of your Macbook Pro is no longer charging from the native adapter, do not rush to poke a soldering iron into it. As silly as it sounds, the first thing to do is:
1. make sure that the contact in the socket is reliable (do not use a broken one);
2. make sure that there is power in the outlet (plug another, known to be working device into it);
3. check that foreign objects are not packed into the laptop's power socket (usually food crumbs, compressed dust clods and other insects get there);
4. carefully inspect the yellow contacts of the connector. They should not be burnt, blackened, oxidized. When you try to drown them inward, the pins should come back without jamming. It is advisable not to scratch the gilded coating once again;
5. make sure that the cord from the adapter to the connector does not have any mechanical damage, creases, no bare wires stick out from under the insulation, it has not been ridden office chair etc. A damaged wire can be easily replaced with your own hands for any other of the appropriate section. In macbooks, only two wires go from the power supply to the Magsafe 2 connector:
If you are a very lucky person, simply unplugging the adapter from the network for a few minutes can save you. It happens that, due to a power surge, the charger goes into protection and it needs time to think the lock has been reset.
Sometimes, when you connect the adapter to your Macbook, the charging indicator does not light up, but in fact charging in progress. The fact is that the desired indicator (orange or green) is set on fire by a command from the SMC system management controller located in the MacBook. Sometimes, due to accumulated errors, the SMC starts to fail and then resetting the controller helps.
To do this, you need to connect the adapter to a completely turned off (not sleeping, namely turned off) macbook, press the key combination Shift + Control + Option and, without releasing them, press Power. Then, simultaneously releasing all the buttons, turn on the laptop with the reset controller. 
If all else fails, you will have to make a friend with the exact same MacBook and discreetly swap chargers with him and try to connect to his charger. It is not necessary that a friend has exactly the same adapter - a more powerful one will also work. The main thing here is that the connectors match. [Comment : according to one of the comments on this article, a less powerful power supply is also suitable for testing]
If your MacBook battery does not charge with your charger, and when you connect someone else's charger, everything starts working as it should, then your charger is broken. Your cap. The bravest ones can tell the wife that the purchase of a mink coat is again canceled, since the MacBook is more important. The rest will have to repair the adapter on their own.
 I had a faulty 60W MagSafe 2 power supply, so most of the following will be true for this adapter. This charger was equipped with 13-inch models Macbook Pro with Retina screen:
- MD212, MD213 (Late 2012)
- MD212, ME662 (Early 2013)
- ME864, ME865, ME866 (late 2013)
- MGX72, MGX82, MGX92 (Mid 2014)
- MF839, MF840, MF841, MF843 (early 2015);
Macbook Pro Charging Repair
Before delving into the innards, it is useful to know how the charging process is initiated. You may be surprised, but Apple engineers have managed to integrate microprocessor control even into such a simple device as a charger. Here are the key points:
- operating voltage is 16.5 volts. However, as long as the adapter is not connected to a load, its output has an idle voltage (about 3V) with a current limit of ~0.1 mA;
- after connecting the connector to the macbook, the adapter output is loaded with a calibrated resistive load, due to which the open-circuit voltage sags to ~ 1.7V. The 16-bit microcontroller in the charger detects this fact and after 1 second instructs the output switches to output full voltage. Such difficulties make it possible to avoid sparking and burning of the connector contacts when the charger is connected to the laptop;
- when connecting too large a load, as well as in the presence of a short circuit, the open-circuit voltage will drop significantly below 1.7V and the command to turn on will not follow;
- in the power connector of the Macbook Pro there is a DS2413 microchip, which immediately after connecting to the MacBook starts exchanging information with the SMC controller via the 1-Wire protocol. The exchange takes place on a single-wire bus (the middle contact of the connector). The charger tells the laptop information about itself, including its power and serial number. The laptop, if everything suits it, connects its internal circuits to the adapter and tells it the current mode of operation, on the basis of which one of the two LEDs lights up in the connector. The entire exchange of pleasantries takes less than 100 milliseconds;
Considering the foregoing, it is unlikely that it will be possible to charge a MacBook without native charging. Checking the power supply without a MacBook will not work either. 
Theoretically, for testing, you can connect a 39.41 kΩ resistor to the two extreme contacts of the Magsafe connector (which is not so easy to do, given the design of the connector). After a second, a voltage of 16.5 volts should appear on the resistor. In this case, the indicator on the connector will not light.
For those who don't know, the Apple Magsafe 2 power supply connector has the following pinout: 
This smart design of the charging socket allows you to connect your Macbook without thinking about polarity.
Despite the fact that the original adapter has all kinds of foolproofing built in, it should still not be treated lightly. The power of this power supply is enough to set you on fire at the first opportunity, splash you with molten metal and scare you to hell ... hiccups.
How to painlessly disassemble the adapter
To disassemble the Macbook charger, you will have to use brute force, since the halves of the case are glued to each other. The most painless option is to use pliers as shown in this video:
I managed to disassemble the power supply from my Macbook Pro in 2-3 minutes (with most of the time spent looking for a convenient stop for the pliers). After that, light traces of the autopsy still remain: 
After the case is opened, you need to carefully inspect the printed circuit board for burnt tracks, charred resistors, swollen or leaking electrolytes, and other anomalies.
The board will most likely be filled with some kind of compound, it must be carefully removed. And it would be nice not to tear off anything superfluous. 
It does not hurt to immediately ring the fuse at 3.15A. Here it is in brown: 
If the fuse is defective, then this, as a rule, indicates a breakdown of either the diode bridge, or the powerful MOSFET, or both. These elements burn most often, since they bear the main load. They are very easy to find - they are located on a common radiator. 
If the field effect transistor is knocked out, it makes sense to check the low-resistance resistor in the source circuit and the entire snubber circuit (R5, R6, C3, C4, D2, two chokes FB1, FB2 and capacitor C7): 
When repairing a Macbook power supply, it is strongly recommended to plug it into a 220V network through a 60-watt light bulb. This will prevent devastating consequences in the event of a short circuit in the circuit. 
Be extremely careful! A high-voltage capacitor can hold a life-threatening voltage for a long time. I got caught once and it was extremely frustrating.
If, after replacing the faulty elements, the power supply did not start, then, alas, further repair of the charger Apple devices Magsafe 2 is not possible without an electrical circuit diagram.
By the way, the most reliable way to find out whether the circuit has worked or not is to measure the voltage on the output electrolytes. On the working adapter there should be 16.5V: 
Magsafe 2 Adapter Schematic (60 Watts)
To find circuit diagram Macbook power supply failed, so there was nothing left to do but copy it from the circuit board. Here is the most interesting part: 
As can be seen from the diagram, the charger is assembled according to the classical scheme of a single-cycle switching power supply. The heart of the converter is the DAP013F chip - a modern quasi-resonant controller that allows you to achieve high efficiency, low interference, and also implement protection against overload, overvoltage and overheating. 
At the initial moment of time, after connecting the adapter to the outlet, there is no voltage on the turns of the winding 1-2, respectively, the voltage at the gate of the transistor Q33 is zero, and it is closed. At its drain, the voltage is equal to the operating voltage of the zener diode ZD34, which comes there from a full-wave rectifier formed by diodes D32, D34 and part of the power diode bridge BD1, through a chain of resistors R33, R42.
Transistor Q32 is open and capacitor C39 starts charging from the same diode rectifier (along the circuit: R44 - ZD36 - Q32). The voltage from this capacitor is supplied to the 14th leg of the IC34 microcircuit, which, through its internal switch, is connected to pin 10 and, accordingly, to the 22 uF electrolytic capacitor C (we could not find its designation on the board). The initial charging current of this capacitor is limited to 300 μA, then, when the voltage reaches 0.7V on it, the current increases to 3-6 mA.
When the microcircuit start voltage is reached on the capacitor C (about 9V), the internal generator starts, the pulses from the 9th output of the microcircuit go to the Q1 gate, and the whole circuit comes to life.
From this point on, the voltage of the IC34 microcircuit is powered by the capacitor C, the voltage on which is formed from the winding 1-2 of the transformer through the rectifier diode D31. In this case, the internal switch of the microcircuit breaks the connection between the 14th and 10th pins.
Protection against excessive increase in output power is implemented using elements ZD31 - R41 - R55. When the voltage at the output of the winding 1-2 rises above the breakdown voltage of the zener diode, a negative potential appears on the 1st output of the microcircuit, which leads to a proportional decrease in the amplitude of the pulses on the 9th output.
Overheating protection is implemented using an NTC31 thermistor connected to the 2nd output of the microcircuit.
The 4th output of the microcircuit is used to determine the moment of switching the output key at the points of minimum current.
The 6th output of the microcircuit is designed to stabilize the output voltage of the adapter. Into the chain feedback includes an optocoupler IC131, which provides galvanic isolation of the high-voltage and low-voltage parts of the adapter. If the voltage on the 6th leg drops below 0.8V, the converter switches to reduced power mode (25% of the nominal). Capacitor C36 is required for correct operation in this mode. To return to normal operation, the voltage on the 6th leg must rise above 1.4V.
The 7th leg of the microcircuit is connected to the current sensor R9 and if a certain threshold is exceeded, the operation of the converter is blocked. Capacitor C34 sets the time interval for the auto-recovery system after an overcurrent.
Pin 12 of the microcircuit is designed to protect the circuit from overvoltage. As soon as the voltage on this leg exceeds 3V, the microcircuit goes into blocking and will remain in this state until the voltage on capacitor C drops below the controller reset level (5V). To do this, you need to unplug the adapter from the network and wait a while.
It seems that this adapter does not use the overvoltage protection functionality built into the microcircuit (in any case, I was not able to trace what the R53 resistor was connected to). Apparently, this role is assigned to the transistor Q34, included in the feedback circuit in parallel with optocoupler IC131. The transistor is controlled by the voltage from winding 1-2 through a resistive divider R51-R50-R43 and in the event of, for example, an optocoupler malfunction, it will not allow the microcircuit to increase the converter voltage uncontrollably.
Thus, this 60-watt power adapter implements triple protection against exceeding the output voltage of acceptable limits: an optocoupler in the feedback circuit, a Q34 transistor in the same circuit, and a ZD31 zener diode connected to the 1st leg of the microcircuit. Add here more protection against overheating and overcurrent (against short circuit). It turns out a very reliable and safe charger for a MacBook.
In Chinese chargers, most of the protection systems are thrown away, and also, in the interests of economy, there are no circuits for filtering RF interference and eliminating static electricity. And although these crafts are quite efficient, you have to pay for their cheapness with a higher level of interference and an increased risk of failure of the laptop power board.
Now, having the circuit in front of your eyes and imagining how it should work, it will be easy to find and fix any malfunction.
In my case, the inoperability of the adapter was caused by an internal break in the resistor R33, due to which the Q32 transistor was always locked, the voltage was not supplied to the 14th leg of the controller, respectively, the voltage on the capacitor FROM could not reach the chip enable level. 
After soldering the R33 resistor, the microcircuit start circuit was restored and the circuit started working. I hope that this article will help you fix the charger from your MacBook Pro.
For help in identifying completely burned out elements, I am attaching an archive with photos of the board in high resolution (37 photos, 122 MB).
And people dissected exactly the same charger, only with a power of 85 watts. Also interesting. 
All new MacBooks, in which familiar interfaces have been replaced by newfangled ones USB Type-C, can be charged both from the network and using external batteries (they are also charging banks).
It was this that became the decisive factor for me in abandoning and switching to.
Now even the longest road is not terrible for me, because by 8 hours of autonomy from the built-in battery, I managed to add the same amount from just one charging bank. And this is a victory.
Apple has no official explanations about charging MacBooks with external batteries. Therefore, we decided to create something like a guide based on personal tests, trial and error. Please.
What Apple Says About Charging Your MacBook Pro

Apple insists that for charging new MacBooks you should use power adapters corresponding in power to those that she herself puts in the kit.
- 29 W- for 12" MacBooks
- 61 W- for 13" MacBook Pro
- 87 W- for 15" MacBook Pro
However, the service Apple support emphasizes that smaller or higher power sources can also be used to charge new laptops.
When charging with less watts power for the full use of the MacBook will simply not be enough.
When charging with lots of watts there will be no harm to the device up to 100 watts. Further - only at your own peril and risk.
If you are using a USB-C/VGA Multiport Adapter or a USB-C Multiport Digital AV Adapter, it will not charge more than 60W through its built-in “C” port, which may not be enough to fully power a 15-inch MacBook Pro.
If you connect several power sources to your MacBook Pro at once, it will use the most powerful one, regardless of the order in which you connected them.
Can a MacBook Pro be charged with a regular can?

Roma Yuryev also has his experiences in this direction. Then he actually failed to fully use the charging banks along with a 12-inch MacBook.
I tried to connect with a USB-C to USB-A cable the most common Xiaomi charging bank for 10,000 mAh (we will talk about the value of this and other similar values later in the text), which can produce no more than 15-18 W (this is indicated on its back side).
The 2017 MacBook Pro notified me that it had a wall charger plugged in, but its capacity didn't go up from 71% in a couple of hours.
Note that I am also not saying that capacity dropped during two or three hours of low-end work.
It turns out that due to the low power, such a charging bank simply cannot charge a 13-inch MacBook Pro. However, it is able to power it and greatly increase the time battery life laptop - approximately 20-30%.
The indicator is not painfully large, but it is already something. It turns out that several of these cans on the road will by no means be useless for work or entertainment, which I will try to check during the next train ride, which will take about two days.
In the end, it works. And that's great.
Which banks are best for charging a laptop

But for charging the new MacBooks, of course, special solutions that are already appearing on the market are better suited, including those in the not-so-expensive segment.
One of best solutions today - the ZMI 10 charging bank (consider that it is made by Xiaomi), which Kolya Maslov talked about not so long ago.
For example, it is capable of delivering power not just 15-18, but already as much as 40-45 watts. And this is already enough to fully power the 13-inch MacBook Pro.
When working with text and Adobe Photoshop she replenished my laptop battery by 1% in about 1-1.5 minutes. And its total volume was enough for me to charge the device from 0 to 100%, and I didn’t drop it to the end.
The new technologies that are used in such a bank allow you to charge it incredibly quickly. Imagine a 20,000 mAh monster (this is at charging your iPhone) is fully capable fill up in 3-3.5 hours when using a standard power supply from a MacBook Pro 2017.
Remember how many banks of this volume were charged earlier - once I tried to fill the Xiaomi power bank with 16,000 mAh with a standard iPhone charger. 24 hours was not enough for this - the process took 35-40 hours.
How many times can a MacBook Pro be charged?

20,000 mAh, 16,000 mAh, 10,000 mAh - all these are marketing indicators that really have the right to life, but do not tell exactly how many times a bank can fill a particular device.
And the thing is that the capacity of the battery is actually changes with different voltage at which charging takes place.
For example, the ZMI 10 top external battery claims 20,000 mAh at 3.8 V, at 5 V its capacity already reaches only 12,000 mAh, and at 7.2 V it is already less than 10,000 mAh.
The battery capacity is also measured in Wh. For example, the 2017 13-inch MacBook Pro with and without the Touch Bar is 49 Wh and 54.5 Wh, respectively.
The manufacturer claims that ZMI is capable of delivering 70.2-72 Wh. It turns out that he can charge such a laptop more than once. Almost, but not quite.
There are more nuances. The declared capacity of an external battery is usually more than what it is actually ready to give. There are losses, which depend on a variety of indicators outside our control.
Therefore, in the end it turns out that we can only approximately guess how many times you can actually charge external battery one device or another. And the same ZMI 10 can fill my 13-inch MacBook Pro 2017 with Touch Bar from 0 to 100% and about 20% more. Norm.
Our thoughts on the quality of all accessories

USB Type-C is a public standard that does not require certification from Apple or any other entities.
That is why you need to be very careful with it, because when you connect something of poor quality through it, you can simply ruin the same MacBook.
For example, Apple generally recommends using only the supplied power adapter to charge it and insists that each USB Type-C cable must have a special serial number that allows you to make sure that it is suitable for a particular laptop.
Marking official USB-C from Apple:
- If the first three characters serial number C4M or FL4 cable designed for use with the Apple 29W USB-C Power Adapter.
- If the first three characters of the serial number are DLC or CTC, the cable is designed for use with the Apple 61W or 87W USB-C Power Adapter.
My personal practice shows that in addition to official Apple accessories, USB can be used without any problems. Type-C cables from Native Union, Nomad and other manufacturers that are on everyone's lips.
 Modules for digital television
 Tricolor TV - receiver software update
 Satellite receiver or satellite TV input ci common interface