Make your own flash card as good as new. Hacker flash drive from BIOS chips. Preparing a new building
In this video, I'll show you an idea on how to make a DIY USB lighter from an old flash drive! Do-it-yourself modding of an old flash drive is very easy at home! In order to make modding an old flash drive and turn it into USB flash drive- the lighter will not be difficult! But, for that, you will 100% stand out from the crowd with such a unique device! With such a little trick, you can diversify a simple ugly old flash drive, but turn its stylish USB flash drive into a lighter! Such interesting idea and cunning, you can diversify a simple ugly old flash drive and turn it into a stylish USB flash drive - a lighter! ******************************************************* ********** I welcome you to my channel Roman Ursu, where you will learn how to make homemade, New Year's crafts, gifts, toys, scarecrows for Halloween, and most importantly, that all this can be done at home and with your own hands! Are you into handicrafts, crafts or do you just have nothing to do? Then you got to the channel you need here you can find a lot of homemade crafts, crafts that are made by yourself, and most importantly, they are all made from improvised means and at minimal cost! ******************************************************* ********** main channel: http://www.youtube.com/user/romanursu my second channel: https://www.youtube.com/user/romanursuvlogs vkontakte group: http:// vk.com/club59870517 group in classmates: http://www.odnoklassniki.ru/romanursu Attention! be careful and do not repeat this at home, the author is not responsible for your actions, this is an entertainment video, not a training or a call to action! ATTENTION!!! - my channel for decent ones: for mate, shortened or modified mate, for insults and "trolling" - I WILL BAN!!! ******************************************************* ********** Channel of Ilukha “Zveriyo”: https://www.youtube.com/user/3BEPbEnokia In this video I "m going to show you an idea of making a USB lighter with your own hands out of an old flash drive! It "s very easy to make a modding of an old flash drive at home! It"s quite an easy job to do a modding of an old flash drive and turn it into USB flash drive-lighter! There"sa 100% chance to be unique with having such a device at your disposal! With such a little trick you may vary an old plain flash drive, and turn it into a stylish USB flash drive-lighter! Such an interesting idea and trick will help you to vary an old plain flash drive, and turn it into a stylish USB flash drive-lighter! The main thing is that one can make it at home and with one's own hands. You are interested in handiwork, craft or you just have nothing to do, haven"t you? You have found the channel you really need. Here you can find lots of crafts, hand made items, and the main thing is that they all made of make-shifts and at the lowest cost!
If you have a crash operating system or it gives a lot of errors during operation (buggy), then you need to reinstall the system. Since a huge number of different laptops, netbooks and other devices with a missing CD / DVD drive have appeared on the market, the need bootable flash drive increases very strongly. Since the purchase of an external CD / DVD drive is quite expensive and not particularly in demand. And now I will tell you how to create a bootable USB flash drive with your own hands, at home, in the three most common ways.
Bootable flash drive using Windows 7 USB/DVD Download Tool
Let me start with the simplest and fast way creating a bootable flash drive Windows programs 7 USB/DVD Download Tool is good utility from Microsoft, created for simple and convenient creation of a bootable system on various types removable media. This makes it easier to create a bootable flash drive for users of laptops, netbooks and owners of personal computers with a faulty drive. Next, consider the step-by-step creation of a bootable USB flash drive using this program:
- Download and install Windows 7 USB/DVD Download Tool.
- We run our program as an administrator. To do this, press right click click on the program shortcut and select "Run as administrator".
- The program window will appear in front of you. Microsoft Store". You must click the "Browse" button to select the operating system to create the ISO image.

- After selection, press the "Next" button.

- Next, the following window will appear in front of you, in which you will be offered the choice of recording to a DVD disc or a USB drive. Since we want to create a bootable USB flash drive, we need to select the "USB devise" item.

- The program will then prompt you to select the USB drive on which you want to burn the operating system image. You select the flash drive you need and click the "Begin copying" button.

- Next, the program will format and install automatically.
- After a while, the download bar will reach 100% and the inscription “Backup completed” will appear in front of you in the status, which in turn will signal the completion of creating a bootable USB flash drive.

- We close our program and now you can use the bootable USB flash drive for its intended purpose.
Bootable flash drive using the UltraISO utility
And now let's look at one of the most popular and common programs. UltraISO - a program designed to read, edit and create disk images. This program very simple and convenient for ordinary users personal computer. This program will come in handy for your work, because it can work with more than 30 file formats. And now let's figure out how to create a bootable USB flash drive using the UltraISO program in step-by-step instructions.
- Download and install the UltraISO program.
- Right-click on the UltraISO program shortcut and select "Run as administrator".

- On the toolbar, click on the "File" tab and select "Open". Or press Ctrl+O.
- After we select the image of the operating system we need to create a bootable USB flash drive. For example, I have selected the image of the operating room Windows systems 7 Ultimate Ru x86-x64 Orig wBootMenu by-ovgorskiy.
- Left-click on the name of the operating system (thus we select it).
- Open the "Boot" tab. Select "Burn hard disk image".

- After that, a pop-up window will appear in front of you, where you need to check whether the correct flash drive is selected, whether the operating system is selected, as well as the method for recording a bootable flash drive. It must be installed in USB-HDD format. Check and click on the "Record" button.

- Next, the installation of data on the USB flash drive begins.
- After a while, you will see the inscription "Recording completed." This inscription will inform you that you have completed the creation of your bootable USB flash drive.

- Once completed, close the program and use your flash drive to install the operating system.
Bootable flash drive using Windows command line
This method of creating a bootable flash drive does not require additional programs and utilities. And only because of this he deserves to tell you about it. It is a little more complicated and will take you a little more time than with the programs we have reviewed above. Let's take a look at our steps step by step:
- We call the "Run" window. To do this, press both Win+R keys at the same time. Only you may have a different name. Vyacheslav will be your place.

- In the empty field, enter the command "cmd". This command will open a command prompt. We will continue to work on it.
- V command line enter the command "DISKPART".

- Then we enter the command "list disk". This command will give us the opportunity to see the drives connected to the PC.

- Enter the command "select disk 1". With this command we select our flash drive.

- Next, we clean our flash drive. To do this, enter the "clean" command.

- The next step is to create a primary partition. To do this, enter the command "create partition primary".

- We need to select the partition we just selected with the "select partition" command.

- Enter the "active" command. This command will make the selected partition active.

- Next, you need to format the flash drive in NTFS system. To do this, type the command "format fs=NTFS".

- We are waiting for the system to format your flash drive to 100%.
- Next, give the letter name of our flash drive. To do this, use the command "assign letter = O". Choose the letter for the name of the flash drive yourself. I have an O.

- After that, you will open the "Removable disk O" folder.
- At the command line, enter the command "Exit". This command will close the command prompt.

- In the folder "Removable disk O" we transfer all the files of the operating system. Files must be copied (transferred) only in unpacked form. You should not just copy the image of the operating system in one file, such a flash drive will not work.
- The bootable flash drive is ready to use.
Finally
We talked about simple and understandable ways to create a bootable USB flash drive using various programs. We hope that this article helped you understand the principle of creation. Do not forget that if you install (reinstall) the operating system using a bootable USB flash drive, you need to install the initial startup of the operating system from USB, through the BIOS. Otherwise, the device will not recognize your operating system image written to the USB flash drive.
How to make a flash drive?
Our article, dear reader, will tell you about a very exciting activity that can even turn into a hobby. Today, we will deal with how a flash drive is made, its internal structure, various engineering techniques for translating it into real life. After reading our article, you will be able to assemble a flash drive from scratch with your own hands from almost any material. So let's get started:
Flash drive with your own hands!
I think everyone understands that if these "own hands" grow not from the shoulders, but from another place, then it is best to transfer the design of the flash drive to your more skilled comrade. If, however, your case is the opposite, then here's what you can do.
The essence of creating a new flash drive is to disassemble the old one. Why is this needed? The fact is that the electronic filling of the old flash drive will be the main component of your future product. Although, if you are able to solder a working electronic circuit on your own, please. So, the first step is to get the contents from the old flash drive and "dress" it in new building.

As already noted, this method case manufacturing is not the only one. Craftsmen who feel confident working with wood can use wooden blocks instead of a ruler. Undoubtedly, such material will be more reliable and durable. Do not forget that you can make various linings for the body of the flash drive. These can be metal strips, or plastic patterns from finished household appliances. All in your hands. In addition, you can try your hand at wood carving directly on the finished case, however, it will not be easy, given the very small size of our product.
Modification of computers and computer accessories has always been and remains popular around the world. Modification of flash drives requires special attention, as this allows you to get a unique accessory. We present to your attention a material that is devoted to a review of a video on modding an old and shabby flash drive.
What do we need:
- new building;
- 300 ohm resistor;
- light;
- flash drive;
- glue gun;
- soldering iron.

As a new body, the author of the video uses a rubber toy bull.
First of all, you need to disassemble the flash drive.

Next, you need to take care of the body. To do this, we put a toy bull flash drive board. We take a clerical knife and mark on the toy the place of the cover of the new case.

After that, we cut off the toy at the mark, thus obtaining two parts.

The steer, which the author of the idea uses as a body, turned out to be empty. This will greatly facilitate the work of inserting a flash drive into the case.

Now we take a screwdriver and two drills for 3 and 2 mm. With the first drill we drill the mouth of the bull, and with the second - the eyes.


The next step is to solder the resistor to the positive terminal of the LED bulb.

Then you need to solder the LED to the flash drive board. The positive contact, that is, the contact that is soldered to the resistor, is connected to the first leg, and the negative contact to the fourth. Before soldering, you need to put heat shrink on the resistor on the LED contacts.


It remains only to carefully seal the flash drive board in the new case. To do this, you just need to insert the board into the case and seal it with a copious amount of glue from the glue gun.


In the second part of the case, that is, the cover, you can stick a small magnet, which will allow you to quickly close the flash drive after using it.
Hello my friends. Today we will not consider any schemes of certain structures, the topic for today is the so-called homemade flash drive. Some, of course, may not believe that this is possible at home, and they do it right, since it is quite difficult and it is almost impossible to do it at home without special equipment. But smart people have long come up with a memory card for mobile phones. In stores, you can easily find an adapter with which you can connect a memory card to a computer via usb port. This adapter only costs $2.
The device works very simply - you just need to put the memory card in a certain place on the adapter, and the adapter itself is made in the form of a USB plug that only needs to be connected to the PC's USB port. For our homemade flash drive, you need to have just such an adapter with a memory card from mobile phone and one more plug or an appropriate plastic case for yusb.


Then we place the adapter in the plug casing and close the cover and see what we got.

Now it looks like a cut off USB plug, but no one will even suspect that there is a memory drive there! Now it's time for the schematics. There are 4 wires, we remove a small part of the insulation from the wires in advance and tin them. Next, we take a couple of brand new parts (it is better to take damaged ones, but so that they look like new ones) and share them with each other. There is no specific circuit here, solder whatever you want, the design should just look like a circuit, of course it will not work! You can use capacitors, resistors, polar and non-polar capacitors and a pair of transistors, as you know, some flash drives have a built-in led indicator, you can get a simulator of such an indicator so that our homemade flash drive looks believable and does not raise doubts.

To do this, the unpacking of the usb socket and plug is attached to the article, power is supplied through the side channels, which must be connected to our wires, then assembled the simplest circuit flashers for one LED, in which case we still have two free wires to which you can attach a pre-made<блеф>memory storage diagram. So, let's summarize - we got a rather interesting design, when connected to usb port the computer's LED will start flashing and it will give outsiders the feeling that a flash drive is connected, but they will be more surprised when the computer notifies that a memory drive is connected to it! Yes, everyone will begin to believe that you are a genius and ask for a diagram of such a simple miracle flash drive. Try to make the details connection scheme as confusing as possible, so that even the master does not suspect what the deception is. Well, that's all, you can see such interesting gizmos in further articles, goodbye friends - Arthur Kasyan (AKA).
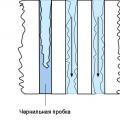 Instructions for using flushing fluid
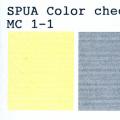 Why do printheads burn out on Epson printers?
 Installing and configuring the Canon i-SENSYS MF3010 printer Download driver for canon 3010 for scanning