Installing windows 7 from an ultraiso flash drive. Create a bootable USB flash drive using UltraISO. What you need to create a bootable USB flash drive
It's not a secret for many that UltraIso is one of the best programs for burning windows images of all versions to a USB flash drive. That is, in fact, with its help, in just a few clicks you create a bootable USB flash drive from an iso image. You will learn how to do this in this article.
It is also one of the best programs for burning a windows image to a USB flash drive.
So, to start writing Windows 7 to a USB flash drive through ultraiso, run the program. The main window opens before us.
The main window of the program UltraIso
In it, select "File" -\u003e "Open".

Opening the windows image
In the window that opens, you need to select the Windows image that will be written to the USB flash drive. You should have downloaded it in advance, for example on the Internet.

Selecting an image to burn
Select the iso image and click the "Open" button.
Now we insert the USB flash drive on which our image will be written to the USB connector.
Attention. There should not be any data important to you on the flash drive, since all of it will be destroyed during formatting.

Go directly to recording in UltraIso
A window will open in which you need to check that the flash drive you need is being used, while the recording method should be “USB-HDD +” and all other parameters as in the figure below.

We set the parameters for writing a Windows image to a USB flash drive
First, click the "Format" button. In the window that opens, select the file system "FAT32" and check the box "Cleaning the table of contents".

We prepare a USB flash drive for writing to it windows

After a few seconds, the flash drive will be formatted. Click "OK" and close the formatting window.
Now, in order to burn Windows 7 to a USB flash drive via ultraiso, click the "Burn" button and click "Yes" in the window that opens.

Data deletion warning

Burning Windows 7 to a flash drive using ultraiso
The recording process will start. After which you will need to close the Ultraiso program and your bootable USB flash drive will be ready to go. You will only have to boot from a USB flash drive and you can proceed with the installation of Windows.
The recording time depends on many parameters, ranging from the capacity and speed of the flash drive to the size of the image that you are writing to it. But on average, within 15 minutes, your bootable Windows USB flash drive will be ready.
Now you know how to use UltraIso - Programs for burning windows to a USB flash drive to burn Windows 7 and thereby make a bootable USB flash drive from an ISO image.
Share the article on social networks! Help our site!
Join us on VK!
Creating a bootable USB flash drive in UltraISO is the easiest way to record a Windows installation. And perhaps the fastest. Just a couple of minutes - and you're done (of course, provided that you have a normal PC).
Before you start, you need to install the program. You can download it from the official website (link).
How can I create a bootable USB flash drive using the UltraISO program?
You just need to follow the following instructions:
- Run the program (you need to run it as an administrator).
- Next, you need to open the Windows installation file image that you want to burn. To do this, select File - Open (or you can press Ctrl + O).

- Specify the folder in which the Windows image is located, select it and click the "Open" button.

- If you did everything right, it should look like this:

- Now let's start recording. To do this, in the top menu, select the items: Boot - Burn hard disk image.

- Next, select your USB flash drive, leave the recording method the same - USB-HDD + and click the "Burn" button. IMPORTANT! This will delete all your data on the USB stick. Therefore, before performing step 6, it is recommended to save all files (for example, to a computer).

- Actually, the program will warn you about it. If you have saved all the data (or you do not need them), agree and click the "Yes" button.

- Recording can go from a couple of minutes to an hour (or even more). It depends on the power of your PC or laptop.
- After the recording is completed, the program will report that the process has been successfully completed.
If you do not have a Windows image, but have a licensed installation DVD, then you can make a bootable USB flash drive using it
To do this, in the 3rd paragraph you need to specify the path to the drive where the DVD is located by selecting the items: File - Open DVD.


Create a bootable flash drive from a folder with files
Finally, there is another way how you can create a bootable USB flash drive in UltraISO. It is suitable if a licensed digital copy is already stored on your computer in a folder.
To write the installation files to a USB flash drive, do the following:
- Run UltraISO and select the items: File - New - Bootable DVD image.

- A new window will appear in which you need to specify the path to the Windows distribution kit (this is the bootfix.bin file, which is located in the boot folder).

- After that, at the bottom of the program, select the folder where the Windows files are located and move all the files to the top.
 If the indicator at the top right turns red, just click on it and select the item - 4.7 (4.37 Gb).
- And then follow the instructions, starting with the 5th paragraph.
After a while, the bootable flash drive will be ready.
P.S. If for some reason the creation of this bootable flash drive in UltraISO did not work (an error or something else appeared), try repeating the procedure, carefully following the instructions. As a last resort, you can always write it down with another program - since there are plenty of them.
Recently, the method of writing images to a Flash drive has become more and more relevant. This was influenced by the fact that the speed of the drives is greater than that of an optical disc, i.e. and Windows you will install faster. In this article, we will clearly and correctly show how to burn an image to a USB flash drive via UltraISO, highlighting the main points, and here you can also proceed to download this software if you have not installed it yet. In some new computers, especially from the category of compact ones, a disk drive is no longer included in the package, so having an image on a USB flash drive is already a necessity.
Don't forget to compare the amount of free space on the Flash drive with the size of the image so that there are no problems and you don't have to be distracted and waste time cleaning up. But how much minimum space is needed? It is necessary to build on the size of the image. For example, before writing an image, you need to have order 2.5 GB of available space . For other versions - XP, Vista, 8 / 8.1 - this number can vary, respectively, up and sometimes down. Hence - in order for you to record normally, at least you need to have a Flash drive 4 GB, but whether it's a regular flash drive or a 2 TB portable drive, there is not much difference. Apart from the program and the drive (and a little attention and the ability to act according to the instructions), you will not need anything else. Anyway, the operation of how to write Windows to a USB flash drive through UltraISO, quite simple and does not take much effort of the user, and also does not create problems.
But imagine that until quite recently, no one at all meant that the PC industry would step forward so far. When Bill Gates demonstrated a 5 MB floppy disk, saying that he would place all the information he needed on it with a margin, did he think what PC technologies would be like in a few years?
Would 5 MB be enough for you now? Imagine what work has been done so that, for example, you can not worry about how to create a bootable Windows 7 UltraISO flash drive. The special contribution here is not only engineering - the teams of programmers (and how could it be without them) also know their work, and in aggregate progress is obtained. That's it... Now let's go back, the following link contains a soft distribution UltraISO. Download if you don't have it. Let's go and don't be shy!
To record in the program, you first need to open the image:
After that, you will see the program dialog box with the sample you downloaded. A little lost? It's OK! Move on!

Choose Bootstrap . Next is the item on recording a hard disk image, see the screenshot. We immediately inform you that before the process of how to write a Windows XP image to a USB flash drive through UltraISO, you only need to format it and do no unnecessary actions other than those indicated. The essence here is the same as for OS Win7/8.

It remains to select a device. Set the write method USB HDD+. Paragraph hide boot partition- there should not be a checkmark, we do not need to hide the boot partition. It remains to press burn :

Information for disc users! Although they are outdated in several ways, the program supports recording them. The essence of the action, how to write through UltraISO the image of Windows 7/8, etc., remains fundamentally the same as with a Flash drive, only you need to choose to write a disk, self-loading, in principle, which is not needed, because. the drive is given priority. But given the progress it won't be long!

After all, you yourself see how quickly their need disappears with the advent of more convenient and efficient devices.
Tell us if it worked out UltraISO make a record. How fast was the creation UltraISO Windows 7 bootable flash drive? It will be useful to other visitors; Of course, you also need to take into account the characteristics of the PC and what kind of drive you have. Of course, there is nothing complicated here, but a PC can sometimes do strange things with the OS, so ask more about how to make a bootable Windows 7 flash drive using UltraISO, helping yourself and other users. Describe the difficulty - we will try to help you. Write comments via social networks below! Thanks!
Why do you need a bootable flash drive?
When we turn on the computer, the software is first loaded, which is responsible for the internal, as the people say "hardware". That is, first the motherboard, processor, RAM, video card, and so on are initialized. This software is called .
This process usually takes a matter of seconds. After that, there is an appeal to the storage medium (sit / DVD disk, floppy disk, hard drive, flash memory, network drive) and search for information about the MBR (master boot records) - a special code that is responsible for loading the operating system. Next comes the loading of the operating system (windows / linux, dos). At this stage, we may need a bootable USB flash drive.
For example, to install an operating system, or download a portable independent (live) operating system.
Remember, for a flash drive to be bootable, it must contain the correct MBR, if the ISO image that we want to burn does not contain the correct MBR, then the flash drive WILL NOT be bootable.
Those. it’s not enough just to write the image of the operating system to a USB flash drive (it will not become bootable from this), but you need to “stick” the master boot record (MBR) there in a special way.
Therefore, now you will learn one of the options for how to make such a bootable USB flash drive using UltraISO Portable.
The example will use the Windows 7 operating system, a 4 GB USB drive, UltraISO 9.6.0 Portable, an OS boot image ISO file.
Now, where and what do we take.
- Windows 7 itself (yes, at least the tenth) is bought (very rarely), mostly downloaded from . such images of the system are usually so well “split” there that the “small-soft” ones themselves recognize it as their own. (The first time the system starts, it connects to microsoft and authenticates with Windows.)
- A flash drive is the main requirement for its volume to contain a Windows image.
- Download the UltraISO program itself. The program is in English, and even with a key, so you have to download from file hosting, but with a key and Russian. Choose .
Unpack the archived file and run the file UltraISO_Portable_unpack.exe

Determine the location where the files will be extracted and click the Extract button. In this package we find the UltraISOPortable.exe file and run it. 
After the utility is installed, we look through the program menu for the ISO image you need (this can be a disk image for installing Windows, or Linux, or any other utilities, such as antiviruses, error scanners, various editors).  After that, you will see the windows image on the top left and its contents on the right.
In order for Windows to be installed from a USB flash drive, it is not enough just to copy the files from the Windows 7 installation disk to a flash drive. First you need to format the USB flash drive and make it active (that is, indicate that it is bootable).
If you have a disk image and you don't know what to do with it. Then install the free program daemon tools light. This application allows you to open disk images as if they were virtual.
Now let's proceed directly to writing a disk image to a flash card. To do this, launch UltraISO and select the section labeled "Bootable" in the menu, select the "Burn Hard Disk Image" item in the drop-down submenu and click on it.  Now you need to make some settings so that the flash drive becomes bootable after recording. You will see a recording window in which you need to select the USB-HDD + recording type and after that you can start recording. But first, let's format the flash drive if we haven't done it before.
 After formatting, click the "Write" button
After you have indicated to burn the ISO image to a USB flash drive in the UltraISO utility, you will have to wait a while until the process is completely completed. 
And we look... 
That's all. Windows 7 ultraiso bootable flash drive created
Now reinstall Windows...
Next, we restart the computer, if it does not boot from a flash drive, then in the BIOS we specify that the boot is done first of all from a flash drive (it all depends on your BIOS) and then install Windows 7 as from a regular disk.
As you can see, making a bootable flash drive out of an ordinary flash drive is not at all a difficult task, the main thing is to understand the functions of the UltraISO utility, which are not so many. If the first time you couldn’t make the USB flash drive bootable, then try formatting it first in UltraISO and then only write the image to it.
If for some reason in bios it is not possible to activate the boot from USB option, then you can restart the computer and hold down the F11 key. A menu of devices you can boot from should appear. The key for calling this menu may differ, so you can try a few trial reboots, and you will definitely be able to boot from the USB flash drive.
Usually, many netbooks (For example, HP Mini, Acer Aspire One, Asus Eee PC) there is no internal DVD drive. For such a netbook, you will have to use either an external DVD drive or a bootable USB flash drive “flash drive”. In both cases, you will need to booting a netbook from an external device. Peculiarities netbook settings for booting from external devices are model-specific.
Installing Windows 7 from a USB flash drive using UltraISO
- Insert the flash drive into the USB port.
- open
Instructions for writing a Windows 7 image to a USB flash drive
- In the UltraISO program, on the File menu, click on the Open item, select and click Open.
- After making sure that the image is open, select Burn Hard Disk Image from the Boot menu
- In the Disk Drive list, select your flash drive, in the Record Method: USB-HDD+ item, and click Burn
- In the window that appears about the destruction of information Hint, click the Yes button
- Wait for the recording to complete (from 5 to 20 minutes depending on the flash drive's write speed)
- Restart the computer without removing the flash drive from the USB port
- Immediately after the start of the restart, start the BIOS by pressing Delete (Del) or F2 on the keyboard, depending on the type of BIOS
- Set BIOS to boot from USB HDD first
- Save your settings and exit the BIOS. The computer will restart and start boot from flash drive
Installation is no different from installing from a bootable DVD, but there is one catch. When the files are copied and unpacked, and the computer reboots for the first time, you need to restart the BIOS and set the boot priority back (by default, from the hard drive). Otherwise, the download will again go from the flash drive.
Installing Windows 7 using an external hard drive (HDD External), similar to installing using a flash drive
Main differences:
- The BIOS needs select boot from HDD(since an external hard drive is defined as an HDD), To do this, select your main external HDD in the priorities for hard drives). After the first reboot in the BIOS, restore the default value of the hard drive priority.
- Before installation, the hard drive on which it will be installed must already be divided into the necessary partitions (for example,), otherwise, the external HDD will occupy the partition with the letter “C”. Which will create some inconvenience after installation.
 Installing and configuring Ghostery Video to help
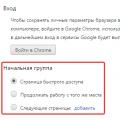 How to remove the start page in the Google Chrome browser
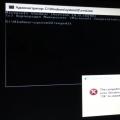 The computer restarted unexpectedly or encountered an unexpected error