Windows 7 recovery does not start. "Disk boot failure" problem or message with text "Insert system disk". Using safe mode.
Detailed description how to restore normal boot Windows 7 after various system failures.
Windows 7 boot problems and their causes
Many computer and laptop users have probably encountered boot problems. Windows 7... The operating system simply refused to boot and gave an error. In such cases, it is impossible even to enter the Safe mode on F8.
The first thing that comes to mind in such situations is reinstalling Windows itself. The procedure is simple and well described in the guides :, and many others.
Reinstallation will solve the problem with booting the system, but I don’t want to lose documents, programs, I don’t want to configure everything again. If the documents can still be used with Ubuntu Linux somehow get it and save (manual :), then installing drivers and applications, as well as configuring them, can take a long time.
Fortunately, the system boot problem can be solved more easily. Bootloader corruption is usually the cause of system boot problems. Windows, disruption of work MBR... To restore the system, you need to restore this same bootloader and MBR. How to do this will be described below.
Restoring Windows to Normal Boot
MBR and bootloader recovery process Windows 7 almost completely identical to that for Windows Vista... This means that the recommendations described below can be safely applied to recovery. Windows Vista.
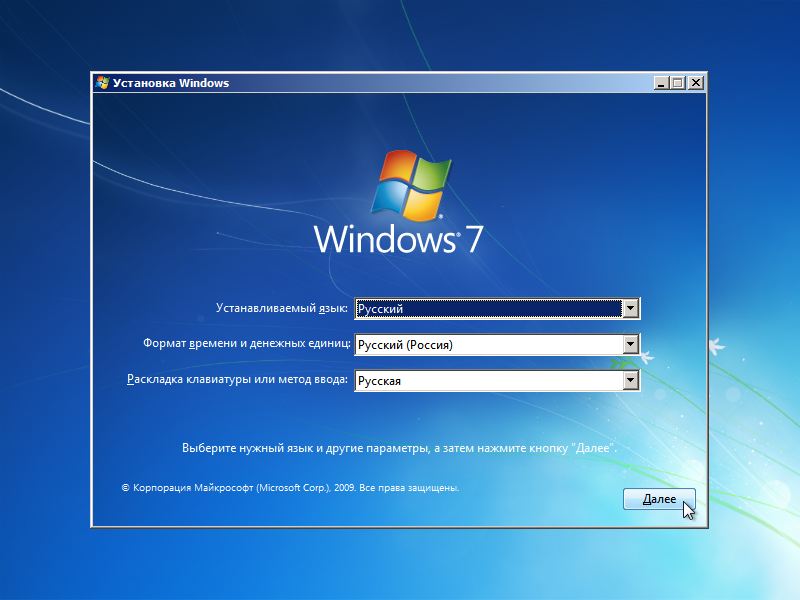
Let's start. First of all, we need a bootable disk or flash drive with the distribution Windows 7... How to prepare them is described in detail in the guides:, and.
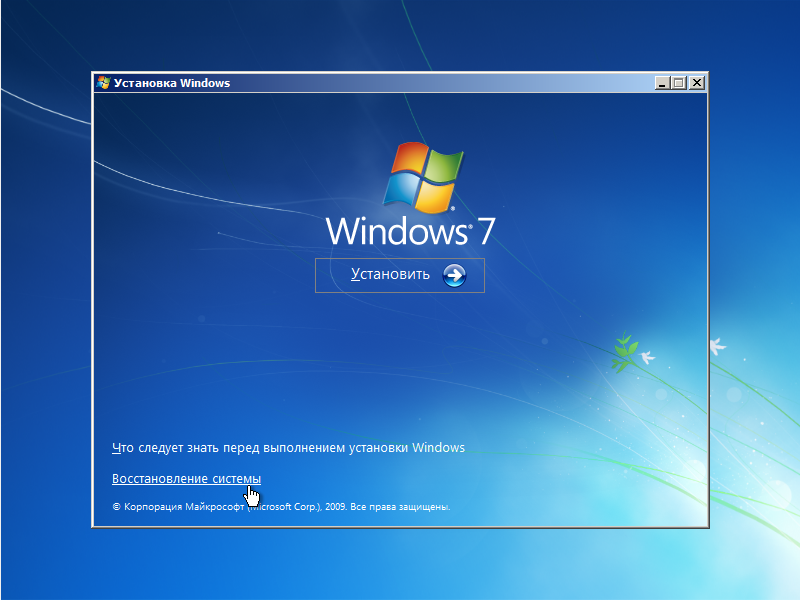
Now it's worth choosing the item below:
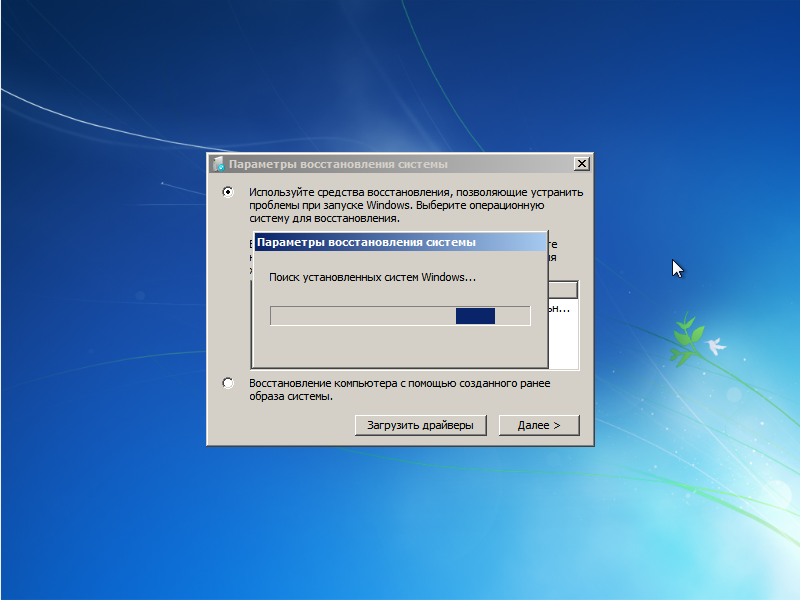
After that, the search for installed copies of Windows on the hard disk will start:
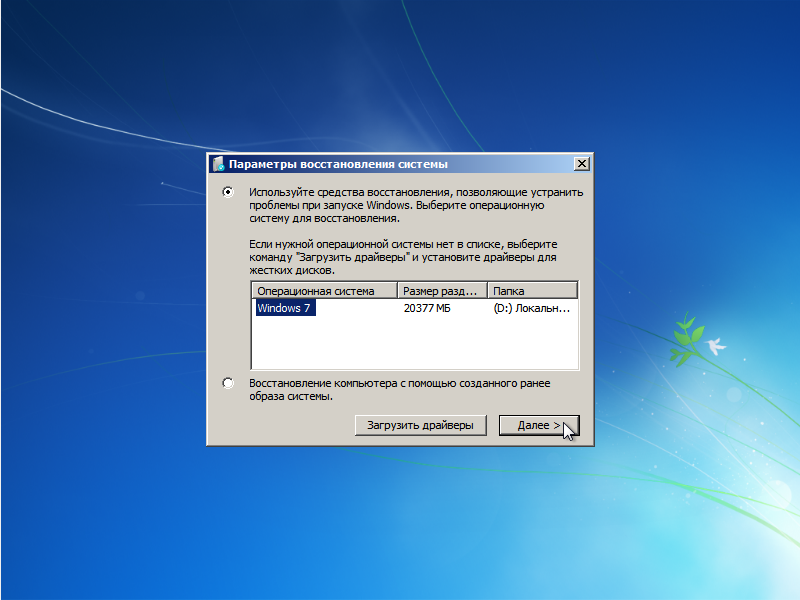
As a result, the wizard must find the installed Windows 7... Select it and click Further:
The Windows recovery menu should appear:
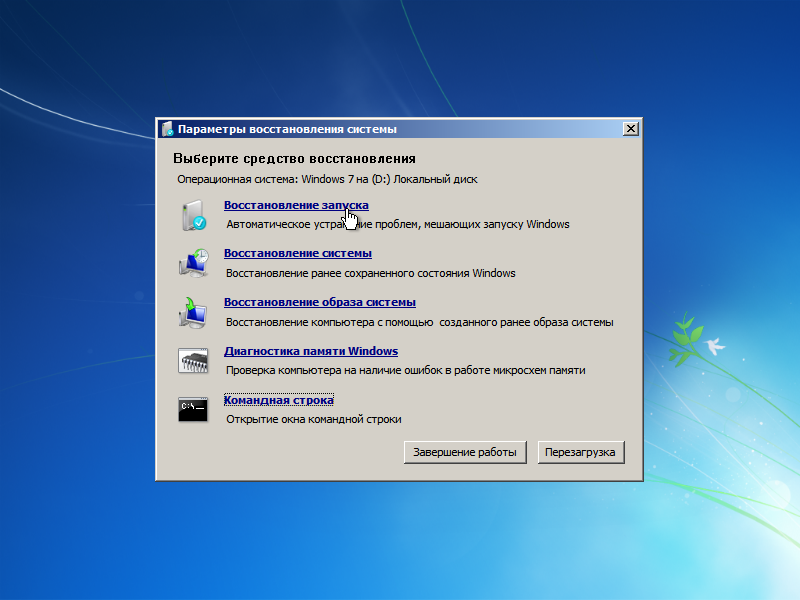
Let's consider what each point is for:
- - recovery Windows bootloader and system files
- - system recovery from restore points. Restore points are created automatically during important system changes, installation system updates and can also be manually created by the user
- System image recovery - Windows recovery from disk image
- Windows Memory Diagnostic Tool- examination random access memory for errors. Quite a useful thing.
- Command line - command line for manual recovery
We are interested in the first two points, as well as the last one. Let's consider first. This is the easiest way to restore normal system boot. Let's launch it. Diagnostics should start:
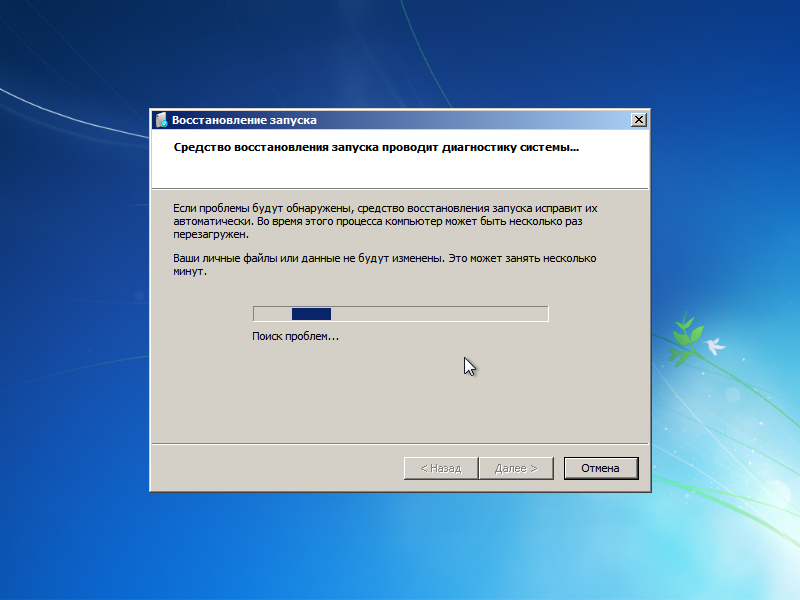
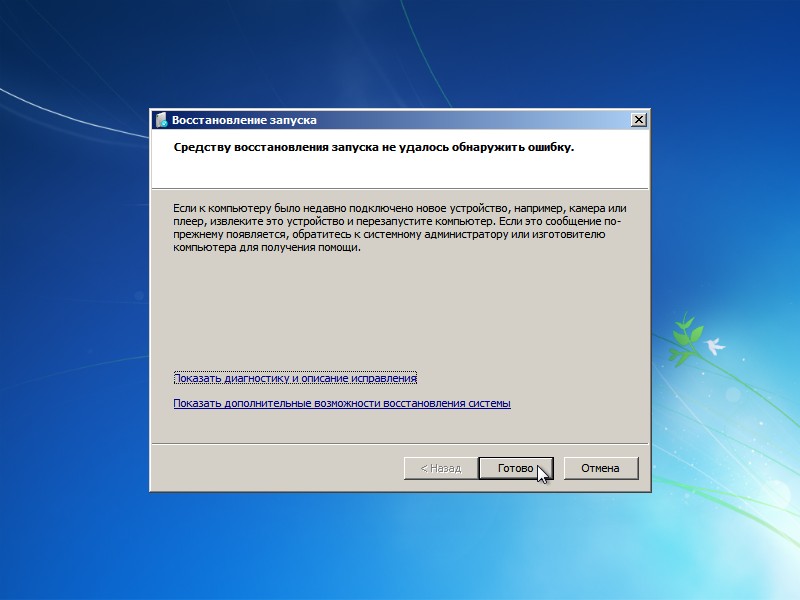
After a while, the problem will (or won't) be fixed:
Consider now the second menu item -. Let's try to restore the system from restore points. To do this, run:

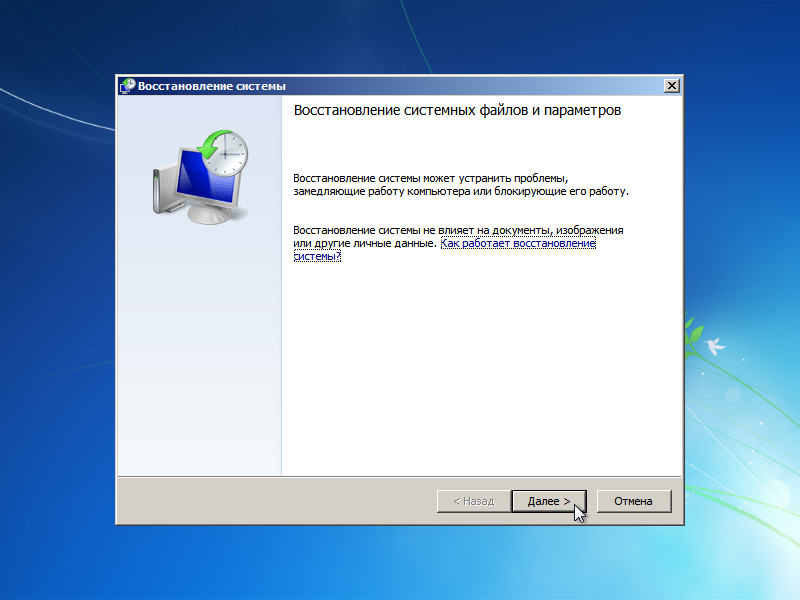
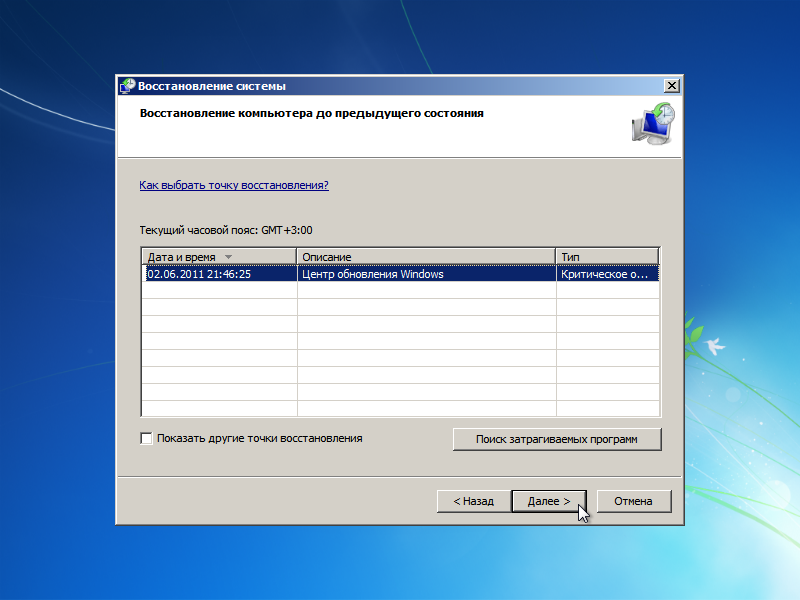
Now select the last restore point and click Further:
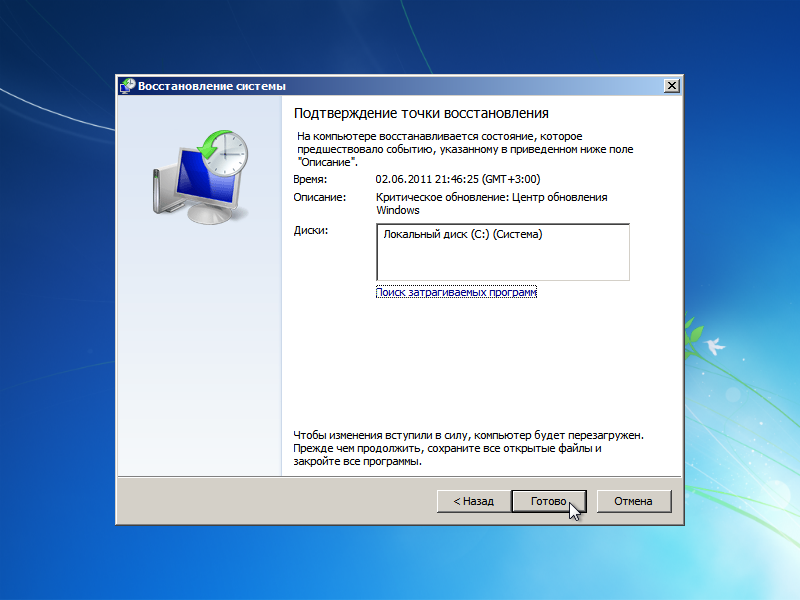
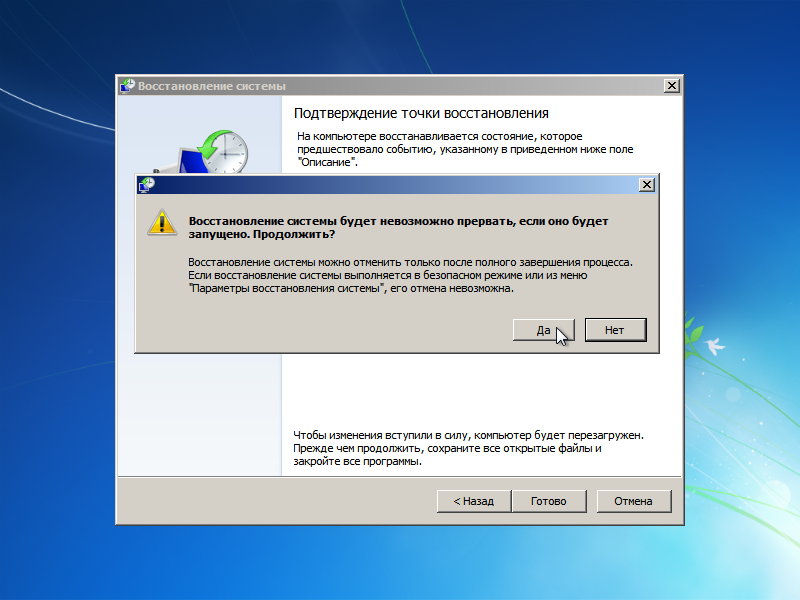
Click on Ready agree with the warnings:

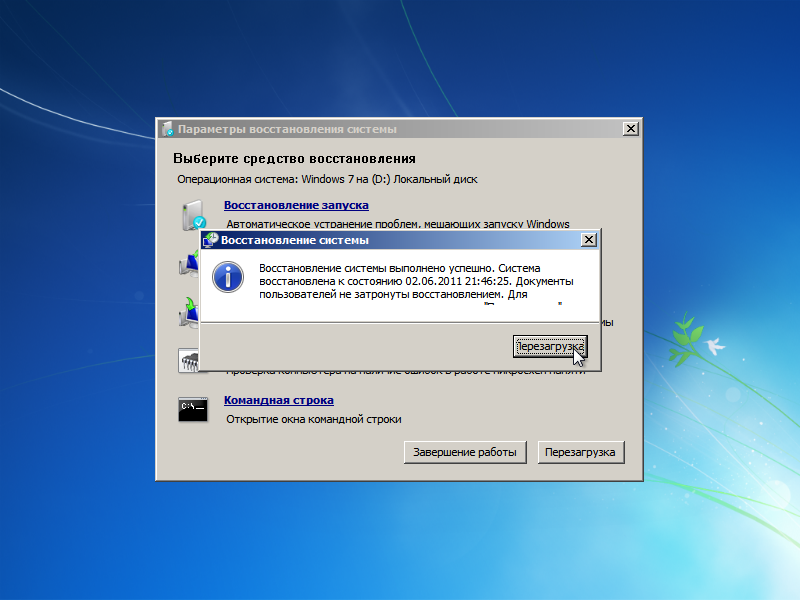
Restart your laptop or computer:
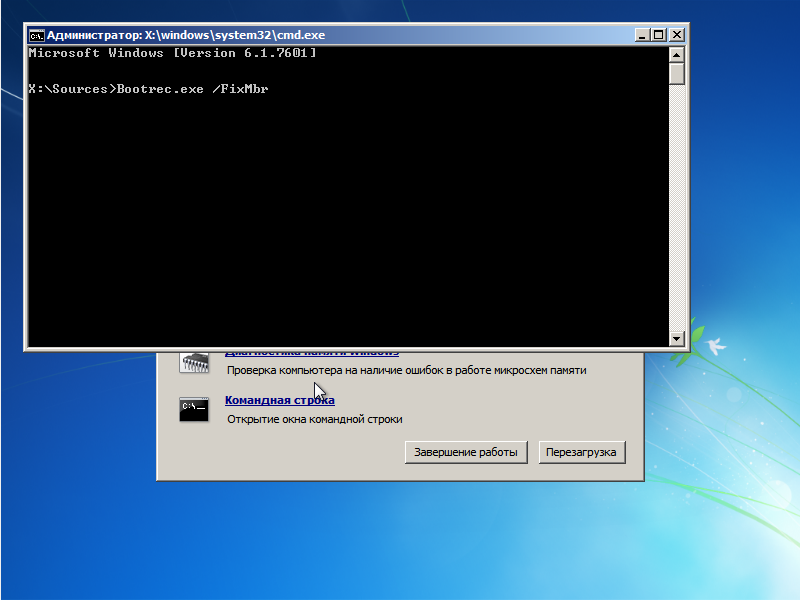
If the manipulations described above did not bring any result, then run Command line:

To restore the MBR, enter the command Bootrec.exe / FixMbr:
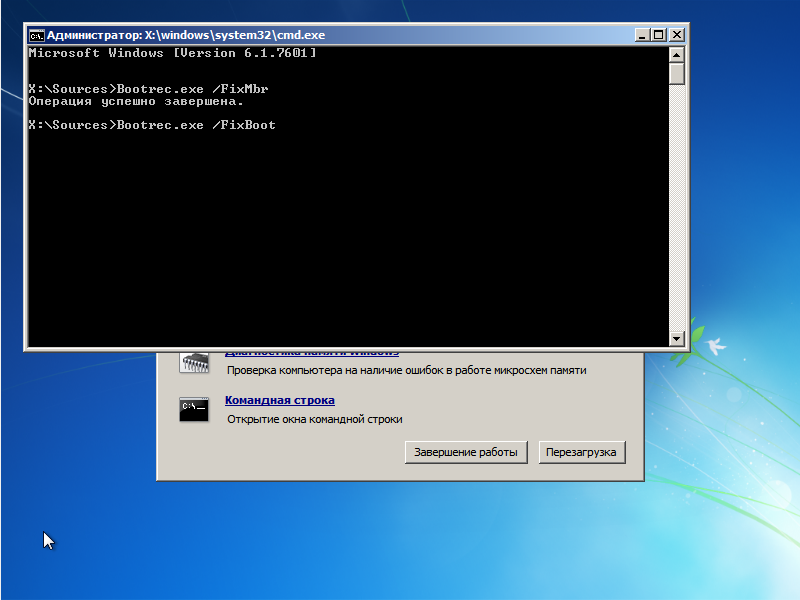
To restore the bootloader, enter the command Bootrec.exe / FixBoot:
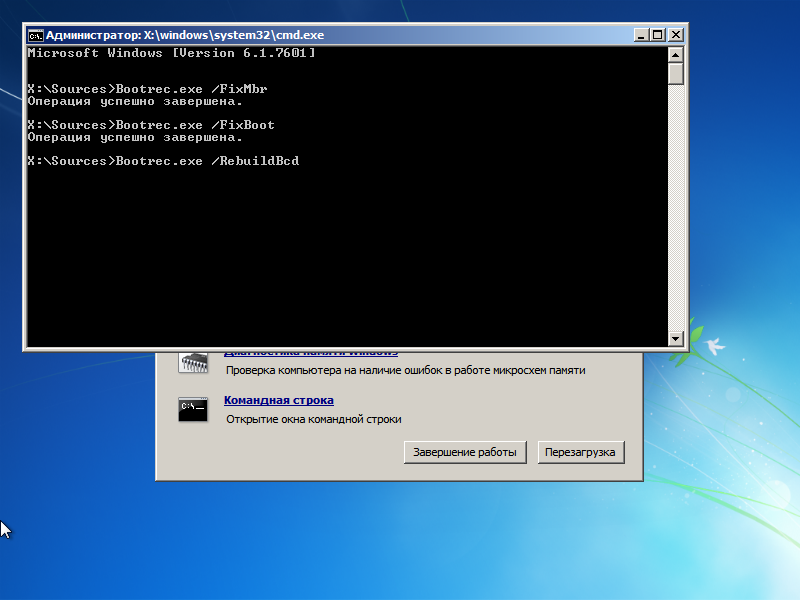
To restore the normal boot of several systems or in case of problems with partitions, you should use the command: Bootrec.exe / RebuildBcd:
As a result, you will get something like the following report:
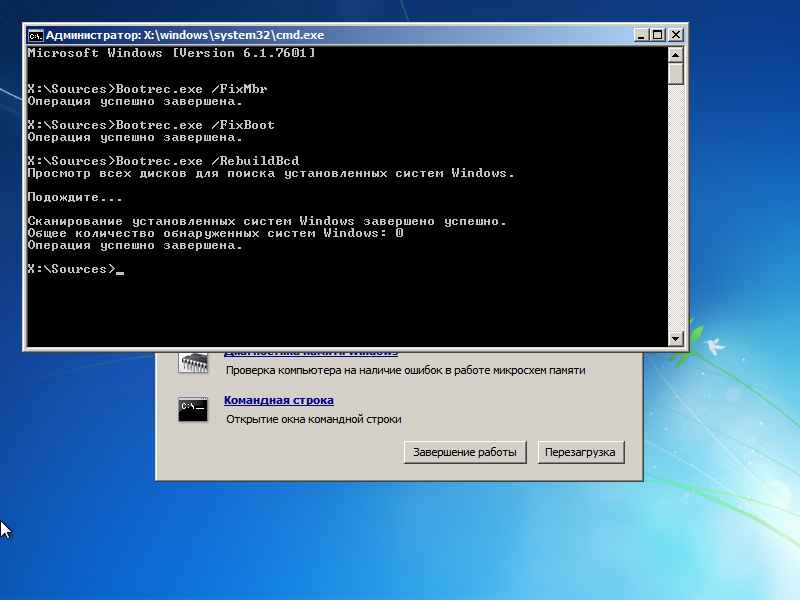
Now you can simply restart your laptop. Windows should boot normally.
That's all. Thank you for the attention.
WinToFlash for beginners.
Detailed description of how to install Windows 7 on a laptop or computer.
There are often cases when after installing a program, driver, unintentional deletion of a system file or a virus attack, the Windows 7 operating system starts to "slow down" or stops functioning altogether. If there is no important information on the computer, then you can simply reinstall it. Otherwise, System Restore will help you. This tool returns the OS with all the data on the hard disk to a usable state.
Windows 7 System Recovery Methods
The developers of Windows OS provide a number of standard recovery methods, but all of them do not provide one hundred percent guarantee. Therefore, be prepared that you may need to use several resuscitation methods in turn.
You can restore the Windows 7 operating system to work using:
- applying the last good configuration;
- safe mode;
- restore points.
Using Last Known Good Configuration
This Windows resuscitation tool is the easiest to use, so you should use it first. The sequence of work will be as follows:
After completing the above steps, data is automatically restored from the OS registry and the operable parameters of the available drivers. If this method fails to start the system, go to the second method.
Safe Mode is an effective Windows resuscitation tool
Safe mode is a special version of the operating system that does not perform automatic start installed programs as usual loading Windows... In this case, only those drivers are activated, without which the operation of the OS is impossible.
This tool is launched in the same way as the last working configuration, that is, using the F8 key. When you enter the system in this way, the screen resolution will change to 800x600. This is normal, so don't worry.
The following recovery procedure is presented below:
Using a restore point
Another effective resuscitation tool Windows systems- application of restore points. The principle of operation of this function is based on the fact that after a certain period of time, the existing OS configuration is written to HDD... If you encounter any software problems, you can use the saved points and restore your computer to work.
The sequence of actions will be as follows:

What if Windows won't boot?
If the damage to the OS has made it impossible to start, you need to do the following:
After returning the system to work, it is recommended to save important information for you in a safe place, and then check the storage medium for viruses and reinstall Windows.
In many cases, the impossibility Windows boot 7 may simply be due to an incorrectly set boot order in the BIOS. This can happen if your computer has more than one hard disk... Typically, the BIOS is entered a few seconds after turning on the computer by pressing a button. Delete or by pressing a special function key... Once in BIOS, make sure your Windows 7 hard drive is in the correct place in the boot queue. If you don't know where to look, read the instructions for your motherboard.
Another possible reason not detecting Windows computer there is a hardware problem during the download. If the BIOS cannot find your system drive, then make sure that all cables are connected to it properly. If your hard drive is making a strange sound like clicking and tapping, then it might be broken. Finally, it is possible that your hard drive is experiencing data corruption issues affecting important system data such as the Master Boot Record (MBR).
If you suspect that your drive is broken, it is a good idea to back up important data, scan it for errors from another computer, and even consider purchasing a replacement drive. Attempts to fix the boot problem on damaged disk can result in data loss, so back up your data before you do anything else.
MBR and other important boot data can also be corrupted by attempting to install earlier versions of Windows other than Windows 7 (such as Windows XP) or by third-party programs such as viruses. In case of a virus, it is recommended to check the disk using antivirus software... Otherwise, attempts to fix the disk with a virus may result in data loss.
Also, the appearance of messages about corrupted boot data may be caused by incorrect assignment of the active partition of the disk, which may come from an overly inquisitive Windows user with administrative rights.
Fixing MBR and other Windows 7 boot problems is most quickly accomplished with the Windows 7 installation DVD. However, if you don't have one, you can alternatively use the Windows 7 system recovery disc, which we'll show you how to create it below.
If you don't have an installation DVD or a recovery disc, then do yourself a lot by creating a recovery disc now to avoid unnecessary headaches in the future.
Step one: Turn on your computer by booting from either the installation DVD Windows disk 7, or from a Windows 7 system recovery disc. Be aware that you may need to change the boot order in the BIOS to boot from DVD.
Step two: When loaded from your installation disk or from a recovery disc, you may be asked to select a language. Select it and then continue downloading. When using the installation DVD, when prompted below (or similar in another language), select Repair your computer.
Step three: It will take some time for the computer to search for installed Windows, after which you will be presented with a list of possible recoverable Windows. Choose the appropriate setting and proceed. If, by chance, a problem is found in one of your Windows installations at this initial stage, the system may ask you if you would like it to automatically correct it. Here you can decide for yourself - should the system fix itself or not? If you do not want automatic correction, then simply select “no” (No).
Step four: When you reach the System Recovery Options screen, which is shown below, you will be presented with a selection list that can help you recover your damaged Windows 7.

If you wish, you can first try the Startup Repair option, which in automatic mode often solves many boot problems. However, in this article, we will be using the Command Prompt option to solve our problems manually. Therefore, click on Command Prompt to continue.
Step five: At the command prompt, enter the following command and press Enter:
If successful, you will see a corresponding greeting message, such as “The operation completed successfully”. This is what you need! Your MBR has been restored!
Although the above command fixes the MBR (and sometimes it is enough), there may still be an error with the boot sector of the system partition and with the Boot Configuration Data (BCD). This can happen if you tried to install in addition to Windows 7 another operating system like Windows XP. To write a new boot sector, try the following command:
If your Windows 7 is still not detected when the computer boots, or you want to include more than one operating system in the system boot list, try the following command to rebuild your BCD:
bootrec.exe / RebuildBcd
The above command will scan all your drives for other Windows 7 compatible operating systems and allow you to add them to the system boot list. If that doesn't work, then you may need to back up your old BCD folder and create a new one using the following commands:
bcdedit / export C: \ BCD_Backup
c:
cd boot
attrib bcd -s -h -r
ren c: \ boot \ bcd bcd.old
bootrec / RebuildBcd
Some users just delete the old boot folder and try the above steps to fix their boot problems. But this is not recommended.
After deliberately changing the active partition on our system drive during system boot, we encountered a BOOTMGR (BOOTMGR is missing) loss error, which prevented us from booting Windows. This is a common error that occurs when you start to “play” with partitions on the system drive. And solving it can cause a serious headache if you do not prepare for it in advance.
To reverse the active partition, use your Windows 7 recovery disc or installation DVD and follow the steps below.
Step one: Follow the steps above (one through four). This should bring you to the command line of the Windows recovery environment.
Step two: Type DiskPart and then press Enter.
Step three: Type List Disk and press Enter. This command will list all drives connected to your computer and assign numbers to them.
Step four: Enter Select Disk x, where x is the number of the disk containing the partition you want to make active. Hit Enter.
Step five: Type List Partition and press Enter. This will allow you to see a list of partitions on the selected drive. Determine which section you want to make active.
Step six: Enter Select Partition x, where x is the number of the partition you want to make active. Hit Enter.
Step seven: Now just type Active and hit Enter. This command will make the section you selected active.

How to create a Windows 7 system recovery disc
Windows 7 makes it easy to create your own system recovery disc, if, of course, your operating system is already installed and working.
Step one: Click on the Start button -> Programs -> Maintenance -> Create a system recovery disc.
Step two: Insert a blank CD or DVD into your optical drive.
Step three: Click on the create disc button and let the program do its job.
What you need! The program only needs to write 140-160MB of data to disk (depending on the type of operating system), which should take only a few minutes. If you do not have an optical CD / DVD-R drive that you can use to create a recovery disc (and for later use), then you can download yourself an ISO image with a Windows 7 system recovery disc and then use it to create bootable USB stick.
Step one: Download the Windows 7 system recovery disk image (link).
To download you need a torrent client like µTorrent. Alternatively (if you have a DVD drive), you can use a Windows 7 installation disc or a Windows 7 system recovery disc. In this case, you should skip directly to step seven.
By the way, with the help of the installation disk with Windows 7 in the seventh step, you can not only restore the system, but also install Windows 7 from a USB drive, which is very useful if you are a netbook user.
Step two: Open a command prompt with administrator rights. To do this, click on the Start button -> Programs -> Accessories -> click right click mouse on the Command Prompt and select Run as administrator.
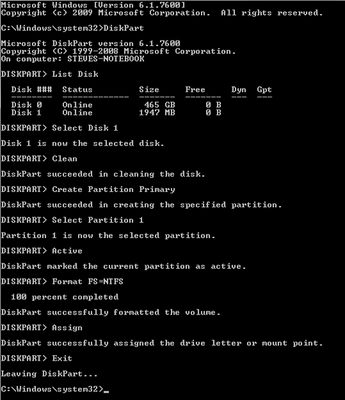
Step three: After confirming all UAC prompts, you should be at the command line. Make sure your USB stick is connected to your computer, then type DiskPart and press Enter.
Step four: Type List Disk and press Enter. Determine which number corresponds to your USB stick. In our case, the USB flash drive corresponds to Disk 1. We determined this by the capacity of the flash drive, which we have for 2GB.
Step five: Enter the commands below in order, changing the disk number to your own. Warning - executing the commands below will erase all data on your USB stick or drive of your choice.
Select Disk 1
Clean
Create Partition Primary
Select Partition 1
Active
Format FS = NTFS
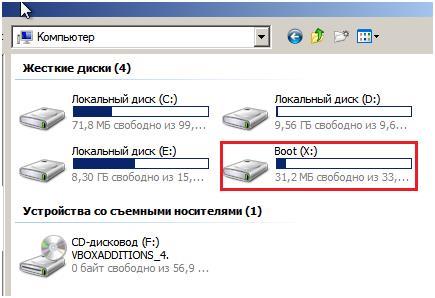
Step six: After DiskPart has successfully formatted your USB stick (which may take a few minutes), you need to enter the following commands:
Step seven: Now you need to copy the contents of the ISO image (or DVD) you downloaded to your USB stick. It's just a couple of folders and a file. To extract files from an ISO image, you need a program like WinRAR.
Step eight: Now that the files have been copied, you need to make your USB stick bootable. To do this, you need to download a small file bootsect.exe. This file can also be found in the boot directory of the Windows 7 installation disc. After downloading, place bootsect.exe in root folder your USB stick.
Step nine: Back at the command line, you need to change the current directory to the root directory of the USB stick. In our case, the flash drive corresponds to the letter E, so we will use the following commands:
e:
bootsect / nt60 e:
The bootsect command will add compatible boot code to the specified volume. If all goes well, you will have a bootable, recovery USB stick. However, when using it, do not forget that it must be specified in the BIOS boot list.
Let's take a look at how to start Windows 7 System Restore.
In the second half of 2017, Microsoft plans to officially end support for the seventh version of Windows.
In this regard, many users are trying to find options for solving many errors and problems on their own.
According to the latest data from the company, OS updates are released much less frequently, and user support is provided only in really important cases. The entire focus of the corporation is on improving Windows 10. Insufficient system support leads to bugs and freezes.
Often, user actions are also the cause too slow work OS. Installing "heavy" games, programs, rebooting the RAM and hard drive - these are the main factors in the breakdown of the system. If you experience a sharp deterioration in the performance of your computer, you should perform a recovery. After this procedure, all PC functions will be corrected.
There are three basic recovery methods:
- Using the built-in assistant;
- Using system tools (BIOS, command line, and others);
- Through third-party programs.
Standard utility "Recovery"
By default, every copy of Windows 7 periodically creates restore points - this is an archived version of the last successful PC configuration that the user can use to restore.
Each such restore point is stored on your computer's hard drive. To select one of them, you need to use the standard Windows utility. This option is the simplest and is suitable only if the operating system boots normally and the function of creating archived copies of the OS is not disabled on the computer.
Follow the instructions:
1. Go to the PC control panel and enter "System Restore" in the search text box;
2. In the results tab, select the window of the same name and wait for it to open;
Rice. 2 - standard utility window
3. By clicking the "Next" button, you consent to the processing of your data by the system. During the restore process, only those files and folders will be saved that were created before the date of adding the access point you selected. The configuration settings of the RAM and hard disk are also changed. Also, drivers and other software will be updated, which supports the stable operation of the system. Make sure your computer is connected to the internet;
4. When choosing a restore point, pay attention to the date of its creation. The save date should correspond to the period when Windows 7 was working normally, without crashes;
5. Click on the "Show other points" checkbox to see all the objects in the window. To see what applications the rollback process will work with, select the required point and click on the "Affected programs" button;
6. After you have decided on the choice of the created backup, click "Next";
Rice. 3 - choosing a restore point
7. In the new window, confirm your choice. Do not forget to check the properties of the point and the name of the disk with which it will work (to restore the OS, the system drive C must be indicated in the corresponding column);
Using Safe Mode
After a serious error occurs in Windows 7, the system may not boot normally. To troubleshoot such a problem, the option to start in safe mode is provided. It can be used to boot Windows specifically for troubleshooting purposes.
This boot option is missing some standard services and options. Only the basic drivers and components that are required for the system to function are launched. This option is suitable if you cannot work due to a constantly occurring error that shuts down the computer or causes it to freeze.
In safe mode, such errors will not appear, and you can remove malware or perform a system rollback, as described in previous paragraph articles.
Follow the instructions to start Safe Mode:
- Turn on your PC. Then press the power key again;
- Open the startup menu by holding down the F8, F12 or Escape key, depending on your PC model;
- After a few seconds, the Windows 7 boot options window will appear;
Rice. 4 - system boot parameters window
- Select "Safe Mode" by pressing the up and down keys, as shown in the picture above;
- Press Enter to complete the action.
After restarting the PC, you are taken to the working Windows table 7 where you can perform an access point restore.
Remember! In this mode, there is no way to use a WAN connection. If you need Internet access to configure the normal operation of the system, select "Safe Mode with Networking Components" in the advanced settings window.
Automatic troubleshooting
Boot options can also enable the troubleshooting option. It allows you to reset all errors in automatic mode. Also, users have the option to enable the last normal configuration of Windows 7. After selecting this function, the OS desktop will boot as the last good copy of the settings.
Follow the instructions:
- At the stage of turning on the computer, start the system menu of the power-on options by holding F8;
- Select "Last Known Good Boot" and try to start Windows 7;
- In case of an unsuccessful attempt to turn on, go back to the system menu and select "Troubleshooting";
- The operating system will launch a utility to automatically fix all errors. After that, Windows 7 should start in a restored form.
Rice. 5 - troubleshoot and start a good Windows 7 configuration
Command line recovery
This option is suitable if there are no saved restore points on your computer, but you are able to start Windows 7.
Turn on your PC in safe mode with command line support. This will allow you to open a CMD window and work with basic commands.
Rice. 6 - select the OS launch option
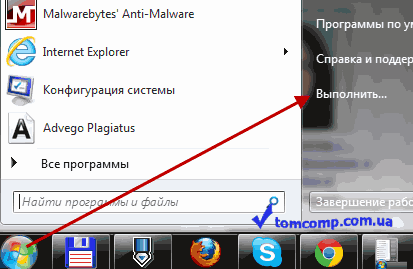
After turning on windows 7, open the Run window and enter the command below in the field. It will run the line.
Rice. 7 - Run window in Windows 7
In the window that opens, type the command shown in the figure and press Enter. After a few minutes, a message will appear stating that the PC has been restored successfully. Reboot it to exit safe mode.
Rice. 8 - fix the system using Command Line
Recovery using a flash drive or disk
Due to the occurrence of fatal errors in Windows 7, users are unable to start the system using Safe Mode. In this case, you can restore Windows using a boot disk or USB flash drive.
Bootable media is a removable device (usually a CD or flash drive) onto which an installation copy of the Windows operating system is downloaded. You can create such a media on another PC using ISO programs Maker, Live CD, Daemon tools and other utilities. If you still have a disc with an official copy of Windows, you can also use it to roll back the system.
Note! Windows 7 system versions on boot disk and on the computer should be the same. Otherwise, the recovery will fail.
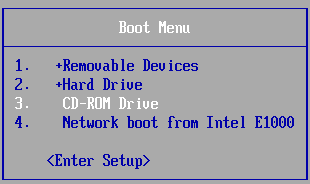
Before starting to fix the work using removable media, you should configure the boot queue of components in the BIOS - the computer should boot an uninstalled Windows version 7, and the one on the drive:
- Open the BIOS by pressing the F8 or F12 keys immediately after turning on the PC;
- Go to the Boot tab;
- In the window that opens, find the items "Boot Priority" - each of them means a certain order of loading PC components. Put the type of your bootable media in the first place. In our case, the recovery will be carried out from a flash drive, so in the first column "Boot Priority" select "USB Storage". If you are working with a disk, put the “Hard Drive” component first;
Rice. 12 - launching the standard utility
Using the AVZ utility
AVZ is an antivirus software that quickly scans your computer for malware, incorrect settings and Windows errors... The application is distributed free of charge and does not require installation. Suitable for use in a system of any bit size.
To perform Windows recovery in this program, just open the "File" tab in the main window. Then click on "System Restore".
Fig. 13 - main menu in AVZ
In the window that opens, check all the system options with which the program will work. Click on the "Run" button. The list is quite lengthy. We recommend that you select all items.
Their implementation will increase the likelihood of uninterrupted Windows work 7 after application shutdown. Correcting network, hard drive, search, and startup settings at the same time is the best recovery option for the operating system.
Fig. 14 - selection of system settings in AVZ
Occurrence of error 0 * 000000
Sometimes, during recovery or immediately after the completion of the operation, an error with the code 0 * 000000 may occur. Its various variations can be supplemented by other identifiers, for example, 0 * c0000034 or 0 * 0000007b.
Fig. 15 - an example of an error
The occurrence of a problem informs the user that the system was unable to access the bootable media read procedure. Since the error appeared in already installed system immediately after its recovery, we can say that its cause is a problem with the drivers.
Most likely, after the recovery procedure, the operating mode of the system disk was changed from IDE to AHCI, so the existing drivers did not fit to boot the OS. You can solve the problem by disabling AHCI through the BIOS:
- Turn off your computer and open the BIOS menu;
- Go to the CMOS settings tab and select the SATA serial interface configuration item, as shown in the figure below;
- Press Enter and select the IDE option in the pop-up window;
- Save settings, exit BIOS and restart your computer.
Fig. 16 - switching SATA modes in BIOS
Once turned on again, the system will complete recovery and operate smoothly.
Thematic videos:
System Restore Windows 7 and XP
In this video tutorial, you will learn how to perform a Windows 7 and XP system recovery, and in what cases you need to roll back the system.
What is the reason for the refusal Windows startup 7 on a computer? The following factors can affect the possibility of issuing an error when starting Windows: infection of the computer with viruses, failure of the hardware configuration, errors during installation software, imperfection of the operating system.
It is required to find the true reason for their issuance, for this it is necessary first of all to figure out what stages the Windows 7 boot consists of. It consists of 3 main stages, which in turn are divided into stages:
Windows 7 boot stages
First stage - OSLoader
Immediately after the execution of the "BIOS" code, the first stage of loading begins. Here, at the first stage, the main drivers are connected, which are required to read data from the hard drive. After that, "winload.exe" starts loading the kernel, loads the "SYSTEM" registry hive into RAM, as well as the "BOOT_START" program.
The duration of the first stage is no more than three seconds. It ends when the Windows 7 logo is displayed on the monitor.
Second stage - MainPathBoot
MainPathBoot is the main and long-term stage. The duration sometimes reaches several minutes. The stage starts by displaying the Windows 7 logo on the monitor and ends when the desktop starts up.
Stage PreSMSS
The kernel of the operating system is determined, "plug and play" is loaded, the programs "BOOT_START" and the drivers of the computer components are determined. If errors appear, this indicates a problem with the computer components.
Stage SMSSInit
Then control passes to "SMSS.exe". The remaining hives of the registry are determined and included in the work of the program of the "auto" type. At the final stage, "Winlogon.exe", the utility for logging into the operating system, takes control. “SMSSInit” is completed when the menu with user name and password is displayed on the monitor.
Errors here indicate malfunctions of the video card or its drivers.
WinLogonInit stage
It starts with the launch of "Winlogon.exe" and ends with the appearance of the desktop by loading "Explorer.exe". Includes implementation scripts group policies and loading services. This is the most time consuming step for the processor and usually takes a long time.
Errors here indicate problems with the services of programs not included in Windows, for example, antivirus software.
ExplorerInit stage
Continues from loading the shell and ends with loading the window manager. During the stage, shortcuts begin to be displayed, in parallel loading in progress programs that are in startup. This stage is characterized by the highest load on the processor, hard drive and RAM.
Errors here indicate defects in components or the need to upgrade them.
Third stage - PostBoot
Lasts from the moment the desktop is displayed and ends with the full opening of programs from startup.
Errors indicate problems with applications that appear in the startup list or the presence of infected files on the computer.
Errors during the startup phases
Having considered what errors occur at various stages of system startup, it is possible to identify specific problems.
Errors due to defects in computer components:
- Repeated errors of a driver indicate a hardware defect associated with this program;
- Multiple problems at various stages indicate a defect in RAM;
- If there is no image on the computer monitor, but Windows sounds are present, then this indicates incorrect work video devices;
- If it is impossible to start running windows or if it is interrupted, you should check the health of the hard drive;
- If happens complete shutdown at startup, it is possible that the power supply or the motherboard has failed.
Missing or defective boot files
"Bootmgr is missing" flashing on the monitor indicates the absence or malfunction of the boot files, and sometimes there is just a blank black screen.
 If there is no “Bootmgr” loader in the computer, the system will not boot. This section is sometimes accidentally erased by the user himself, using the boot disk.
 Also, the necessary files to start the system are located on the C: drive in the Windows folder.
Registry problems
 Windows can sometimes restore it on its own using the recovery wizard.
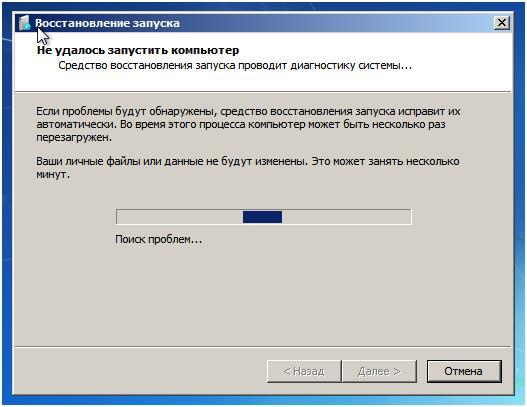
Restoring the operating system startup
Recovery environment
Windows 7 has "Windows Recovery Tools WRT". To recover, you need to select from the F8 menu "Computer troubleshooting".
 Next, a menu will appear - you need to select "Startup Recovery".
 This will restore the startup parameters and files.
Recovery methods
In the event of a software error, the "System Restore" will help the operating system. 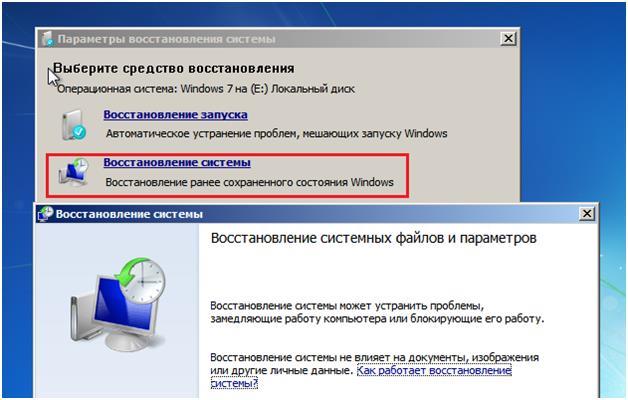
Manual recovery
If there is no positive result after using the system tools, it is possible to manually restore the registry from a backup, which is located at C: in the WindowsSystem32configregback directory. It is necessary to copy the files from it to the WindowsSystem32config directory.
File recovery
Exists useful program"Sfc.exe", which you can run in the recovery environment. You must specify the following: parameters and location of the download folder and the offline system directory Windows directory). The / offbootdir and / offwindir options.
If the problems with the launch have not been eliminated, then you need to manually restore boot files.
 Bugs in Singularity?
 Just Cause 2 crashes
 Terraria won't start, what should I do?