Working with LED strip. Step by step instructions for connecting the LED strip. Joining two single color ribbons
Individual objects in the room are gaining more and more popularity: mirrors, shelves in the closet, beds. For this lighting option, a special tape is used, which can be single-color or multi-color (RGB). If you do not know how to connect an LED strip to 220 volts with your own hands, then we will provide step-by-step instructions with diagrams, photos and video tutorials.
Single color
Connecting a single-color LED strip is not difficult. All you need is to purchase the constituent elements of the backlight, cut off the desired length of the LED strip, solder it to the power supply and insulate the exposed contacts. Now we will consider in detail each of the stages of connection.
Choosing a connection scheme
To independently connect the LED strip to a 220 volt network, you must first choose the connection scheme for all elements. If you decide to make a backlight using no more than 5 meters of the product, then it is enough to connect the tape to a 220 to 12 V power supply, and connect the PSU to home network through a cord with a plug.
However, it often happens that you need to connect more than 5 meters of LED strip - 10, 15 or even 20 meters. In this case, it is forbidden to connect all the segments in series, because the first 5-meter section will overheat and at the same time the voltage in subsequent sections will drop significantly. This connection will shorten the life of the LED backlight. All the most popular we have examined in detail in the corresponding article. As an example, we will provide them again.
Consistently (allowed if you need to add a small segment):
Parallel:

With two power supplies (if the tape is long):

We draw your attention to the fact that you can connect the LED strip through a switch or, which is very convenient when creating additional lighting in the kitchen or another room. In this case, the light switch is connected in front of the power supply in a phase break, as shown in the diagram below:

The dimmer must be connected after the power supply, as shown in this example:

We figured out the schemes for connecting LEDs to a 220v network, now we turn to the very process of connecting the circuit elements.
We connect components
In the very simple example we have a 220/12v power supply and 5 meters of one-color LED strip. To connect all elements to 220 volts, you need to do the following:

That's the whole step-by-step instruction for dummies on connecting the LED strip to the power supply and the network with your own hands. It should be noted that you can connect the product even without soldering, using special connectors, as in the photo below.

The disadvantage of such adapters is that over time, the contact will deteriorate, which cannot be said about a more reliable one. You can see how to connect an LED strip using connectors and soldering in the video below:
Visual instructions for connecting contacts
Multicolor
If you want to connect an RGB color strip at home, the connection technology will not change much. A controller will be added to the circuit with a multi-color device, without which the circuit will not be able to work, and the output will also have 4 contacts instead of two. we also considered, we present them once again to your attention.
Standard way:

Parallel connection:

Amplifier use:


Otherwise, the connection instructions are similar to the previous one - the wires are soldered, the bare contacts are isolated, after which the correct connection of all circuit elements is checked! You can clearly see how to connect a multi-colored RGB tape to the network with your own hands in the video below:
Instructions for connecting a multi-color tape
That's all we wanted to tell you about how to connect an LED strip to 220 volts with your own hands. As you can see, the instructions for connecting a multi-color and single-color model do not differ much, the main thing is to correctly connect the wires by color. If you have any questions, you can ask them using the form!
The LED strip is a light source in the form of a sufficiently flexible printed circuit board with bright diode elements equidistant from each other. Knowing how to connect the LED strip yourself, you can get a practical and affordable lighting system that is economical and guaranteed to last.
What is LED strip and where can it be used
The lighting design is made using the most modern DIP and SMD technologies. The digital designation in the marking of such lighting fixtures corresponds to the size of the crystal chip, calculated in tenths of a millimeter.
For long-term operation of the product, a number of connection rules must be observed.
Most often, such a tape has a width of 8–20 mm, and the standard thickness of a flexible printed circuit board with installed LEDs does not exceed 2.0–3.0 mm. The finished equipment is sold in rolls, represented by five-meter segments. The prevention of excess current flowing through the LEDs is carried out by mandatory introduction in wiring diagram limiting resistors.
 Bright equipment is multifunctional - it will look good both in the interior and in the design of commercial equipment, cars, equipment
 The scope of the light source assembled on the basis of LED elements is quite wide and is currently represented by:
- contour view of lighting on the facade of residential buildings and public buildings;
- illumination of certain sections of bridges, pedestrian or bicycle paths and sidewalks;
- illumination of objects of a landscape decor;
- illumination of fountains, waterfalls or pools;
- illumination of billboards and information structures;
- interior lighting on ceilings and ceiling niches, walls and shelves, skirting boards, flights of stairs and railings;
- furniture lighting;
- lighting in trade and exhibition centers, shops and markets, galleries and cultural and leisure centers, hotels, airports and train stations;
- tuning illumination of cars.
Contour and hidden LED lighting makes shop windows and various commercial equipment more attractive.
Types of LED strips
The following terms are used to refer to equipment:
- diode;
- Light-emitting diode;
- SMD (Surface Mounted Device);
- LED (Light-emitting diode).
Depending on the typical features of the LEDs used in light construction, all lighting strips differ in the amount of luminous flux, the color of the glow, as well as the degree of protection and other important parameters.
Type of LEDs
The main difference between modern LED strips are typical features of diode elements labeled SMD-3028 and SMD-5050 and tightly soldered to a flexible printed circuit board.
 Size SMD 5050 - 5x5 mm, SSMD 3028 - 2.8x3.5 mm
 The digital designation allows you to determine the dimensions of the LEDs used in each specific lighting design.
An important difference between light sources is the density indicators or the number of LEDs that are located on one meter of tape. It is the density of the diodes that determines the power of the product and the level of illumination. Watts (W) are used to measure diode power. For example, a standard SMD-3528 printed circuit board is equipped with six dozen diodes per meter with a consumption of 4.8 watts.
SMD-5050 power parameters:
- thirty diodes per meter of tape - 7.2 W;
- sixty diodes per meter of tape - 14.4 W;
- one hundred and twenty diodes per meter of tape - 28.8 watts.
The design can operate under voltage conditions equal to 5v, 12v, 24v and 36v.
 Tapes differ in the number of diodes and the density of their arrangement
 By degree of protection
According to the specific application of the LED product, the printed circuit board can have different degrees of protection or “IP class”. The specification classifies the degree of protection, and the product is marked in IPXX mode, where the first digit indicates protection against small particles or dust, and the second - against liquids.
The first digit of the IP marking indicates the presence (1, 2, 3, 4, 5, 6) or absence (0) of protection:
- IP0X - against mechanical damage;
- IP1X - from objects >5.0 cm;
- IP2X - from objects> 1.2 cm;
- IP3X - from objects> 2.5 mm;
- IP4X - from objects> 1.0 mm;
- IP5X - partial dust tightness;
- IP6X - full dustproof.
 Before buying, carefully study the marking on the product - after the letters IP there are numbers indicating the presence and degree of protection from external factors
 The second digit of the IP marking (IPX0 - no moisture resistance), in other cases there is protection:
- IPX1 - against drops of water falling vertically;
- IPX2 - from water splashes in conditions of an angle of deviation not more than 15 about vertically;
- IPX3 - from water splashes in conditions of an angle of deviation up to 60 about vertically;
- IPX4 - against water splashes regardless of direction;
- IPX5 - against water flows in any direction;
- IPX6 - from streams and jets of water in any direction;
- IPX7 - under conditions of partial or short-term immersion in water;
- IPX8 - in conditions of complete and prolonged immersion in water.
By color and glow
The color of the diodes installed in the tape can be blue, red, green, yellow, warm and cold white, as well as in the form of an RGB tape. White diodes have a blue color, on which a layer of a special phosphor is applied. In the process of burning out, the glow becomes dimmer, with a characteristic bluish tint.
 You can decorate the interior in different colors - you will find their designations on the packaging
 Of particular interest are the multi-color RGB and RGBW PCBs, making it easy to handle even the most complex decorative lighting scenarios.
 An interesting solution that creates a festive atmosphere
 The base, represented by a special type of coating of the front part of the flexible board, can be transparent, gray or white, as well as brown. It is imperative to pay attention to this criterion when choosing a product for surface mounting.
How to connect LED equipment to the power supply
LEDs cannot be powered directly from a power source, as the result of such a connection is the immediate combustion of the light source. From a household point of view, the receipt of an unlimited power supply by a flexible board causes the consumption of too much power, which is not intended for this type of lighting, so the use of a power supply is rational and in demand.
12 volt
The power ratings of the power supply depend on the load, so when calculating, special attention is paid to:
- the number of diodes in the backlight;
- power consumed by each meter of tape;
- the total length of the printed circuit board;
- safety factor (kz = 1.2).
To determine the total load, it is necessary to multiply the power consumed by a meter of tape by the length of the entire light source:
P total = P m × L
Calculation of the power of the power supply requires the mandatory consideration of the safety factor:
P bp \u003d P total × short
The set of tools and materials required for installation includes:

Some modern models have a built-in dimmer or remote control, but the cost of a ready-made 12 V power supply with additional functionality is much higher than the price of traditional appliances.
 Remote backlight control is convenient from a practical point of view, but it costs many times more.
 The installation technology of 12 V diode lighting using a power supply is not complicated and includes the following step-by-step measures, taking into account the standard connection scheme.
- Tape cutting strictly according to special markings.
 Pay attention to the symbol "scissors" - only here you can cut the tape without the risk of breaking important structural elements
 - Connection to the power supply in accordance with the standard diagram.
 Pay attention to the color of the wires and the sequence of connecting structural elements
Connection of segments with connectors or soldering. The second option involves careful stripping of the insulation at the ends of the conductors, followed by twisting into a bundle of sufficient density. The conductor is laid on rosin and heated with a heated soldering iron, after which a small amount of solder is collected on the tip of the tool and the wires are heated again. With proper soldering, the cores will be very reliably tinned.
At the final stage, the operability of the light source assembled on the basis of diodes is checked.
Features of connecting the product 24 V
You can most often connect a 24 V LED strip using a pair of standard power supplies.
In this case, it is very important to adhere to the following recommendations:

The PSU inputs must be connected to the 220V AC mains. Most often, power supplies have the following color coding:
- brown wire - phase;
- blue wire - zero;
- green or yellow wire - ground protection.
It should be remembered that plastic PSUs do not have a traditional wire for protective grounding. Connectors should provide the most reliable connection of all elements of the assembled lighting structure.
 Procedure for combining multiple printed ribbons
 Some features have a circuit for connecting 24 V to a PSU from a computer, which is due to the lack of a “device” in the PC to consume such a voltage. The comb is equipped with a blue 12 V wire, which, in combination with any yellow wire, allows you to get the necessary 24 V.
To connect a 24 V tape equipped with 240 diodes per linear meter, you need to use a special connector.
Features of connecting a monochrome LED strip
Single color flexible printed circuit boards, produced in the main traditional color variations, are called monochrome LED strips. Due to their diversity, such light sources are actively used in interior lighting conditions, in zoning a common area and creating a decorative color scheme.
 Suitable for interior solutions and discreet decoration
 A simple circuit involves connecting to a traditional 220 volt switch using a power supply. In this case, the phase wire is connected to the input conductor L, and the zero wire must be connected to the conductor N, after which it will be necessary to use the PSU with strict polarity.
 Be sure to use wires with colored windings so as not to get confused
 The monochrome design should be connected to the power supply with the obligatory observance of the color marking and the polarity of the wires. The installation wires used for the connection must have a cross section of 0.5–1.0 mm.
Single-chip type LEDs are extremely easy to connect on a flexible tape and emit only one shade of light. Brightness adjustment is carried out by means of a rheostat. There should be a single current-limiting resistor per section, including the neutral and power tracks.
 Algorithm for connecting the tape to the power supply
 Monochrome flexible tapes are very low power and compact, and the ability to remote control the lighting system is provided by the introduction of a traditional remote control device into the general wiring diagram.
Video: connecting the tape to the power supply with your own hands
How to connect 2 or more led strips
There are several options for connecting two or more LED products that do not differ in design complexity and are easy to do on your own. Several of these elements are connected in parallel, using a high-power PSU that is fully consistent with the connected lighting fixtures.
Particular attention should be paid to RGB tapes, the connection of which will require the mandatory use of a controller that controls the color and intensity of the diodes.
Connection technology:
- Preparation of four wires, of which only three allow color control, and the fourth is common. The wire markings correspond to the controller: "B" for blue, "R" for red, "G" for green and "V+" for power wires. To connect, you can use soldering or use a special connector.
- Calculation of the total total load of all connected devices in order to correctly determine the nominal load indicators of the PSU and the controller.
- Preparation of an RGB amplifier for connecting several tapes in order to synchronize the control of color and intensity of the diode glow.
- Connecting the second flexible PCB to the RGB amplifier, which is fixed on the main tape.
It is advisable to use a pair of power supplies in order to separately connect the amplifier and the lighting system controller.
Connecting tapes through the controller  Diode structures are connected to the blocks through the controller and amplifier
Diode strips must be connected to one another by means of a controller, and in addition using a power supply unit, the power of which must match the lighting system. Without an amplifier, even connecting colored diodes in series is impractical.
Video: how to connect the LED strip to the battery
Safety measures and operating rules
Installation and further operation of diode lighting products is characterized by intuitive simplicity:
- the use of a lighting system without the presence of strong mechanical loads;
- protection of conductive tracks from damage;
- checking after installation the correct connection of all wires;
- ensuring a stable supply of electric current;
- prevention of sudden surges in voltage;
- use of power supplies with optimal power indicators.
It is forbidden to operate flexible printed circuit boards of any kind at temperatures above +40°C. If it is supposed to operate diode lighting on a metal surface, then a high-quality insulating layer is necessarily provided. Diode lighting equipment must have sufficient protection from moisture and any aggressive external influences, so the use of a special sealed casing is relevant.
Flexible LED lighting systems, which differ in color and power ratings, have become very popular in various areas of human life. Super-bright modern diodes are characterized by economical consumption of electrical energy, as well as durability and richness of colors. Among other things, a flexible board with diodes can be easily and quickly installed by yourself, without the involvement of specialists in the field of lighting equipment.
From time to time, questions come to the mail regarding the LED strip operating directly from 220 volts. Visitors to the site are wondering about the real existence of such a product. To reveal the topic completely and give answers to all possible questions, we decided to write an article that will give detailed answers about the 220 V LED strip: types, choice, connection.
How it works and how it works
The 220 volt LED strip consists of SMD LEDs designed to operate from 220 volts. The LEDs on the tape are divided into groups of 60, so you can see the resistances that limit the excess voltage. The LEDs mounted on the SMD tape are not designed to work directly from a 220 volt network. Need a converter. Depending on the type, it can be sold in a certain length with or without a straightener.
Do not try to connect a 220 Volt LED strip directly to a 220V network. It will fail, tk. not designed for this kind of work.
The principle of operation is as follows. A converted voltage of about 200 volts is applied to the LED strip through a rectifier (diode bridge), and it begins to emit light. It's all!
Step-down transformer and smoothing filter - no!
Application
220 Volt LED strips have been widely used in business, where they are used as lighting and illumination of billboards, banners, signs and other elements of advertising and attracting attention.
Popularity gained due to the following factors:
- simplicity,
- not high price
- reliability,
- efficiency.
The cost was reduced due to the implementation of operation from the mains 220. Expensive and environmentally sensitive, expensive elements (power supply) were excluded from the power circuit, leaving only a diode bridge in the circuit.
The reduction in price entailed not only pluses, but also minuses. It is not recommended to use such tapes in rooms with constant presence of people. The voltage after the rectifier is pulsed, with a frequency of 100 Hz. The emitted light flickers at this frequency. The human eye is unable to see this, but on nervous system and the brain is affected by such light in a negative way. We recommend reading an interesting article about to broaden your horizons.
Do not use a 220 volt LED strip in residential areas, at home, as well as in places with the constant presence of people.
Many people know that the problem is solved by adding a smoothing filter (capacitor) to the circuit. But, this will entail a number of disadvantages:
- appreciation,
- increase in size,
- increasing the converted voltage to 280 volts.
All these disadvantages turn the 220 Volt LED strip into a useless device, so it is designed to work through a rectifier and is recommended for use in places without constant human presence, such as the facade of a house.

Kinds
Separation according to the power scheme. On sale you can find two versions of LED strips for 220 volts:
- with straightener, length multiple of 50 cm or 1 meter (0.5 m; 1 m, etc.),
- without a rectifier, in a bay, the desired length is cut off (also a multiple of 50 cm or 1 meter), and the rectifier is connected separately.
Why is the tape cut at 50 cm? Above, we have already said that the LEDs on it are divided into 60 pieces. So, these 60 pieces are located on a segment of 50 cm or 1 meter, depending on the density of the LEDs. This is a feature of production and it is applicable to all 220v tapes. It is worth noting that it is not possible to cut off a piece of 40 or 90 cm!
Rarely, but still there are tapes with a cut line of 200 cm (2 meters).
Separation by protection class. In terms of protection against dust and moisture, they are no different from their low-voltage counterparts and have the same classification. The most common:
- IP 67 - such protection will protect a person from touching live parts.
- IP 68 - silicone tube, waterproof. Suitable for use in very wet rooms, including a bath, sauna or outdoors.
Practice shows that the use of 220v LED strip is practical in an aggressive environment: street, rain, wind, snow, temperature changes, cold, heat. All these conditions led-tape withstands and works for a long time.
It should be noted that self-adhesive tape does not hold well in frost and moisture, so it is worth attaching it additionally to special brackets.
Types of LEDs. Things are the same here. The separation can be carried out according to the variety of SMD LEDs. On sale you can find tapes on SMD LED:
- 2835,
- 5630.
3528 and 5050 are the most common in Russia, they can be bought at any large store. Less common, but still appearing on sale on SMD 5630 LEDs. Chinese-made products are of poor quality, so it is better to refrain from purchasing them.
Also, LED strip 220 can be on a rigid basis or flexible adhesive. The first is often used by amateurs with crazy hands to make lamps or modules.
You can also separate by color, there are single-color: white, red, blue, green, yellow and multi-color - on RGB LEDs.

LED strip RGB 220 Volt on SMD 5050 LEDs
Brightness control
To change the glow level of the LED strip to 220v, you need to use a dimmer. To control the brightness of a multi-color RGB LED strip, you will need a special controller, you can’t do without it.
Comparison with low-voltage counterparts
The main difference is in the power supply. The power quality affects the emitted light, as the tape is powered "almost" directly from the mains, without a voltage stabilization unit. Reduced voltage in the network reduces the level of glow of the LEDs of the tape, increased reduces its service life. This is also a minus. We cannot influence this in any way, because. according to GOST, the voltage in the network can be in the range from 190 to 240 volts.
If the voltage in the network where you use the LED strip is 240V or more, use a voltage stabilizer. It will significantly extend the service life.
Low light output due to low voltage in the network will not lead to failure of the tape, and on the contrary, will extend its service life. However, low light output can also be a problem. You can solve the problem by including a stabilizer in the connection diagram.
Let's note the main differences:
- nutritional features,
- appearance and performance
- length multiplier.
As for the length, take note. If you are going to mount the tape around the perimeter of the room, then you may have tails that you can’t get rid of anywhere, because. the length of the tape is at least 0.5 meters.
Connection
Anyone who is able to replace the switch in the house with their own hands can connect a 220 Volt LED strip. Above, it has been said more than once that a rectifier (aka a diode bridge) is needed to connect. It is better to buy it immediately with a tape in the store, the sales assistant will help you make the right choice.
When choosing a rectifier, pay attention to its power, it should not be less than the power consumed by the tape. For example, to connect a low-power tape 100 meters long, a 700-watt rectifier is required. The same bridge can power a powerful tape 40 meters long.
Those who want to save money can make a straightener with their own hands. To do this, you will need to solder 4 LEDs according to the diode bridge circuit. If this is not familiar to you, then you can buy a ready-made diode bridge, solder wires to it and place it in a homemade case.

Scheme of connection to a network of 220 Volts
Connection algorithm:
- Cut the tape to the desired length.
- One end is securely sealed with a plug. If this is not available, then we use glue or sealant.
- The second end is connected to the rectifier using a special connector.
- We also securely seal the connection.
- We connect the led tape to the network 220.

Carefully check all connections, they must be properly sealed, in order to avoid moisture ingress or even worse - electric shock to a person.
Pros and cons
Throughout the article, we have noticed the main pros and cons of using a 220 volt LED strip. We will note them once again with a small list, summing up.
Pros:
- no power supply needed. Operates from a conventional matchbox-sized rectifier,
- low current. You do not need to use thick wires for connection - cost savings and ease of installation,
- length up to 100 meters in one piece.
Minuses:
- flickering at a frequency of 100 Hz. The main disadvantage, because because of this, it cannot be used in a room with the constant presence of a person,
- not being repaired. After repair, the tightness will be broken, which excludes its further use due to high voltage.
- DANGEROUSLY! Still, high voltage causes concern during operation, because. can harm a person if safety rules are not observed.
- Multiplicity of cut is not less than 0.5 meters. It is not always convenient to use such lengths.
Still, a 220 Volt LED strip is a functional and practical device that can be used in many ways thanks to the listed pluses. Practice shows that it can be used without problems in an aggressive environment. And power from a homemade rectifier will save an extra thousand rubles on the purchase of a power supply.
If you become the owner of an LED strip, a power supply and all mounting accessories and you have a question about that, then I ask you to pay attention to this article. In it, I will answer the main questions that arise during the installation and connection of diode strips.
LED strips are known for their small size and high flexibility. The efficient LEDs are mounted on a 10 mm wide circuit board and are 3 to 20 meters long. Flexible LED strips have many features that make them easy to use in various situations:
?
Can LED strip be bent?
So. How to connect LED strip?
The first and one of the most important steps is to check the LED strip before installation.
Checking the tape before installation.
ATTENTION! Check the tape before installation! If the tape is lost, as a rule, it is not subject to return and exchange, and you will never get your money back.
1) Remove the ribbon spool from the package.
2) Carefully unwind the tape and check for mechanical damage
3) Make sure output voltage and the power of the power supply correspond to the supply voltage and power of the LED strip.
4) Connect the tape to the output of the power supply, observing the polarity.
5) Turn on the power. ATTENTION! If you turn on the LED strip wound on a coil for more than 30 seconds, it will lead to premature failure of the LEDs. Even if the tape did not burn out immediately.
6) Check the uniformity of the LEDs.
7) Make sure that all LEDs are lit and that the shades of the glow of the ribbons of different coils match.
8) Disconnect the source from the network after checking.
How to connect the LED strip correctly?
In order to properly connect the LED strip, you must follow the following rules:
LED strip connection ways
STRICTLY FORBIDDEN!
1) LED strips with a power of more than 14.5 W / m should not be connected in series with a length of more than 5 m. This leads to significant voltage drops, uneven glow, an increase in current through the conductive track, overheating of the tape and its failure.
2) Installation of the tape on heated surfaces with a temperature above +40 ° (as well as operation at an ambient temperature above +45 ° and near heat sources: heating systems, power supplies, lamps, fixtures.
3) Mechanical action on the LEDs, pressing or pressure on their surface, as well as wiping the LEDs. These actions violate the structure and lead to the failure of the LEDs.
4) Exceeding the specified supply voltage of the tape. Power supply with increased voltage leads to overheating of the tape and its failure. 
LED strip connection methods.
A simple diagram of how to connect an LED strip. Parallel connection of LED strips is the best option for building light lines from an LED strip longer than 5 m. 
How to connect RGB LED strip?
Below is a detailed illustrated diagram How to connect an LED.

LED strip 12 volt how to connect?
LED strips for 12 volts, like any other LED strip, except for, should be connected according to the following scheme.

How to connect multiple LED strips to one power supply?
Often you need to connect several LED strips. To do this, you will need to run parallel wires from the power source to each individual section of LED strips with a total length of 5 m.

How to install and connect the LED strip?
1) First you need to prepare the surface of the ceiling or wall to install the tape. The basis has to be dry and previously degreased. Better to use a degreaser. The most reliable LED strip is glued to the surface of plastics and metals. It is very important that the base is even and smooth, without recesses, protrusions and dirt.
2) Cut the LED strip into pieces of the desired length.

3) Peel off the backing from the base of the 3M tape

4) Securely fix the LED strip on the plane.

5) Connect the diode strip according to one of the schemes given in this article
How to connect LED strip without soldering?
It is not always necessary to solder the LED strip, it can be easily connected using special connectors. When buying a connector, pay attention to the fact that the width of the connector matches the width of your LED strip. How to connect LED strip without soldering? You just need to follow the instructions below.
Attention: Fixing the connector is not always reliable. 
The question is debatable, how to properly connect the LED strip, using connectors or more reliable soldering. In my opinion, in this matter it is necessary to build on the directness of hands.

How to solder LED strip?

- Strip the ends of the wire for 3-5 mm and then twist.
- Apply a drop of alcohol flux to the twist and tin with a soldering iron.
- The wires are connected in accordance with the color marking, and the stub conductors are led to the contact pad on the tape.
- It is recommended to seal the solder point with silicone sealants.
Can LED strip be cut?
Cutting LED strips is very easy thanks to cutting lines along the strips. There is a black line at each cutting point with copper solder pads located on each side. Copper solder pads are divided so that each piece of LED strip can be soldered after cutting. This allows you to connect LED strips together or connect strips elsewhere in your home.
You can cut the diode tape in the designated places, between the soldering sites. Use scissors for cutting. When mounting the diode tape on metal and other conductive surfaces, in order to prevent a short circuit, isolate the tape from the surface.

Is it possible to glue the LED strip?
It is desirable to glue the tape to smooth fat-free surfaces. It is desirable to carry out gluing from the first time, repeated gluing of the tape does not allow reliable fixation. The LED strips have 3M adhesive backing for easy mounting options. The LED strip has a peelable backing that exposes the 3M adhesive for easy installation.

Fixing an adhesive-based LED strip is easy, but sometimes a stronger fixation is required. As with most adhesives, it does not bond well to some surfaces and may need to be reinforced over time. In these situations, use additional fixing devices:
- Extra Adhesive Tape- 3M adhesive tape, which you additionally glue to the surface in front of the strip to double the bonding.
- LED Strip Mounting clips— Mounting brackets for LED strips. See photo.

Installation of LED strip in aluminum profile- another great option for those who want a professional finish. Aluminum profiles for LED strips most the best solution for mounting. The LED strips adhere perfectly to the lower part of the profile, and the light diffuser creates additional light diffusion and creates the effect of a uniform light strip, without pronounced dots.

MANDATORY REQUIREMENTS AND RECOMMENDATIONS
Observe the operating conditions:
1. The tape must be powered from a stabilized source constant voltage.
2. The tape is designed for indoor use.
3. Ambient temperature -20 ... +45 "C. Relative air humidity is not more than 80% at +25 "C.
4. Absence of vapors and aggressive impurities (acids, alkalis, etc.) in the air.
5. When connecting a tape with a total length of more than 5 meters, use a parallel connection of the tapes.
6. Check the polarity of the connection, the reliability and correctness of the connections before switching on.
7. To prolong the life of the tape, install it on an additional heat sink, such as an aluminum profile.
8. When mounting the tape on metal or other conductive surfaces, insulate the tape from the surface to prevent a short circuit.
9. Do not subject the tape and the components on it to mechanical stress.
10. Do not damage the conductive tracks of the tape.
11. The minimum bending radius of the tape is 3 cm.
12. Avoid moisture and condensation on the tape.
13. Before installing the tapes, visually check the glow and select BIN. When installing multiple ribbons side by side, it is recommended that you use ribbons with the same BIN color value.
14. You can cut the tape in the designated places, between the soldering sites. Use scissors for cutting.
15. Connect the pieces of tape by soldering. The wires are soldered to the designated contact pads marked "+ 12 V", "-12V". The soldering time should not exceed 5 seconds at a soldering iron tip temperature not higher than 280″C.
In this article, I have given answers to the question How to connect an LED strip? It also provides an analysis of the main difficulties of how to connect an LED strip when installing LED strips.
This is an artificial light source, which is a narrow flexible tape with conductors, up to 5 m long, on which LEDs are installed equidistantly. The LEDs on the tape are divided into groups. Each group consists of several LEDs connected in series and is a complete circuit, which allows you to cut the tape across into segments of any length multiple of the length of one group.
LED strips
LED strips are available in monochrome, luminous only in one color (red, blue, green, yellow or white) and universal (RGB), the glow color of which can be changed independently using the remote control, including one of the primary colors or choosing any that exists in nature .
It is also possible to turn on a mode in which the color of the LED strip will change smoothly over the entire range with a given rate of change over time.
R G B led strip
According to the organization of light emission R G B LED strips are of three types.
The first type of tape uses LEDs LED-R-SMD3528 or LED-R-SMD5050 (red), LED-G-SMD3528 or LED-G-SMD5050 (green) and LED-B-SMD3528 or LED-B-SMD5050 (blue) , soldered in three pieces next to each other in repeating triads along the entire length of the tape. Changing the color of the glow of the tape is achieved by group changing the intensity of the glow of the LEDs of each color. Such LED strips are well suited for interior lighting in cases where LEDs are hidden from human eyes. If the LEDs are visible, then changing the color of the glow will be less effective.
R , G and B LEDs of the SMD3528 series have a size of 3.5 × 2.8 mm 2 and emit a luminous flux from 0.6 to 2.2 lumens, depending on the color of the glow. LEDs of the SMD5050 series are larger in size (their size is 5 × 5 mm 2) and accordingly shine brighter, the luminous flux is, depending on the color of the glow, from 2 to 8 lumens. Therefore, by the size of the soldered LEDs on the tape, even without knowing the technical characteristics, it is easy to determine which of them will shine brighter.
In the second type of tapes, R G B LEDs of the LED-RGB-SMD3528 or LED-RGB-SMD5050 series are used. A distinctive feature of these LEDs is that three LEDs are mounted in one housing at once - red, green and blue. Therefore, their luminous flux is much less and is only 0.3-1.6 lumens for LED-RGB-SMD3528, and only 0.6-2.5 lumens for LED-RGB-SMD5050. But due to the fact that the color emitters are located almost at one point, a high efficiency of color gradation has been achieved.

More recently, a new type of LED WS2812B (has four pins) and WS2812S (has six pins) has appeared. Geometrically and appearance these LEDs are no different from the LED-RGB-SMD5050. However, thanks to the installation of the WS2811 PWM controller in the WS2812 LED housing, it became possible to control each of the LEDs installed on the LED strip personally with just two wires.
Thus, designers have the opportunity to change the color of the glow of any section of the tape, regardless of its length, at their discretion. The wide distribution of the LED strip based on WS2812 LEDs is constrained by the high price and the need to use an expensive specialized controller. Without a control signal from the controller to the WS2812 LED, it will not shine.
LED strip marking
LED strips are marked by all manufacturers, as a rule, according to a single international standard. The protection class in the marking is indicated in accordance with the requirements of the IEC-952 standard for protecting electrical equipment from external factors.
| Reference table for marking LED strips | ||||
|---|---|---|---|---|
| Ordinal number of the alphabetic or numeric sequence in the marking | Designation in the marking | Deciphering the designation | ||
| 1 (light source) | LED | Light-emitting diode | ||
| 2 (glow color) | R | Red | ||
| G | Green | |||
| B | Blue | |||
| RGB | Any | |||
| CW | White | |||
| 3 (type of pins on the chip) | smd | Leadless chip for mounting directly on the printed circuit board | ||
| 4 (geometric size of the light source body) | 5050 | in the example 5 mm×5 mm | ||
| 5 (number of LEDs per meter length) | 60 | pieces | ||
| 6 (class of protection against external factors) | IP | The protection class in the marking is indicated in accordance with the requirements of the IEC-952 standard for protecting electrical equipment from external factors. | ||
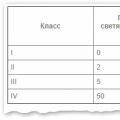
| 7 (first digit after IP, protection against ingress of solid objects) | ||||
| 0 | No protection | |||
| 1 | From the penetration of bodies with a diameter of 50 mm or more | |||
| 2 | From the penetration of bodies with a diameter of 12 mm or more, a length of not more than 80 mm | |||
| 3 | From the penetration of bodies with a diameter of 2.5 mm or more | |||
| 4 | From the penetration of bodies with a diameter of 1 mm or more | |||
| 5 | It is allowed to ingress dust in an amount insufficient to disrupt the operation of the equipment | |||
| 6 | Dust ingress is not allowed | |||
| 8 (second digit after IP, protection against liquid ingress into the case) | 0 | No protection | ||
| 1 | From vertically falling drops of water | |||
| 2 | From water drops falling at an angle of 15° | |||
| 3 | From water drops falling at an angle of 60° | |||
| 4 | From water splashed at any angle | |||
| 5 | From a jet of water sprayed at any angle | |||
| 6 | From strong water jet (100 l/min, 100 kPa) | |||
| 7 | From water ingress when immersed to a depth of 15 cm | |||
| 8 | From water ingress during prolonged immersion | |||
Consider, for example, how the marking of the LED strip LED-CW-SMD-5050/60 IP68 is deciphered. LED - LED strip, CW - white light, SMD - made on the base without output LEDs, 5050 - LED housing size 50x50 mm 2, 60 - 60 LEDs are installed on one meter of the tape length, IP68 - according to the degree of protection, the tape is designed for long-term operation on depth (for example, to illuminate an aquarium or pool from the inside).
If there is no IP parameter in the marking, then the LED strip does not have any degree of protection, that is, the degree of protection corresponds to IP00.
Moisture resistance of LED strips
According to the degree of protection against moisture, LED strips can be divided into three categories: waterproof, waterproof and moisture resistant.
Waterproof can only be used in dry rooms where there is no high humidity. Moisture-proof are designed for use in rooms with high humidity (bathrooms, baths, building facades, where direct contact with water on the tape is excluded).
Moisture-resistant tapes are designed to work directly in the aquatic environment, such as in an aquarium, they can be placed to illuminate the bottom of the pool.

In the photo, the LED strip is completely sealed with silicone, so the LEDs and resistors are reliably protected from water. Waterproof LED strips can be used without restrictions for outdoor advertising, light decoration of streets and buildings. When choosing a moisture-proof tape, it should be borne in mind that part of the light flux is lost when passing through the silicone layer.
For outdoor decorative lighting, there are special led strips called Duralight, which belong to the waterproof category.
Density of placement of LEDs on the tape
The brightness of the LED strip depends not only on the type of LEDs installed, but also on their number. The unit of measurement is considered to be the number of LEDs installed per meter of tape length. The more LEDs, the naturally, the luminous flux will be greater. Typically, the number of LEDs per meter of strip length for 12 V LED strips ranges from 30 to 120 pieces. For LED strips designed for a supply voltage of 24 V, the number of LEDs can reach up to 240 pieces per meter of length; in such strips, the LEDs are placed in parallel in two rows.

But it must be taken into account that the more LEDs per meter of the length of the LED strip, the more powerful the power supply will be required and the more expensive the purchase will be. The choice of this parameter must be approached from the position of "necessary and sufficient". For example, there are 30 LEDs per meter of tape, therefore, the distance between them is 3.3 cm, which is quite enough in the vast majority of cases.
Choosing an LED strip according to the amount of light output
The main lighting characteristic is the intensity of the luminous flux, which is expressed in lumens per meter (lm / m). The amount of luminous flux is determined by the type and number of LEDs installed on one meter of tape. Knowing the type of LEDs and their number, it is easy to independently determine the luminous flux.
For example, 30 LED-CW-SMD3528 type LEDs (size 3.5×2.8 mm 2 ) having a luminous flux of 5 lm each are installed per meter of a white light LED strip. We multiply 5 lm by 30, we get 150 lm. Such a luminous flux emits a 10-watt incandescent light bulb. If the tape is made on the basis of 30 LED-CW-SMD5050 LEDs (size 5×5 mm 2) already having a luminous flux of 12 lm, then 12×30=360 lm, which is equivalent to using a 24-watt incandescent light bulb. Everyone has experience in using incandescent lamps, therefore, using the above method, it is easy to determine the type of LEDs installed on the tape, their number and the length of the tape. And if the length of the tape is already determined, then perform the reverse calculation.
Let's perform the reverse calculation on a specific example. You need to make ceiling lighting in a room measuring 5 mx4 m. The perimeter of a room of this size will be 5+4+5+4=18 meters. You want to create soft and not very bright lighting. If you use incandescent lamps, then their total power will have to be about 200 watts, the luminous flux from which will be 3000 lm (15 lm × 200). The length of the tape should be equal to the length of the perimeter of the room, that is, 18 meters. To determine the luminous flux that one meter of LED strip should emit, you need to divide 3000 lm by 18 meters. It turns out 166 lm / m. For our case, a tape with 30 LED-CW-SMD3528 LEDs per meter of length is suitable. The calculation was made without taking into account reflection losses from the ceiling, and they are at least 50%. Therefore, for guaranteed illumination of the room, you need to choose a tape with a twice as large luminous flux. There are two options, either take a strip with 30 LEDs LED-CW-SMD5050, or LED-CW-SMD3528, but already in the amount of 60 pcs. on the meter. The first option is preferable, as it will provide a guaranteed supply.
For R G B and monochrome LED strips, the calculation is performed in the same way as for white strips.
LED strips are not always marked, which makes calculations difficult. But it is very easy to find out the technical parameters of the LED strip if you use the data given in the reference table. In modern LED strips, as a rule, three types of LEDs are used: SMD3014 (super bright) with a size of 3.0 mm × 1.4 mm, SMD3528 with a size of 2.8 mm × 3.5 mm and SMD5050 with a size of 5.0 mm × 5.0 mm. Therefore, by the size of the LEDs, you can determine what type of LEDs are soldered on the tape. By counting the number of LEDs per meter of length, using the reference table below, you can get data on the technical characteristics of the LED strip.
Table of the main characteristics of LED strips
for voltage 12 V
Using the table, it is easy to choose the type and length of the LED strip - an analogue of incandescent bulbs. For example, to replace one 80W incandescent bulb with an LED strip, you need to take 8 meters of SMD3528 (30) or two meters of SMD3528 (120) or SMD5050(60) LED strip.
| Main specifications LED strips for voltage 12 V | |||||
|---|---|---|---|---|---|
| LED type | LED size, mm 2 | Number of LEDs per meter of LED strip length, pcs. | Power consumption of one meter of LED strip length, watt | Luminous flux of LED strip length meter, lm | Equivalent power of an incandescent lamp, watts |
| SMD3014 superbright | 3.0×1.4 | 60 | 6,0 | 600 | 40 |
| 120 | 12,0 | 1200 | 80 | ||
| 240 | 24,0 | 2400 | 160 | ||
| SMD3528 | 3.5×2.8 | 30 | 2,4 | 150 | 10 |
| 60 | 4,8 | 300 | 20 | ||
| 120 | 9,6 | 600 | 40 | SMD5050 | 5.0×5.0 | 30 | 7,2 | 360 | 24 |
| 60 | 14,4 | 720 | 48 |
How to connect the LED strip to the mains
Connecting the LED strip to the car's on-board network
LED strips are ideal for direct connection to the car's on-board network. The main thing is that the tape matches the voltage of the vehicle's on-board network in terms of supply voltage. For cars, you need to choose a waterproof tape designed for a supply voltage of 12 V, for trucks - for 24 V.
At what voltage is the battery installed in the car, at this voltage you need to take the tape. When connecting the LED strip to the vehicle's on-board network, the polarity must be observed; the symbols "+" and "-" are marked on the tape. If the polarity is confused, then nothing bad will happen, just the LEDs will not glow.
Connecting the LED strip to a 220 V household power supply
Unlike electric lamps, LED strips cannot be connected directly to a 220 V household electrical network. They require a DC supply voltage of 12 V or 24 V. The supply voltage is indicated on the tape along its entire length. Voltage converters are used to obtain the required voltage.
While there is no established terminology, they are called differently: drivers, adapters, converters, power supplies, power supplies. All these words refer to one device that converts the AC mains voltage of 220 V into a DC voltage of the required value, for tapes, depending on the type, 12 V (often used) or 24 V (rarely used, as a rule, in RGB tapes).

To select a power supply for an LED strip, not only the value of the constant voltage at the output is important, but also the amount of current that it can deliver to the load. To select a suitable power supply for a particular case, you need to find out the total amount of current that all installed LED strips will consume.
An example of calculating a power supply for an LED strip
For example, let's select a power supply unit (PSU) for the LED strip, which we have chosen above to illuminate the ceiling. Usually, the current consumption of a tape meter is indicated in the accompanying documentation, but if there is none, then it is easy to perform the calculation yourself. It is enough to multiply the number of installed LEDs by the current consumption of each of them.
We chose an LED strip with installed LEDs of the LED-CW-SMD5050 type, the length of the strip is 18 meters, and 30 LEDs per meter. The total number of LEDs is 18×30=540 pcs. One LED-CW-SMD5050 (according to the reference table) consumes a current of 0.02 A, therefore the total current consumption of the entire backlight will be: 540 × 0.02 A = 10.8 A.
But we did not take into account that LEDs with a supply voltage of 12 V tape are connected three in series through resistors, therefore, the calculated current must be reduced three times: 10.8 A / 3 \u003d 3.6 A. But in one housing of the LED-CW- SMD5050 contains three elementary LEDs, so the resulting current must be multiplied by 3. That is, the resulting current will be 10.8 A. As a result of the calculation, it is determined that a 12 V power supply with a load current of up to 10.8 A is required.
To calculate the power of the required PSU, you need to multiply the voltage by the current: 12 V × 10.8 A = 130 W, it turned out that you need a 130 W PSU. For reliable operation of the PSU, a 20% power reserve is required. As a result, you will need a 156W power supply. In practice, you can use any power supply that meets the necessary requirements.
Device and installation of LED strip
On a flexible plastic tape up to 5 m long there are thin copper conductive tracks of the required configuration. LEDs of the SMD3528 or SMD5050 type and current-limiting SMD resistors of the P1-12 type with a power of 0.125 W are soldered to the tracks. Please note that the size of the LED is indicated in the designation, for example, SMD5050 has a size of 5.0 mm × 5.0 mm. With a supply voltage of 12 V, three LEDs connected in series and one or more current-limiting resistors are installed. The number of resistors is determined depending on the amount of power dissipated by them. The resistor can be placed anywhere in the circuit, on the circuit it is on the plus side, you can install it on the minus side or between any LEDs.
Electrical circuit and wiring diagram
LED strip segment

Resistor marking
The resistor is marked with the number 151. This means that the resistor value is 150 ohms. Deciphering the label is easy. It is indicated by a three-digit number. The last digit in the number tells how many zeros to add to the first two digits. For example, the resistor is marked 153, which means you need to add 3 zeros to 15, we get 15,000 ohms.
For clarity, I gave below the eclectic wiring diagram. A complete LED strip circuit is a large number of such circuits connected in parallel. With a supply voltage of 24 V, the number of LEDs connected in series in the circuit can reach up to 10 pieces. Pay attention to the marking of the LEDs, from the side of connection to the cathode (minus), the corner of the LED body has a cut. Pictured in the lower right corner.
Connection and fastening of LED strips
On the side of the tape opposite the LEDs, a sticky layer is applied, protected by a film. In order to fix the tape on the surface, it is enough to remove the protective film and apply the sticky side to the installation site. When organizing lighting using LED strips, often a length of 5 meters is redundant, so it is possible to cut the strip into segments. The places where the tape can be cut are indicated by the image of conditional scissors and the cut line. The step of cutting the LED strip into segments sets the number of LEDs connected in series. Near the cut line on both sides there are contact pads that allow you to solder wires to them in case of splicing tape segments to each other. You need to solder very carefully with a low-power soldering iron.

The connection polarity and the supply voltage are marked next to the contact pads. There are special clips that allow you to connect LED strips without soldering.

To one end of the LED strip, conductors are usually already soldered for connection to the power supply. Two wires are required to connect monochrome tapes, four wires for RGB tapes: black (common is connected to the positive terminal) and three color wires. The length of the wires is no more than half a meter, and if the power supply cannot be installed next to the LED strip, then the conductors will have to be extended to the desired length.
LED strips are indispensable when you need to provide lighting or illumination over a long distance. Only LED strips that are not protected from moisture can be cut into pieces, that is, only those that are intended for indoor use. It is unacceptable to cut moisture-proof and moisture-resistant LED strips without subsequent sealing.
To eliminate this shortcoming, LED modules have been created that make it possible to illuminate the interior and illuminated advertising easily, quickly and reliably. The scope of LED modules in practice is limited only by human imagination. Particularly useful modules for lighting in the car. It is enough to connect through the fuse to the on-board network and glue or fix the module with self-tapping screws inside the car interior or from its outside.

The design of the LED modules is a shallow crib made of plastic or metal, in which a printed circuit board with LEDs is installed. The top of the board is filled with transparent silicone. Thus, protection against moisture and splashing water is provided. The LEDs are connected in the same way as in the LED strip above.
On the outer side of the bottom of the crib there is a sticky layer, by opening which, by removing the protective film, the module can be fixed on any flat surface. It is possible to mount the modules by the lugs using self-tapping screws. All lighting and electrical calculations given above on the page for the LED strip are also valid for LED modules.
Rectangular LED modules are sold in the form of blocks, in the photo there is a block of 20 modules.

Modules are easily separated from the block one by one or in groups. All modules are already electrically interconnected. It is enough to apply power to any of the extreme ones and the LEDs on all modules will light up. Blocks can be increased in any number by connecting them in parallel.
About the choice of wire cross-section for connecting LED strip
The LED strip consumes little power, and the current consumption with a strip length of one meter, even the brightest SMD5050 (60), is no more than 1.2 A. Therefore, you can not think about the wire cross section when connecting such a piece of tape, almost any available under hand stranded wire.
But when connecting a tape 18 meters long like LED-CW-SMD5050 (30), which we selected to illuminate the ceiling of the room above, you should already seriously think about how the total current consumption will be 10.8 A. Unfortunately, I didn’t find it anywhere, what current is allowed on the copper track of the tape itself. But, knowing the power consumption of one meter of the LED strip and the supply voltage, I calculated the amount of current that LED strips of various lengths of popular types would consume, and summarized the results in a table.
| Reference table of current consumption of LED strips for voltage 12 V | ||||||
|---|---|---|---|---|---|---|
| LED strip type | Number of LEDs per meter of LED strip length, pcs | Current consumption (A), LED strip length: | ||||
| 1m | 2 m | 3m | 4 m | 5 m | ||
| SMD3014 | 60 | 0,5 | 1,0 | 1,5 | 2,0 | 2,5 |
| 120 | 1,0 | 2,0 | 3,0 | 4,0 | 5,0 | |
| 240 | 2,0 | 4,0 | 6,0 | 8,0 | 10,0 | |
| SMD3528 | 30 | 0,2 | 0,4 | 0,6 | 0,8 | 1,0 |
| 60 | 0,4 | 0,8 | 1,2 | 1,6 | 2,0 | |
| 120 | 0,8 | 1,6 | 2,4 | 3,2 | 4,0 | |
| SMD5050 | 30 | 0,6 | 1,2 | 1,8 | 2,4 | 3,0 |
| 60 | 1,2 | 2,4 | 3,6 | 4,8 | 6,0 | |
Since LED strips are produced with a maximum length of up to 5 meters, the manufacturer must ensure the necessary cross-section of the tracks that can withstand the current consumption of the LED strip, and you can take its value as a basis for developing an electrical wiring diagram for connecting the LED strip to a power source.
Based on economic considerations, the stock of tracks in terms of load current does not exceed 20%. Therefore, connecting all four of our tape segments in series, soldering the end of one segment with jumpers to the beginning of the next LED strip, is not permissible, since a current three times higher than the permissible will flow through the conductors of the tape connected directly to the power supply.
This will lead to overheating of the first tape, which is fraught with its failure, and a weak glow of those included behind it. Therefore, it is necessary to connect each tape individually with a double wire with a core cross section of at least 0.5 mm 2 directly to the output of the power supply. Below is a typical scheme for connecting LED strips to a power source when organizing room lighting by installing LED strips along the corners of the ceiling behind the cornices.

Since one power supply is designed for a current consumption of 6 A, we had to use two identical blocks, each supplying half the length of the backlight. The switch connects both units at the same time. If you use a double switch, then it will be possible to turn on the tapes in sections. When parallel sections of the tape are connected to the power supply, it will be possible to turn them on individually or all at the same time, changing the lighting design. RGB tapes are connected according to exactly the same wiring diagram. Only instead of two wires, 4 are laid. One common and one for each color.
If one powerful power supply is installed at a considerable distance from the tapes, then it is advisable to stretch a pair of thick wires from the power supply to the LED strips. You can select the required wire cross-section for a given current according to the table. For example, for our case, at a current of 10.8 A, you need a wire with a core diameter of 1.6 mm (section 2.0 mm 2). Put the junction box and already in it with thin wires connect the tapes through the terminal block or by soldering to the incoming wire from the power supply. In each specific case, it is necessary to make an individual decision based on the boundary conditions.
Powerful power supplies are usually large, and it is often more advisable to use several less powerful units, placing them in close proximity to the LED strips.
 What are dead pixels and how to deal with them
 Ira Vaimer and her high-quality content In contact with Irina Vaimer's games
 YouTube (youtube) registration, login, mobile version and video download Is it worth downloading