Connecting a studio microphone to a computer. High quality computer microphone. How to Connect an External Condenser Microphone to Your Android Device
There are at least three varieties of condenser microphones. Some of these devices can be connected directly to the computer, while others will have to be coordinated with the input. sound card.
Instruction
Before connecting any microphones to the computer, familiarize yourself with the pinout of the corresponding socket on the sound card, which is usually red. This jack is mono, whereby the output that is common in a normally stereo jack is here connected to the middle. There are also mono plugs that have the appropriate connection, and if there is none, make it from stereo by making the appropriate connection. Never connect these plugs to stereo headphone or speaker jacks to avoid causing a short circuit.
The sound card has a special circuit of a capacitor and a resistor. Through the resistor, the microphone is supplied with a supply voltage (positive relative to the common wire), and through the capacitor, the variable component of the signal is removed from the microphone. Therefore, if you have a 1.5-volt electret microphone, simply connect it to this jack through the plug, observing the polarity (negative to the common wire). Before that, determine the polarity of its terminals: the negative terminal is connected to the body.
If the microphone is designed for a 3V supply, the signal will be barely audible when powered by a sound card. Therefore, the decoupling chain will have to be located outside. Connect the microphone, also observing the polarity, with a voltage of 5 V (from the computer's power supply) through a 5-kΩ resistor. The voltage drop on it will be such that the microphone will have just 3 V. Apply the signal to the input of the sound card through a paper capacitor with a capacity of about 0.1 microfarads. In all cases, make connections with the machine turned off.
There are also non-electret condenser microphones. There is no internal source of constant polarization in them, just as there is no preliminary cascade. It is impossible to connect such a microphone to a sound card directly. Use a dedicated mixing console designed to work with a condenser microphone. And feed the signal from the linear output of the remote control to the computer.
But what if all connections are made correctly, but there is no sound? The reason for this may be software. Both Linux and Windows have special program virtual mixing console. It has virtual controller microphone volume, as well as its switch. Check their position and change if necessary.
Professional microphones are connected to mixing consoles using special XLR type connectors. Sometimes you want to use such a microphone in conjunction with household equipment, but it's a pity to spoil it by changing the connector. A simple switch will help.

You will need
- - soldering iron, neutral flux and solder;
- - multimeter;
- - screwdriver.
Instruction
Refer to the following illustration for the pinout of the XLR type connector:
http://upload.wikimedia.org/wikipedia/commons/thumb/8/81/XLR_pinouts.svg...Here, number 1 indicates the pin connected to the cable sheath, number 2 - connected to the output of the microphone capsule, connected inside the microphone housing with a braid, and the number 3 - attached to the opposite output of the microphone capsule.
Make sure the studio microphone is dynamic and not a condenser microphone that requires phantom power. It is more difficult to connect such a microphone than not only dynamic, but even electret. Unlike an electret microphone, a studio condenser microphone requires a special power supply, which is not easy to make at home.
Purchase a three-prong XLR socket from a radio parts store. In the same place, buy a 6.3 mm jack plug if the microphone will be connected to a karaoke system, or 3.5 mm in diameter if you want to connect it to a sound card. In the latter case, you will also need parts for assembling the amplifier (more on that below).
On an XLR socket, connect pins 1 and 2 together.
On the plug, connect the pin closest to the cable entry to the middle pin.
If you are going to work with a karaoke system, connect the connection point of pins 1 and 2 of the XLR socket to the “far” contact of the “jack” plug with a diameter of 6.3 mm, and the 3rd outlet of the socket to the connection point of the “near” and “middle” contacts of this forks. Check the integrity of all connections with a multimeter in ohmmeter mode. Connect the microphone through the adapter to the karaoke system and make sure it works.
Connect the microphone to the sound card in the same way, with the only difference that the “jack” type connector is 3.5 mm, and a microphone amplifier must be placed between the XLR socket and the “jack”. The need for its use is due to the fact that the sound card input is designed to work with an electret, not a dynamic microphone. A diagram of such an amplifier is given at the following link:
http://jap.hu/electronic/micamp.html
Attention, only TODAY!
All interesting
The main task of the preamplifier is to convert a weak signal into a more powerful one. To record guitar or microphone sound (at home), you can purchase an audio card with a preamp. Sound Card with Preamp Sound Card with Preamp –…
Modern computers support work with various equipment for sound input and output. You can connect almost any microphone to make calls, record your own voice and process it later. For this you need…
You often need a microphone to work, play, and communicate using your computer. If you are into amateur recording or often sing karaoke with friends, then a microphone is a must. How to properly connect the device to a computer or laptop, in ...
All modern condenser microphones contain an internal constant source of polarization called an electret. However, any of these microphones has an amplifier inside, and therefore still requires power. Instruction 1To connect…
The microphone can be used for different purposes and tasks. There are some nuances and points that need to be taken into account. But still, there is a special algorithm for choosing a good microphone that will help you do this without problems. Instruction 1 Decide for which ...
Professional microphones are connected to mixing consoles using special XLR connectors. Sometimes you want to use such a microphone in conjunction with household equipment, but it's a pity to spoil it by changing the connector. A simple switch will help. To you…
If you connect a dynamic microphone designed for karaoke to the microphone input of your sound card, the signal level will be very low. A simple modification of the microphone will allow, while maintaining appearance appliance unchanged, make it compatible…
Connecting an electret microphone to a computer depends on its type. Electret microphones are often used instead of condenser microphones because they are cheaper, require no external power supply, and have many other advantages. To you…
Computer technologies are increasingly entering the life of a modern person. This is how special microphones are used to convert sound into an electrical signal and play it back through a computer. Almost all computers are equipped with sound ...
Do you want to record videos for Youtube on your phone but don't know?
The principle of operation of the microphone / smartphone bundle
How to connect a microphone to a phone
Your smartphone, regardless of model, uses a certain form of connector (four-pin) that can accept up to 2 channels of audio per input.
Thus, the smartphone perceives external stereo sound. It also provides 2 channels of stereo headphone output.
This connector is also called a "socket". This is where the pins for the input and output lines intersect.
If this is not the case, then the sound will not be crisp and clear. The contacts on a stereo microphone plug (TPC) are aligned differently than the contacts on a smartphone (four-pin).
Therefore, you cannot just plug a gadget into your smartphone and expect it to work.
What it takes to get quality sound, is a microphone that has a built-in adapter (such as the Rhode Smartlav+ or GORA Lavalier).
Another option is to use an adapter and a standard microphone.
The type of adapter depends on the microphone, of course, but again it is important to make a good choice.
Just remember that the plug on the adapter needs to be a 4-pin and the socket will probably need to be either TRS or XLR plugs. These are the two most common types of forks.
How to use an external microphone on an Android phone with a 3.5mm headphone jack

Connecting and recording audio from an external source on your phone is a fairly simple procedure.
But many new users complain that doing this is not as easy as it seems.
At first, you might think that you just plug in a microphone, and naturally everything should work.
But, if you've already tried it, you know it won't work.
The headphone and microphone jacks on Android devices are different.
Headphones work fine on Android, but it doesn't work with microphones. You just have to know how to do it.
The only place you can plug it in is in the headphone jack.
But in order to prepare the device for work, you will need an adapter cable.
It depends on him whether the microphone input will be fully functional, as well as the headphone audio output. It is this small detail that causes difficulties.
Choosing the Right Adapter

On the Internet you can find universal multifunctional adapters.
When the adapter is connected, the user has the opportunity to connect a microphone and headphones at the same time. Both of these devices will work at the same time.
For example, StarTech TRS to TRRS can be bought on popular online platforms for only $7.
They compare favorably with many other devices that only have one headphone jack.
Smartphone as a universal device

Smartphones today are undeniably powerful handhelds capable of doing many amazing things.
While the ability to check on the go was once considered an incredible feat, today their possibilities seem limitless.
We play games on them, take and edit amazing photos, view and edit spreadsheets and documents.
Many users can't imagine a day without drawing, scheduling tasks and reminders, saving the most personal notes, and recording and editing audio - whether on blogs or forums.
The smartphone is also used to download current music.
Bloggers shoot exclusive.
It has also become a common practice for musicians to take out their smartphone as soon as a new song idea pops into their heads.
Creative individuals use smartphones to write down their unique ideas.
And, let's be honest, users are missing one small detail.
Even most high-end smartphones are practically incapable of producing thick, powerful sound without distortion, muting and interference. There is also no bass at all.
Luckily, there are many external microphones available for capturing full-featured audio.
The bad news is that most of them only come with an Apple digital connector. It's a shame that Android users can't enjoy many decent options.
But for them, they developed the ability to connect a digital microphone via an OTG USB cable.
This means that users have access to limitless options available to most PC users.
How to Connect an External Condenser Microphone to Your Android Device

There are many reasons why you might want to connect a high-end microphone to your mobile device.
Having mobile phone, almost studio-quality recordings can be achieved. A sound source can be really helpful.
About the video High Quality, there are no problems here.
Mobile image sensors are responsible for processing them, which create decent opportunities for video recording.
But the audio signal Low quality can be a big scare for aspiring video producers and vloggers.
Whether you're a mobile videographer looking to optimize your audio recording quality, or you just want to find a better alternative to existing solutions, an external microphone is worth considering.
It is obvious. With all that said, here are a few mobile gadgets that are worth paying attention to.
Simple solution: Discrete solution for one Rode smartLav+ speaker

The buttonhole, or lingering type is widely known to the audience. This device is still widely used by vloggers who rarely film more than one person in a video.
Someone uses them in clips, it can be attached to clothes, usually in the chest area. Then it is customary to hide the cable under clothing.
Obviously, in this case, there is one limitation - the speaker is not too far from the phone.
Maybe it's a good idea to use the lavalier microphone in an accessory that is placed in your pocket while another camera is recording video.
Otherwise, interference may occur.
If we talk about the price of the above options, you can find quite budget solutions for $14 or purchase branded devices from Rode.
In any case, lavalier solutions are a great compromise between size, ease of use, and sound quality, but they're not the best option if you're looking for noise-free audio.
- Compact and discreet
- Easy to connect and set up
- Not suitable for multiple audio sources
- Cable may interfere with use
Omnidirectional and portable: The Mighty Mic

It's louder, more sensitive, directional. But the most unique thing is that it does not take up much space.
Indeed, The Migthy Mic is great option, if you want to record video with noticeably better sound than what the standard .
There is also a headphone jack for monitoring purposes.
- Ultra-portable directional
- Easy to connect and set up
- Not suitable for loud sounds
- Not the best choice for recording music
Robust stereo recorder: Shure MV88

This machine is built with performance in mind.
The architecture is designed for crisp stereo sound. The user gets 5 digital presets to adjust the recording parameters according to the current situation: speech, singing, apartment, acoustic instruments, loud environment.
Polarity option and gain options are also available. Obviously, it is created for serious applications.
It can capture the deafening sounds of a rock concert and try to turn them into crisp recordings, but the price tag certainly reflects that.
So the user will have to prepare for the fact that you need to fork out. But the result will be worth it.
- stereo recording
- Rugged housing
- Presets for several different scenarios
- Advanced features such as wind reduction, EQ, compressor and limiter
- Performs well in noisy environments
- A little more expensive
- Cannot be used with a smartphone with cases
Fashion Gadget for Meaty Sound: Zoom iQ6

This module consists of two , located X / Y figuratively to the recording source.
The idea is that the off-axis attenuation performed by each of the microphones creates a difference in stereo and a difference in level.
The result is good, the sound is very rich.
This device is great for recording acoustic instruments.
The gadget can record songs as well as any special sound effects you want to capture from the real world and turn into digital materials.
The Zoom iQ6 will cover your iPhone's audio jack, but fear not - the mic and output will be free. These can be used if you want to control your tracks!
- Captures deeper, more realistic sounds
- Variable angles
- Fine gain control
- Handles very well in noisy environments (up to 130 dB)
- Extended Lightning connector, and removable spacers adapt to most smartphones
- Not the best choice for beginners
- Can't capture wide stereo
Wide tuning range: Blue Microphones Mikey

This rugged beauty is built to handle loud sounds - according to the spec, it can handle up to 130dB of volume.
To understand what this parameter is, it must be said that the volume at a rock concert fluctuates around 120 dB, so you should feel pretty comfortable.
There are three gain modes - quiet, car, and loud.
The gadget adapts depending on the situation, and its protection is able to reflect unwanted noise.
The device also has a micro- USB port which allows you to charge your /iPod/ using the microphone. This option is implemented just in case there is a long recording ahead.
Unfortunately, the device is blocking the headphone port on iPhone 6 and iPhone 6S.
You will not be able to use headphones for monitoring.
Therefore, in those places where constant tracking and monitoring is required, it is worth using another device.
iPhone 6 / 6S users - you can still use it to demo or capture a clip of your favorite band, but when using it for studio work, be prepared for inevitable disappointment.
- Stereo capture
- Rugged housing
- 230 degree rotation
- Micro USB port for charging your phone while recording
- Built specifically to handle loud environments (130 dB), and can cancel unwanted noise
How to connect a microphone to a phone
How to connect a microphone to the phone: Most simple ways
Usually this question is asked by those who do not understand anything about microphones and musical equipment at all. Such people face a number of problems, often they make purchases without understanding the subject and it turns out that they either buy something extra or simply do not realize that what they bought will not work the way they want and in fact need to. spend a lot more money than they bargained for to make things work as they should.
Let's conduct a briefing, so to speak, for complete laymen.
So, rule number one - never buy microphones in electronics stores like M-Video, Eldorado, in shopping centers or, God forbid, in Auchan. Nothing is ever sold there. At best, you will buy a karaoke microphone that sounds disgusting and is incompatible with normal equipment.
Rule number two - never buy a microphone that has a mic cable attached by default. It's generally taboo. And the cable and microphone will be lousy. However, you vote with the ruble and buy what you buy. Everything has a price, but then don't say you weren't warned.
If you want to sing karaoke songs after a feast, this is one thing. It is not a pity to get such a microphone dirty in Olivier salad. If you want to record your voice on your computer, read on.
The first and easiest option for connecting to a computer is to buy a USB microphone. You are connecting via a USB port, conventional USB cable and immediately get decent sound. USB microphones are both cheap and expensive. This option has long ceased to be a compromise and the sound quality of such microphones is very decent. Given the convenience of connecting to a computer, their price is justified. Naturally, a USB microphone will cost more than a karaoke microphone from Auchan. But it will sound right.

If you voice computer games or record podcasts, conduct trainings on the Internet, then a USB microphone is your option. Our consultants will help you choose the right model, taking into account the budget - call or write to us.
Well, the last and coolest option is a studio microphone for recording vocals. Do not be afraid of the word "studio". Studio does not mean expensive. Prices for these microphones vary greatly. There are very inexpensive models and there are top-end items that, in our opinion, are not justified for use at home.
The advantage of a studio microphone is primarily in sound quality. If sound is a fundamental point for you, then there are no options, you need to assemble a home studio.
First, let's decide on the type of microphone you need. For vocal recording, it is best to buy a large diaphragm condenser microphone. Dynamic microphones are an option for concerts, while small diaphragm condenser microphones are for recording musical instruments. Ribbon microphones are generally a topic for a separate article and they do not suit us.
In general, we take a condenser microphone with a large diaphragm. It looks something like this:

Options and prices - a million. Again, our consultants will help you choose the right one. Ask, do not be shy.
Buying a microphone by itself does not make you a rock star. A condenser microphone will not work on its own. And you will not be able to connect it directly to your built-in sound card. even if you try, it won't work. Because a condenser microphone needs phantom power. And such power is available either in external audio interfaces or in specialized microphone preamps.
Therefore, if you want to use a condenser studio microphone and get a cool sound, in addition to the microphone, at least you also need an external USB audio interface with a microphone input. In the common people - an external sound card.
For example, this one:

There are also more expensive options and solutions, but we will not touch on them in this article, because. this is already equipment for professional studios and the approach to it is completely different.
And now we will conduct a small educational program on microphone cables and connectors in which they are included. Because this is what causes most problems and questions among ignorant people.
So, all professional microphones (not karaoke and not USB) use XLR connectors. The XLR connector on the microphone looks like this:

In turn, the connectors on the microphone cable will look like this:

In any Auchan you will not buy such a microphone cable. they are sold by specialized music stores like ours.
On sound cards and microphone preamps, as a rule, either XLR inputs are used for connecting a microphone cable or combined Jack / XLR connectors. A standard XLR input looks like this:

A combo Jack/XLR connector looks like this:

The combo jack can accept both a microphone cable with an XLR connector and an instrument or stereo cable with a Jack connector. Jack connector in professional equipment looks like this

There is also a mini jack, but it has nothing to do with professional musical equipment - this is a solution for portable players, etc.
If you've bought a karaoke microphone and are trying to plug it into a jack/xlr combo jack, you may be in for a disappointment. Why? Because, as a rule, combo connectors are designed in such a way that when connected via a jack, the signal preamplification is much less. This is done so that you can connect musical instruments or linear signal sources such as an mp3 player, synthesizer or computer through the jack. And when you connect an XLR cable, another chain is triggered, which is designed to amplify the signal coming from the microphone.
In English: if you plug your microphone with a jack connector at the end of the cable into such a combo input, the signal will be very quiet, and the problem is not with the microphone and not with the device you are plugging into, but with misuse and misunderstanding of how your equipment is working.
Usually this question is asked by those who do not understand anything about microphones and musical equipment at all. Such people face a number of problems, often they make purchases without understanding the subject and it turns out that they either buy something extra or simply do not realize that what they bought will not work the way they want and in fact need to. spend a lot more money than they bargained for to make things work as they should.
Let's conduct a briefing, so to speak, for complete laymen.
So, rule number one - never buy microphones in electronics stores like M-Video, Eldorado, in shopping centers or, God forbid, in Auchan. Nothing is ever sold there. At best, you will buy a karaoke microphone that sounds disgusting and is incompatible with normal equipment.
Rule number two - never buy a microphone that has a mic cable attached by default. It's generally taboo. And the cable and microphone will be lousy. However, you vote with the ruble and buy what you buy. Everything has a price, but then don't say you weren't warned.
If you want to sing karaoke songs after a feast, this is one thing. It is not a pity to get such a microphone dirty in Olivier salad. If you want to record your voice on your computer, read on.
The first and easiest option for connecting to a computer is to buy a USB microphone. You connect via a USB port with a regular USB cable and immediately get decent sound. USB microphones are both cheap and expensive. This option has long ceased to be a compromise and the sound quality of such microphones is very decent. Given the convenience of connecting to a computer, their price is justified. Naturally, a USB microphone will cost more than a karaoke microphone from Auchan. But it will sound right.
If you voice computer games or record podcasts, conduct trainings on the Internet, then a USB microphone is your option. Our consultants will help you choose the right model, taking into account the budget - call or write to us.
Well, the last and coolest option is a studio microphone for recording vocals. Do not be afraid of the word "studio". Studio does not mean expensive. Prices for these microphones vary greatly. There are very inexpensive models and there are top-end items that, in our opinion, are not justified for use at home.
The advantage of a studio microphone is primarily in sound quality. If sound is a fundamental point for you, then there are no options, you need to assemble a home studio.
First, let's decide on the type of microphone you need. For vocal recording, it is best to buy a large diaphragm condenser microphone. Dynamic microphones are an option for concerts, while small diaphragm condenser microphones are for recording musical instruments. Ribbon microphones are generally a topic for a separate article and they do not suit us.
In general, we take a condenser microphone with a large diaphragm. It looks something like this:

Options and prices - a million. Again, our consultants will help you choose the right one. Ask, do not be shy.
Buying a microphone by itself does not make you a rock star. A condenser microphone will not work on its own. And you will not be able to connect it directly to your built-in sound card. even if you try, it won't work. Because a condenser microphone needs phantom power. And such power is available either in external audio interfaces or in specialized microphone preamps.
Therefore, if you want to use a condenser studio microphone and get a cool sound, in addition to the microphone, at least you also need an external USB audio interface with a microphone input. In the common people - an external sound card.
For example, this one:

There are also more expensive options and solutions, but we will not touch on them in this article, because. this is already equipment for professional studios and the approach to it is completely different.
And now we will conduct a small educational program on microphone cables and connectors in which they are included. Because this is what causes most problems and questions among ignorant people.
So, all professional microphones (not karaoke and not USB) use XLR connectors. The XLR connector on the microphone looks like this:

In turn, the connectors on the microphone cable will look like this:

In any Auchan you will not buy such a microphone cable. they are sold by specialized music stores like ours.
On sound cards and microphone preamps, as a rule, either XLR inputs are used for connecting a microphone cable or combined Jack / XLR connectors. A standard XLR input looks like this:
A combo Jack/XLR connector looks like this:

The combo jack can accept both a microphone cable with an XLR connector and an instrument or stereo cable with a Jack connector. Jack connector in professional equipment looks like this
There is also a mini jack, but it has nothing to do with professional musical equipment - this is a solution for portable players, etc.
If you've bought a karaoke microphone and are trying to plug it into a jack/xlr combo jack, you may be in for a disappointment. Why? Because, as a rule, combo connectors are designed in such a way that when connected via a jack, the signal preamplification is much less. This is done so that you can connect musical instruments or linear signal sources such as an mp3 player, synthesizer or computer through the jack. And when you connect an XLR cable, another chain is triggered, which is designed to amplify the signal coming from the microphone.
In English: if you plug your microphone with a jack connector at the end of the cable into such a combo input, the signal will be very quiet, and the problem is not with the microphone and not with the device you are plugging into, but with misuse and misunderstanding of how your equipment is working.
Computer technologies occupy a rather large niche in the life of a modern person. Various devices, connected to a computer, allow you to more fully use its potential. The microphone, converting the sound into an electrical signal, allows the computer to hear, perceive, analyze, store and transmit the sound. This device is a necessary link in the evolutionary process of computer technology. Today, almost every desktop computer has an integrated sound card. The device can thus be connected via the MIC jack.
How to connect a microphone to a computer?
Depending on the purpose and type of the transforming element this device subdivided into several different groups. Multimedia microphones are used to communicate through a computer by voice. Basically, they are used for voice communication via Skype and others. computer networks a similar direction. Such a microphone can be connected directly through the MIC input.
How to connect a microphone to a computer in a studio or at a concert?
For studio recordings, rehearsals and other similar events, you will need a type. To connect this device, you need to connect it to a mixing console or a preamp - a microphone preamplifier, and then to a sound card. If there is a built-in preamp, it can be connected directly to the MIC input. One of the features of such a device is the absence of additional power requirements.
During conferences or reports, as well as for recording voice and vocal parts, capacitor-type devices are used. To work they need extra food. Usually it comes from a preamp or from a mixing console through a wire that connects them. This type of power is called phantom power. If the microphone input has a condenser microphone, you can connect it via the MIC input.
Before connecting a microphone to a computer, you should remember that high quality can be obtained by using a condenser microphone. In turn, sources with extremely high sound characteristics or limited frequency ranges require the use of dynamic type devices. Their connection schemes are relatively complex. In order to simplify this operation, manufacturers produce microphones for recording of a special design. They are initially equipped with all the necessary elements that allow you to connect a microphone to a computer via USB or via FireWire. As a result, such devices are highly mobile and easy to connect.
When connecting this device for the first time, you should study the manufacturer's instructions. It will indicate a specific connection order, as well as a list of devices recommended for work. There are some models with non-standard connection schemes and a special switching order. Knowing and following these recommendations will protect your microphone, computer and other related equipment from damage. So that sound recording and sound transmitting devices do not spoil your mood and nerves, you need to purchase such things in specialized stores.
Today, almost every modern laptop has an integrated microphone. windows 7 how operating system new generation allows you to use this gadget as accessible and easy as possible. Simple settings, a clear interface allows for fast and high-quality recording in almost any range.
 Modules for digital television
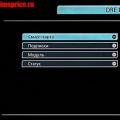 Tricolor TV - receiver software update
 Satellite receiver or satellite TV input ci common interface