Update BIOS on MSI. We update the BIOS on MSI We understand motherboard models and utilities from a Taiwanese manufacturer
The functionality and BIOS interface receive at least some serious changes quite rarely, so you do not need to update it regularly. However, if you have built a modern computer, but an outdated version is installed on the MSI motherboard, then it is recommended that you consider updating it. The information below is relevant only for MSI motherboards.
Depending on how you decide to update, you will have to download either a special utility for Windows or the files of the firmware itself.
If you decide to update from the utility built into the BIOS or the DOS line, then you will need an archive with installation files. In the case of a utility that comes under Windows, downloading the installation files in advance may not be necessary, since the functionality of the utility has the ability to download everything you need from MSI servers (depending on the type of installation chosen).
It is recommended to use the standard methods for installing BIOS updates - the utilities built into it or the DOS prompt. Updating through the interface of the operating system is dangerous because in the event of a bug, there is a risk of suspending the process, which can lead to serious consequences, up to the failure of the PC.
Stage 1: Preparatory
If you decide to use standard methods, then you need to make the appropriate preparation. First you will need to find out information about the BIOS version, its developer and the model of your motherboard. All this is necessary so that you can download the correct BIOS version for your PC and make a backup copy of the existing one.
To do this, you can use both the built-in Windows tools and third-party software. In this case, the second option will be more convenient, therefore, further step-by-step instructions are considered using the example of the AIDA64 program. It has a user-friendly interface in Russian and a large set of functions, but it is paid (although there is a demo period). The instruction looks like this:

Now download all BIOS update files from MSI official website using this guide:

To perform the installation using the standard method, you need to prepare a USB drive or CD / DVD in advance. Format media to file system FAT32 and transfer the BIOS installation files from the downloaded archive there. Make sure that there are elements with extensions among the files bio and ROM. Without them, the update will not be possible.
Stage 2: Flashing
At this stage, we will consider the standard flashing method using the utility built into the BIOS. This method is good because it is suitable for all devices from MSI and does not require any additional work other than those discussed above. Immediately after you have dumped all the files on the USB flash drive, you can proceed directly to the update:

Method 2: Update from Windows
If you are not a very experienced PC user, you can try updating through a special utility for Windows. This method is only suitable for users of desktop computers with motherboards from MSI. If you have a laptop, then it is strongly recommended to refrain from this method, as this may cause malfunctions in its operation. It is noteworthy that the utility is also suitable for creating a bootable USB flash drive for updating via the DOS line. However, the software is only suitable for updating via the Internet.
Instructions for working with the MSI Live Update utility are as follows:

Method 3: Through the DOS line
This method is somewhat confusing, as it involves creating a special bootable flash drive for DOS and working in this interface. For inexperienced users, updating using this method is strongly discouraged.
To create an update flash drive, you will need the MSI Live Update utility from the previous method. In this case, the program will also download all the necessary files from official servers. The next steps are:
Now you will have to work in the DOS interface. To enter there and do everything right, it is recommended to use this step-by-step instruction:

Updating the BIOS on MSI computers/laptops is not that difficult, and there are a variety of ways, so you can choose the best one for you.
MODIFICATION REQUESTS ARE PERMANENTLY SUSPENDED!
See vendor specific FAQ
FAQ basic:
- Q1: My board is not listed on this page, is it supported at all?
A1: Almost all motherboards based on Intel P965/G965, G3x/P3x, G4x/P4x chipsets, as well as nForce 6xx/7xx chipsets are supported with some reservations. You can search for your board. - Q2: My board is on the link above, but it is not in the list below, where can I get the BIOS?
A2: Browse , it is recommended to search for your board by Ctrl+F search on the page. - Q3: There is also no payment for me. What to do?
A3: Ask for the BIOS in the comments to this post if your board is OEM/rare/pr. give a link to the original BIOS, specify the board model and BIOS version. You can also make a mod yourself using the instructions for , or . - Q4: I have questions, where can I ask them?
A4: This is not a forum. There is zero traffic here, you should not expect any reaction to questions that are not directly related to mod requests. If your system is not stable, you don't know how to flash the BIOS, you don't know which processor to choose, you don't know how to overclock your system, or you have other questions that are not directly related to the modification request, ask them. - Q5: I have a board on intel 945/946/955/975 chipset, what are the prospects?
A5: First you need to understand if the board can work with processors of the Core generation, then whether it supports 45nm processors and then whether it supports the 1333MHz bus. Depending on the answers to these questions, a 945-based board can install a processor up to X5260 (dual-core only!), and a quad-core processor can be installed on 946/955/975-based boards, but it's better to limit yourself to processors with a bus frequency of 1066MHz. On the 1333MHz bus, there may be stability issues. - Q6: I have a board on intel X38/X48/Q3x/Q4x chipset, what are the prospects?
A6: Your board will work with the Xeon UP (single processor option), such as the Xeon X3363 or X3370. Some Asus boards based on the Q35 chipset also work with Xeon DP (E5xxx/X5xxx for dual-processor systems), but this is rather an exception. The mod for your board may be at the very bottom of the list. - Q7: I have a board on an intel 915P chipset or on a 945P but without Core 2 Duo support, what are the prospects?
A7: Most likely nothing will come of it. Your ceiling is a Xeon W5080, but it's hotter (yes, it's possible) and not that much faster than a Pentium D945. - Q8: There are two folders in the archive, ORIG and 771. What is it?
A8: ORIG - the original image from the manufacturer's website, it is recommended to flash it first and check the stability of the system with it. 771 - Original image with added/replaced microcodes. - Q9: What is SLIC?
A9: What is SLIC roughly written. Most recent mods lack the SLIC variant. Requests for SLIC modification will be ignored. - Q10: Next to some mods, nothing is indicated in brackets, with others the version is indicated, with the third something else, does it mean something?
A10: If nothing is indicated next to the mod, then this is one of the first mods and only 45nm QuadCore Xeon microcodes have been added to it. The BIOS version can usually be found from the file name, I leave it original whenever possible.
If only the BIOS version is listed - which usually means the same - only 45nm QuadCore Xeon support is added.
If it is indicated in parentheses that only 65/45nm core/xeon microcodes are present, it means that only these processors are supported and the latest microcode version. Support for Pentium 4, Pentium D and Celeron of similar generations has been removed. Pentium E and Celeron E supported!
IMPORTANT! The CompareExchange128 instruction is only implemented in 2010 firmware. Install Windows 8.1/10 on BIOS without modification or with old microcodes and Xeon will not work. - Q11: I asked to make a mod three days ago, but my message did not appear, then I wrote three more comments, and then the day before yesterday five and three yesterday and today I am writing the 10th, but they still do not appear and there is still no mod, what should I do?
A11: I'm not suggesting killing yourself against a wall, but the answer is somewhere in this area. The comment is approved either upon the fact of the modification, or if I need to ask a leading question, for example, to clarify the board model, revision, or to inform about the possibility of a partial modification or not. No need to write the same request ten times - it will not be faster. I am a living person and work at my own pace. Links to instructions for self-modification are given in the answer to the 3rd question. An alternative (and more complete!) list of mods is in the answer to the 2nd. - Q12: Do you bear any personal responsibility for the quality of mods? Do you guarantee their performance? Do you check mods on boards?
A12: No. The use of these (and any other) mods is done at your own risk. - Q13: I have a XXX brand board, and you have a topic about YYY, where can I ask / look for a mod?
A13: At the moment I "support" the manufacturers. The link from the second question has a slightly different set. If you have not found your manufacturer - ask a question in any topic. - Q14: The board has been modified, the processor is installed, but the system is running very slowly. Windows may take 10 minutes to boot. This is fine?
A14: Disable the C1E / C-Step / EIST or similar option in the BIOS (the name may vary depending on the brand of the motherboard) - Q15: I read the entire FAQ, but did not understand which processor to choose for me!
A15: Again - twenty-five!- Xeon X5482-X5492 (QX9750-QX9770 can be considered an analogue on the 775 platform) - If you have a top-end board with FSB 1600 support and you don’t plan to overclock much (not every board will give a bus much higher than 400)
- Xeon E5430-X5470 (Q9450-QX9650 can be considered an analogue on the 775 platform) - If you have a medium or top motherboard with FSB 1333 support and overclocking on the bus is not needed, but it may be necessary
- Xeon X3353-X3363 (Q9450 can be considered an analogue on the 775 platform) - If you have a motherboard based on a Q or X series chipset
- Xeon X3360-X3370* (Q9450-Q9650 can be considered an analogue on the 775 platform) - If you have a motherboard based on a Q or X series chipset, or if you have a motherboard from Intel
- Xeon X3220-X3230* (Q6600-Q6700 can be considered an analogue on the 775 platform) - If you have a board with FSB 1066 support and the power supply will draw 100W, or if you have a board from Intel
- Xeon L5420-L5430 (there is no direct analogue on the 775 platform) - If all of a sudden everything is like in the second paragraph, but you want a small TDP
- Xeon revision 45nm C0 - if you have a board from Intel (see)
- Xeon revision 45nm E0 - In all other cases.
- I would not recommend the X3323 processor because of the "low" frequency and multiplier.
- I would not recommend the X5462, X5472 processors because of the "low" frequency and almost impossible overclocking on the bus.
- Processors L5405, L5408, L5410 I would not recommend because of the big compatibility problems
- I would not recommend E53xx processors due to the fact that there are so-so frequencies on the 1066 bus, and in other cases E54xx is preferable
- However, I would not recommend processors with a 1600 bus because of the big compatibility problems.
* - These processors are of the s775 design, you won't have to cut / re-paste anything.
- Q16: The board is modified, the processor is installed, but the temperature is at rest 20 (or 50) degrees. This is fine?
A16: Yes and no. The fact that temperature sensors show us in different programs is described in detail (many English beeches). If the temperature is displayed normally in the BIOS, and it is too high only in monitoring programs, you just need to set the correct TJMAX for the existing processor:- X5492, X5482, X5472, X5470, X5460, X5450 series - 85°C
- E5472, E5462, E5450/40/30/20/10/05 series - 85°C
- L5408 series - 95°C
- L5430, L5420, L5410 series - 70°C
If the temperature is not displayed correctly even in a modified BIOS, the problem cannot be solved by simple methods.
- Q17: What video card is suitable for these processors.
A17: Subjectively, NVIDIA cards from GTX760 to GTX1060 and analogues from AMD, apparently up to RX480. It definitely won't hit the processor. - Q18: How are things going with virtualization?
A18: Just like on Core 2 Quad coupled with P3x/P4x chipsets: VT-d - no, VT-x - yes, NXBit - yes. Those. VMware ESXi will get up, but forwarding of PCI devices will not work. Bundles of Q3x/Q4x and X3370 will probably allow a little more... - Q19: After installing Xeon and a modified BIOS, my once-stable system started to crash. BSODs, reboots, freezes... defective processor?
A19: Probably not. Leave one memory module that is guaranteed to keep the frequency of DDR2-800 or DDR3-1333, check the quality of the cooling installation, etc. Well, in general, return to the fourth question of the FAQ. - Q20: I installed an energy-efficient L5408 processor (or any other) in a motherboard with a modified BIOS, but after POSt SCREEN the white cursor in the upper left corner flashes and the OS does not load, what should I do?
A20: Unfortunately, there is no answer to this question yet. Most likely, the fact is that the motherboard cannot form such a small VID, which this processor requires and goes into defense from that. Usually, such systems at least somehow work without microcode at all, but you need to understand the consequences. See next question. - Q21: I installed the processor in the motherboard with the original BIOS and everything works fine. do you really need a mod?
A21: Everything I think about this is described. But if in a nutshell, you probably do not have energy savers working, there are no SSE4.1 and CompareExchange128 instructions, the processor temperature is not displayed correctly, and so on. The choice is yours, of course, but IMHO you need a mod.
FAQ vendor specific:
- The confusion in PCB revisions, coupled with the lack of protection at the ROM ID level, bricks the boards. I can't check mods on live boards, and I don't want to produce potential bricks. Either use the generic way from the 3rd FAQ question, or use the Genius mods (2nd FAQ question)
- Q: Hello, G41M-S01 is not in the list, does it support e5450? The name of the board is written in the BIOS and in CPU-Z, but I can't even find a clean BIOS.
A: This is the whole charm of microstar ...
1. Google
2. Open "Support for G41M-P28", yes, yes ... you never know what is written on your board, Microstar somehow hints at how it relates to you ...
3. Download BIOS version 26.11
4. Open the text file in the archiver…. and here it is: G41M-S01 (MS-7592) V26.11 BIOS Release
I don't know why it's like this...either MSI has good fish soup, or they are simply above the problems of ordinary users. And so with every payment ... - PAY ATTENTION TO BOARD REVISIONS!
- There are no SLIC versions.
- All mods have microcodes. only on CORE/XEON 45/65nm unless otherwise noted!
Mods:
- MSI (1.6, old microcodes)
MSI (1.7b14, old microcodes) - MSI(1.A)
- MSI (1.5)
Functional innovations and the BIOS graphical interface rarely receive major updates, which means that there is no need to regularly update the BIOS. But if your PC has a fairly modern build at your disposal, but under some circumstances your motherboard has an old version, it would be advisable to update it. This article will be useful information for you, but on the condition that you have an MSI motherboard.
An important step for you will be the choice of how you want to update the BIOS. You need to have a specialized WIndows utility or the firmware files themselves.
It is recommended to use standard BIOS update methods. Using the utility from under Windows is fraught with problems, if any error occurs during the installation, the installation will stop, which can lead to serious consequences, for example, the PC will "die".
If you decide to use standard methods, then you should prepare. As a first step, you need to find out all the information about the BIOS version that is on your motherboard. All this is necessary to find the best similar and latest release of software, and as a fallback option, keep a backup. To get started, we can use both standard Windows services and specialized programs. The most convenient option is option 2, an excellent program for this is AIDA64. Includes a Russian interface and a huge set of features.
Let's get started:
We open the software, click "Motherboard", go to the "Bios" sub-item, there we will find all the necessary information on the BIOS installed now, it must be saved.

The link to official updates is in the same paragraph, but it would be best to update the latest version yourself, because the link may not lead you to the latest release.
The final step in the preparatory process will be the need to go to the "SYSTEMBOARD" subsection, find - the properties of the motherboard, the data that is indicated there will be useful in searching for update files on the MSI website.

We download all the files we need from the official site.
In the search bar, enter the full name of the motherboard.

As a result of the search, find it, click on the item "Downloads"

You need to go to the Bios section, there will be software that you need to download.

From the list of files, select the top one, since this is the latest update at the moment.
To perform the installation in the standard way, you need to prepare a USB flash drive or CD (dvd) disk. It is necessary that the media be formatted with the file system in FAT32 mode, then you need to copy the installation files.
It is important that among all the files there are also files with the bio and rom extensions. This is a very important nuance, without this update is impossible.
Next, the flashing stage using the standard BIOS utility.
You need to make the computer boot from USB. To do this, restart your computer and go into BIOS using the keys (F2 - F12), Del.
It is necessary to put the USB flash drive in priority so that it boots first, and only then the hard drive.

Save, reload. F10 - Save & Exit.
Further, thanks to all the previous steps, when the computer boots up, installation files will be detected, several options for the outcome will be offered. You must select "Bios update from drive".

Update from under WIndows
This method is less reliable, but if you are not an experienced user, you will have to use a specialized utility. This method is possible only for owners of a stationary PC, but if you have a laptop, I recommend not to do this, because it will lead to malfunctions.
Download the MSI LIVE UPDATE utility. Turn it on, go to the Update section located in the top line. Turn on "Manual scan" and "mb bios". Now we scan and wait for the end.
Finishing our series of articles on updating the BIOS, we will tell you how to update the MSI BIOS, because motherboards from them have their own characteristics!
Updating the BIOS in a device equipped with an MSI motherboard is generally done as follows:
- a specific model of your motherboard is installed;
- checks for updated versions of the system you are interested in;
- install them directly.
If you know exactly the model of your equipment and the version of the system to reinstall, then it remains to find out only on your motherboard from the MSI brand. The firmware you need can be downloaded both to the computer itself and to a portable device.
How to update BIOS from MSI brand using flash drive?
You can launch the version of the I/O software update you are interested in directly from the desktop.
For the convenience of this operation, you can use the special Click BIOS II interface, suitable for working with devices from the Taiwanese manufacturer we are considering. In the "Utilities" section, you will find the M-Flash program suitable for installation from a USB flash drive, which will help you update the I / O software.
This specialized utility will prompt you to use the "Update Bios" option. With its help, the desired update file is selected from the USB flash drive, previously downloaded from the official website of the manufacturer, and then it is installed automatically. It is recommended that you restart your computer before continuing to work with it.
The same section contains MSI live update 6 . This is a special utility with which you can find out the version of your motherboard using the "System Information" section. 
Also, this program will help you check for the latest updates for your device in real time, either manually or automatically. When choosing the first option, you will need to check the box next to the second item “MB Bios” before starting the scan. 
Understanding motherboard models and utilities from a Taiwanese manufacturer
It is worth remembering that under the abbreviation for the equipment for which we are trying to install a BIOS update, the name of a company specializing in the production of motherboards is hidden.
It sounds like Micro-Star International. Thus, we are not talking about any particular version of the motherboard, but rather about their whole family. For example, you may have the MSI z270 a pro or MSI h110m pro vd option on your computer.
There are various ways to find out your motherboard model so that you can upgrade your I/O system later, including:

Have a great day!
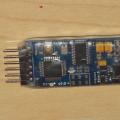 OSD for ArduPilot Mega - a system for overlaying telemetry data on flight video
 Why won't my Windows PC connect to my phone in Wi-Fi hotspot mode?
 Solving the problem with adjusting the brightness on a laptop