Reinstall windows xp via bios. Step-by-step instructions for the correct installation of Windows XP
Hello everyone, today we will talk about how to install Windows XP to your computer. I will write several options, for example, installation from a USB flash drive and in other articles - on virtual machine... Windows XP is very old system which causes nostalgic feelings for many, so let's try to install it on the PC again and do a little work!
By the way, before installing Windows XP, I advise you to read the material: "". This is to set the boot from disk to the first place. If you do this from a USB flash drive, then read about, with which you can not rearrange the drives, but immediately select the USB flash drive to boot.
Preparing to install Windows XP from disc
If you have an old distribution kit with Windows XP lying around, then let's proceed directly to the installation. In the absence of a distribution kit, I recommend downloading the image from the following links:
http://win-torrent.net/windowsxp_torrent
http://free-max.ru/windows_xp
On them you can find images without keys.
We enter the BIOS and move to the tab Boot or Advanced(depending on the BIOS version). We get into the parameter Boot Device s Priority and using the F5 and F6 keys, move the desired device to the first place, for example, a CD / DVD drive. Or use Enter to select the desired boot device.

To save the parameters, you need to go to the tab Exit and choose an option there "Exit & Save Changes".

If you have another BIOS version, for example - Award, you can proceed as follows: open the section "Advanced BIOS Features".
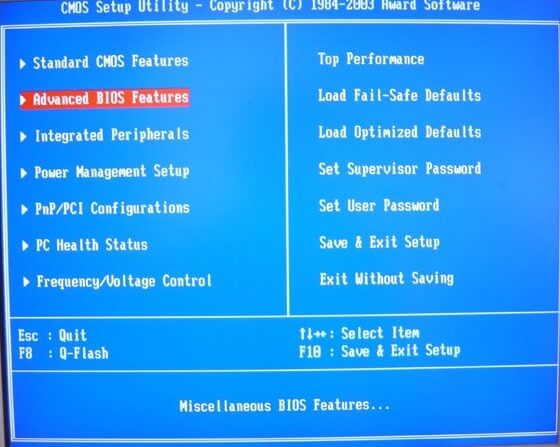
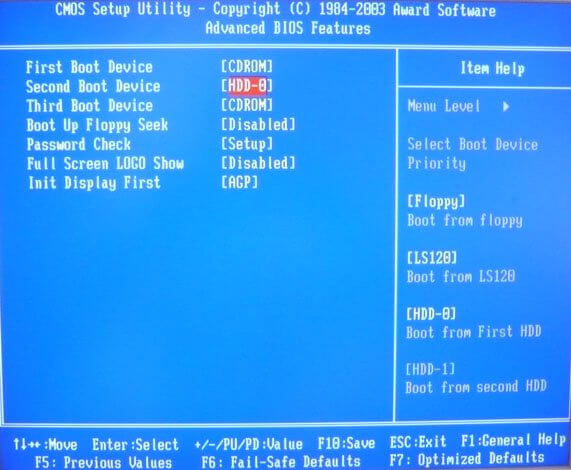
Choosing a parameter First Boot Device... Nearby there is the HDD0 option, which is responsible for booting from the hard drive. Press Enter and select CDROM if booting from disk.

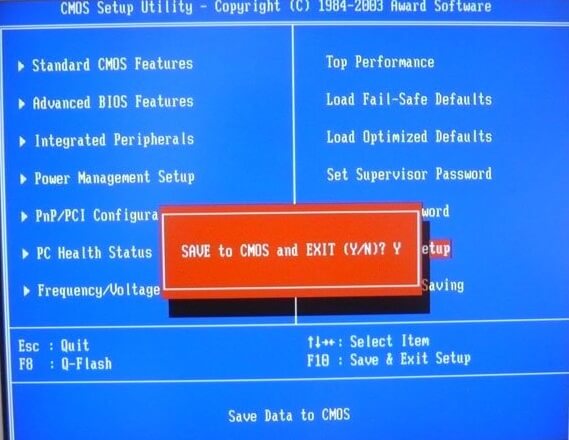
To save the changed parameters, go to the option in the main window Save & Exit Setup... A red confirmation window will appear, where we press the button Y.
How to install Windows XP using a disc
As soon as you have done everything you need to do and exit the BIOS while saving the settings, you should see such a black window with the phrase "Press any key to boot from CD" which means "press any key to boot from disk". Be sure to press any key for the installation to go.


Our gaze comes off the welcome menu. There are several parameters here that we can use:
- Proceed directly to the installation of Windows XP.
- Recover Windows XP using the Recovery Console.
- Exit the installer.
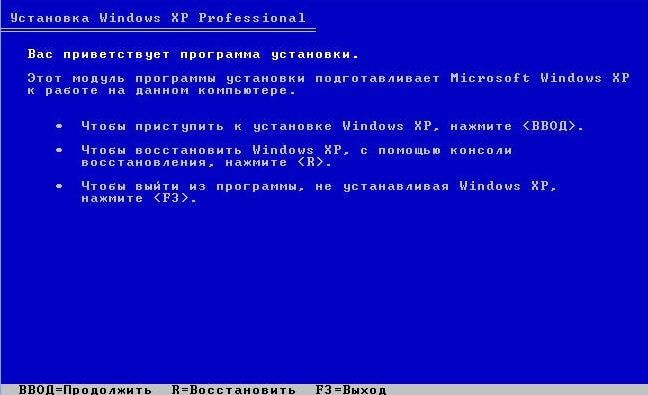
Naturally, it is necessary to select the first option by pressing the key ENTER.
In the next window, we accept the terms of the license agreement using the key F8.

Now we need to deal with the sections. V this example we see three sections. You can delete all partitions to put them together (done with the D key), or install into a ready-made partition. I will choose a disc called "Section 2", it just has the letter C. The choice is made with the Enter key.
In the next window, you need to select the type of formatting. You can choose full formatting to completely clear the partition table, but this is not required. Choosing a parameter "Format a partition in the NTFS system<Быстрое>» .

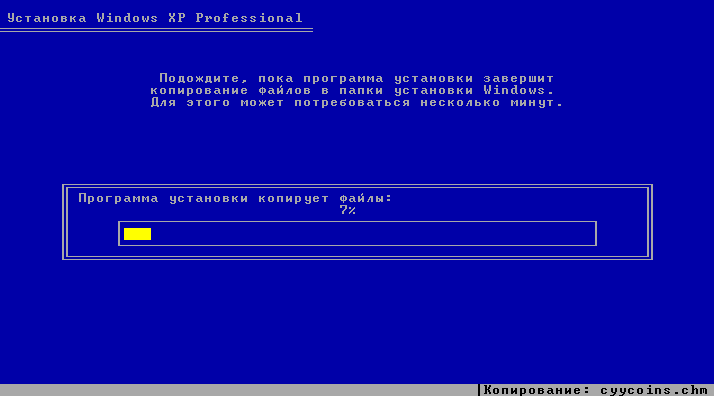
Here comes the Windows XP installation. We waited! During this process, the computer may restart a couple of times. Now you know how to install Windows XP, or rather, how to get started.

As soon as the installation files are copied to the disk, a window will appear asking you to specify the regional data. In this case, click Next.
If you are asked to enter the product key, enter. In case you downloaded another image, the key may be embedded in it, so you will not see this window.
Another window where we are asked to indicate the date and time. Then we press the button "Further".
To further configure the system, click the "Next" button.
In order not to install any updates during the installation process, select the item Postpone this action... Click "Next".
In another window, we see the check of the Internet connection. Just push "Skip".


To complete the installation of Windows XP, press the button "Ready".
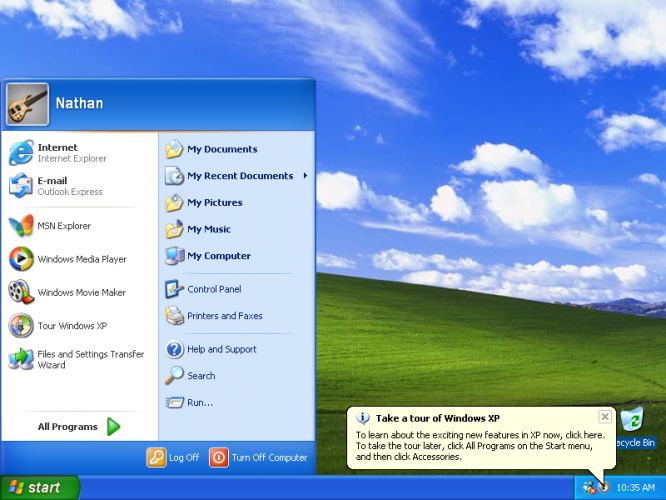
Now you can enjoy the appearance of the desktop with the same green field in the background and your favorite Start menu.

Now the question of how to install Windows XP will disappear for you, right? Everything is quite simple and straightforward. For any questions, please contact us in the comments. Later, as a supplement, I will post articles on installing various modifications of Windows XP, such as Zver and others. I will also try to make a video for those who do not like to read.
If you decide nafig to get rid of this system, then I recommend reading,.
I propose to consider a few links
Installing Windows XP- a fairly simple process, but it requires adherence to some basic rules. Firstly, this is the choice of a distribution kit, it is very important to use only original distributions, using any kind of assembly - you install viruses for yourself and become a member of the botnet. The number of possible viruses in the assembly is simply off scale, then what you would never get infected via the Internet - it will easily harm you already at the installation stage. Use only original distributions or assemblies based on them. Well, the second rule is the correct observance of the installation, and we will talk about it.
I describe the installation from a licensed disk, you may not have some configuration points, they depend on the computer and the Windows XP distribution kit.
1. We insert the disc into the drive and boot the computer from it. (?)
2.
When the inscription “ press any key to boot from CD»Press any button on the keyboard and the download will start. 
3.
The first step is to choose what we are going to do with the distribution, choose to install by clicking " Enter». 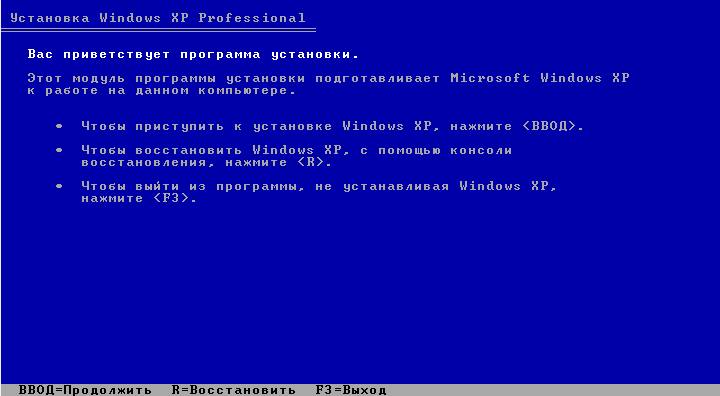
4.
We accept the license agreement by clicking " F8». 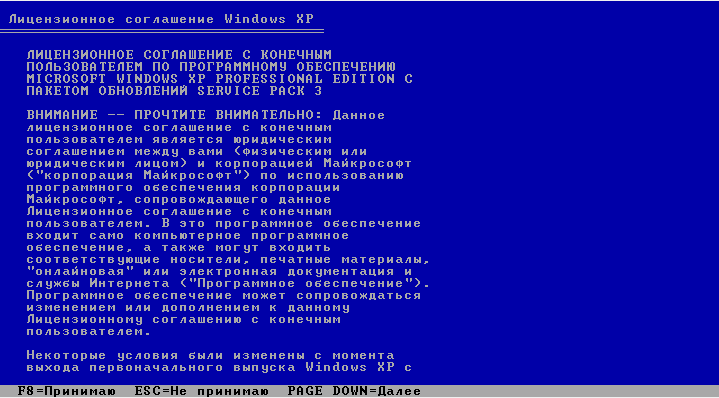
5. Selecting a disk and formatting is the main and main stage in the installation. It is very important to use two sections. I give instructions clean install(with full formatting hard disk, if your disk is already divided into a system and file partition, then do not touch the file partition). For the system partition Windows XP 20GB is enough, we will give the remaining space for the file partition. Create and format sections:
A) Press the "C" button on the unmarked area. The system offers to create a section, enter 20,000 and press "Enter". 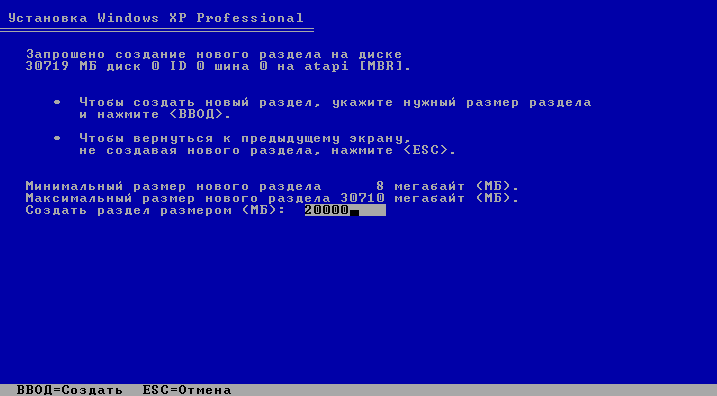
B) Now select the "Unmarked area" with an arrow and create a second section from the remaining space. 
V) The sections are created, now we select the section C and press the "Enter" button to start Windows XP installation to this section. 
G) Since the partition is not formatted, the installation prompts you to do this, select "Format partition in NTFS" and press "Enter". 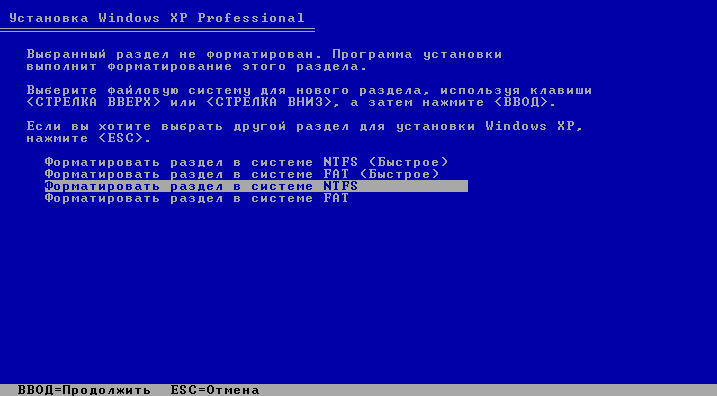
6.
Now we have been watching the process of formatting and copying files to disk for some time. 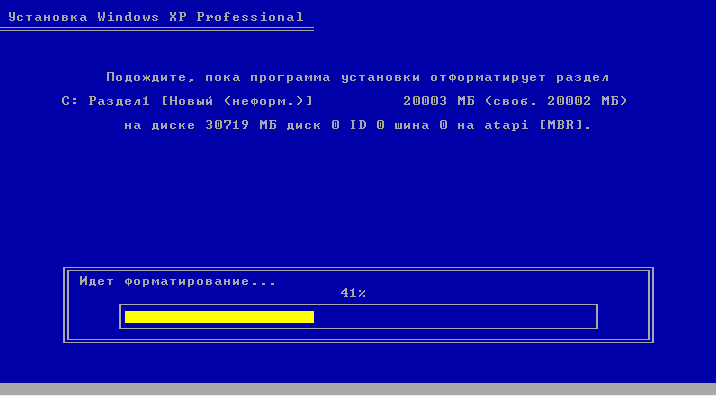
7. The system offers to restart the computer, we agree by pressing "Enter". During the reboot, we change the boot device to your HDD and now we always boot from it.
8.
If you did everything correctly and started booting from the hard drive, you will see the process Windows installations XP. 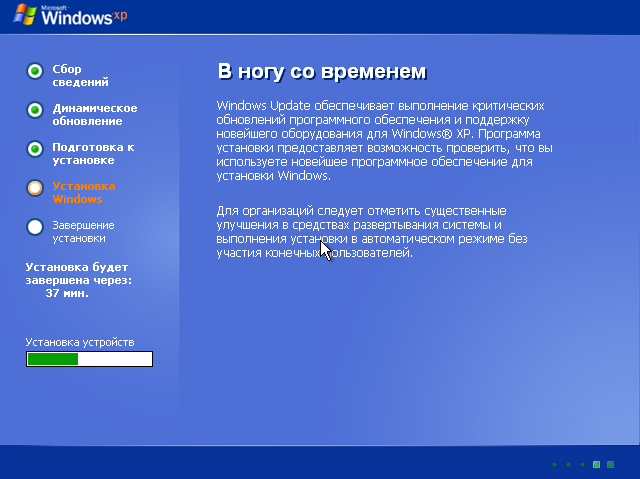
9.
The first step during the installation will be the Regional and Language Settings screen, for Russia everything is set by default and we click Next. 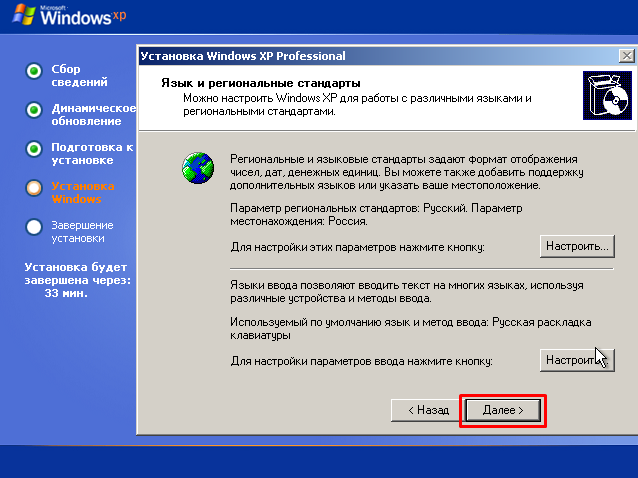
10.
Now we enter the username, use only Latin letters, and click "Next". 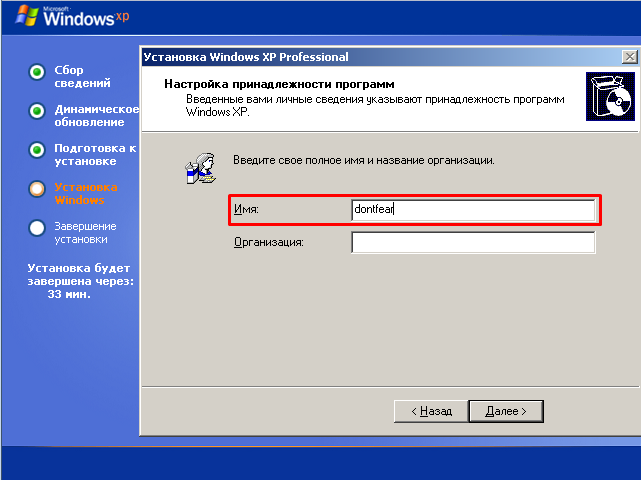
11.
Enter 25 digits license key and click "Next". 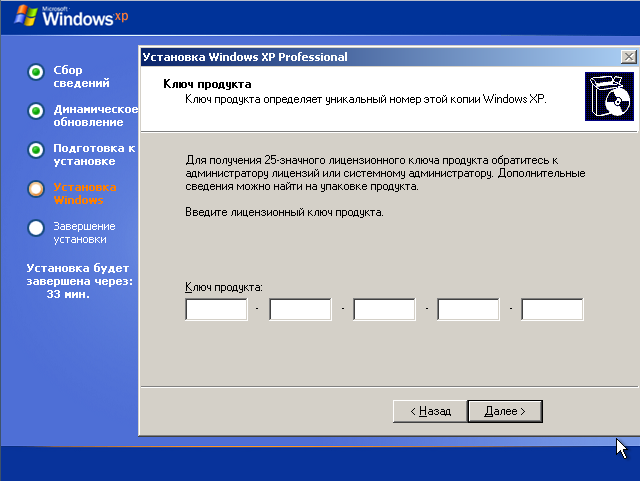
12.
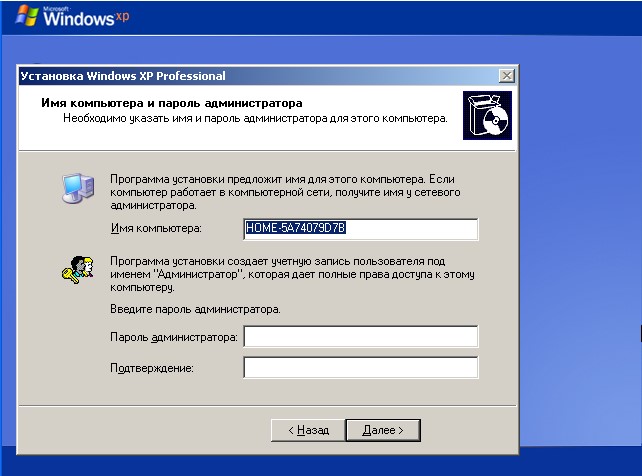
Now we are asked to enter a password for the administrator, you can skip. Enter or leave blank and click "Next". 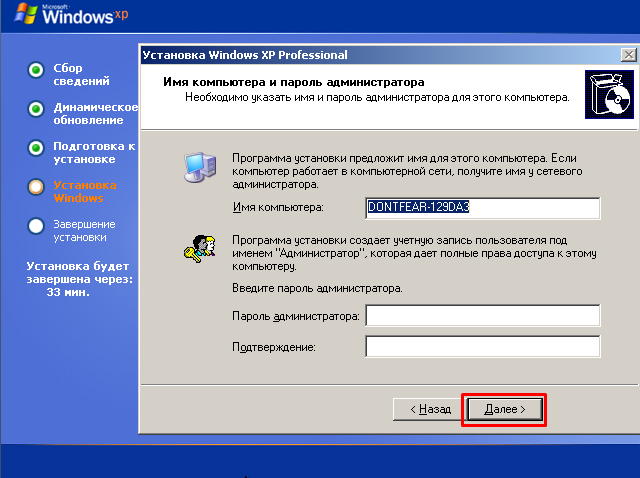
13.
We set the time and time zone, click "Next". 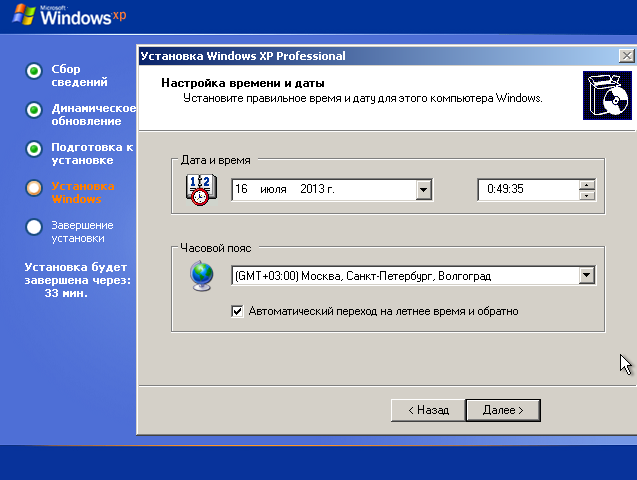
14.
On the network settings screen, leave the "Normal settings" and click "Next". 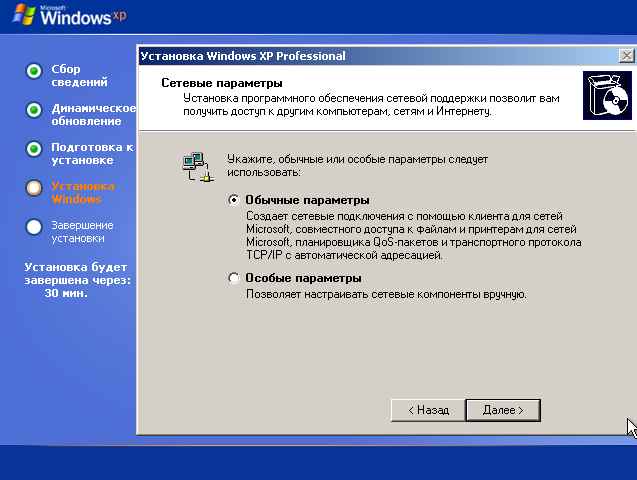
15.
Enter the name working group Windows, if you are not using - just click "Next". 
16.
The computer installs Windows XP for a while and reboots. 
17.
At the first boot, Windows XP offers to set the optimal screen resolution, we agree. 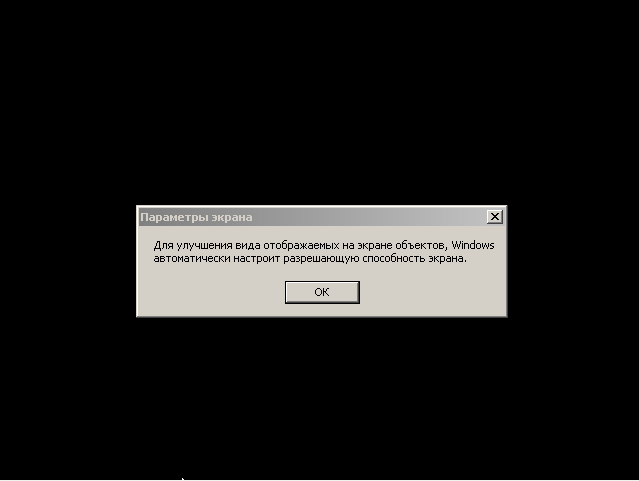

It usually takes up to 2 hours to install Windows XP. Installation can be done from disk and from a flash drive. If you want to install Windows XP from a flash drive, you
So, to install from disk, insert it into your floppy drive and restart your PC. You will need to put in the bios boot from the floppy drive, or call the boot menu, (Boot menu is a function that allows you to choose from which device to boot the computer. (Floppy drive, HDD (hard disk), portable hard, flash drive, etc.) On each PC, the boot menu call may be different, so press in turn the keys f8, f9, f10, f11, f12) if it is not disabled in bios.
You can find out how to enter bios, turn on the boot menu or set the computer to boot from a floppy drive or flash drive
If you write everything in one article on how to enable the boot menu or install boot from various devices, it will turn out to be very extensive, so I just made links. If a person can do all this, this information is useless to him.
Installation starts.
After the PC has seen and spun the disc, you will see Press any key to boot from CD press the space bar. If you missed this message, restart your computer and start over.
Please select automatic installation Windows. The mouse does not work during installation. Use the keyboard. After loading the system files, the following window will appear:
Then choose fast format NTFS
Formatting will begin, then copying new files, and after completion, the computer should restart.
Now you need to boot not from the disk that is in the drive, but from the hard disk. When the Press any key to boot from CD entry appears again, ignore it. And if you set the boot from the HDD after the floppy drive in bios, then it should start loading windows as when turning on the PC normally, then a window like this will appear:

Also, a little further, windows may appear with the requirement to enter a license key, computer name and password, etc. (V different versions XP everything is different) We enter all this and wait for the installation to complete. After the installation is complete, the PC will reboot, again you need to boot from the HDD and you will see the desktop after a while:
After installing Windows.
Next, you need to install drivers for correct work Windows if they haven't installed themselves. In order to see if all the drivers are in place, click the Start menu and right click click on my computer and select Management. A window will appear where we press Device Manager.

As you can see in the picture above, I have not all drivers installed. If you have disks with drivers that come with your computer / laptop, put firewood from them. When there are no such disks, I use a wonderful Driver program Pack Solution.

Download it from the Internet, then run it and check the Expert mode checkbox on the left in the column. If there is no column, click the Expand button at the top right. Select the drivers you need to install, scroll down the list and there will be an Install button. After installation, restart your computer. Also, you can additionally look at the "" section and choose what you need there. Almost all articles describe in detail how to install firewood.
Windows XP installation is complete.
Below you can watch a video detailing the installation of Windows XP from a disk. Good luck!
Friends, with this article we open new section on how to properly work with a computer. We will cover issues such as how to install Windows XP correctly, as well as update drivers and other programs for everyday use.
Many will say: “ What to put there? Is everything simple there?”. And you know that the incorrect installation of the OS in most cases is the main cause of malfunctions when working on a computer, ranging from banal freezing and braking, ending with errors at the hardware level.
How you install the operating system on your computer will determine how well it will serve you. So, let's figure out how to properly install Windows XP.
We analyzed enough material on the Internet on this topic, but we did not find a simple and adequate disclosure of the topic. Also, as a simplification of perception and a better understanding of the OS installation process, a video story with a detailed description was prepared.
Little attention was paid to such trifles as “buying a disc with an operating system”, “whether it is necessary to read the license agreement”. We focused on the initial setup of the installed system.
Basic steps to install Windows XP
- 1. The first thing to do is change the boot order in BIOS to “boot from optical disk”. To do this, when loading the OS, you must click “ F2"Or" DEL", And go to the" BOOT”, Where by pressing the“ + " or " - ”, Edit the loading order so that the entry“ CD-Rom Drive”Was at the very top.

- 2. Save the settings by pressing the “ F10”. When you restart your computer, the message “ Press any key to boot from CD ..”, You must press any key to start booting from the installation disk.
- 3. Next, preparation for installation will begin operating system... When the welcome window appears, the system will once again ask you to confirm your intention to install a new OS, press the “Enter” key.
- 4. When the license agreement appears, click “ F8”To accept it and continue with the installation.
- 5. If you reinstall the OS, the installer will try to restore installed version... We do not need this, we press "Esc".
- 6. Next, perhaps the most important thing. Selecting a partition to install. If you already have a priori hard disk divided into logical partitions: system and one or more user, then this is very good. Then it will only be necessary to delete the system partition, then create it, format it and install a new OS on it.

If your hard drive has not been shared before, then it must be done right now. For what? Everything is very simple. By dividing the hard drive into a system part and a user part, you create an airbag for yourself. if the OS fails, in the worst case, you simply reinstall the OS on a formatted system partition, but the user data will remain safe on the user partition.
How to properly divide the hard drive, see the video. As an example, a 10 GB hard drive was considered in the video tutorial. If your hard drive allows, make the system partition at least 20 GB.
- 7. Next, you need to format the partition with the type file system NTFS. Choose quick format.
- 8. The system will reboot, we will take a convenient moment and restore it to BIOS settings boot from hard drive, not CD-Rom. We have already considered how to do this in the very first steps.
- 9. After rebooting, the system will continue with the installation. The first window that appears will be “ Regional settings window”, Where you need to select the keyboard layout.
- 10. Next, the installer will ask you to enter a Name and Organization name. Enter only the Name and click next.
- 11. In the window that appears, enter the product license key. Be careful.
- 12. Set the Computer Name. Leave the admin password field blank for now.
Spend required settings date and time. One thing, but at the moment we have legally canceled the transition to winter time. I advise you to install the corresponding update from the official Microsoft website (WindowsXP-KB2570791-x86-RUS). This can be done after installing the OS.
- 13. Next, you need to determine whether the computer will work in the domain network or not. We do not change anything, we press “ Further”. We are waiting for the installation program to finish its work and reboot.
- 14. At the first start, the system will try to automatically adjust the screen extension. accept them if you are satisfied with the selected option. When the welcome window appears, click “ Further”, Postpone the settings automatic update, skip the settings to the Internet, postpone registration with Microsoft.
- 15. Create an account.
- 16. Initial OS setup is mandatory. Watch the video and follow everything step by step. After completing all the settings, you will receive an optimally configured computer prepared for work.
How to properly install Windows XP video
Watching the video, learning. If something is not clear, we ask questions.
 Bugs in Singularity?
 Just Cause 2 crashes
 Terraria won't start, what should I do?