How to open PowerShell, all methods. What is Windows PowerShell - how to start it and use basic commands Where to find powershell in windows 10
Experienced Users operating system Windows 10 may have heard about the utility command line PowerShell. Also, those who have experience with Windows 7 and 8.1 may be familiar with it. After years of using the Windows command line application and .bat files, it's time to get familiar with a more powerful tool.
PowerShell is a valuable addition to the list Windows tools and its scale may scare off some users. Is it a scripting language or a command shell? No need to worry: despite the vast possibilities, everyone can master PowerShell.
Step 1: installation
First, we need the PowerShell utility itself. If you're on Windows 10, you already have PowerShell 5 installed. Windows Update The 10 Anniversary Update uses version 5.1, but the difference is subtle. Windows 8 and 8.1 use PowerShell 4, which is also sufficient. Installing PowerShell on Windows 7 won't be a problem, but there are still a couple of extra steps to take. In particular, you need to additionally install the .Net Framework. You can install the Windows Management Framework, which includes PowerShell.
PowerShell has two interfaces. Advanced users can opt for a complete graphical interface known as the Integrated Scripting Environment (ISE). Newbies are better off using the PowerShell console, a simple text-based Windows command-line style interface, or even DOS 3.2.
To run PowerShell as an administrator on Windows 10, click on the Start button and scroll down to Windows PowerShell... On Windows 8.1, look for Windows PowerShell in the System folder on Windows. In Windows 7, the shell is located in the Accessories folder. As a regular user PowerShell can be started in exactly the same way using left button mouse instead of right.
At any Windows versions you can apply a search. For convenience of further use, you can pin PowerShell to the taskbar.
Step 2: old Windows commands
The Windows command syntax in PowerShell works as usual. For example, cd changes folders, dir shows a list of all files and folders within the current folder.
Depending on how you start the PowerShell console, you can start at c: \ Windows \ system32 or in c : \ Users \
Step 3: installing help files
Commands like cd and dir are not active PowerShell commands. These are so-called aliases - replacements for real PowerShell commands. Aliases are handy for those with extensive command line experience. However, they do not touch the depths of PowerShell.
To get started with what PowerShell can do, type help and the command you need. The screenshot shows the command .

Command help says that dir is an alias for the PowerShell command Get-ChildItem... If you type get-childitem v PS C: \>, you will see the same as when using the command dir.
As noted at the bottom of the screenshot, the help files for PowerShell are not automatically installed. To get them, run PowerShell as administrator and type update-help... Installation of help files will take several minutes, some modules may be missing - for example, in this case Help for NetWNV and SecureBoot were not installed. When everything is ready complete system help will always give the right clues.
Now type the command get-help and any command you are interested in ("cmdlet" in PowerShell, in Russian - cmdlets), its description will be shown. For example, get-help get-childitem gives a list of options get-childitem... You can also display different possible options... For example
get-help get-childitem -examples
gives seven detailed use cases get-childitem... Command
get-help get-childitem -detailed
includes these seven examples and detailed explanations of each parameter in the cmdlet get-childitem.
Step 4: get help with parameters
In the screenshot you may have noticed two lists under SYNTAX for get-childitem... Having two different syntaxes means you can use two ways to run a cmdlet. How to keep the syntax separate from each other and what do the parameters mean? The answer is simple if you know the trick.
For details regarding the parameters of the cmdlets get-childitem or whatever use the parameter -full:
get-help get-childitem -full
This gives you a list of what you can do with the cmdlet and what will happen. See screenshot.

Viewing the parameter descriptions reveals that get-childitem makes it possible to get an object child(like a subfolder name or file name) at a specified location, with or without certain characters matching. For example:
get-childItem “* .txt” -recurse
returns a list of files "* .txt" in the current folder and all subfolders (due to the parameter -recurse). Whereas
get-childitem “HKLM: \ Software”
returns a list of all registry keys top level v HKEY_LOCAL_MACHINE \ Software.
If you've ever tried to get into the registry using the Windows command line or .bat files, you will be able to appreciate the functionality of this access option.
Step 5: learning the names
There is a reason why the cmdlets shown so far look similar: get-childitem, update-help, get-help use a single verb-noun scheme. This convention is used by all PowerShell cmdlets, where the verb appears before a single noun. This will appeal to those who at one time suffered from the inconsistency of command names in the VB and VBA languages.
Take a look at the most common cmdlets:
set-location: sets the current working location to a specific location
get-content: gets the contents of the file
get-item: gets files and folders
copy-item: copies an object from one location to another
remove-item: deletes files and folders
: gets processes running on local or remote computer
get-service: gets services running on local or remote computer
invoke-webrequest: retrieves content from a web page on the internet
To see how a specific cmdlet works, use get-help as in the case
get-help copy-item -full
Based on the description in the help, you can see what the cmdlet needs. For example, if you want to copy all files and folders from Documents v c: \ temp, use
copy-item c: \ users \ \ documents \ * c: \ temp
By entering this command, you will see some interesting features of the PowerShell environment. For example, if you type copy-i and press Tab key, PowerShell fills in Copy-Item... If you type the cmdlet incorrectly and PowerShell cannot recognize it, you are given Full description what went wrong.
Try this cmdlet:
invoke-webrequest askwoody.com
You'll get short list headers, images, links and other content of the web page. Pay attention to get-help on the list invoke-webrequest which "returns a collection of forms, links, images and other important HTML elements" - exactly what should be displayed on the screen.
Several cmdlets help manage PowerShell itself:
get-command: list of all available cmdlets
get-verb: list of all available verbs
clear-host: clear the host program screen
Different parameters allow you to make commands smaller and narrower the circle useful options... For example, to see a list of all cmdlets that work with Windows services, type
get-command * -service
All verbs available with the noun will be shown. service... Here is a list of them:
Get-Service
New-Service
Restart-Service
Resume-Service
Set-Service
Start-Service
Stop-Service
Suspend-Service
You can combine these cmdlets with others.
Step 6: using pipes
If you are familiar with the Windows command line or batch files then you know about redirection and pipes. Redirection (> symbol) and pipes (| symbol) take the result of the action and attach it somewhere else. For example, you can redirect the result of the command dir v text file or pass the command result ping to the team find to filter interesting results like
dir> temp.txt
ping askwoody.com | find “packets”> temp2.txt
Here in the second team find looking for a string packets taken from the askwoody.com address by the command ping and concatenates all the matching lines into a file called temp2.txt.
The first of these commands works great in PowerShell. To run the second command you need something like
ping askwoody.com | select-string packets | out-file temp2.txt
The use of redirects and pipes greatly expands the capabilities of the Windows command line: instead of endlessly scrolling down the screen to find a text string, you can filter required commands Windows.
Powershell has support for pipe, and it is not limited to text. PowerShell allows you to pass an entire object from one cmdlet to another, where an object is a combination of data (called properties) and actions (methods) that can use that data.
The tricky part starts when you line up the objects. The objects supplied by a single cmdlet must match the type of objects that are received by the receiving cmdlet. Text is a very simple type of object, so if you are working with text, aligning the objects is a simple task. The rest of the objects are not so elementary.
How to understand this? Use the cmdlet get-member... If you want to know what type of object the cmdlet handles, walk it through get-member... For example, if you are trying to understand the processes running on a computer and narrowed the options down to cmdlets , here's how to find out the output of the cmdlets:
get-process | get-member
Running this cmdlet produces a long list of properties and methods for , but at the very beginning of the list you can see the type of object that creates :
TypeName: System.Diagnostics.Process
The screenshot below also shows the properties entitled get-process Handles, Name, NPM, PM, SI, VM and Ws.

If you want to manipulate the result to work with this cmdlet (instead of displaying a long list of active processes on the monitor), you need to find another command that accepts as input System.Diagnostics.Process... To find the cmdlets you want, use PowerShell features again:
get-command -Parametertype System.Diagnostics.Process
This cmdlet will give you a list of cmdlets that can handle System.Diagnostics.Process.
Several cmdlets are notorious for accepting almost any kind of data. Chief among them is ... This cmdlet loops through each pipe object, one by one, and applies the specified selection criteria to it. There is a special marker called $_ which allows each item in the pipe to be used, one at a time.
Let's say you want to get a list of all the processes running on the computer with the name "svchost", that is, you want to map the property Name process svchost... Use the command:
get-process | where-object ($ _. Name -eq “svchost”)
Cmdlet looks at every object System.Diagnostics.Process, compares .Name this object with "svchost"; if there are matches, they are displayed on the monitor. See screenshot.

Step 7: parsing useful PowerShell commands
By now, you already know enough to be able to damage your computer, so be careful. Let's see, for example, the commonly requested PowerShell commands.
These commands only work on Windows 10 and only when running PowerShell as an administrator. They are designed to reinstall the pre-installed Windows applications 10 and may come in handy for those who first uninstalled these programs, and then decided to return them. The command looks like this:
Get-AppXPackage | Foreach (Add-AppxPackage -DisableDevelopmentMode -Register “$ ($ _. InstallLocation) \ AppXManifest.xml”)
If you run this command, ignore the warnings indicated in red, and when the command is completed, restart your computer; all preinstalled programs in Windows 10 will appear in their places.
This is how the command works. Get-AppXPackage checks all application packages in the user profile. Even if you uninstalled the app, it remains in the user's profile list.
Cmdlet Get-AppXPackage returns an object TypeName Microsoft.Windows.Appx.PackageManager.Commands.AppxPackage which includes the fully qualified package name of the application and the location of the corresponding XML manifest file. If you run the cmdlet get-appxpackage, you will see a long list of application packages. The screenshot shows a description of the Xbox app.

Cmdlet Foreach through a loop goes through each object in AppXPackage by sending them to the cmdlet Add-AppxPackage... According to get-help for Add-AppxPackage, there are two key switches:
- Switch -Register used to register existing app package installations, parameters can be set DisableDevelopmentMode and Register
- Switch -DisableDevelopmentMode tells Windows to re-register an existing application package that has been disabled, unregistered, or corrupted.
Line " $ ($ _. InstallLocation) \ AppXManifest.x ml 'describes where the file is located manifest.xml... Looking at the files AppXManifest.xml, you will see a complex list of application IDs, executables, and a large number of visuals associated with the application.
After a reboot, all added application packages are downloaded and installed from Windows Store Store.
How to open PowerShell from the "Win + X" menu
This method is very convenient in Windows 10. Starting with Windows 8, Microsoft introduced the Power Users menu, which contains many useful elements such as "Control Panel", " Network connections”Etc. Of course, Windows 10 also has such a menu. It contains a PowerShell element and a PowerShell (administrator), the latter is exactly what we need.

To access this menu in Windows 10, press the Win + X keyboard shortcuts.
In the menu that opens, click the item PowerShell (administrator).
Opening PowerShell with Search in Windows 10.

In Windows 10, you can use the search icon on the taskbar. Click on the search icon and Type PowerShell, press CTRL + SHIFT + ENTER to launch PowerShell as administrator.
This also works in the start menu, just start typing PowerShell then click right click mouse on the appeared view Windows PowerShell and select Run as Administrator.
Launch an instance of PowerShell from Windows 10 Explorer

You can launch PowerShell from File Explorer. You may wonder why you need this. Let me show you an example scenario.
Hello everyone! Today is a small note on the topic, how to open powershell as administrator... Let me remind you PowerShell, this is a powerful programming and administration language from Microsoft, every year it is overgrown with an increasing number of cmdlets and functionality. Basically, it is a replacement for the Windows command line. Below we will consider the methods for opening and configuring it.
.
Methods for opening a PowerShell snap-in
Powershell is developing very well and with the release of Windows 10 it has already received version 5, but we have a different topic. So how do you open powershell? It's simple if in Windows XP, then nothing. as it is delivered separately, in all subsequent releases it comes as a built-in component. The most versatile way to open powershell is to press
Win + R and enter powershell

Pressing enter will start the PowerShell console, the only problem is that it will not open on behalf of the administrator. And as a result, many commands cannot be executed, below we see how to do this on behalf of the administrator.

How to run windows powershell as administrator in Windows 8.1 and Windows 7
You can open windows powershell through the start. In Windows 8.1, Windows 2012 R2, go to the System Tools - Windows item and right-click to run as administrator.

In Windows 7 and Windows 2008 R2 it looks like this Start> Accessories> Windows PowerShell

You can also create a shortcut in the task item and right-click on it and select the appropriate item

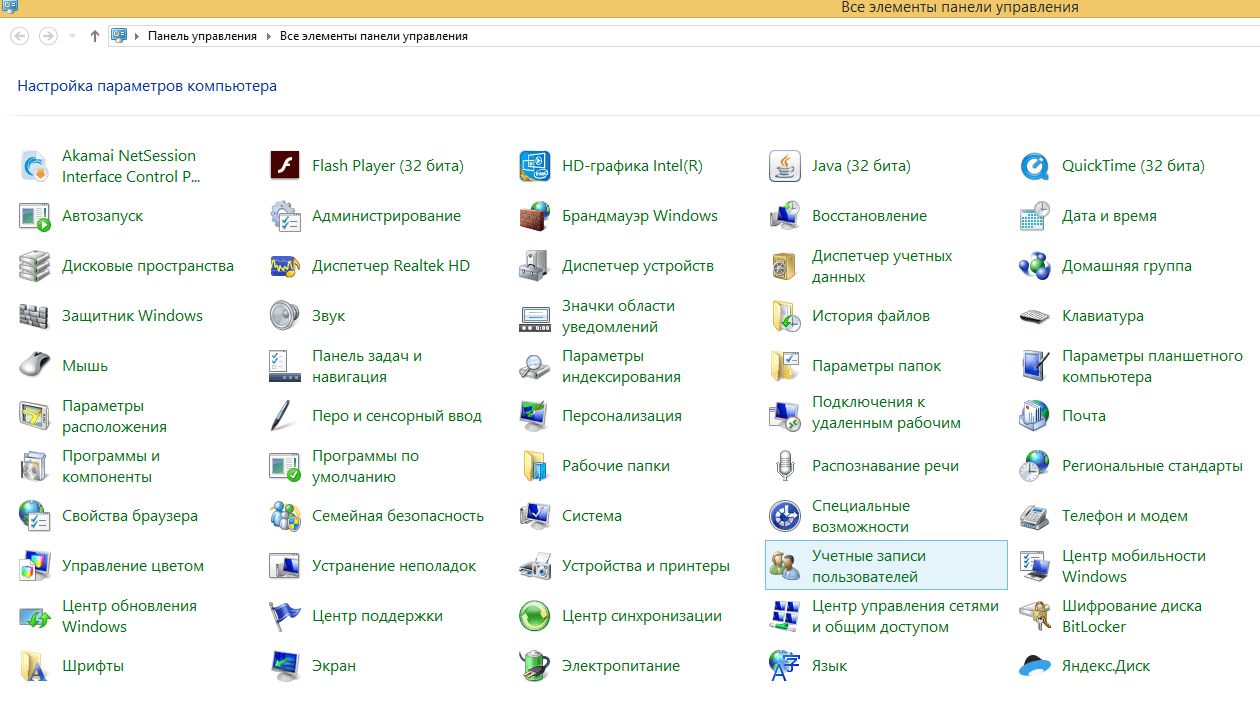
it would be convenient for PowerShell to always open as administrator, let's implement that. This is done in all versions of Windows in the same way. Opening the control panel

We click on it with the right mouse click and select the property item. You can immediately see the path to the file where it is located in the system.

Click the "Advanced" button. You will see additional properties. where you need to set the checkbox to run as administrator.

Everything is very simple. I am sure that now you will not have a question how to open windows powershell. It is also useful to change the font in the powershell window.
How to open PowerShell from the Start button context menu in Windows 10
Microsoft is increasingly focusing on the command line towards its strong language (PowerShell), and this is logical, since its capabilities for managing operating systems of the Windows family are almost limitless, or even more than in the graphical interface. Starting with Windows 10 version 1709, in the context menu, PowerShell has replaced the familiar cmd. Right-click on the start button in Windows 10 and from context menu, select the appropriate item:
- Windows PowerShell
- Windows PowerShell (administrator) is exactly what Windows 10 is in maximum privilege mode.

Start Windows PowerShell by using Windows 10 search
In Windows 10 and older versions, you can find PowerShell using a regular search, there is a special section for this. Click next to the Start button, the magnifying glass icon. In the search form that opens, enter the word PowerShell. You will be searched for all the options, among which you will find the shell. If you right-click on it, you can open it as an administrator.

Start Windows PowerShell from the Windows 10 Start Menu
To open PowerShell from the Start menu, open it and find the Windows PowerShell item, it will be in the form of a folder, open it and run the appropriate version.

If you right-click, then you can run the shell as an administrator and as administrator.

Additional and generic methods for starting the shell
There are also very specific methods for opening a shell with Microsoft's powerful language. The most clumsy, it's easy to find executable file and launch it directly from the location on the system. Let's go to your Windows 10 along the way:
C: \ Users \ username \ AppData \ Roaming \ Microsoft \ Windows \ Start Menu \ Programs \ Windows PowerShell
As a result, you will open a folder with shortcuts that are present in the "Start" menu, you can run them.

You can also run the original, executable file, which lies along the path:
C: \ Windows \ System32 \ WindowsPowerShell \ v1.0
And by right-clicking on it, you can download it as administrator, with maximum rights.

You can also run Windows PowerShell from the command prompt window, just enter the magic word in it and press Enter.

Well, I will also remind you of the method for starting a new task from the Task Manager snap-in. Open the "Task Manager", select the menu item "File - Run a new task"

In the window that appears, enter PowerShell.

Well, the last method I know is to launch PowerShell, via windows explorer 10, to do this, open Explorer, select the "File - start Windows PowerShell" menu item, there will be both modes.

The responsible administrator always has two accounts, the first has the minimum rights of an ordinary user for everyday tasks. The second already has the necessary administrative privileges, from under which he performs the settings of servers and everything related. In operating rooms Windows systems there is functionality that allows you, while in the session of one user, to run the application on behalf of another, which has more advanced rights. So in a regular user session, the system administrator launches the PowerShell shell on behalf of a user with different rights and calmly manages what he wants.
To run PowerShell as another user, you need to hold down the SHIFT button, then right-click on the PowerShell icon, select "Run as another user" from the context menu


Enter the username and password from the one you need account... As a result, the shell will run in the context of another user.

you can also start a new PowerShell window from the current user window, but with new rights, to do this, enter the command:
start powershell -credential ""
In the account request window, we indicate the login and password from the account that has the rights you need for your further work.

What is PowerShell ISE
You've probably noticed that the PowerShell ISE shortcut is everywhere, and you would like to know what it is. In a nutshell, this is a special shell in which you can write scripts and scripts in PowerShell using all the variety of cmdlets that Microsoft offers you.
One of the handy methods for starting PowerShell, which you use very often, is to assign a keyboard shortcut to it, and when pressed, it invokes the shell. It is done very simply. Open the window properties PowerShell, under the " Label"find the item" Quick call", by default it has a status of no.

Select it and click Shift key or Ctrl, or CTRL + SHIFT, as a result of which you will have a construction for the future combination and also press any key from the letter range, in my example it turned out CTRL + SHFT + C. It is with this combination that I will call my PowerShell shell. We save the settings. I also note that you can easily cancel it or change it to another.

I try to enter the shortcut combination CTRL + SHFT + C, as I see everything works fine.

Launching a shell from ISE
Until recently, I usually opened ISE from a regular PowerShell shell, and not vice versa, but what was my surprise that in my "File" I found the item "Run PowerShell.exe" and there is even a keyboard shortcut Ctrl + Shift + P.

powershell font changes very simply go to the properties on the Font tab, where you can set the size from 5 to 72.

you can also get to the properties from the utility window itself, click on the icon in the upper left corner and select properties

Here the font settings are slightly different, along with their change, the size of the console also changes.

On the Colors tab, you can set the font color in powershell and the window itself. Making it black for example, like the command line.

I also advise, if you are an active console manager, set the buffer size not to 50 commands, but at least 100.

It's hard to find someone who wouldn't wait new windows 10. Not only visual but also functional changes aroused interest. As conceived by the developers, built-in applications make life easier for users and make it more comfortable. Problems with the store are possible in different cases, but mostly they are related to the upgrade to version 10. In some cases, not only the store, but also the Edge browser is missing.
You can reinstall different ways... But they are all related to the utility PowerShell as the uninstall button for the Windows 10 Store in the app settings section is usually grayed out. For this reason, this article also contains detailed information about starting and working in PowerShell Windows 10.
Running the PowerShell utility
Find store information

Store installation

Removing the Windows 10 Store

A way to quickly set up a store
Also, for a simple installation of the Windows 10 store, you can enter and execute the following code in PowerShell:
$ manifest = (Get-AppxPackage Microsoft.WindowsStore) .InstallLocation + "\ AppxManifest.xml"; Add-AppxPackage -DisableDevelopmentMode -Register $ manifest
By mistake, you can run the code from the command line or the application " Execute". Remember to run your code from within PowerShell, as detailed earlier.
Easy installation of all removed packages
If you are only removing the store, you can simplify the installation process by running the command to install all remote Windows packages 10. Using the same code, it is easy to perform a bulk installation of all previously removed applications, thereby reinstalling all the necessary ones at once.
Enter code:
Get-AppxPackage -AllUsers | Foreach (Add-AppxPackage -DisableDevelopmentMode -Register “$ ($ _. InstallLocation) \ AppXManifest.xml”)
After that, all that remains is to press Enter. Windows 10 will take a while to restore everything.
- Sometimes, various causes of Windows 10 application failures can occur. installed antiviruses... Pay attention to them if the reinstallation does not go as it was written earlier.
- It is better not to get carried away with installing or removing built-in programs, as this may cause stability problems.
- Also, if the information on your PC is important to you, it is recommended to create backups before taking this or that action.
- The right action is also to create control point for recovery in case of unacceptable errors, problems that cannot be eliminated by simpler methods.
Related Videos
 Examples of jQuery function setTimeout () Javascript prevent multiple timers from running setinterval at the same time
 DIY amateur radio circuits and homemade products
 Crop one- or multi-line text in height with the addition of ellipses Adding a gradient to the text