Online generator of html pages. CSS3 generators. The best. What are catalogs of ready-made templates, and what are they for?
This simple on-line site page generator allows you to create your site pages as usual. text editor... He knows how to generate all the most necessary html tags in the body of a web page. This generator of html-code of the body of the site pages will greatly speed up the creation of site pages.
Some notes on using the site page generator
This generator of site pages is visual in the sense that it generates such html-code of the page so that in the browser in which you are working with this generator, the page will be displayed exactly as you see it in the editor window. This editor-generator generates only markup codes, that is, only HTML. It is not intended for scripting in programming languages such as JavaScript or PHP.
This editor is intended for novice webmasters who are just starting to learn the HTML markup language. But it will also be useful for experienced site builders for fast creation small pages or page templates. Novice webmasters will be attracted by the ability to quickly compare the changes made to the design of the page with how it is displayed on the change in the html markup of the page. This quick comparison allows you to learn HTML as quickly and efficiently as possible.
This editor is not designed to work with very large text and a large number of "heavy" pictures. If you want to create a web page with very large text and / or large images in this editor, then it is better to create a complete web page template first, copy the resulting html code into the web page file and only then insert the long text there and links to pictures. Remember that this editor is not a professional editor and is intended primarily for amateur and novice webmasters. Its main purpose is to help beginners in teaching site building.
Instructions for use
If you have ever used text editors such as MS Word, then you will not have any difficulties in mastering this web page generator. This editor can be used either to create the body of a web page from scratch or to fix an existing web page to make your own changes.
If you start creating your page from scratch, then you need to erase my initial text in the editor window and start entering your text, pictures and doing your own formatting there. When the work is finished, you need to click on the "Code" button at the bottom of the editor screen and copy the resulting code into the file of your web page. And save this file. Please note that you need to copy the received codes only into the body of the web page, that is, only between the tags
and
... The tags themselves body are not created by the editor.
If you want to edit some ready-made web page, for example, one that was not created by you or that you created a long time ago, then you need to click on the "Code" button at the bottom of the editor screen, delete all my initial codes from the editor window and copy there codes from the web page file. Please note that you need to copy the codes only from the body of an existing web page, that is, only what is between the tags
and
... The tags themselves body you do not need to copy to the editor. Then you need to switch back to visual editing mode. To do this, you need to click on the "Design" button at the bottom of the editor window and start making changes to appearance pages.
It is clear that there are two ways to edit the body of a web page in this editor. Or in the "Design" mode to edit visually or in the "Code" mode to edit immediately in the codes. Therefore, for novice webmasters, this editor is very useful for learning. You can make some small changes to the web page in visual mode and immediately see how the code has changed by switching to code editing mode. Or, conversely, you can make some small changes to the code of the web page in the code editing mode and immediately see how your web page changes by switching to the visual editing mode (or to the viewing mode using the "Preview" button) ...
Normal text editing
The top menu bar contains buttons for general text editing. They have standard designations that are accepted in any other text editors. Therefore, we will only briefly go over them.
Everything works very simply. You either select some part of the text and click on the top menu button so that this part of the text is formatted accordingly. Or, if nothing is selected, then you switch to the mode of the corresponding button, that is, if you continue to type text, the text will be typed in the mode of the button that you just turned on.
Also, as with any text editor, there are modes that apply only to a paragraph as a whole and modes that can be applied to a part of a paragraph.
A brief description of all the buttons at the top of the menu in order of their arrangement:
- Paragraph. Selects the heading level. Applies to the entire paragraph.
- Fonts.
- Font size.
- Font color.
- Bold font.
- Italic font.
- Underlined font.
- Strikethrough font.
- Left alignment. Applies to the entire paragraph.
- Centering. Applies to the entire paragraph.
- Right alignment. Applies to the entire paragraph.
- Bilateral alignment. Applies to the entire paragraph.
- Horizontal line. It is neither a paragraph thing nor a part of a paragraph. It's just inserting a full-width horizontal line.
- Superscript.
- Subscript.
Basic html editing
The middle menu bar contains buttons for typical editing of a web page, as well as service buttons for ordinary editors.
Description of all buttons at the top of the menu in the order of their arrangement:
- Create a hyperlink. Be sure to select with the mouse the text or picture, when you click on which you want to go to another web page. After highlighting, click on the menu button and open a window in which you must specify the address where the transition will go (URL) and the transition conditions (target). You can set the following conditions:
- It’s empty. By default, a new page will open in the same window.
- _blank. The new page will be displayed in a new browser window (or in a new browser tab, depending on the specific browser settings).
- _parent. The new page will be displayed in the parent browser window (or tab). If there is no parent window (or enable), then this is an analogue of the _self condition.
- _self. The new page will be displayed in the same window as the link. This is analogous to the "Empty" mode.
- _top. If a site page with frames (that is, split into several windows), then the new page will be displayed in the entire browser window. In the usual case, this is also analogous to the _self mode.
- Cancel hyperlink. Select the text of the hyperlink FULLY. If you select only part of the hyperlink text, the unselected part will remain the hyperlink. For example, if only the central part of the hyperlink text is selected, then two hyperlinks are formed with the same address on the unselected texts.
- Insert a picture. Place the cursor in the place where the picture should be and press the button. In the window that opens, set the path to the image (Image URL), the description of the image (Image Description), the alignment of the image on the page (Alignment), the width of the border (Border) and the margins of the image from the text (or other elements on the page horizontally and vertically (HSpace , VSpace) .You can set the alignment of the picture as follows:
- It’s empty. By default, this is left-aligned.
- BaseLine. The text (and other elements of the page) located with the picture in one paragraph will be located as the creators of your browser decided.
- Top. The text (and other elements of the page) located with the picture in one paragraph will be aligned to the top of the picture.
- Middle. The text (and other elements of the page) located with the picture in one paragraph will be aligned to the center of the picture.
- Dottom. The text (and other elements of the page) located with the picture in one paragraph will be aligned to the bottom of the picture.
- TextTop. The text (and other elements of the page) located with the picture in one paragraph will be placed above the picture. (Not supported by all browsers.)
- Absolute Middle. (Not supported by all browsers.)
- Absolute Bottom. (Not supported by all browsers.)
- Left. The picture will be placed to the left of the text (and other page elements) that is in the same paragraph with the picture.
- Right. The picture will be placed to the right of the text (and other page elements) that is in the same paragraph with the picture.
- Cancel Formatting. Undoes the formatting that was done with the buttons top line menus that relate to formatting part of a paragraph. It works in the same way as the top menu buttons, when you need to undo the formatting, that is, select the desired piece of text and click on this button. The convenience of this button is that with one click it immediately removes all formatting, of all types that were in the selected fragment.
- Creating and editing a table. The button is used to create a table at the cursor location or edit the selected table. When creating a table, you need to set the following parameters:
- Rows - number of rows.
- Columns - the number of columns.
- Width - the width of the table. It is set either as a percentage of the screen width or in pixels.
- Border - the width of the cell borders. If you leave the value at 0, then the borders of the cells will not be visible.
- CellSpacing is the distance in pixels between table cells.
- CellPadding is the distance in pixels from the cell border to the text inside the cell.
- Alignment - alignment of the table into pages:
- Default. By default, as set by the developers of your browser.
- Left. The table is aligned to the left edge of the page.
- Center. The table is located in the center of the web page.
- Right. The table is aligned to the right edge of the page.
- Create one column to the left of the cursor. If several columns are selected, then the cursor is considered to be on the last column that was selected.
- Create one column to the right of the cursor. If several columns are selected, then the cursor is considered to be on the last column that was selected.
- Create one line above the cursor. If several lines are selected, then the cursor is considered to be on the last line that was selected.
- Create one line below the cursor. If several lines are selected, then the cursor is considered to be on the last line that was selected.
- Remove one column from the cursor. If several columns are selected, then the cursor is considered to be on the last column that was selected.
- Delete one line from the cursor. If several lines are selected, then the cursor is considered to be on the last line that was selected.
- Create a numbered list. Or select some paragraphs and click on the menu button. In this case, all these paragraphs become elements of a numbered list. Or put the cursor in the right place, click on this menu button and then all the paragraphs that you enter automatically become elements of a numbered list.
- Create a simple list. Select some paragraphs and click on the menu button. In this case, all these paragraphs become elements of a simple list without numbering.
- Removing indentation. The cursor should be on the paragraph, the indents of which we want to remove. You can select the entire paragraph or only part of it.
- Indentation. The cursor should be on the paragraph where we want to indent to the left. You can select the entire paragraph or only part of it. The indentation is created for the entire paragraph as a whole (and not just for the first line).
- Rollback all changes back. Until you clicked on the "Code" or "Preview" button, you can delete all the changes made and return to the state that was the last time you viewed the code or viewed the page.
- Restore all removed changes forward. If you have rolled back the changes more than necessary, you can restore the removed changes. Likewise, if after rolling back the changes you switched to the "code" or "Preview" mode, then you will not be able to restore the changes.
- Destroy the selection while copying the selection to the Windows "pocket". (Ctrl + X)
- Copy selection to Windows pocket. (Ctrl + C)
- Paste the contents of the Windows "pocket" where the cursor is. (Ctrl + V)
Additional html editing
The third menu bar contains mainly buttons for creating and editing forms, as well as some common additional opportunities any editor.
List of buttons on the third line of the menu in order of their arrangement:
- Create a form. It is necessary in the open window to enter the name of the form, the address of the script that will process the data of this form and the method of data transfer (post or get).
- Create Check Box. In the open window, enter the name of this form of selection, the value taken upon selection and indicate whether or not the selection checkbox is initially in this form.
- Create a radio button. In the open window, enter the name of this form of selection, the value to be taken upon selection and indicate whether this button was initially selected or not. When creating a menu from radio buttons, do not forget that all radio buttons of the same menu must have the same name.
- Create a space for text entry. In the open window, enter the name of the pad for entering text, the width of the pad by the number of characters, the number of pad lines, the location of paragraphs and scroll bars, and the initial text in this field.
- Create a Run button. In the window that opens, write the name of the button and the text that will be written on this button.
- Create a "Run" button in the form of a picture. In the window that opens, write the name of the button and the address of the picture that will play the role of the button.
- Create a button to clear the completed form and return all default values. In the window that opens, write the name of the button and the text that will be written on this button.
- Create a hidden field. In the window that opens, write the name of the hidden field and its value.
- Create a field for entering a password with asterisks. In the window that opens, write the name of the password field, the length of the field and the maximum number of password characters that the user can enter when entering his password.
- Create a text box. In the window that opens, write the name of the text field, its size in characters, how many characters the user can enter and the initial text in this field.
- Send to print.
- Select all.
A CSS code generator is a very handy tool that can save a web developer a lot of time and avoid unnecessary mistakes. In addition, your code will become more readable. In this article, we have selected a number of useful CSS code generators in our opinion.
CSS Click Chart
CSS CheatSheet
Spritebox
Pixel Map Generator
Clean CSS
CSS Animate
Well guys, animation? Apply and play with CSS transitions. 
UI Gradients
WAIT! Animate
Creating custom repeating pauses between CSS animations has never been an easy task. But with this application, the complexity of the procedure is reduced to zero. 
CSS3 Generator
CSS Type Set
Ever wanted to see what the different fonts look like? Go to CSS Type Set. All you need to do is enter text and select font options. 
Enjoy CSS
Flexy Boxes
If you are having trouble getting your head around flexbox, then you should try Flexy Boxes. This appendix compares different flexbox versions and syntax interpretations. 


Good day! I'll explain right away about the design of the post: once, having stumbled upon, I was not very pleased with the immense amount of information and navigation elements in the presented generators, and even more - their user interface! Outraged that the tools for working with styles- they themselves are not kept within the framework of the possibilities that they represent ... how so ?!
When you are engaged in creativity, you want to have available tools and tools to master and work with which you spend minimum effort and time. As a result of all this, the thought came: select the best tools and organize them for frequent use (a la navigation menu, such as: Quick Launch).
Hopefully for many, this know-how will be a good helper in the process of web development.
CSS generators:
- CSS3.me- simple, elegant and at the same time feature-rich CSS generator, with a beautiful domain
- CSS3Maker.com- very extensive functionality for working with new CSS3 features, cross-browser, flexibility and a full set of everything you need;
- CSS3Generator.com- nothing superfluous, for lovers of classics and simplicity, in one word "old school";
- Colorzilla.com- a gradient generator for creating beautiful background images, with support for most browsers and without the use of images (pure CSS).
WEB tools:
- Button builder- a tool for designing buttons, with exposure to the rhythm of Web 2.0. Among the functionality, we can note the ability to customize: padding, text size, rounded corners and the choice of gradient colors;
- Form builder- a form designer, which allows you to customize the appearance of both the form as a whole and its individual elements;
- Icon builder- Feel like a free artist creating new icons for your buttons, menus and favicons;
- Ribbon builder- to create stylish ribbons in pure CSS, use this tool, with a wide range of settings and options.
Pictures in the form of buttons (icons) at the beginning of the article - clickable!
If you have any suggestions or know interesting tools that can support this idea, please speak up. Please do not throw rubbish, you only want to add exclusive to the assembly. Thanks.
CSS generators and online CSS services simplify the web development process. With their help, you can get ready-made cross-browser code for various interface elements, test how the site looks on screens mobile devices, choose a color palette for the site and much more.
Generators, online CSS services
updated 05.04.2017
- a service for generating browser prefixes and more.

- a huge collection of color palettes, including for creating material and flat designs.

- generator of color schemes.

Auto prefixer online- adds the required vendor prefixes and removes unnecessary ones in your CSS.

- a service for the selection of color schemes for the site, alternative shadows, the definition of colors from the picture.

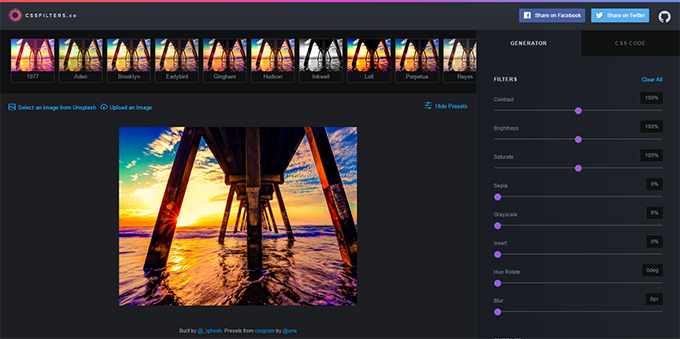
cssFilters- custom filters and filters like Instagram for images.
Type Scale- visual calculator for calculating the size of headings.

TRANSPARENT TEXTURES- a collection of transparent seamless textures for your site.
![]()
Image Slider Maker- an online service for creating a responsive slider with pictures.

- 3D editor for creating 3D models in pure CSS.

Web Code Tools- a code generator for creating CSS effects, HTML code for various elements, Twitter cards and other useful things.

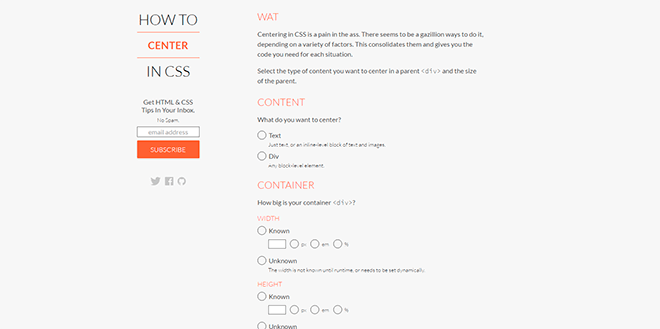
HOW TO CENTER IN CSS- a style generator for centering (aligning) a block or text using various techniques. There is also support for various Internet versions Explorer.
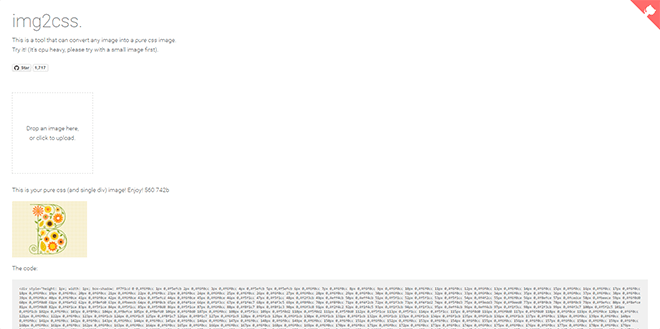
img2css Is a tool that converts images to CSS code, it gives you one div of code that you can use in your projects.
CSS Apple Device Generator- generator of markup and styles for Apple devices... In the Device Type field, you can select the type of device, with using Device Width - set the width and also select the screen color in the Device Inner color field.

Web Color Data Is an online service that allows you to get the color palette of any web page.

The Simpsons in CSS- a collection of your favorite characters in pure CSS.

Mobile phone emulator will test how the site looks on the screens of mobile devices. Cell phone terminal- field for selecting device type, window size and orientation, Website to terminal- field for entering url-address.

CSS Load- great selection of loading indicators. Editing is provided - you can change the color, size, rotation speed, and then download the resulting code. To switch to Russian, click the flag icon in the upper left corner of the window.

Flexplorer- a platform for demonstrating the capabilities of the Flexbox model. You can set your own parameters for the blocks and see an example in action.

Screenfly- this service will help you test how your site will look on the screens of devices of different resolutions. To use the service, you need to enter the url-address in the search bar, to select the type of device, use the top menu.

Long shadows- a service that allows you to create so-called "long shadows" for blocks and for text.

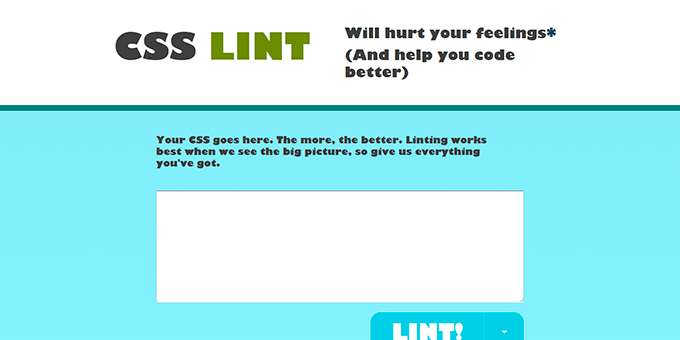
- a web application that checks CSS code for errors. The results of the check are displayed in the form of a table with an indication of the error lines, and an explanation. When checking, you can use different parameters, determining its depth.
Responsive Grid System- CSS framework for creating a flexible grid based layout. Chapter Let’s Go to Work allows you to select and download the desired page layout using from 2 to 12 columns, and the calculator in the section Or Make Your Own will help you define your own markup.

CSS TEXT TO PATH GENERATOR will generate html-code for the curved text.

3D Ribbon Generator will help you create beautiful 3D ribbons. You need to choose a design option, as well as set the color and size of the elements.

Paletton Is an online service for selecting a color scheme for your website. The COLOR TABLES tab will open the palette, as well as various color combinations, and the round switches under the service name will allow you to choose the number of combined colors.

CSS3 generator Is an online service that allows you to easily generate CSS3 code for specific properties, such as:
border-radius, box-shadow, text-shadow, RGBA, @ font-face, multiple columns, box resize, box sizing, outline, transition, transform, gradient. You just need to select the property that you want to use in your browser styles, set the required parameters for it, and then copy the resulting code into your project.

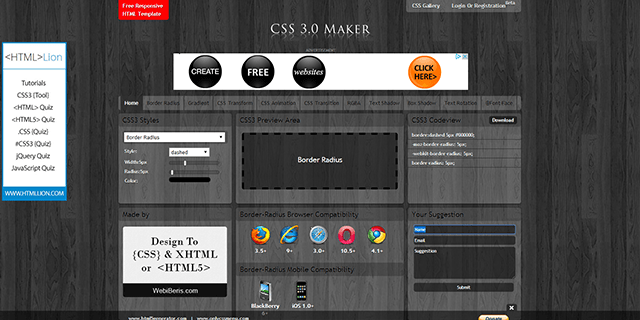
CSS 3.0 Maker- a service similar to CSS3 generator, there is another interesting feature - Text Rotation.
- an indispensable service for creating list-based navigation bars in both pure CSS and using jQuery... In addition to the basic layout, it offers ready-made style options for vertical and horizontal navigation bars.

Contains a large collection of CSS properties, on the site you can find all sorts of resources and tools that will make your css code perfect.

Border Image is an online CSS3 border-image property generator that allows you to animate block borders with images.

- generator of HTML + CSS templates. Thanks to this resource, you can easily create a page layout based on a block layout. A big plus of the resource is that you can make a layout of both fixed and "rubber" widths, without having to rack your brains over how to press the "footer" to the bottom of the browser window. We recommend to all beginner layout designers!

CSS3 Please! Is a very handy service for creating cross-browser code for CSS styles such as border-radius, box-shadow, linear-gradient, transition and many others. By setting the style values in the editor, you can immediately see the resulting result using the example of the block located in the window on the right.

- a unique collection of free online applications for your creativity, with which you can easily create your own elements user interface such as ribbons with an inscription, registration forms on the site, icons and buttons.

CSS sprite generator save you the hassle of creating sprites for your web pages.
![]()
Here is an example of masterly using the power of CSS3. You will be able to create complex seamless backgrounds for your website. 37 designs are made in various styles, and we are sure that you will find a sample to your liking!

Designed for all fans of CSS3 features. The test returns the supported attributes of your browser and by clicking each property you can see if there are values that it does not support.
When working on the next project, every web developer who has raised his hand in the slightest degree has to perform routine tasks. It takes a lot of time and effort to work with CSS tables, and with the advent of new standards and functions, along with unique capabilities, the work on coding has also increased. Fortunately, there are bright minds in the vastness of the global network, who quickly rushed in advance, without too much hesitation, took and created a considerable number of the most useful online tools that make life much easier for web developers and designers.
Today, few people will be surprised by some online generator, whether it is highly targeted applications for generating code, a separate button with a linear gradient effect, or blocks with rounded corners and shadows, or whole combines (collections of tools) that include the ability to process almost all CSS3 features. The most important thing in working with such web applications is that you immediately, "without leaving the checkout", see the result of your work directly in the browser and immediately get ready code with all the functions and parameters you need.
It is precisely about such useful web applications that we will talk about today, and in particular, we will consider the most interesting CSS3 code, which will not be superfluous in the toolbox of any web developer or website designer.
In my opinion, it is one of the best online CSS3 code generators, including a complete set of tools for working with CSS3 functions. You can experiment with CSS3 property settings with ease, in real time, and immediately see the end result.

There are great tools available for processing and generating code, such as:
- Border Radius- block border style with rounded corners
- Gradients- choose the style and adjust the parameters of the function of the gradient fill of the page elements
- CSS Transforms- transform the object as you like, rotate, squeeze along the coordinate scale
- CSS Animations-add animation effect for web page elements
- CSS Transitions- CSS properties changes smoothly and over time
- RGBA- select and change the color palette, as well as the level of transparency of the elements of the web page
- Text shadow- text effect
- Box shadow- add shadow to elements
- Text Rotation- rotate text in any direction
- @Font Face- some interesting combinations for working with web fonts
Different buttons are important, different buttons are needed! just one of those tools with which you can quickly and easily diversify the style of such an important element of any site as a simple button. A wide range of CSS3 property settings, real-time preview of the result, will allow you to create your own style for the buttons of your site.

At one time, getting acquainted and testing various, I came across one interesting tool that showed the world, a wonderful bourgeois. Comrade did a great job and created an easy-to-use, highly customizable online tool for creating buttons. I liked the idea and decided that it was useless for our brother to stare at their squiggles, rolling up his sleeves, reworked the sources and made a more understandable version of this wonderful tool for the Russian-speaking user, and also added the missing function to generate a linear gradient code for the background of the buttons. As a result, it turned out to be pretty nimble, understandable and simple.
The text header of the site with an unusual 3D effect, always attracts attention. To create such a miracle without resorting to using additional image files and javascript, this wonderful online generator will help you 3D CSS Text.

Guaranteed support by all modern browsers: Firefox, Chrome, Safari, Opera and more recently IE10! In the process of manipulating the parameters, you will always see the final result of your work. The set of fonts is small, it is updated from time to time, but the main thing is the correct display of the Cyrillic alphabet, that is, by typing in Russian, you will not see various krakobryazy, as it happens in other web applications of this kind.
Another set of tools for editing CSS3 parameters online, which includes processing and code generation for properties text-shadow(shadow to text), linear and radial gradient, transform(various types of element transformations). A wide range of styling settings for block web elements are presented in the toolbox Box Properties.

From the name it immediately becomes clear that we have yet another generator for creating buttons using CSS3 properties. Almost all functions necessary for work are supported. By manipulating the parameters, adding a little imagination, you can achieve amazing results.

Standalone web applications for working with CSS are great, but even better when you have a complete set of tools at your fingertips. - a service about which we can say "All in one". This site has collected as much information as possible to try and help you learn CSS and improve your web design skills. Here you will find a range of quality CSS resources. High-quality tutorials (lessons) and visual examples of working with CSS. An impressive set of online generators covering almost the entire spectrum of CSS properties.

- Quickly check which CSS3 properties your browser supports.
That's probably all for today. The list is certainly not complete, it is simply not possible for one person to cover the entire list of interesting online applications that can significantly reduce the time spent working with CSS. I am confident that these free web tools will definitely improve the level of your work. You can easily take advantage of these out-of-the-box solutions, while speeding up the website development process. Well, I can only wait for your comments and opinions. Good luck and all the best!
With all respect, Andrew
 Bugs in Singularity?
 Just Cause 2 crashes
 Terraria won't start, what should I do?