How to install SATA drivers on an already installed Windows XP. Installing Windows XP How to integrate sata driver into vhd file
- 1 Alexey Added 15:31 July 9th, 2013:
Is it possible to integrate drivers for SATA in this way? Specifically for Windows 7
- 2 Alexey Added 15:36 July 9th, 2013:
Sorry I didn't finish reading! Can you provide more detailed instructions? And such a question, how can you then push boot.win back into the image so that it remains bootable?
Thank you in advance!!! - 3 dontfear Added 03:52 AM July 10th, 2013:
Alexey, where is it more detailed? Well, after you unmount boot.win, copy it to the distribution or to iso.
- 4 Arthur Added 07:04 AM August 15th, 2013:
Hello dontfear! I did everything according to your instructions, but when I start the installation with a new boot.wim, I get the error “Windows failed to start / A recent hardware or software change might be the cause ……
… .File: \ windows \ system32 \ boot \ winload.exe
Status: 0xc0000001
Info: Whe selected entry coukd not be loaded because the application is missing or corrupt. "
I install Win7x64 from a flash drive. - 5 dontfear Added 07:32 AM August 15th, 2013:
Arthur, show the integration log and which distribution? In general, help in VK))))
- 6 Royal Electro Added 20:02 October 18th, 2013:
Did it exactly as described. Everything works great. GImageX is not needed! Thank you very much!
If someone does not get up or succeed, try again. And understand the first point. Will explain. I have an ASUS P8Z77-V DELUXE board, the site ru.asus.com, scored the full name of the mother in the search, and returned the result. I downloaded firewood from there from the USB section to Intel USB 3.0 and ASMedia USB3.0. It turned out great. Firewood can also be on the installation disk for the motherboard, but not quite fresh.
I hope someone will come in handy =)
Good luck everyone! - 7 Antoshka. Added 13:16 November 25th, 2013:
dontfear, I need your help. Please write here: ( [email protected]). I am having problems. I ask for your help :)
- 8 ZZ Added 17:10 February 23rd, 2014:
Thanks. Briefly and clearly. Only I have index: 1.
I made myself 2 body shirts for adding firewood to the main distributor and installer. - 9 Andrew Added 02:31 AM April 8th, 2014:
- 10 Alexey Added 23:18 July 23rd, 2014:
- 11 valentine Added 11:00 August 17th, 2014:
Thank you very much, everything worked out)))
- 12 botanig Added 09:13 PM August 18th, 2014:
And where to find the USB 3.0 driver pack. I want to make an assembly so that the 7 can be installed on any computer ..
- 13 vad Added 05:44 AM March 8th, 2015:
- 14 Yahyo Added at 16:09 May 17th, 2015:
Hello, when I type dism / mount-wim /wimfile:boot.wim / index: 2 / mountdir: mount. I have an "error: 0xc1510113
The specified image does not exist in the .wim file "and it shows me the address C: \ windows \ Logs \ DISM \ dism.log, help me how to solve this problem - 15 Leonid Added 03:15 AM June 18th, 2015:
Hello. I do everything according to the instructions, but when I follow step 5, I get “error: 2
The system cannot find the file specified. "
Tell me what could be the problem? - 16 sergey Added 11:47 AM July 9th, 2015:
write that you can insert windows updates. Where can I get them?
- 17 Paevl Added 15:13 October 23rd, 2015:
when you enter the command dism / image: mount / add-driver: usb3 / recurse An error occurs in cmd 0xc0000135
- 18 Alexey Added 13:07 February 10th, 2016:
Thank you very much for your help, everything worked out with USB3.0.
- 19 Serg Added at 00:56 June 8th, 2016:
I helped a lot with the installation. Thanks!
- 20 Sergey Added 00:09 July 13th, 2016:
Thank you very much for the helpful information! It helped, HP laptop without usb2, only usb3 and no DVD drive. Good luck!
- 21 Serge Added 00:05 September 7th, 2016:
What about integrating the drivers into install.wim as well - not necessary?
- 22 Serge Added 00:24 September 7th, 2016:
I completed all steps 1-8, during installation the same error - no drivers were found. Assembly w7_x86_kdfx_reactor, laptop HP 15-ac610ur, need help, what did I do wrong?
- 23 Anatoliy Added 18:22 October 5th, 2016:
Credit, I suffered for a long time, until I came across your page, thanks, I downloaded the sp1 drivers in 2008 r2, and raid and usb 3. thank you human.
- 24 Rain Cat Added 23:35 October 14th, 2016:
While looking for this article (well, not necessarily this one, but describing this method of integrating files) I came across several manuals on how to do the same using third-party programs. Well, suppose we trust these third-party programs to make some changes to our distribution kit (in fact, not) ... But there are instructions for this program, which are a couple of three times longer than this one. At least that, but I do not understand why this should be done by a third-party program with a never-intuitive interface and a sequence of actions, if the issue is solved with three lines in the terminal.
But - to each his own, probably.
Thanks for the instruction! - 25 Rain Cat Added 23:52 October 14th, 2016:
For those who “didn't take off”. Check the firewood (whether it matches the hardware, whether the bitness of the drivers matches the bitness of Windows). Make sure that you are trying to add not the driver installer, but the unpacked drivers (not something. Exe, but what is unpacked from it).
Well, in order not to suffer once again, you can really add drivers to install.wim in the same way. - 26 dickbutt Added 01:56 AM November 29th, 2016:
It may not take off on certain laptops, for example, XPS13 9343, when loaded manually, the drivers are installed, with integration - no,
Option 1 - after the 5th step, just copy the folder with firewood to the mount folder and go to the 7th, when installing by hand, load the firewood from the folder
Option 2 - Push install.wim and ei.cfg into an image from 10k or 8k
Both versions are tested
Good afternoon, dear readers and guests of the blog, I think many of you have met such a situation that when you try to install Windows 7 on a new laptop, which most often has a fresh chipset and usb ports 3 versions, you may not see the disk where you can install the system, and the whole problem is in the distribution kit of seven, since it does not have usb 3.0 support, today I will teach you and show you how to integrate usb 3.0 drivers into the windows 7 distribution kit.
And so the problem we identified with you, although the modern operating system Windows 10 came out, not everyone likes it, since there are a lot of glitches there, I can only cite the latest ones:
- the sound on the windows 10 computer does not work, the sound is still half trouble, cameras or wifi modules are much more significant
- black screen when turning on a windows 10 laptop and the list goes on for a very long time
As a result, many people stay on Windows 7 and want to use it on new technology as well. One of my friends bought a laptop HP 15-ay043ur, 15.6 ", Intel Pentium N3710, 1.6GHz, 4GB, 128GB SSD, Intel HD Graphics 405. It did not have an operating system, it was DOS. My friend prepared a bootable USB flash drive with Windows 7 with Using the USB DVD Download Tool, it launches the seven installer and when you select the drive for installation, it sees the following.
No device drivers found. Verify that the installation media contains the correct drivers and click OK.
As you can see, he does not see a USB 3.0 flash drive and the installation wizard cannot start, and it is logical that you either need to find a distribution kit with already added usb 3.0 drivers in windows 7 or do it yourself, which we will do.

Integration of drivers into a windows 7 image can be performed using several methods, both using additional utilities, and using the command line and its utilities, we will consider several options.
Not the easiest utility for stitching the necessary drivers, but the utility is very high quality and with great functionality.
Download NTLite from the official site https://www.ntlite.com/download/
Immediately I advise you to install only stable versions, I do not advise beta. Choose the NTLite version for your windows 7 bit depth.

Do not tricky installation of the NTLite utility, click on a couple of times. We launch it and select a free license, this will be enough for us.


Add drivers to windows 7 image using EZ Installer
I would like to note right away that the EZ Installer utility from ASUS is suitable for adding USB 3.0 drivers from Intel chipsets 8, 9, 100 series. The utility is simple and designed to automatically add USB 3.0 drivers to your Windows 7 distribution. It is suitable for users who have little experience with Windows systems.
Let's immediately tell you how the asus ez installer works, you have an ISO image with Windows 7 and from it the utility will make a new one, either a DVD or a usb media, to which it will add a USB driver. The ISO image must be mounted on the system, if you have WIndows 8.1 or 10, then you can do this by double-clicking on the ISO, if your host system version is 7 or lower, you will have to use daemot tools or alcohol 120.
I want to note that in my practice there were cases that when using the asus ez installer
how to use asus ez installer
Run xHCIWin7InstSln.exe, the ASUS EZ installer will open, you need to select either:
- Windows 7 disk for USB-drive> for this you need to insert a bootable USB flash drive with the distribution of seven
- Windows 7 ISO disk image> you will need to mount an ISO image

We agree with the license agreement and click on.

As you can see. the utility was able to determine the mounted distribution in the D: \ drive, click next.

At this stage of the wizard, you need to specify the folder where the new ISO Image will be created and check the Compatibility mode checkbox.

After a while, the integration of usb 3.0 into the windows 7 distribution will be completed.

Now you just have to test the ez installer in practice.
Add drivers to windows 7 image using USB 3.0 Creator Utility
Yes, Intel has its own utility in order to add drivers to the windows 7 distribution, since most of the chipsets in technology in Russia are theirs.
You can download USB 3.0 Creator Utility from the link https://downloadcenter.intel.com/download/25476/Windows-7-USB-3-0-Creator-Utility

Run the utility, next to it is the folder with the drivers, the utility works only with a bootable USB flash drive on which there is already a distribution kit, ISO cannot be inserted.

As a result, USB 3.0 Creator Utility will integrate your drivers into the distribution kit for 15 minutes.

Add drivers to windows 7 image using USB Patcher
USB Patcher utility for integrating USB 3.0 drivers from Intel chipsets 8, 9, 100 series. The utility itself is very simple, when you run it you will have three options:
- Create a Windows 7 installation disk with a USB device> Create a distribution kit on a flash drive
- Create a Windows 7 installation disk with a CD> create a bootable disk
- Create a Windows 7 installation ISO feli for a CD> create an ISO with drivers
I choose the third option, for example, you have the right to use the one that you need.

We indicate the path to your ISO image with seven and click next

Choose where the new ISO with integrated USB 3.0 drivers will be saved

Well, actually, we all press Start to start the process of adding drivers.

Everything was successfully completed.

Summary of adding USB 3.0 drivers
I hope you have mastered all the methods, as you probably noticed, the first method has a huge advantage, and it lies in the fact that you can add a bunch of drivers using this method and not only USB 3.0, but also, for example, on a network card. If I find any other useful utilities I will definitely add to you here, I hope you now understand that adding drivers to a windows 7 image is very simple.

In the previous material (Simplified installation of Windows XP), the installation of Windows XP was described with switching the operating mode of the SATA controller in the BIOS to IDE Mode (compatibility mode). This was done because the original Windows XP did not have drivers for the onboard SATA controllers from Intel (starting with ICH7-M) and some models from AMD (starting from SB700) that run in AHCI mode.
The difference is that in the AHCI mode, the NCQ technology works, which optimizes the trajectory of movement of the hard drive heads. This technology is disabled in IDE Mode. In practice, NCQ technology allows the hard drive to work a little faster simultaneously with several applications. You can get acquainted with the results of comparison of these two modes in this material: NCQ technology. Should I enable AHCI? The previous article (Simplified Windows XP Installation) described installing Windows XP with switching the SATA controller operating mode in the BIOS to IDE Mode (compatibility mode). This was done because the original Windows XP did not have drivers for the onboard SATA controllers from Intel (starting with ICH7-M) and some models from AMD (starting from SB700) that run in AHCI mode.
A logical question may arise: what is the difference between normal mode (AHCI) and compatibility mode (IDE-Mode)? In fact, the difference lies in the NCQ technology. It is enabled in AHCI mode, disabled in compatibility mode. In practice, this technology provides faster operation of the hard drive with several applications at the same time.
The difference is that in the AHCI mode, the NCQ technology works, which optimizes the trajectory of movement of the hard drive heads. This technology is disabled in IDE Mode. In practice, NCQ technology allows the hard drive to work a little faster simultaneously with several applications. You can get acquainted with the results of comparison of these two modes in this material: NCQ technology. Should I include AHCI?
Important note: SATA drivers do not need to be integrated on all laptops. This applies primarily to laptops based on Intel chipsets, as well as laptops on AMD 7 series and higher chipsets. For other laptops, no drivers need to be integrated. Also, it is not necessary to switch the operating mode of the hard drive to the BIOS. The original assembly of Windows XP already contains all the necessary drivers. That is, just put the boot from the disk in the BIOS and install the system.
If you have a chipset from AMD 7th series (bundle 780G + SB700), then it is better to use a simplified installation of Windows XP. The fact is that at the moment there are small problems with the integration of SATA drivers.
So how do you put Windows XP in AHCI mode? There are three main ways:
1. Write the drivers to a floppy disk, insert it into a USB floppy drive, when installing Windows XP, press F6 and select the required driver;
2.Integrate the SATA drivers into the Windows XP already installed in IDE Mode, and then switch to AHCI in the BIOS. If you do not integrate the drivers, but simply switch the operating mode, you will get a blue screen and reboot;
3.Integrate SATA drivers into Windows XP distribution.
Let's take a look at each of these methods:
The first method is the simplest, but you need a floppy drive to implement it. It is not always possible to buy an external USB drive. If the second and third do not work, then you can safely resort to this method, fortunately, floppy drives are very cheap;
The second method is good if there is already a system with customized programs, drivers that are too lazy to rearrange. How to integrate drivers into an already installed system is described in this material: Integrating SATA drivers into an already installed Windows XP;
The third method is optimal in terms of simplicity, time and cost. It is this method that will be described in this article.
Now you can go directly to the description of installing Windows XP with the integration of SATA drivers.
To install Windows XP with driver integration, you need to do the following:
1.Integrate SATA drivers into Windows XP distribution and burn it to disk;
2. Enable boot from disk in BIOS;
3. Install Windows XP;
4. Install drivers on the laptop.
Important note: if you do not have a CD / DVD drive, then you should install Windows XP from a flash drive or from a memory card. How to do this is described in these guides: Installing Windows XP from a USB flash drive or memory card and Installing Windows XP from a USB flash drive using WinToFlash.
1. Integration of SATA drivers into the Windows XP distribution and writing to disk
For integration we need:
1.Disk with Windows XP or Windows XP image in .iso format. It is recommended to use original MSDN assemblies;
2. A set of utilities and drivers. You can download it from these links: download / download. Download the file, run it and unpack it into a folder convenient for you;
3.Clean CD or DVD.
Important note: if you do not know which version of Windows XP to install on your laptop (32-bit or 64-bit), then I recommend that you familiarize yourself with this material: Windows x86 or x64. What is better to install on a laptop? It is also worth reading this material: Comparison of the performance of Windows XP, Windows Vista and Windows 7. Which is the best to install ?.
To integrate SATA drivers, you first need to copy the Windows XP distribution to a folder on your hard drive. Create a folder called Windows XP on the D: \\ drive, for example. Copy all files from the Windows XP disk to that folder. If there is no disk, but there is an .iso image, then it can be unpacked into a Windows XP folder using the 7-Zip utility. You can find it in the archive with programs and utilities, which you downloaded from the links above. As a result, the Windows XP folder should contain the following files and folders:
Install and run nLite, select the language and click Next:
Click Browse and specify the folder where you copied the files from the disk:
On this page we indicate what exactly we will do with the distribution. Selecting Drivers and Bootable ISO Image:
Now it is worth specifying the folder with the drivers that we will integrate into the distribution kit. Click Import and select the Drivers folder:
If you have a processor from Intel, then select drivers for Intel. The archive contains drivers for 32- and 64-bit systems. If you have a chipset from AMD 7 and higher series, then select the corresponding drivers from AMD:
When the folder is selected, select the driver:
And now, perhaps the most interesting part. Selecting your model of the south bridge. For newer laptops with Intel Core processors, this is usually the Intel (R) PCH SATA AHCI Controller. If you do not know which south bridge you have, then select all:
After entering the BIOS, you need to find where the boot order is configured. Usually these settings are located on the BOOT tab. The F5 / F6 buttons are usually used to change the boot order. Usually, right on the settings page, it is indicated which buttons can be used to change the download list.
We put your CD / DVD drive in the first place, save the settings and exit the BIOS
3. Installing Windows XP
Windows XP installation with built-in SATA drivers is no different from a normal Windows XP installation
How to install Windows XP is described in this material: Simplified installation of Windows XP
4. Search and install drivers
How to find and install drivers on a laptop is described in this material: Search and install drivers on Windows
Important note: If you have a laptop from Asus, then the search for drivers for your laptop model should start with this section of the site: Drivers for Asus laptops. If you have a laptop from Acer, then you can find all the drivers here: Acer Laptop Drivers.
Anyone who has reinstalled the OS on their device at least once has always encountered drivers and the problems associated with them - finding them, and then wasting time installing and updating them. In this article I will tell you how to integrate the drivers installed in the current OS into the Windows 10 image so that they are automatically installed with it.
This article will be especially useful for owners of Windows tablets, for which you need a lot of drivers, but it is often difficult to find them, and at best there is usually only a bunch of folders with .inf, .sys and other system files, the path to each of which is after OS installations have to be specified manually.
Extract driver files from current OS
Windows 8.1 has a built-in mechanism for backing up drivers. It also migrated to Windows 10. After using it, it leaves several dozen folders with all the drivers installed in the system, in each folder the system files of one or another driver.
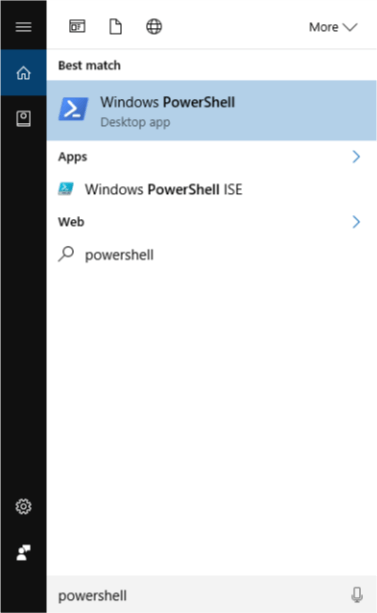
To use it, we need Windows Powershell. Type the word "Powershell" in the search, right-click on the found application and select "Run as administrator".
A blue console window will open. Now let's enter the command to export drivers:
Export-WindowsDriver -Online -Destination D: \ drivers
Replace "D: \ drivers" with the path to the folder where you want to save all drivers.
Press "Enter" and, leaning back in your chair, wait until the console starts displaying a list of imported drivers.

By opening the folder you previously selected, you can see many, many folders with the most precious system components. In my case, there were 102 folders inside.
If, for example, you have drivers that are not yet installed on the system, but which you would like to add to the image, add a folder with them to this backup folder. Please note that your drivers must be in the form of files .inf, .sys and others, and not in the form of.exe, .msi.
Preparing an OS image
We have the drivers, now we will prepare the OS image into which we will integrate them. You can download it, for example, from the official website.
The integration work is done with the unpacked image, not with the ISO file itself! If, after integrating the drivers, you want to rebuild the image, you can do it using a variety of third-party programs. For example, I use UltraISO, but there are a lot of analogues.
To unpack the image, you can use some kind of archiver (free 7-Zip does it with a bang). You can immediately make and work with it.
After unpacking, go to one of the unpacked folders - " sources " from where copy two files - " boot.wim " and " install.wim ".
Create a folder named " winpe"(not necessarily at the root, but it will be more convenient, since you do not have to type long paths in the console) and insert two data files into it.
After that, copy to the newly created folder, which so far contains only 2 wim files, the folder with the backup copy of the drivers (the one in which there are many folders inside), and also create a folder in it " mount".
You should have a folder like this:

Clarification of OS edition
At this step, you need to perform some actions related to the edition of the OS that you are going to install.
The fact is that some images can install several editions at once. For example, the standard Windows 10 image is designed to install two editions at once - Home and Pro. In order to integrate the driver into the correct edition, we need to find out some information about it.
Right-click on the "Start" button and run.
Let's go to the folder " winpe", to do this, enter the commands one by one:
cd winpe
Here E is the drive, at the root of which the "winpe" folder is located, replace it with your own.

Now enter the following command:
dism / Get-WimInfo /WimFile:install.wim
You will receive a list of OS revisions that are embedded in the image.

The revision index is important for us here, the line with it is underlined in the screenshot. Select the edition that you are going to install and into which, accordingly, you need to integrate the drivers, and remember its index. It will come in handy later.
Integration of drivers into the OS image
Now you need to integrate the drivers one by one into each of the files " boot.wim" and " install.wim". The commands that need to be entered for each of the files are exactly the same, only the file name changes (boot to install).
Let me clarify that at the moment we are already in the winpe directory. If after the previous step you closed the console, reopen it and enter the commands again:
cd winpe
For the forgetful: here E is the drive, at the root of which the "winpe" folder is located, replace it with your own.
Now let's look at the file " boot.wim".
First you need to mount it. To do this, enter the command:
dism / mount-wim /wimfile:boot.wim / index: 1/ mountdir: mount
The command will underline the OS revision index, which we talked about above. Put the desired number, which I asked to remember, right after the colon.
Now we directly integrate the drivers:
dism / image: mount / add-driver: drivers / recurse
Notice the command "/ add-driver: drivers". The colon must be followed by the name of the folder where the backup copies of the drivers are stored. I have it - a folder " drivers", if you have it differently, enter your name.
dism / unmount-wim / mountdir: mount / commit
Now we carry out similar operations for the file " install.wim". The only difference will be in the first team. It will look like this:
dism / mount-wim / wimfile: install.wim/ index: 1 / mountdir: mount
We just changed the filename from " boot.wim" on " install.wim". The next two commands are exactly the same as with the file" boot.wim".
Again, don't forget about the index!
Now let's copy the received files " boot.wim" and " install.wim"and paste them into the folder" sources", replacing the original files.
If you "updated" the wim files directly on the bootable USB flash drive, it will now install your system with all the drivers. If not, then create an image of the system using third-party programs.
That's all. Hope this tutorial will help someone.
I was going to describe the integration of SATA / RAID drivers for a long time. Unfortunately, my configuration does not allow testing the integration of such drivers, and therefore self-writing of the article was excluded. In the original site, the drivers page had a link to a good article from an MSFN GreenMachine conference attendee, but it took some preparation from the reader. It is on this article that the page about SATA / RAID drivers on the MSFN website is based. This page appeared there relatively recently, and did not exist at the time of writing the first edition of this article.
Anyway, there was a man named Michael hollinger who took the trouble to combine information scattered across the MSFN forum and forum members' sites into one guide. His leadership seemed to me uncomplicated and provides enough information to carry out the integration process "inside and out." Michael has kindly given permission to translate his manual into Russian. The original manual (PDF, 1.28 Mb) is publicly available information and can only be used in free or non-commercial publications. The disclaimer and author's contact information can be found in the text of the manual. Michael recently sent me a new version of his manual, which I have posted now. The manual has become as detailed as possible, with a huge number of screenshots (mainly Explorer and Notepad ;-). But since the essence remained the same, I did not change the content of my article.
Note. This article describes a manual method for integrating drivers. The process can be automated using nLite.
I hope that the article will be useful not only for people interested in automatic installation, but also for everyone who is unable to install SATA / RAID drivers during Windows installation due to the lack of a floppy drive. Any questions or comments on this article, please ask in. Now to the point.
Step 1 - creating directories
Create a directory to contain all drivers and intermediate files that will be configured in the preliminary step. In this article, the C: \ preload directory will be used, in which you need to create subdirectories as follows C: \ preload \ $ OEM $ \ $ 1 \ drivers
Step 2 - Unpacking the Drivers
You will need drivers for SATA and / or RAID controllers. They can be taken from the CD that came with the motherboard or laptop. Newer driver versions can be found on the manufacturer's website.
Unpack the drivers into a directory named after the controller. For example, such a structure is possible
C: \ preload \ $ OEM $ \ $ 1 \ drivers \ motherboard\controller
Note: The names of subdirectories containing drivers must be no more than eight characters long. For example, for the ABIT IC7-MAXIII motherboard, there are two sets of Silicon Images drivers: Si3112r and Si3114r. In this case, you need to create the following directories
C: \ preload \ $ OEM $ \ $ 1 \ drivers \ IC7_MAX3 \ Si3112r
C: \ preload \ $ OEM $ \ $ 1 \ drivers \ IC7_MAX3 \ Si3114r
If your drivers are located inside the installation program (often found in Intel), then unpack them from * .exe using WinRAR, for example.
At this stage, you should have at least the following files in the appropriate directories
Step 2a - Unpacking Intel Drivers
Intel drivers are a special case. If you do not have the above files, then most likely you have two cabinet archives (* .cab) and setup.exe... In this case, run the following command from the command line:
c: \ setup.exe -a -p c: \ path
where path- the directory you selected for unpacking. After unpacking, your drivers will be either in the XP subdirectory or drivers. Copy the contents of this directory. Following our structure, you should copy the content to
C: \ preload \ $ OEM $ \ $ 1 \ drivers \ motherboard\ intel
Step 3 - Matching files
You can safely delete the readme files and any directories related to other operating systems (Windows 2000 and Windows 98). If the same drivers are intended for XP and 2000, then, of course, they do not need to be removed. Continuing the example with ABIT IC7-MAXIII, we now have the following picture:
The C: \ preload \ $ OEM $ \ $ 1 \ drivers \ IC7_MAX3 \ Intel directory contains the files
TXTSETUP.OEM
iaAHCI.cat
iaStor.cat
iaAHCI.inf
iaStor.inf
iaStor.sys
And in the directory C: \ preload \ $ OEM $ \ $ 1 \ drivers \ IC7_MAX3 \ Si3112r there are files
SilSupp.cpl
TxtSetup.oem
si3112r.cat
Si3112r.inf
Si3112r.sys
SIWinAcc.sys
SiiSupp.vxd
Step 4 - copying files
If the contents of the Windows XP installation disc have not yet been copied to your hard drive, but now is the time to do it. Copy to C: \ XPCD. Then copy the $ OEM $ directory from C: \ preload to C: \ XPCD.
Now you need to make compressed copies of all * .sys files and copy them to C: \ XPCD \ i386 using the makecab utility. Run the following command from the command line:
makecab C: \ XPCD \ $ OEM $ \ $ 1 \ drivers \ motherboard \ controller \ controller.sys C: \ XPCD \ I386 \ controller.SY_
where motherboard is the name of the directory that you gave by the name of the motherboard, controller is the name of the controller directory, and controller.sys and controller.SY_- the names of your * .sys files. You can have more than one * .sys file in each directory, however you only need one with the same name as the * .inf file. If we take step 6 as an example, then from the Si3112r directory we only need Si3112r.sys... Add all other * .sys files to i386 in the same way.
Step 5 - Editing the section of the txtsetup.sif file
Open the file in a text editor txtsetup.sif located in C: \ XPCD \ i386. A notebook is fine, although not very convenient for this purpose. The main thing is that the editor does not create unnecessary formatting, such as line breaks, for example.
where controller.sys is the name of the file created in the fourth step. Add the lines corresponding to the rest of the * .sys files in the same way. Each file must have one line. In our example:
iaStor.sys = 1.3_, 4.1
Si3112r.sys = 1.3_, 4.1
Si3114r.sys = 1.3_, 4.1
viasraid.sys = 1.3_, 4.1
I decided to put the story about the format of these lines on a separate page due to the complexity of the material.
Attention! In order for the drivers to be correctly installed when installing the system from the hard disk or updating it from the CD, you also need to make changes to the file dosnet.inf in the following way:
d1, iaStor.sys
d1, Si3112r.sys
d1, Si3114r.sys
d1, viasraid.sys
d1, iaStor.sys
d1, Si3112r.sys
d1, Si3114r.sys
d1, viasraid.sys
Step 6 - Editing the section of the txtsetup.sif file
Do not close txtsetup.sif and find the section around line 18800. We'll come back to this section in a minute, but for now let's look at the files in the driver directories. There are files, information from which needs to be copied to txtsetup.sif. We will need either * .oem or * .inf file from each of them. We go to the first directory and act according to the following principle: if there is a file of the same name * .sys to a * .oem file, then open it, and if not, then open a file of the same name * .inf. If you are using a * .oem file, then find all lines starting with PCI \ VEN_ enclosed in quotation marks. If you are using an * .inf file, then find the section where there are similar lines (but without quotes). Ignore lines starting with%. Copy each line from the beginning to the first point (not including the point). For example, if the line PCI \ VEN_8086 & DEV_2652 & CC_0104.DeviceDesc = "Intel (R) 82801FR SATA RAID Controller", then you only need to copy PCI \ VEN_8086 & DEV_2652 & CC_0104 and nothing more.
Now place the copied lines in the file section txtsetup.sif and add to each = "sysfile" , where sysfile is the name of your * .sys file of the same name * .oem or * inf. file. In our example in the section, it looks like this:
PCI \ VEN_8086 & DEV_2652 & CC_0104 = "iaStor"
PCI \ VEN_8086 & DEV_2652 & CC_0106 = "iaStor"PCI \ VEN_8086 & DEV_24DF & CC_0104 = "iaStor"
PCI \ VEN_8086 & DEV_25B0 & CC_0104 = "iaStor"
PCI \ VEN_1095 & DEV_3112 = "Si3112r"
PCI \ VEN_1095 & DEV_3512 = "Si3112r"PCI \ VEN_1002 & DEV_436E = "Si3112r"
PCI \ VEN_1002 & DEV_4379 = "Si3112r"
PCI \ VEN_1002 & DEV_437A = "Si3112r"
PCI \ VEN_1095 & DEV_3114 = "Si3114r"
PCI \ VEN_1106 & DEV_3149 = "viasraid"
Step 7 - Editing the Sections and the txtsetup.sif File
Now find the section around line 19266. Add the following line for each * .sys file
where sysfile is again the name of your * .sys file. In our example in the section, it looks like this:
iaStor = iaStor.sys, 4
Si3112r = Si3112r.sys, 4
Si3114r = Si3114r.sys, 4
viasraid = viasraid.sys, 4
Now find the section around line 21613. Add the following lines for each * .sys file.
where sysfile is the name of your * .sys file and Description is any description you want to give to the controller. The easiest way is to use descriptions from the * .inf file. In our example, it looks like this:
iaStor = "Intel (R) 82801FR / 82801ER / 6300ESB SATA RAID Controller"
Si3112r = "Silicon Image SiI 3x12 SATARaid Controller"
Si3114r = "Silicon Image SiI 3114 SATARaid Controller"
viasraid = "VIA Serial ATA RAID Controller"
On this editing txtsetup.sif it's finished. Close and save the file.
Step 8 - Editing (creating) winnt.sif
Now is the time to change winnt.sif(or create a new one if you don't already have one). More about winnt.sif I am telling, so I will focus only on the section. To successfully install the drivers, the following parameters must be present in the section
OEMPreinstall = Yes
OemPnPDriversPath = "Drivers \ path"
where path is the path to the directory with controller drivers. In our example, it looks like this:
OEMPreinstall = Yes
OemPnPDriversPath = "drivers \ IC7_MAX3 \ intel; drivers \ IC7_MAX3 \ Si3112r; drivers \ IC7_MAX3 \ Si3114r; drivers \ IC7_MAX3 \ via"
Since our drivers are located in several directories, we enclose their listing in quotes and separate them with a "semicolon". All OemPnPDriversPath parameter values must be on one line, hyphenation is not allowed.
If you are only interested in driver integration, and the answer file is created solely for this purpose, then in addition to the above parameters, add a section with the following content:
Close up winnt.sif and save your changes (or save your file with the name winnt.sif in i386).
Conclusion
In general, this completes the procedure for integrating SATA / RAID drivers. The rest of the original guide will show you how to create a bootable Windows XP disc. I see no reason to repeat myself.
Acknowledgments
All that remains is to thank Michael Hollinger and give credit to those people whose books, articles and forum posts were used in his leadership. The author follows one of the generally accepted American styles used in scientific publications. Excuse me, I won't keep up with the style ;-)
- Chandra, Omeeda. (2004 October). Book Update Your Windows XP CD. Maximum PC, 68-70
- GreenMachine. Slipstreaming SATA / RAID Drivers (no more article link)
- raskren (2004, January 5) Unattended install, SATA drivers, and NO Floppy, I finally got it to work!
- raskren (2004, February 9) A post in the topic Switches in TXTSETUP.SIF.
Tell me, if when installing Windows XP, disable the AHCI mode in the BIOS (set it to Disable), then XP will be installed without additional SATA drivers. BUT IS POSSIBLE then. already in the system. install drivers for AHCI mode, then enable AHCI mode in BIOS ... Does the computer recognize newly installed drivers for AHCI mode at boot?
Got a question. Maybe someone has already thought of it and there is an answer. The Windows Server 2008 disk already has SATA / RAID drivers integrated (and a bunch of other drivers). Is there some way to use this in a 2003 installation?
To intersk >>>
Yes, you can. I did just that today on the Lenovo ThinkPad SL510 laptop.
Much easier than written here !!!
---
You turn off AHCI in BIOS, install Windows with partition formatting for the system, install SATA drivers (forcibly) and turn on AHCI in BIOS again when you reboot. Windows boots normally and already sees the hard drive and all the partitions on it. Only then can you install other drivers, configure the system and install programs.
My method for installing the system is any that requires FDD (w2k, XP, w2k3).
No integration into the distribution.
Used tools:
MultiBoot USB - Multiboot flash drive
Windows
winimag
the firewood itself
So,
1) using Winimag I create * .img image of floppy disks with firewood,
2) using MultiBoot USB I create Boot Flesh,
3) I throw * .img on the USB flash drive,
4) I register in menu.lst
These are examples:
title install Windows XP Home SP3
root (hd0,0)
map --mem /WINSETUP/XPhSP3.ISO (0xff)
map --mem /flp-rst.IMA (fd0)
map --mem /jraid.IMA (fd1)
map (hd0) (hd1)
map (hd1) (hd0)
map --hook
root (0xff)
title install Windows 2003 SP2
root (hd0,0)
map --mem /WINSETUP/23SP2.ISO (0xff)
map --mem /boot/HP/cp011324-.IMG.gz (fd0)
map --mem /boot/HP/cp014590-.IMG.gz (fd1)
map (hd0) (hd1)
map (hd1) (hd0)
map --hook
root (0xff)
chainloader /I386/SETUPLDR.BIN
5) and boot from the flash drive, press F6 along the way, and select the required driver.
From and all the little ones. Go for it!
faetonets
tried your way, add a ride controller. After pressing F6, everything worked out well, only after partitioning the disk and copying the files, the installation tries to copy the raid driver from the floppy image, but it is not already in the system.
a way out of the situation found the following nLite I form a distribution kit with drivers and pack the necessary drivers there, then copy them to a USB flash drive in I386 and everything goes.
Killed the day trying to install Windows 2003 on RAID1 on the mat. MSI 870S-C45 board. Can't see the hard disk, kill yourself. I stuffed all the drivers that I found on the CD from the mat. boards in folders like floppy32. I looked at the initial process of starting the installation (copying files), they were actually copied. Doesn't see the hard drive and that's it.
Tried also the way given by faetonets. At the stage of polling the hard drive, a blue screen crashes.
Sorry for the wasted time. The confusion in the hardware is also of interest: someone knows how to find out the manufacturer and model of the built-in mat. RAID controller board prior to operating system installation? The trick is that I would have spent much less time if I knew which of the four drivers on the CD to push into the distribution. It also pisses me off that even entering the BIOS of a RAID controller, one cannot contemplate the controller model. This is also not indicated in the user manual. By the way, the situation is the same with some laptops: you buy a laptop, there are no drivers in the kit, and you start downloading all the drivers from the manufacturer's website (and some of them weigh 100 meters) and poke each one until you come across the required driver. Is it idiocy with the lack of information about the configuration, or am I not aware of something?
Attention! In order for the drivers to be installed correctly when installing the system from the hard disk or updating it from the CD, you also need to modify the dosnet.inf file as follows:
d1, iaStor.sys
d1, Si3112r.sys
d1, Si3114r.sys
d1, viasraid.sys
d1, iaStor.sys
d1, Si3112r.sys
d1, Si3114r.sys
d1, viasraid.sys
Does it need to be added or replaced in the dosnet.inf file, or what?
Find the first section, which is located around line 189. At the very beginning of the section, add the following line
controller.sys = 1.3_, 4.1
where controller.sys is the name of the file created in the fourth step. Add the lines corresponding to the rest of the * .sys files in the same way.
Actually, in the fourth step, the file controller.SY_ is created, not controller.sys. This is also incomprehensible.
tried to integrate with this instruction and ... result Can't find file amd_sata.sys ..
However, the same result was with nLite.
I think the problem is that the sys file of the same name is not .oem but.inf file and there are no lines like this PCI \ VEN_8086 & DEV_2652 & CC_0104 in the section there, besides other text, there is PCI \ CC_010601 but in the .oem file there is but it is not identical to the file
.sys :(
But I think not everyone has such problems ...
Thanks to the author, the article is useful and is worthy, although in some places it was possible to write out in more detail.
 Backlash of the volume and power buttons on the iPhone - a marriage or not?
 The network card does not see the cable: instructions for solving the problem What to do if the Internet cable does not work
 StoCard and Wallet: discount cards from the application