The best junk cleaning apps for Android. How to clear the internal memory "android" and speed up the operative memory How to remove the built-in memory from Lenovo A319
Some time after the first start-up, too much information accumulates on the phone and there is simply no free space for new files. Especially often owners of budget Android devices face this problem. But not everything is so simple, all phones have several types of memory, and first you need to figure out what each of them is responsible for, and only then clean the gadget of unnecessary files and irrelevant information. What are the ways to clean up or increase storage space?
Types of memory on Android devices
Each of the memory departments has its own tasks and characteristics, which we will now understand:
If the built-in and external memory is full, then you will no longer be able to put anything on the device. It is also possible that the phone will freeze, slow down and refuse to launch applications.
If the RAM or ROM is completely full, the phone will freeze, slow down and stop opening applications. Also, in many devices there is a function due to which, with a heavy load of RAM or ROM, an automatic restart and shutdown of some applications occurs.
How to view statistics on the memory load of a smartphone or tablet
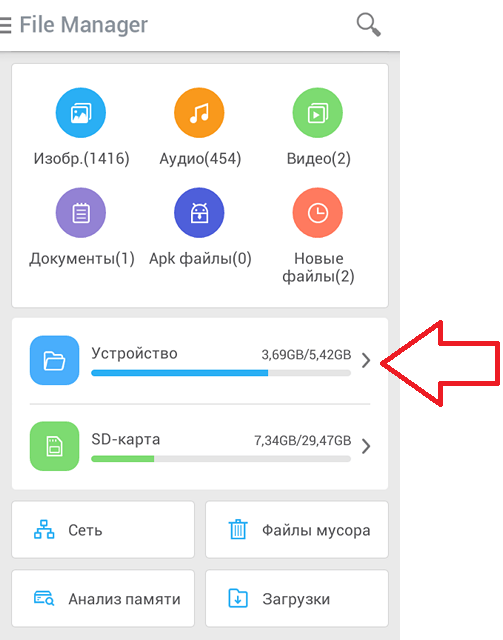
First, let's check how much and what memory we have left by doing the following:
 Opening the settings
 Go to the "Memory" section
 Memory Usage Information
 Press the "Menu" button to view data about RAM and ROM
 The button at the bottom of the screen contains information about the available and shared RAM and ROM memory
How to clear device memory
Since everyone faces this problem sooner or later, there are several ways to clean up, each of which is used for a specific memory.
With built-in applications
First of all, we will use what the developers of your smartphone have come up with to clear the internal and external memory by following these steps:
 Go to settings
 Go to the "Memory" section
 Click on the "Cash" button
 Confirm deleting the cache
 We go to the section "Miscellaneous"
 Marking applications whose files you do not mind deleting
 Click on the trash can icon to delete data
Video tutorial: we leave the necessary, delete the unnecessary - how to properly clean the memory in Android
To clear RAM and ROM, follow these steps:
 Hold down the "Menu" button to open the list of running applications
 Click on the broom icon to close all applications at once
 Opening the phone settings
 We go to the section "Applications"
 Go to the "Working" section
 Choosing apps you can stop
 Press the "Stop" button
 Click on the special icon to go to the list of cached applications
 Stop unnecessary applications
Video Tutorial: Clean Up RAM on Android Device
Freeing up storage space manually
This method involves transferring files and programs from internal memory to external memory, since usually the built-in phone memory is noticeably less than that which can be additionally installed using an SD card. Pictures, videos, e-books and files that are not involved in maintaining the phone's performance can be transferred to external memory. In general, transfer anything that is not related to the operating system.
 Opening the explorer
 Go to internal memory
 Select a file to transfer
 Click on the scissors icon to cut the file
 Go to the MicroSD section
 Insert the cut file with the "Paste" button
You can also transfer part of the application to external memory by following these steps:
 Opening the phone settings
 Go to the "Memory" section
 We put a tick in front of MIcroSD
 Reboot the device
Using a computer
Do not forget that you can use your computer as an external storage device. To transfer files from phone to PC, follow these steps:
 We connect the phone and computer using a USB cable
 Moving on to the contents of the phone
We expand the capabilities of the gadget using cloud technologies
In recent years, such an Internet industry as cloud technologies has been actively developing, allowing you to upload via an Internet file to the "cloud". It goes like this:
 Installing the Yandex.Disk application
 Uploading the required files to Yandex cloud servers
We work with third-party programs
In the Play Market, you can easily find many free programs that help you clean your phone in a couple of clicks. Now we will consider the most popular and practical ones:
Clean Master will free storage from unnecessary information
Probably one of the most famous applications, and not only in its category, as it has over 5,000,000 installations. Clean Master offers a complete cleaning of the device from temporary files, cache, corrupted and empty folders, browser history and other junk. Also, its capabilities include automatic closing of unnecessary applications and built-in antivirus. The application has a pleasant and convenient interface that allows you to clean the device in just two clicks of the "Analysis" and "Clean" buttons. Link to install from the Play Market -
 Installing the Clean Master app
System monitoring in Android Assistant
Also deservedly in the top Play Market program (https://play.google.com/store/apps/details?id=com.advancedprocessmanager&hl=ru), which has a very wide list of features:
 Installing the Android Assistant app
Total Commander will help you structure folders and files
This application is designed to organize all the files on your device. Total Commander will allow you to pack and unpack folders with their contents in rar and zip formats. Also, its capabilities include editing and transferring the contents of the phone from place to place or to another device. Link to install from the Play Market -
 Install the Total Commander application
How to increase internal storage on Android
If clearing the memory didn't solve your problems, then it's time to think about upgrading your device.
First, purchase an SD card. At the moment, their cost depends on the amount of memory. That is, an 8 GB card will cost twice as much as a 4 GB card. Try to get a card with more memory than you currently need, as in the future you can swap it into a new phone without having to buy a new one.
Secondly, install the FolderMount application from the Play Market (https://play.google.com/store/apps/details?id=com.devasque.fmount&hl=ru) and the 360root application, which will give your device root rights (download it can be found on the official website of the developer http://360root.ru).
 Press the button to give the phone root rights
 Open the application
Video: combine folders
Thirdly, let's figure out how to increase the device's RAM. This can be done using special programs that create a paging file. For example, Ram Manager.
 Install the RAM Manager Free application
 We give the application root-rights
 Choose one of the modes
Ram Manager operating modes:
How not to clog your phone and save system resources
To avoid problems with free memory of the device in the future, it is worth adhering to simple rules:
The performance of the device directly depends on the free space. If the memory is clogged, then you cannot avoid freezes and decrease in the performance level of the phone. Remember that any computer device requires constant care and protection from viruses. Only if you are careful and careful with your gadget, it will serve you for a long time and efficiently, constantly satisfying your needs.
Smartphones and tablets on the Android operating system actively use the device's RAM. Some firmware and shells allow you to clean it with standard tools, for others you have to use third-party software. The more RAM is free, the faster the device itself works. In addition, users often clog up the internal storage, leaving no free space on it (games, videos, photos, etc.) and forgetting to clean it up. This results in performance issues, system errors, random reboots, and freezes. In this article, you will learn how to clean your Android phone, what tools and why to do it.
First, let's take a look at the types of internal memory that affect the performance of the phone. Mobile devices, like computers, use two types of memory: RAM and ROM.
- RAM)- a random access memory device that stores data only during the direct operation of the device. Running games, browser tabs, running applications - all these processes consume part of the RAM;
- ROM (ROM)- permanent storage device. The memory stores all data until you delete it yourself. This category includes all files on the hard drive, application cache, and the like.
When both types of memory run out, the device starts to slow down and malfunction. To eliminate it, you need to clean the RAM and ROM from the "garbage".
Cleaning methods
You can use all the presented cleaning methods absolutely free of charge. Choose the appropriate method depending on the manufacturer of your device and the version of the operating system.
You can clean unnecessary files using the following methods:
- With built-in functionality;
- Third-party software for a mobile device;
- Through a personal computer.
We will also understand the methods of clearing the cache and viruses using special programs.
In many modern devices Samsung, Lenovo, Fly, Meizu, etc. (regardless of the company and the country of the manufacturer), you can check the state of the RAM as follows:
- Press the system key (it can be located on the left or right). In the window that opens, you will see a list of all active applications (1), the amount of RAM filled (2) and the ability to clear it (3).
- Click on the cross, after which all RAM occupied by applications will be cleared. The system memory used by the OS cannot be cleared.
How do I clear it manually?
If you do not want to resort to using third-party programs, or you do not have free space for installation, then you can clean it manually. After all the procedures, the phone will work much faster:
- cleaning browser and application cache;
- deleting messages;
- removal of old and unnecessary applications;
- cleaning files stored on the phone (photos, videos, etc.).
All steps will take longer than cleaning with the app, but the result will be much better.
Application cache
First, let's figure out what a cache is in a phone. The cache is an intermediate buffer with information that can be requested in the near future. Because of this, time is saved on calculating tasks and solving problems, and accordingly, the performance of the device increases. The file cache is accumulated, storing information on each installed and used application. When clogged, you need to free the entire cache.
To do this, follow the presented algorithm:
- Open the settings menu of your device.
- Find the section in the settings.
- In the opened manager, you can observe information on cache memory, system and third-party applications. Sort the list of all programs by size.
- Open one of the programs. In the new window you can "Erase all data"(deletes stored information on the hard disk) and. Click on the second button.
This procedure must be repeated with all installed applications to completely clear the cache memory.
How to remove garbage in the browser?
- Go to your browser and open the side menu. Select an item from the menu.
- In the window that opens, click on.
- Set the settings that are acceptable to you (what to delete, for how long, etc.) and click on.
Cleaning is considered on the example of Google Chrome, since it is one of the standard browsers on the Android operating system. In other browsers, the procedure is slightly different.
Deleting Messages
This item will be optional if we are talking about a relatively new device. A tablet or phone that has been in use for several years stores several thousand or even tens of thousands of messages. Over time, their number (including MMS with multimedia data) may take up some space on the internal memory. You can completely delete messages like this:
- Click on the message icon in the menu or on the desktop, hold down one of the messages with your finger and select an item.
- Take action.
Removing applications
If you cannot install new programs or games, the phone's permanent memory is full. To clean up, you must uninstall unnecessary programs through the Android menu.
If your device has a firmware without a full menu (for example, Xiaomi or Meizu phones), then you need to uninstall applications right on the desktop. To do this, hold your finger on the required icon and drag it to the basket at the top of the screen.
If the shell of your Android implies the presence of a full-fledged menu (for example, Samsung Galaxy or Sony Xperia), then deleting it from the desktop will only lead to the disappearance of the shortcut. For complete removal, you need to go to the menu and also hold down on the application icon, then transfer it to the trash.
Deleting files
You can get rid of garbage from the internal drive using a standard file manager. Since the interface on each phone is different, let's take a look at cleaning up files with a handy ES File Explorer.
- Go to Android in the Play Market, enter the name of the application in the search bar and click on the information page.
- Launch ES File Explorer and check out some getting started tips. In the upper part of the screen there is information about the occupied / free space on the internal memory (1), a button for analyzing the need for cleaning (2). Click the button "Cleaning" (3).
- After that, the program will analyze the unnecessary information and provide you with a list. At the bottom of the screen, click on.
- Now go to the side menu. Go to subsection (1) and then click on "Device" (2).
- A window with all the folders on the built-in storage will open in front of you. Here you can check their contents and delete anything you don't need. To do this, hold down the file for 2 seconds, then click on in the bottom panel of the pop-up menu. In the same way, you can clear the SD card.
- Through ES Explorer, you can also clean libraries with images, music, etc. To do this, go to the menu again, select a subsection and go to the desired tab (3):
- To empty the trash on Android, go to the section through the menu:
- Be sure to check for hidden files that can take up a significant amount. To do this, enable the item in the menu, then go to the folder again and check for their presence.
We figured out how to carry out manual cleaning from excess debris using ES conductor. Now let's move on to using another software.
What programs should I use?
Through third-party software, you can automatically clean RAM and ROM from unnecessary data, thereby speeding up your phone. Use the following programs:
- SD Main;
With their help, you can free up space, clear RAM and protect your phone from viruses. In addition, each of the utilities is suitable for different smartphones - from modern to devices running on older versions of Android. This will be understood further on. All applications are installed in the same way as ES Explorer - you can find instructions above.
On the home screen, you will find the following tools:
- Garbage - cleans the device from unnecessary files after scanning (ads, outdated applications, system cache, etc.).
- Antivirus - scans your device for malicious software and files. The functionality includes a protector of social networks, checking memory cards, galleries, blocking applications.
- Phone acceleration - the tool scans the need to optimize running processes.
- Cooler - optimizes running processes in order to reduce the temperature of the processor.
SD Main
After the scan is complete, you will receive detailed information about each of the sections: garbage, system, applications and databases. After that, you can clear each of them separately by clicking on the trash can, or start a full cleaning. SD Main also has a built-in file manager where you can personally manage files on the internal memory and microSD:
- Convenient one-click cleaning tool. Upon entering, the program immediately scans the system and offers to perform cleaning in the following form:
The Deep Clean button starts a deep scan. At the end of the process, click « Clear ":
This application will be an excellent alternative for those who own old smartphones (for example, the Fly model or Samsung Duos 5-6 years ago). For such devices, the simple Mobile Boost assistant is suitable, since it supports older versions of the Android OS.
To clean up, just run the app and press the button « Clear ":
How to clean a phone via a computer (via USB)
The last option to delete unnecessary files from the internal memory of the phone is to connect to a computer. To do this, you need a miniUSB cable. Connect your device to your computer and follow these steps:
- On your phone, select an action.
Do I need to clean?
How do you know if your phone / tablet needs this procedure? The first indirect sign is a decrease in productivity. If the technical side of the phone is completely serviceable, then the point is precisely in the clutter of RAM and ROM.
You can also verify this using the built-in applications. This can be done in different ways on different devices. Each device has a standard file manager, which indicates the size of all files on the internal memory. Knowing the total amount of ROM on the phone, it is easy to understand when the internal storage is completely clogged.
Now you know how to clean the phone via a computer, via USB, how to view statistics on memory usage, how to delete the cache using standard and third-party programs. At least one of the methods will definitely be suitable for you, so you can bring your device into full operation and serviceability!
Video instruction
You can also watch a thematic video.
All modern portable digital devices under the control of an android are tied to a personal mail or a profile on social networks. Therefore, if you decide to sell a smartphone or tablet on Android that has served faithfully and truly beloved, but do not want personal data, photos or videos to become available to the buyer, then in such cases you need to quickly and simply clear it. It will also help if, after downloading a whole bunch of unknown applications, a virus was installed. This can be done in several ways, without resorting to using any programs:
- Return to factory settings
- Make a hard reset
1. How to do a factory reset on android
This method is quite simple and we recommend using it. To do this, you need to enter the "settings" menu. Further, the choice depends on the android version. For Android 4.x and higher "Restore and Reset". For older Android 2.x - "Privacy". In the available menu, select "Reset settings" with one click.
An example of a reset on the 5 version of android

After that, the system will notify you once again that all data, as well as linked profiles, will be deleted from the phone. You need to confirm the action by clicking "Reset phone settings". After restarting your phone, Android will be completely cleaned up. It's so simple and fast, unlike the next method.
2. How to reset the settings on android (hard reset)
Attention, using this method may cause the Android system to malfunction. Use only if the first one does not help.
This android cleaning technique is really effective when, after installing the application, a message appears about the paid unlocking of the device, or you have forgotten the pattern.
First you need to fully charge, and then turn off the phone. Next, you need to enter the "Recovery" mode. It is necessary to hold and hold a certain key combination. Each manufacturer has its own set of keys. We will present the most common options and consider using the example of a Samsung Galaxy phone.
- Volume up (or down) key + power key
- Both volume keys (up + down) + power key
- Volume up (or down) key + home key + power key

It is necessary to keep them pressed until a dark screen with text in the upper left is displayed. This is the Recovery menu. Moving along it is carried out, as well with the up and down keys, and the choice is the power button.
We move down to the item "wipe data / factory reset" and confirm by pressing the power key. On the next screen, we confirm the choice "Yes - delete all user data" in the same way. This will start the procedure for cleaning the phone and returning to factory settings. You will be returned to the initial menu, where you will need to select the "Reboot system" item to reboot the phone.
We hope the material on complete cleaning of android devices was useful to you. If you have any questions, you can ask them in the comments.
Is a common problem for Android devices. This problem is especially relevant for users of budget devices. After all, only a few gigabytes of memory are available on such devices.
If you also encountered a similar problem, then this article should help you. Now we will tell you how to clear the system memory on Android.
Step # 1. Removing unnecessary applications.
If you are faced with the need to clear the system memory on Android, then the first thing to do is. This is quite simple to do. To get started, open the Android settings and go to the "Applications" or "Application Manager" section.
This section of settings will display a list of all applications installed on your Android device. If you carefully study this list, you will surely find quite a few applications that you never use. Clicking on an unneeded application will open a window called Application Information. To uninstall an application, simply click on the "Remove" button.

Step # 2. Transfer applications to a memory card.
If your Android device is equipped with a memory card, then you can transfer applications to it and thus clear the system memory. Transferring applications to a memory card is done in much the same way as uninstalling them. Open Settings and go to the list of installed apps. After that, open the application that you want to transfer to the memory card, and click on the button "To SD memory card"

After pressing this button, Android will automatically transfer all application files from system memory to SD card.
The only limitation of this method is that not all applications can be transferred to a memory card. If the application is not transferred, then the button "To SD memory card" will be inactive and you will not be able to use this function.
Step # 3. Deleting unnecessary files.
In order to clean up system memory to the maximum, you must examine the files that are stored on your device. Very often, a large number of unnecessary files accumulate in folders such as Bluetooth, Documents, Movies, Music, Download, Pictures and Sounds. There is especially a lot of garbage in the Download folder, into which files are downloaded from the Internet. If you frequently use Bluetooth to transfer files, then the corresponding folder will also be filled with a lot of old files.
Download the file manager application and use it to inspect files in the system memory. For example, you can use an app.
Step # 4. Use the SD maid application.
SD maid app is specially designed to remove junk files from Android device. Despite its name, SD maid is able to clear not only the SD memory card, but also the system memory. In order to clear system memory using this application, launch it and go to the "System" section.

In the "System" section, click on the "Update" button.

After the system analyzes the system memory of your Android device, click on the "Delete" button.

After that, the SD maid program will ask for confirmation and, if received, will start clearing the system memory on your device.
Posted Mon, 02/15/2016 - 19:27
Android Assistant software, Link2sd, X-plore, Root App Delete.
Transfer of backbone applications using special software. YOU can use a special program, for example Android Assistant, which contains 18 essential tools to manage the system. How to use Android Assistant.
Having installed Android Assistant from the Play Market on Lenovo ideatab s2110, s2109a, ideapad a1, a2109a, go to the "Tools" tab and select the item "App2Sd". Next, open the "Maybe" tab - this is a list of applications that can be transferred to the SD memory card. Sequentially select applications and press the button "To SD memory card".
Through the button "Batch uninstall", you can see what programs are installed on the ROM and delete them immediately in a list.
If you still got root rights or you already had them, then you can advise the program Link2sd... This program for the correct transfer of mobile applications from internal memory to SD Card Lenovo windows 8, a2107ah, s890, k900 and it effectively controls the "cache" and RAM, keeps them at a minimum.
And through the program X-plore, you can visually see the system partition in the form of a diagram ideaphone a800 black, a820, 720, s880, for this you need to press the "disk map" button.
Using Root App Delete, you can remove programs that are currently unnecessary and useless.
Lenovo Rooting Apps: 360root, FolderMount, RAM Manager Free
Program 360root will help to issue root-rights to the Lenovo b50, a328, s860, a6000 device running on Android versions 2.2-4.4. The probability of getting root access is 90%. You can download the program from the developer's official website at 360root.ru.
How the program works. After launching 360root, in order to obtain superuser rights, press the button in the center of the screen. Then press the button to root the Lenovo phone.
We reboot the phone, now it will be possible to completely transfer all system-forming applications to the external storage from the Lenovo s820, g50, b590, a7600 phone, thus freeing up the built-in memory.
FolderMount- the application allows you to unroot a Lenovo phone based on Android 2.3 - 6.0. Through the program menu, you can do all the same manipulations with the transfer of backbone programs.
You can download FolderMount through the Play Market.
RAM Manager- will allow you to create a paging file in the Lenovo s 50, a8, a916, tab 2 a10 phone, which frees up RAM and speeds up the Lenovo device. You can download Ram Manager through the Play Market.
After installing the program, you need to give it root rights.
Then we select one of the operating modes:
Balance- maximum optimization of RAM.
Balance (with more free memory)- Maximum RAM optimization for Lenovo with up to 512MB.
Balance (with more multitasking)- maximum optimization of RAM for devices with a volume of more than 512 MB.
Hard gaming- to run resource-intensive programs such as 3D games.
Hard multitasking- to run several programs at the same time.
Default settings of your phone- reset the RAM settings to "default".
Comparison of Root Uninstaller, Root App Deleter, Root Cleaner for Lenovo.
Clean Master - Clean up trash from Lenovo system.
So, after spending some time, you can solve the memory problem on any android phone, including Lenovo s 50, z90a40, pb2, P70 and other models.
But after this action, you need to control the situation: periodically go into the File Explorer and watch the appearance of new files and folders and respond accordingly.
Video review: We clean Android from garbage.
This manual process can be automated through the use of special software, such as a mobile application. This is a simple and convenient program for cleaning the internal memory of a Lenovo device based on Android OS. This program speeds up the system well and optimizes the RAM of Lenovo a690 black, 770, 800, a2107a and other models.
SD maid app- analogue of Clean Master. SD maid analyzes junk files left after removing old applications and adds them to the "Trash" section. After carefully reviewing this section, you can give the "Remove Trash" command. The Refresh button re-searches the Lenovo phone for junk files.
Preliminary results.
Above it was said how to transfer files and programs to a removable Flash Sd Card and clear the memory.
In addition to this topic, you can talk about cloud storage such as Google Drive, Yandex Drive, iCloud, Goole Photo and the like. The use of cloud storage very effectively frees up not only internal memory, but also the flash memory inserted into the phone 7, tab 2 30, tb2 tab 2 16, tab4 tab 4 plus tb. These services are free, provided that the limit of cloud space is not exceeded.
Using cloud technologies, you can transfer photo files, videos, photos from the internal memory of a Lenovo g580, 70, s660, vibe x2 mobile device to the Internet servers of Google, Apple, Yandex and others in automatic mode.
Let's consider the example of the service Yandex.Disk, how you can transfer your photo and video files to the cloud.
1.Download the Yandex.Disk application from Google Play and install it.
3. The program automatically starts uploading photos, videos and documents to the "cloud".
2. You can forcibly show which file should be sent to the "cloud" from Lenovo. To do this, press the button + and select a file or folder for synchronization.
In total, 15 GB of memory is available to the user in the cloud for free.
If you do not use your account in the "cloud" for a long time, then your files will be automatically deleted.
Cloud applications for Lenovo vibe z2, a7, g570, a5000 and other models work in a similar way: Yandex.Disk, Google Drive, Picasa, Degoo, Dropbox, G Cloud, MEGA, BOX, OneDrive, [email protected].
But I would like to go deeper into the topic of freeing the ROM and consider different points in solving the problems of the Lenovo shoot shot phone mobile device.
Professional memory cleaning for Lenovo devices based on Android OS.
The following information has been collected from various sources: from sites, forums, and may be useful to someone. But you need to use it very carefully, because it has not been tested by the author and thoughtless actions on applying these tips can permanently lock your Lenovo phone or lead to costly repairs.
SD Maid program - clearing the phone memory with root rights.
SD Maid- another program is a device memory, cache cleaner and has additional functions: batch uninstallation of programs, forced closing of applications, increasing performance by optimizing the operation of RAM and processor.
SD Maid is optimized for Lenovo tab3 tab 3, p2, a7600 h, k6 note power and other devices. Tablet SD Maid suitable for tablet computers from this manufacturer.
Video Review: Acquiring root rights, how to swap memory locations.
To use this program effectively, it is desirable to have root user rights.
Titanium Backup and instructions on how to free up memory on your Lenovo smartphone.
Titanium Backup- this program effectively transfers software to SD Card Lenovo a1000, s1 lite, a6010, tab 10, and updates after the transfer are also loaded onto the external drive. The transfer scheme using this covina is described below.
Required:
1. Root rights.
2. Titanium Backup
3. File manager, for example Total Commander for Android.
Instructions:
1. With the help of Titanium, when the automatic mode is started, the system is cleared of "garbage". Titanium Backup can easily clear dead files in dalvik-cash (menu-> more-> clear dalvik cache) on Lenovo shoot shot, 4 10 plus 64, k5, x304l 64gb. Also in this program is a good backup, a service for rolling back the system to a previous state.
2. Through the menu - "integrate sysDalvik into ROM", files are transferred from / cache / dalvik-cache to system / app.
3. Then the programs are transferred manually, as described above.
4. Removing useless system programs located in the system / app folder, but attention, if you delete something wrong, it will turn the device over, the phone will need to be reflashed, in the worst case it can only be thrown out. You can delete the Market with its service, Google maps, live wallpapers, dead wallpapers, cyan themes.
5. Removal of the English-language voice synthesizer Pico (/ system / tts). And deleting system ringtones - ringtones from the / system / media / ringtones directory.
Another way to solve Lenovo memory full problem
I also had the same nonsense - "out of memory" on Lenovo. I naturally transferred all applications to the memory card, except for the browser. But the problem repeated itself, again there was not enough memory. And what is surprising, I moved the Opera and everything worked, while there are no problems.
Also, the Google Chrom browser "clogs" the system memory with its data a lot. Using it on Lenovo c2 power, tb3, zuk, phab 2 or another model is simply not realistic and not possible, maybe in new versions it will be made better. In the meantime, it is better to delete it or replace it with another browser or use the built-in one.
Replacing the "internal storage" and "microSD" partitions
To radically change the situation with the lack of memory Lenovo s 50, tb x704l, p1ma40 8gb 32, k 5, there is such an original way: Swap "internal storage" and "microSD". What does it do? The system should treat the SD card as internal by default and internal as SD.
Video review: How to swap Android memory. Android memory remapping.
To do this, you need to have root superuser rights on your phone and download File Manager to Lenovo Root Explorer. Next, we act on the points:
1.Open the root explorer, go to the / system / etc folder, click on the top "RW rights" and open the vold.fstab file with the editor
There are 2 lines (without the # sign at the beginning):
Question answer. What to do if photos are lost in Lenovo Phone Gallery
1 question. What to do if the photos on the flash card of the Lenovo a820, 720, s880, ideaphone a800 black phone become cloudy or cannot be read at all. After transferring files from Lenovo main memory to a USB flash drive, the files cannot be read, although the phone sees the card. When you connect your phone to your computer, they will not open. How do I get my photo files back to main memory? Answer 1. Perhaps you transferred to the memory card not originals of photos, but previews, sketches. The originals of the photos could remain in the internal memory of the Lenovo a690 black, 770, 800, a2107a phone in a different folder, the program will help to solve this problem DiskDigger. Answer 2. So that such situations do not arise, before performing certain operations with the memory of the Lenovo phone, it is necessary to make a backup (data backup). To do this, you need to connect your smartphone to the computer via a USB cable and completely copy all the memory, all folders and files to the PC hard drive. After these steps, you can move the files to the SD-card of the cell phone.2. Question. I got the "Not enough memory on my phone" error. I deleted unnecessary files, folders and cache according to the recommendations. Now, when viewing photos, when opening the "Gallery", the system writes another error "The storage is not available". I have a Lenovo s 50 phone. How can I solve this problem? How to return photos, photos, photographs back to the Gallery?
Answer. In order to avoid such problems, you should always make a backup copy of Lenovo's main memory and flashcards. In this case, while cleaning the system, you may have accidentally deleted the folder with photos on the memory card, which is located at the address: SDCARD / DCIM / CAMERA. You can try to recover lost files using data recovery programs: CardRecovery or PhotoRec.
On this page you can read instructions on how to connect, increase, clear, expand the RAM, cache on the Lenovo s 50 phone on the OS platform on the screen with the resolution, type and other models. How to free, clean the internal storage, sd card on android Lenovo 7, tab 2 30, tb2 tab 2 16, tab4 tab 4 plus tb, tab3 tab 3, p2, a7600 h, k6 note power, a1000, s1 lite, a6010, tab 10, shoot shot, 4 10 plus 64, k5, x304l 64gb, c2 power, tb3, zuk, phab 2, s 50, tb x704l, p1ma40 8gb 32, k 5, s 1, 2 a10 70l, p1m, ideacentre aio, yoga 2gb, essential, z90a40, a5500, y720 4g, tb 4 8504x, x x3, 730x, a859, a369i, a316i, 850m, pb2, k10a40, p770, a660, p700i, a789, ideaphone s720 gray, P780 S90 4Gb 32Gb, A2010, P70, A536, S850, A319, S60, Vibe Shot, K3 Note, g580, 70, s660, vibe x2, vibe z2, a7, g570, a5000, b50, a328, s860, a6000, s820, g50, b590, a7600, a8, a916, tab 2 a10, vibe p1, vibe pro, a2109, s2109, k1, thinkpad tablet 2, ideatab a2107 16gb 3g, yoga, ideatab s2110, s2109a, ideapad a1, a2109a, windows 8, a2107ah, s890, k900, a820, 720, s880, ideaphone a800 black, a690 black, 770, 800, a2107a, answer to the question why not enough, problem with device memory.
Instructions on how to clear, free, internal memory, cache on Lenovo A319, S60, Vibe Shot, K3 Note and other models can be found here. Find out where the files are and how to move or delete them correctly. How to clean a flash memory drive, sd card of an android phone for Lenovo tab 2 30 phone based with a screen type with resolution and other models.
Popular Lenovo Reviews
| Free download of pictures is possible for such types of Lenovo phones as simple and touch-sensitive, for different OS, registration is not required. | Programs for remote desktop connection of Lenovo cell phone. Gaining remote access to the file system of a mobile device and its OS, as well as the ability to configure and administer the system via the Internet.|
| If for some reason you are having difficulty connecting your Lenovo phone to a laptop or PC via wifi, bluetooth, usb, read the following instructions. | |
| For information on how to restore a Lenovo phone after flashing or from a locked state, or when the phone does not turn on, you can read here. | |
 | Lenovo has such a ROM issue. You start installing programs and after a while the system writes "Not enough memory". How to overcome this problem, further ... | For these and other questions: what types, resolutions and sizes of screens for cell phones are, how much it costs, you can read here.
| - International Mobile Equipment Identifier — a 15-character number assigned to all Lenovo mobile devices when manufactured by Lenovo. |
 Architecture of a distributed control system based on a reconfigurable multi-pipeline computing environment L-Net "transparent" distributed file systems
 Email sending page Fill relay_recipients file with addresses from Active Directory
 Missing language bar in Windows - what to do?