How to change the keyboard layout on a smartphone. Five Easy Tips for Typing on Touchscreens
Surely everyone in life sometimes has situations when you need to write something down urgently, but there is no pen and paper at hand. And something important, or a telephone interesting person, whether the address of the store or even just an idea, disappeared forever from our lives. However, in our time of mobile phones, somehow writing down something you need has ceased to be a problem. Android smartphones make this process even easier. And at the same time, it is very important to have comfortable keyboard, which will allow you not only to painfully poke at the screen, but to quickly record everything and even have fun. In this review, we're sure to find the keyboard that's right for you.
Of course, any smartphone must have some kind of keyboard. However, in most cases, it can only suit when you need to write a maximum of a couple of sentences per week. If you write several SMS or notes a day, then most likely you should try one of the keyboards in this review.
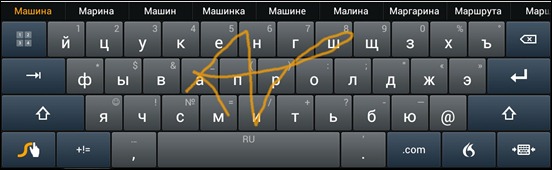
For those who are not in the know. On-screen keyboards are of two types. Basically, people use ordinary typesetting keyboards, in which each word is typed by letter. However, there are also keyboards with a slide set, in which you need to draw a line through the letters that make up the word. However, it is rather difficult to explain, it is easier to show.
How to switch to a new keyboard
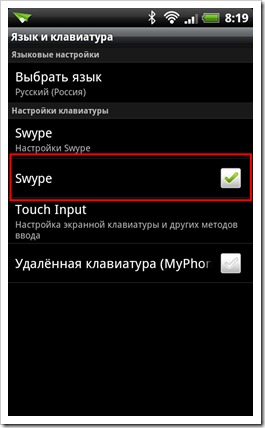
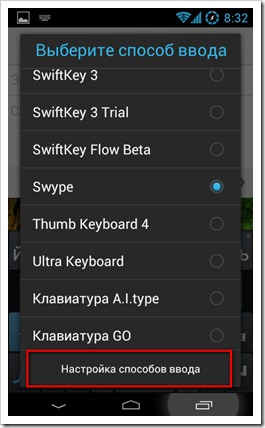
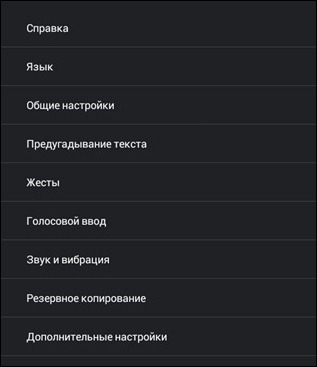
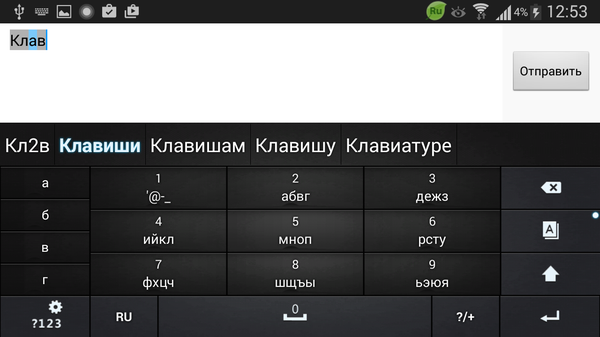
In Android 2, switching to a fresh keyboard is somewhat confusing. You need to go to the settings and select "Language and keyboard".

We set a check mark on the installed keyboards.
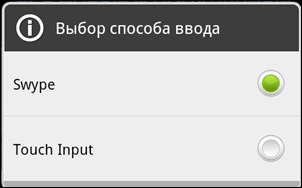
Then in the input field of any application, for example, in the search Google play, make a long tap and select the "Input Method" item in the menu that appears.

Where we select a freshly installed keyboard.
In Android 4, switching is a little easier. Go to any application and tap on any input field. A keyboard will appear and with it such an icon.
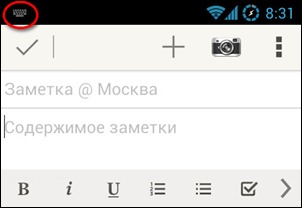
Tap on it or open the notification panel.
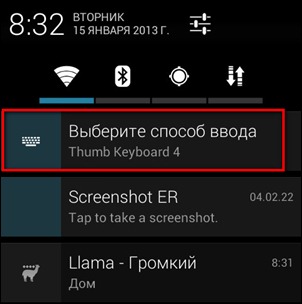
A menu appears, where we select the item "Setting input methods".
We get into the settings, where we put a tick on the desired keyboard.
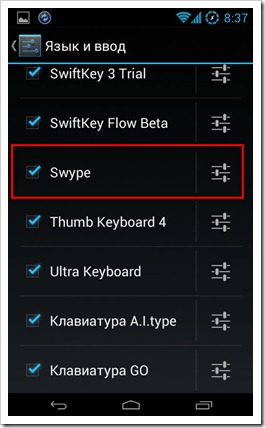
Then press the "Back" button and select the installed keyboard that appears in the menu.

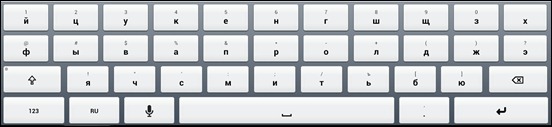
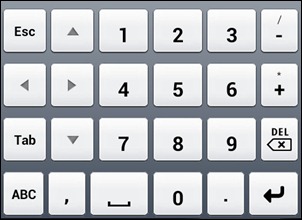
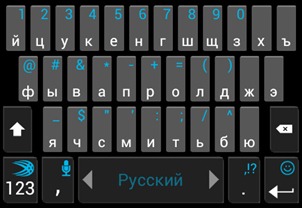
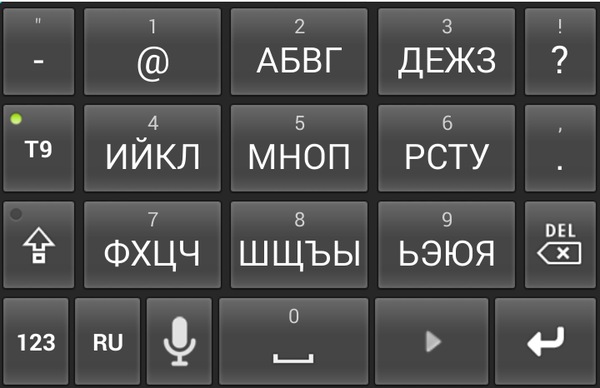
Thumb Keyboard
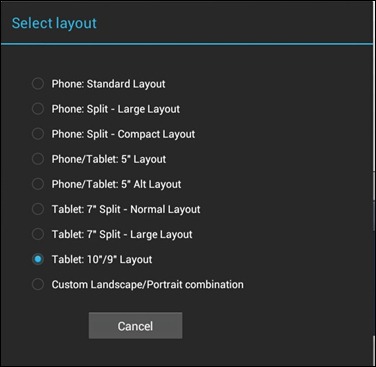
The first keyboard, the developers of which realized that on a tablet, especially on a 10-inch tablet, it is much more convenient to type with your thumbs and offered a special split layout. Here's one:
The rest of the Thumb Keyboard is a regular typesetting keyboard.

In landscape mode, you can turn on a special top row of keys. Each key in this row can be configured for any action by making a long tap.
Thumb Keyboard has a solid number of layouts for different screen sizes.
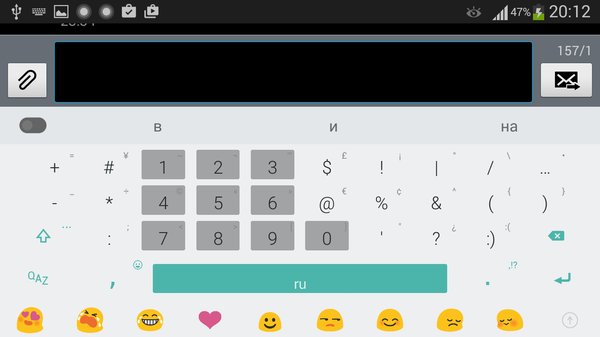
Switching languages is done with a scrolling gesture on the space bar. Voice input uses Google services and requires a connected internet. Thumb Keyboard has a decent enough dictionary and suggests words, including contacts, by the first letters entered. Unfortunately, this keyboard does not have a prediction of the next word and slide typing. But there is support for gestures that are customizable.
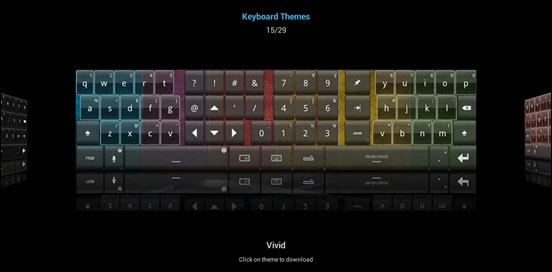
There are many themes to choose from in such a spectacular 3D interface.
There are a lot of settings and they are grouped badly enough, so you can search for the desired option for a long time.
Unfortunately, the developers are so confident in their creation that they don't provide a trial version. The price, however, is not high, about $ 1.5.
Pros of Thumb Keyboard
- Tablet layout for thumb typing
- Customizable top line
- Arrows
- Gesture support
- Various themes available
- Contact hints
- Smiley panel
Cons of Thumb Keyboard
- No trial version
- No slide set
Swype
The creators of this keyboard were the first to offer a slide set. The first time I tried to type words in such a cunning way, I thought: "Damn, some kind of garbage." However, the idea interested me, and pretty quickly I got used to it so much that now I really don't understand how you can type the text by letter. The slide is much nicer and faster.
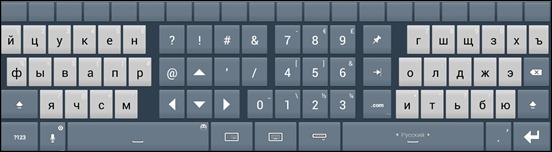
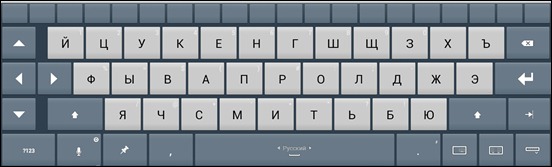
Swype has 3 keyboard layouts. In portrait mode, it is quite compact.
Landscape mode.
There is a special tablet mode for typing with your thumbs. For the first time such a layout appeared in Thumb Keyboard, but apparently the Swype developers could not pass by such a tasty idea. Unfortunately, they didn't think to place in the middle numeric keys like in Thumb Keyboard.
There is a digital panel with arrows and additional functions. It is activated by pressing the upper left button.
There is also a symbol panel.
There is a handwritten set by letters, although it is disabled during the first installation and you need to activate it in the settings. However, the regime is very exotic and it is not very clear who wants to torture himself in this way.
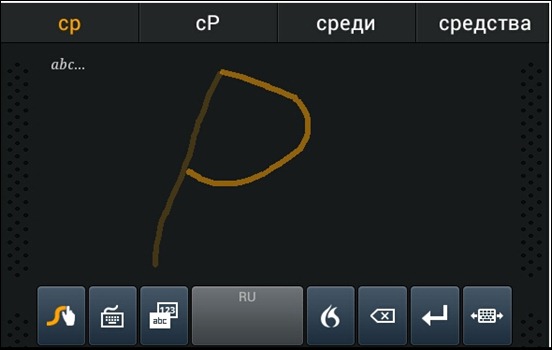
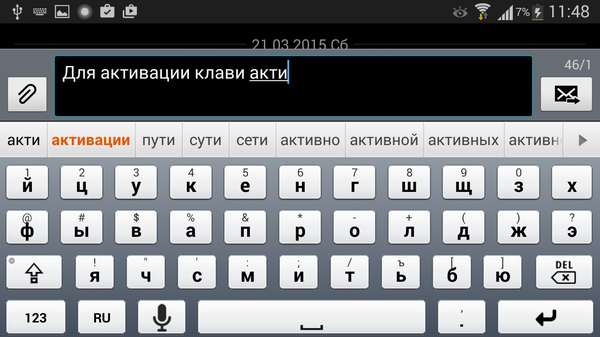
The language switches in two ways. You need to make a long tap on the space bar and select the desired language from the menu. Or draw a line from the “Swype” button to the space bar. It's not as convenient as one-button toggling, but you can get used to it. But Swype remembers everything you write and offers suggestions for the next word. The hints also apply to contacts from the address book. You can also write them in a slide set. There is also voice input, it is activated by pressing the button with the flame icon, but it works somehow very strange. It recognizes one word out of ten.
Swype pleases with various handy features. For example, a space is automatically inserted after the completion of each word. A period is put on a double space.
It is worth mentioning that Swype stores and synchronizes the personal dictionary through the Swype Connect service. Therefore, it should be activated after the first launch. In addition, through this service, Swype uploads new words and phrases that are often used by other people.
If the standard coloring does not please you, then from the settings you can choose a different design theme.
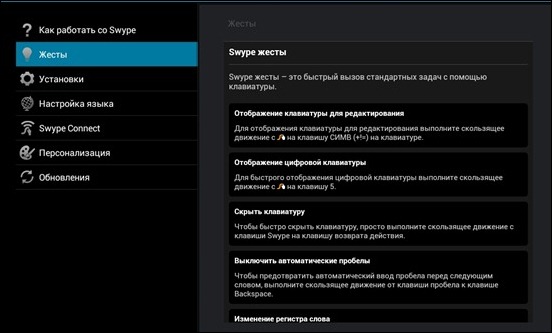
There are not very many settings, they are all well grouped. Here it will not be superfluous to read a quick reference guide "How to work with Swype" and "Gestures". It literally takes 5 minutes and will save you a lot of time.
Surprisingly, Swype is still a free keyboard, but it's not available on Google Play. You need to go to the download page and download it, and always from Android. There download Swype Beta. Don't worry about it being beta. The Swype developers adhere to this policy, and Swype has been in beta for several years now.
Pros of Swype
- Slide set
- Gesture support
- There are arrows
- Predicting the next word
- Handwriting text input
- Synchronization of a personal dictionary between different smartphones
- Contact hints
Cons of Swype
- Not a very convenient way to switch the language
- Recognition works poorly with voice dialing
- No undo and redo options
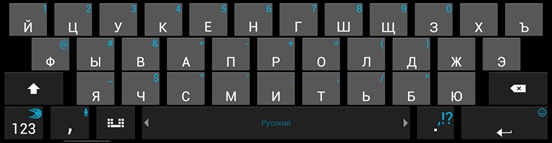
Smart Keyboard Pro
One of the most famous typesetting keyboards for Android. Unfortunately, you cannot enter text on it with a slide, but the developers have brought the spelling set to perfection. Indeed, this keyboard most accurately detects the key you press, and very rarely allows false positives. If nevertheless this happens, then you need to activate special function calibration.
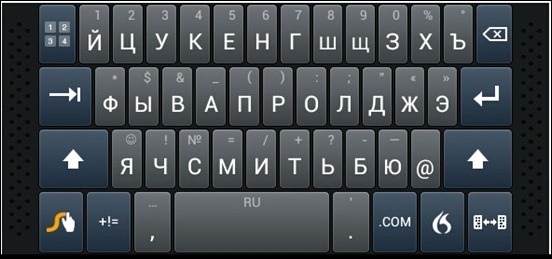
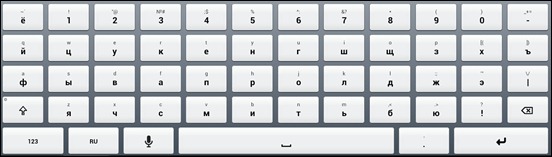
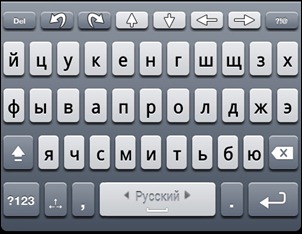
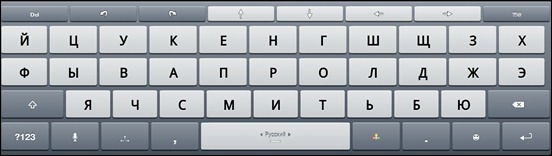
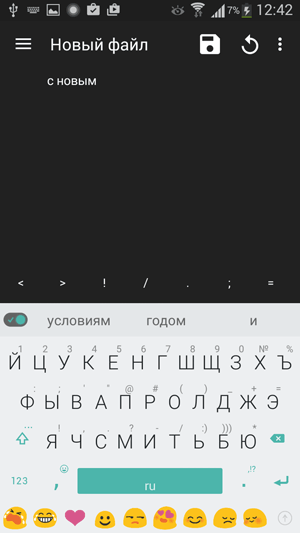
The keyboard has a bunch of different languages and layouts. For example, here is one of the portrait layouts in Russian.
The landscape layout enlarges the keys proportionally.
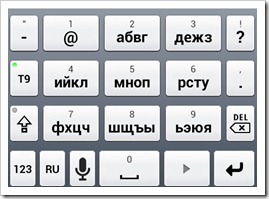
There is a wonderful layout that simulates a keyboard on a PC. This is for those who like to type passwords or other secret information in Russian in the English layout.
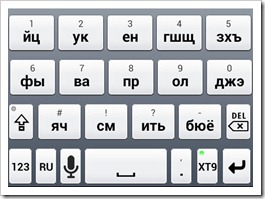
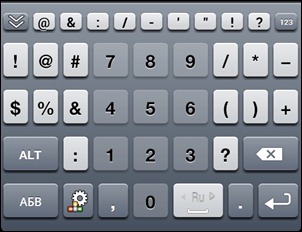
If you still lack a set of SMS via T9 in Android, then Smart Keyboard offers two options: XT9 and regular.
Of course there is a numeric keypad with arrows and tabs. By the way, if necessary, the arrows can be displayed on the main panel.
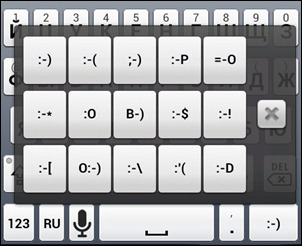
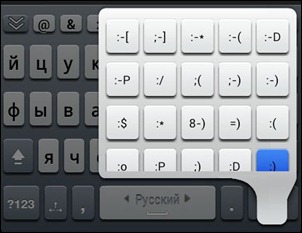
There is even a separate panel with emoticons that can be changed in a special editor, which will delight any emoticon.
There is a voice input button on the keyboard, which uses the Google service, that is, you need the Internet to work. There are customizable gestures that basically allow you to quickly launch some layouts or features. A special button is carefully provided for switching the language.
Unfortunately, there is no prediction for the next word in Smart Keyboard. However, the prediction of words and contacts by the first letters entered is done at a height. At the same time, if you often use some words, then over time they move to the beginning of the list.
A huge number of themes for Smart Keyboard have been made, both by the designers of the developer's company and by enthusiasts. Moreover, some skins are very original and exotic.
Although the settings are grouped, there are quite a few of them and some have specific names. Therefore, you have to tinker with the keyboard configuration for yourself.
There are two on Google Play Smart version Keyboard - trial and pro. In fact, they are no different, except that if you like the keyboard, then you can support the developers by purchasing the pro version.
Pros of Smart Keyboard
- A large number of themes
- Low false positives
- T9 support
- English-Russian layout similar to PC keyboard
- Gesture support
- There are arrows
- Smiley panel
- Button to switch language
- Contact hints
Cons of Smart Keyboard
- No prediction of the next word
- No slide set
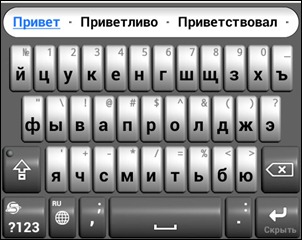
SwiftKey
For the first time, SwiftKey developers have made a very original way to enter. After the typed word, the user is presented with options for the next. The application analyzes what has already been written in Gmail, Facebook, Twitter and SMS. If you have a blog, you can even download your favorite words and phrases from your rss feed. In my case, the accuracy of predicting the next word is not very high, but there are people who, using SwiftKey, think that it reads their minds.
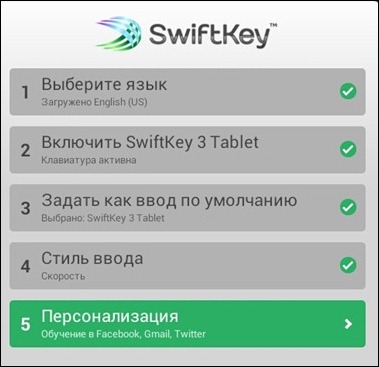
After the first installation, SwiftKey will prompt you to set it up immediately by choosing your language and typing style.
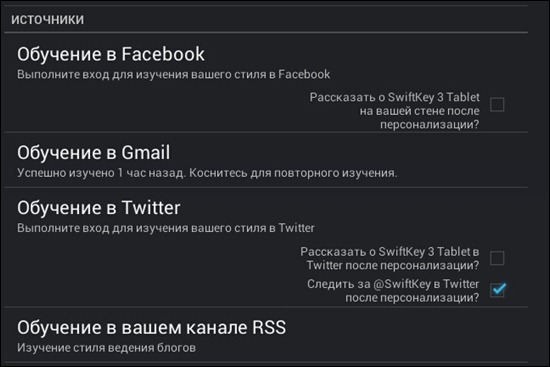
Additionally, you will need to specify logins and passwords for Facebook, Gmail and Twitter, so that the keyboard will get a taste of what you have been writing in mail for many years and social networks... This is necessary for a more accurate word prediction.
The keyboard has three types of layouts. Portrait is pretty standard.
The landscape layout works great for tablets too.
There is a special mode for typing with thumbs, which is sharpened for tablets.
Additionally, there is a panel with numbers and symbols.
And also with arrows and specific icons.
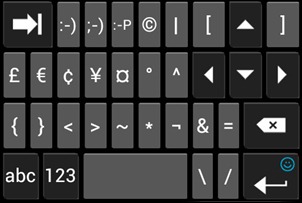
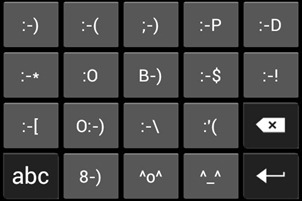
For lovers of smiles, there is a separate panel that is activated with a long tap on “Enter”.
The language is switched with a scrolling gesture on the space bar. There is voice input through Google services, which means you need the Internet. There is no slide set, but you can download the beta version of SwiftKey Flow, which provides this feature. True, it works a little worse than Swype, so we are waiting for the developers to complete it. SwiftKey does not support gestures, but there are a number of conveniences, such as a period on a double space or removing a space before a punctuation mark.
The keyboard looks scary to me, especially after the Smart Keyboard. The proposed themes do not improve the picture in any way, but you can choose some more suitable color.
Google Play has different versions for phones and tablets. Trial works for one month, after which you need to buy
The pros of SwiftKey
- There are arrows
- There is a panel of emoticons
- Dedicated tablet layout for thumb typing
Cons of SwiftKey
- Scary appearance
- Not a very convenient way to switch the language
- No undo and redo options
- Doesn't suggest contacts
A.I.type Keyboard
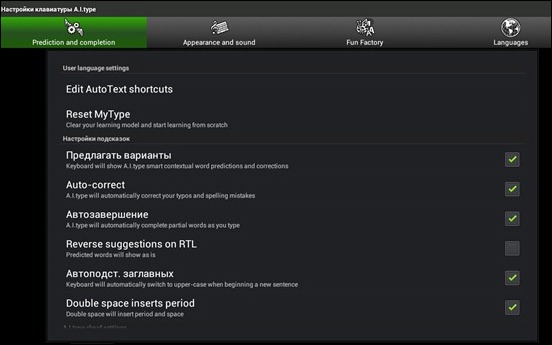
The developers of this keyboard in the description promise revolutionary context-sensitive word hints. True, in fact, the keyboard works on the SwiftKey principle, that is, words are predicted based on the texts typed earlier. It predicts A.I.type very well, maybe a little worse than SwiftKey, but this difference is very subtle. But it has a nice look and some very handy chips. One of these handy things is an additional top line with service functions, arrows, numbers and symbols. In this case, you can hide or show this line at any time.
There are only two layouts. Portrait, which is more suitable for smartphones.
And landscape, which looks very good on tablets. Unfortunately, there is no layout for typing with thumbs, and therefore on large screens may be inconvenient.
There is a symbolic and numeric panel.
And also a panel of various service functions, which has undo and redo buttons, which are quite unique for Android keyboards.
With a long tap on “Enter”, a panel of emoticons is displayed.
The language is switched by swiping the space bar. At the same time, switching the language somehow jerks the keyboard, which is a little confusing. Voice input traditionally works through Google services.
Themes are made much better than SwiftKey. There are dozens of quality skins to choose from and the keyboard looks pretty.
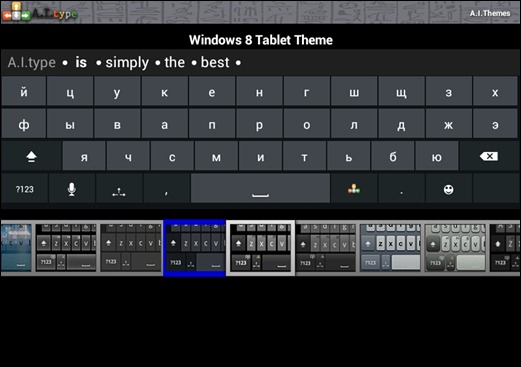
There are many settings, but at the same time they are piled up in a heap. The grouping seems to be there, but it helps to understand this sea of options, it is very weak. In the Fun Factory, you can show your creative talents and dramatically change the look of your keyboard. You can edit fonts, background image, colors, and more.
Trial A.I.type can be used for 15 days and, if you like it, then buy the plus version.
Pros of A.I.type Keyboard
- Perfectly done next word prediction
- Additional top line
- There is a cancellation and a refund (undo and redo)
- You can completely customize the look
- There are arrows
- Smiley panel
Cons of A.I.type keyboard
- No slide set
- No layout for typing with thumbs, which is not very convenient for tablets
- Not a very convenient way to switch the language
- Doesn't suggest contacts
- No gesture support
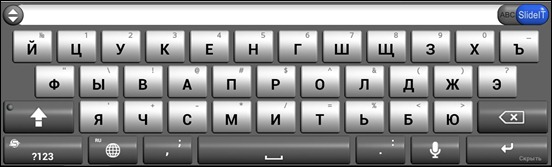
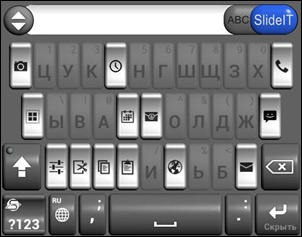
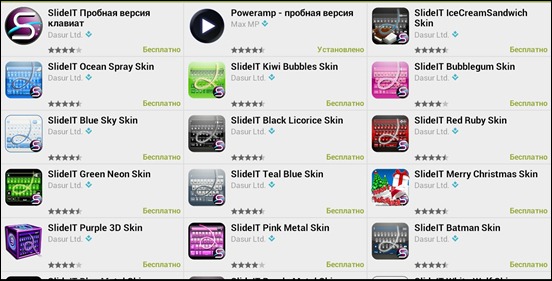
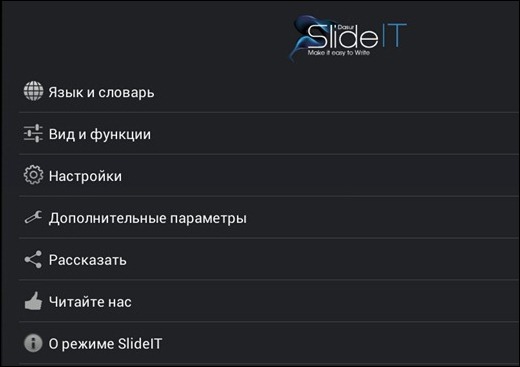
SlideIT
This keyboard came out literally a couple of months after Swype and also supports slide typing, which is clearly evident from the name. From time to time, developers make a qualitative breakthrough and bypass Swype, but then they again lose their positions. Thanks to this competition, slide-type keyboards are rapidly improving and delighting with their ideas.
There are only two keyboard layouts in SlideIT. The portrait is done conveniently and compactly.
The landscape is exactly the same, only the size of the keys is increased.
The size of the landscape layout can be changed, which is important for tablets. The very large stretched keyboard is not very comfortable for slide typing. But if you reduce it by half, then just right.
With a long tap on the key numeric keypad, a panel of various service actions and quick launch shortcuts appears.
The numeric keypad has copy and paste buttons.
And of course there is a panel of emoticons, where can we go without them.
Language switching is done with one button, which is clearly more convenient than different gestures. There is voice input, and not strictly tied to Google services. You can choose any other option.
There is a huge bunch of design options and you can always choose something to suit your tastes.
The few settings are grouped quite conveniently.
With Google Play, you can install a 15-day trial and, if you like it, then buy it.
Pros of SlideIT
- Handwriting text input
- Gesture support
- Quite a lot of themes
- You can flexibly resize the keyboard
- Convenient to switch language
- Smiley panel
- Action bar
Cons of SlideIT
- No prediction of the next word
- Doesn't suggest contacts
- No undo and redo options
Outcomes
My first recommendation is to try the slide keyboard. For example, Swype or SlideIT. Both of these options differ from each other only in a few small things.
If such a keyboard still does not suit you, then you should take a closer look at the options for predicting the next word, such as SwiftKey or A.I.type Keyboard. They can be so accurate in their suggestions that you don't even have to type.
If predictive keyboards come up with completely obscene options or you just need more options, then take a look at Smart Keyboard for Smartphone or Thumb Keyboard for Tablet.
In case you do not understand all these newfangled things and want the good old T9, then Smart Keyboard is made for you.
If we talk about my personal experience, then I use Swype and am very pleased with it. Latest Versions this wonderful keyboard makes me very happy.
Good luck choosing the keyboard that will delight you.
All owners of smartphones and tablets know that typing messages on an on-screen keyboard is far from being as convenient as on a regular computer keyboard. This is primarily due to the lack of tactile response, because we do not press virtual buttons, but only touch them. Smartphone “keyboards” are also so tiny that any inaccuracy leads to touching adjacent keys.
These inconveniences are not so obvious if we write an SMS or a short post on Twitter, but if you need to write email, blog post or magazine article? Of course, best solution- use external keyboard, fortunately, almost all modern devices support the connection of any wireless "keys" with a Bluetooth interface. But what if you do not have such an opportunity or you fundamentally do not want to weight a compact smartphone or tablet with bulky accessories?
Fortunately, there are many ways to make typing on the glass much more convenient: you just need to understand the settings and spend some time evaluating different options. Here are some basic tips to make working with virtual keyboards more comfortable.
1. Choose the optimal position
When working on a desktop or laptop the screen is in front of our eyes, and we can adjust a comfortable position so that it does not glare, and we do not bend over it until it hurts in our neck.
With a smartphone or tablet, it's not so simple: most likely, to type long text, you put your gadget on some kind of horizontal surface, and as a result, you have to look at the screen from an uncomfortable angle.
If you intend to enter long texts often, try to choose devices with as little O Larger screen size: if it is a smartphone, prefer a phablet with a display diagonal of at least 5 inches, if it is a tablet, take models with a diagonal of about 10 inches. Firstly, on large gadgets, virtual buttons are larger, and secondly, it is more convenient to install them at the desired angle - for example, placing the upper part on a book, a closed laptop or some other object. For a tablet, you should purchase a folding cover that allows you to put it at a certain angle, or a special stand.
After that, you need to make some system settings... First of all, adjust the brightness of the screen. Do not rely on automatic adjustment: at the slightest change in illumination, the brightness will also change, and this is very annoying when typing.
Then choose a font size that is comfortable. If you are using built-in or some simple applications like Writer for Android, this is done in system preferences. In more advanced text editors like Pages for iOS, you can select the font size directly in the app itself.
2. Select a keyboard layout
The ability to install alternative virtual keyboards is not considered important by all manufacturers: if there are many options for third-party developers for the Android platform, then there is simply no such function in iOS. In principle, this is quite understandable, and in most cases the standard keyboard turns out to be the most convenient - but not always.
For devices under Android I would recommend taking a closer look at the Swype keyboard, which allows you to enter words using a “sliding” method, that is, without lifting your finger from the screen. Some find this method more convenient, while others prefer the traditional mobile devices input, relatively speaking, "thumbs". Still others initially try to use the classic "multi-finger" dialing method, but quickly realize that it is poorly applicable even on large tablet screens, let alone smartphones.
Swype uses T9 technology to guess words by first letters, which is not surprising, because Swype and T9 have the same author - Cliff Kushler. Interestingly, some manufacturers immediately install Swype in their gadgets in addition to the standard keyboard, and you do not need to download it from Google Play and activate it, but just select it in the settings.
Another variant alternative keyboard- SwiftKey. This virtual keyboard belongs to "intelligent", that is, it remembers and analyzes the texts entered by the user, and "prompts" the necessary words and expressions "on the fly". It supports normal and sliding text input, as well as dictation via Google Voice.
There is no full-fledged alternative keyboard for iOS (in the same sense as for Android), since there is no option to install it. However, for iOS version 7 you can install Fleksy keyboard as a standalone application. It can integrate into some other programs, but to use the typed text in other iOS applications, you will have to copy it. Fleksy boasts an original predictive input algorithm and support for gestures, but since it does not understand Russian, this keyboard is not yet very useful for us.
In the settings of the standard keyboard, there are also items that can be enabled or disabled at your discretion. First of all, this concerns automatic installation capital letters at the beginning of each sentence and auto-correction: some people prefer to have everything in their hands, and this kind of automation annoys them.
3. Free up screen space
Smartphone and tablet displays are small. At the same time, useful space can be occupied by all kinds of status bars, application panels and other elements useful for normal use. However, in cases where you are watching a movie or typing, you want to hide these elements.
On Android devices, you can use free application full! screen, which allows you not only to hide the system panel and organize a full-fledged full-screen mode, but also flexibly adjust, for example, the size of the touch area and the duration of the recognized press.
If you have an alternative CyanogenMod firmware installed, you can switch to Extended desktop mode, which also hides all secondary elements.
4. Screen orientation: portrait or landscape
Despite the seeming obviousness that it is more convenient to type texts with the landscape orientation of the screen, this is not always the case. Yes, the keys in this case are larger and easier to use, but you will only see five or six lines of text.
If we switch to portrait orientation, then we will see b O most of the page, but the virtual keyboard itself will be almost halved.
Of course, it all depends on personal preference, but in our opinion, if you have a tablet, portrait orientation is still more convenient: the keys remain large enough so as not to miss, while you will see a significant part of the page. In the case of a smartphone, of course, you have to make compromises.
The stock iOS keyboard supports the so-called "thumb layout", which can be enabled on iPad by simply sliding it apart with two fingers or by clicking on the keyboard icon in the lower right corner and swiping to the upper register key. Such a keyboard can be moved around the screen and placed in any place, which is sometimes useful.
5. Remember useful tricks
In mobile operating systems There are some helpful tricks to improve the usability of virtual keyboards. For example, on iOS, to put a period, a space, and select an uppercase letter for the beginning of the next sentence, just double-click on the space. Or, to quickly go to the selection of one of the popular first-level domain names, including .com and.ru, you need to hold your finger on a point: this action will cause a pop-up panel.
There are other little secrets, the description of which is not difficult to find on the Internet. Knowledge and regular use of such secrets will not only save time, but also make work with on-screen keyboard much more comfortable.
Android has a built-in keyboard, which is also called virtual or on-screen keyboard.
The first question that arises for a person who has not previously dealt with the touch screen of a smartphone or tablet with Android: where to look for a keyboard? The trick is that you don't have to look for it: the keyboard automatically appears itself when you need to enter something with its help.
The second question of a newbie, which I myself was on Android: how to master typing on Android?
It's easy to master the virtual Android keyboard if you practice writing messages to family, friends, on social networks, etc. At first you will suffer a little, but then everything will work out, if only you do not quit.
I am reviewing a regular Samsung keyboard that is native to a smartphone.
1) Capital letters when typing on Android
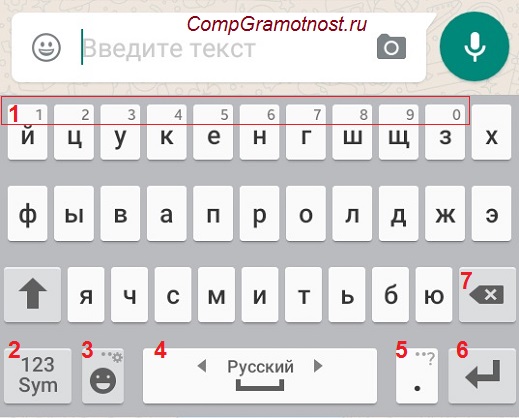
How to change from small letters to large (capital) letters? Notice the arrow for uppercase (1 in Figure 1):
To type ALL the text in capital letters, you should make a long tap on the upper case arrow (1 in Fig. 1), that is, press the arrow and hold your finger on this arrow for a while, and then type.
To remove the LARGE (capital) letters mode, you also need a long tap: as you turned on the capital letters mode, you turned it off.
After the period, the next word is automatically capitalized. This is intended to make it easier to enter text, because, as you know, a period means the end of a sentence, and a new sentence begins with a capital letter.
If you do not immediately enter a capital (capital) letter after the period in a new sentence, this means that there is no checkmark in the Keyboard Options next to the option “Automatic capital letter in the first sentence” (number 4 in Fig. 2), you should put this tick.
In Android 5, the keyboard settings are located in the following way: “Settings” - “System” - “Language and input” - “Keyboards and input methods” - “Samsung keyboard”.
Rice. 2. Android: input languages, auto capital letters
You have probably seen on the Internet texts or comments printed without periods and commas, and also without capital letters? Agree that such texts are not so easy to read and understand. Therefore, when entering text, do not neglect dots and capital letters.
2) How do I change the language on Android?
In other words, how do I switch the keyboard layout? V different models Android can be designed for this
- globe button,
- or a button labeled En / Ru,
- or you need to slide your finger over the space bar.
In my model, to change the language on Android, you need to slide your finger (from left to right or right to left) over the space bar (2 in Fig. 1), figuratively speaking, “dust off” the space bar.
If you slide your finger once - the first language changes to the second, another time you wave your finger - the first language appears again. This all applies to the case when two languages are enabled (active) on Android.
In fig. 2 you can see that in Settings - "Keyboard settings" - "Input languages" I have two languages enabled (they are enabled by default):
- Russian,
- English.
If you connect more languages, then the change of languages will occur sequentially: from the first language to the second, from the second language to the third, and so on in a circle. As a result of swiping on the space bar to change the layout, all connected languages will appear in turn: a kind of circulation of languages in Android.
3) How to connect more languages in Android?
Open in Android in turn: "Settings" - "System" - "Language and input". There are check marks opposite the connected languages. You can also easily connect other languages that are on the list.

Rice. 3. Connecting new languages to Android
As seen in Fig. 3, to connect a new language in the Android settings, just check the box next to the new language, and it will become available. This way you can connect many languages, if necessary.
4) Landscape screen orientation is more convenient for entering text
If the "Screen rotation" option is enabled on the smartphone, then it is enough to turn the smartphone in your hands to change the vertical position to the horizontal one. When this happens automatic turn screen to its landscape version (Fig. 4):

Rice. 4. Landscape screen orientation on Android
Landscape screen makes it easier for newbies to get to desired buttons without accidentally pressing the "extra" buttons. Plus, in landscape orientation, the larger buttons are more visible.
The screen rotation mode is turned on and off differently in different models. In my model it is “Settings” - Device “Display” - “Auto-rotate screen”. Opposite the option "Auto-rotate screen" there should be a check mark, then it will be possible to rotate the smartphone for a different position of the screen in different situations.
5) How to remove a character?
There is a cross to remove it (number 7 in Fig. 5). The easiest way is to delete immediately incorrectly entered characters, because in a typed message it is difficult to put the cursor in the right place.
To move the cursor in the Samsung keyboard, you just need to poke your finger in the right place, but your finger can not always accurately hit the target. Lucky for those who have a stylus on Android (a pencil to facilitate typing), there is no problem with cursor positioning with the stylus. But the stylus needs the Android device to support Note technology. If your Samsung device does not support it, the stylus will not work on it either.
6) How to print numbers and other symbols?
Rice. 5. How to type a digit, period, emoticon, line feed, delete a character
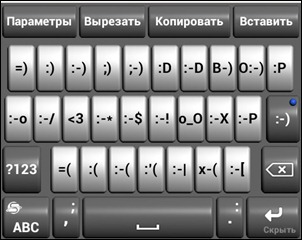
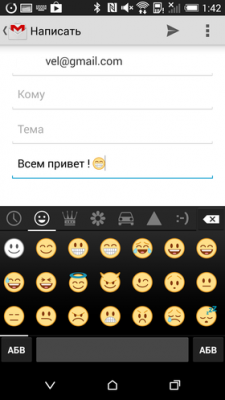
3 in Fig. 5 - this button opens the screen with emoticons: choose any and insert into your messages.
4 in Fig. 5 - tap on this button enters into the text space... If you slide your finger from one side to the other, the Russian layout will change to English.
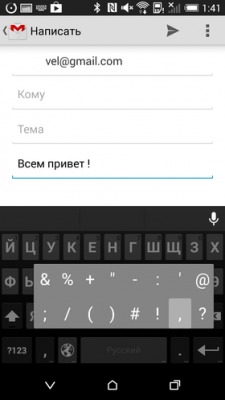
5 in Fig. 5 - tap on this button puts point in the message. A long tap on the same button will open a window with other symbols:! ? " other.
6 in Fig. 5 - tap on this arrow calls line translation(go to a new line), start a new paragraph.
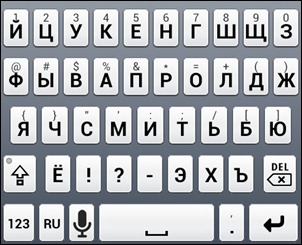
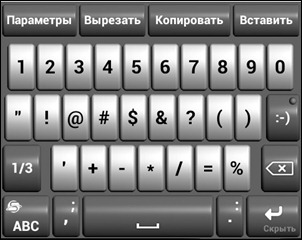
To enter numbers there are two ways in the message on Android:
- Long tap on the key in the first row (number 1 in Fig. 5). If you hold your finger on a key in the first row (long tap), a number will appear instead of a letter on the same key.
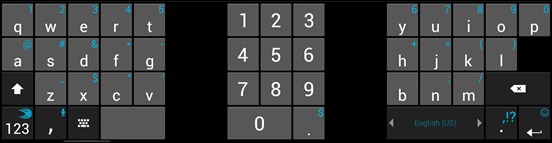
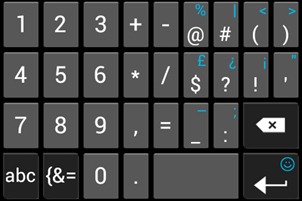
- You can tap on the key to switch the keyboard to symbols (2 in Fig. 5). Will appear additional keyboard(fig. 6), where there will be numbers in the first row. To enter these numbers, you will need the usual tap on the number keys.
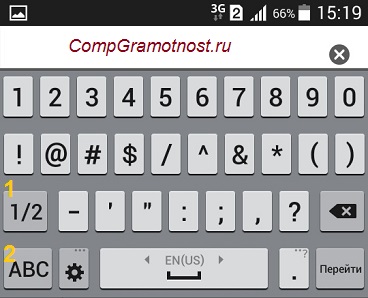
Rice. 6. First part of the numeric keypad (1/2)
To continue the numeric keypad, tap on key 1 in Fig. 6, and to return to letters there is an ABC button (2 in Fig. 6).

Rice. 7. Android keyboard symbols (2/2)
1 in fig. 7 - return to the first part of the numeric keypad, which in fig. 6.
2 in Fig. 7 - return to the letters on the Android keyboard.
How to dial sign number on Android (no.):
- just enter Latin N,
- or install other keyboards,
- or copy from somewhere No. and paste.
7) How to turn off the sound of typing on Android
In the Android Settings, we find the following items: System - Language and input - Samsung keyboard - Keyboard settings. In the Parameters, we find the "Feedback by pressing the key" and uncheck the box opposite the "Sound" (Fig. 8).

Rice. 8. Enable / disable sound when typing on Android
In addition, you can check the general (system) sound settings on Android: Settings - Device - Sounds and notifications - Sound mode:
- Sound,
- Vibration,
- Soundless.
Here you need to check where the checkbox is. I think it's better to have a checkmark next to the "Sound" option.
Exercises to check:
1) If your smartphone has Internet, open Chrome browser... V address bar browser enter: yandex.ru.
2) Open "Messages" on Android. Enter your message: “Hello! Today is August 1st, 2016. I'm typing a message on Android. "
A guide to Android keyboard skins, part 1
With active correspondence, constant typing on smartphones and tablets, the requirements for the software keyboard increase. In this guide, we will explore the keyboard skins available on Google Play.
The information will also be useful to those who find the standard keyboard inconvenient for many reasons, be it inconvenient key layout or lack of necessary languages, layouts, functions.
Review participants:
Also mentioned will be:
- Hacker's Keyboard
Smart Keyboard is a multilingual keyboard with support for themes and alternative layouts. The adjective "Smart" in the name, apparently, is explained by the fact that this shell can automatically correct typos, guess words and work with a custom dictionary. However, like many other reviewers.
To enable the keyboard, go to the system settings "Language and input", activate Smart Keyboard and select it as the default input method.
Russian is present in the list of supported locales, in the "Language" settings of the application, you can mark the layouts available for switching when typing. For the Russian language, QWERTY layouts in 3 or 4 rows, T9 and a phonetic keyboard are available. Accordingly, where there is QWERTY, the usual layout for the Cyrillic alphabet is assumed (hereinafter in the guide).
For full support of the Russian language in Smart Keyboard, you can go to Google Play and download the corresponding dictionary. The Text Prediction section provides options to help you speed up your text input and reduce the percentage of typos. These include: fix typical mistakes, hints, word completion and punctuation. Separately, it is worth noting the smart autocomplete option - that is, the tips take into account the frequency of the word use.
Custom dictionaries and autotext can be imported / exported in CSV format. The program can copy both dictionaries and user settings to the cloud, synchronize via Facebook, Twitter, Evernote and other web services.
When working with text, Smart Keyboard allows multi-touch (i.e. multitouch) and gestures (swipe left, right, up and down). Various actions can be assigned to them: changing the language, switching to compact mode, editing text, and more. dr.
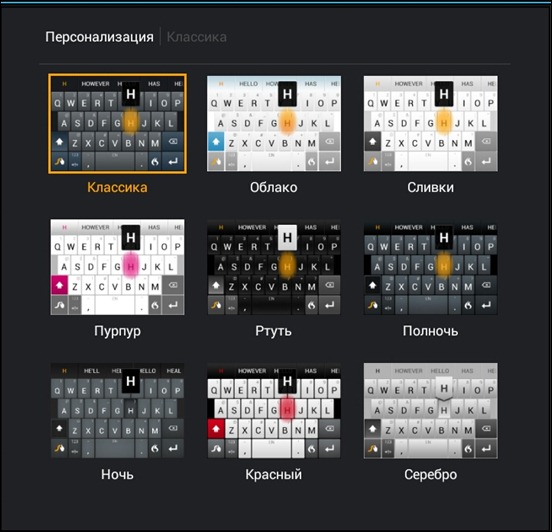
Through the general settings of Smart Keyboard, you can change the keyboard style. The list contains quite recognizable themes: iPhone, Android, Galaxy, HTC, in various colors, plus you can download other themes on Google Play.
On small screens, you can activate the full-screen keyboard. Also, for accurate typing, it is not difficult to increase the height of the keys in landscape and portrait display. Separate keys (arrows), fields and rows are configured for each layout.
Summary... The Smart Keyboard shell will be interesting as a replacement and addition to the standard keyboard. It's kind of universal option without "frills", which will suit many users.
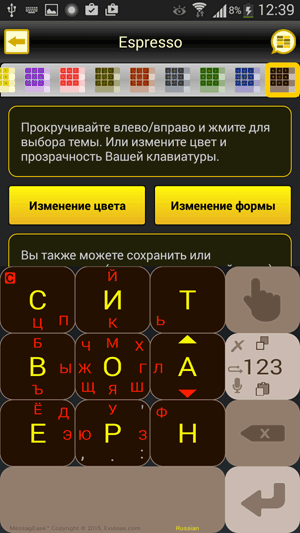
MessagEase is significantly different from most of the keyboard skins on Google Play. First of all, there is no traditional QWERTY layout. But, as you know, the QWERTY layout is not optimal everywhere and not for everyone. For devices with a small screen, it makes sense to test alternatives.
According to the developer, maximum speed, achieved when writing a text in MessagEase, is 82 words per minute, which is not so little. To study the structure of the MessagEase keyboard and further accelerate typing, you can download the MessagEase Game educational game on Google Play. Also, after installation, it will be useful to familiarize yourself with the tutorial and look into the help section, which describes in detail the functions of the application.
MessagEase's interface is represented by a keyboard with 9 large buttons. They are arranged so that text entry is intuitive: the most common letters of the alphabet are placed in the center of the keys, and to enter them, just touch the center of the buttons. Other letters are entered using gestures (circular motions, swiping to the side, etc.). You can use multitouch, draw shapes in combination with modifier keys. Thus, it is easy to enter not only letters, but also numbers, special characters, and use editing commands.
In MessagEase, you can connect dictionaries to guess words. They are available as add-ons on Google Play, including a Russian-language dictionary. In the section “Autoswitches” there are more settings for text: correction of letters to lowercase, punctuation, correction of errors in words, etc.
For quick entry, MessagEase provides macros. True, these are not so much scripts as abbreviations, abbreviations of expressions. They are convenient when entering frequently occurring text fragments, some values (date, time, contact) and some macros inside others.
And finally, in the additional parameters, you can activate the "Turbo speed" mode - a synonym for sloppy input. Using this method, you only need to enter basic characters in the layout; MessagEase corrects typos on its own.
The MessagEase application flexibly configures the appearance of the layout. Through the settings, you can change the color and shape of the keys, fonts, remove unnecessary symbols on the buttons. In addition, the shape and size of the keyboard itself changes. Left- and right-handed keyboards are available for tablet and landscape modes. You can switch between modes on the fly - directly when entering text.
Summary... This exotic solution can take root on Android, although it requires some retraining and getting used to. This approach has both pros and cons. The advantages of MessagEase are undeniable: an optimized and convenient layout, many important points have been taken into account: interface customization, full support for languages and gestures. In general, all this ensures fast and correct text entry. However, such addiction can lead to the opposite effect: you will have to relearn the QWERTY layout again.
The application is interesting at least because it raised almost 100 thousand dollars through crowdfunding, despite the fact that it was planned 10 times less. The Minuum Keyboard is described as a "small keyboard for the thumb" - which is obviously attractive.
Minuum Keyboard offers not so much an alternative layout as its other layout - QWERTY staggered. This allows you to free up the screen and, at the same time, have a full set of letters and numbers at hand. It is most convenient to use such a keyboard in landscape display and on a tablet: all letters are clearly visible, the distance is optimal and there is access to the bottom row of characters. Pressing any button turns on scaling.
In case of sloppy typing, words are automatically corrected. To demonstrate how Minuum Keyboard handles typo fixing, you can run a small tutorial inside the program.
Alternatively, there is a full QWERTY layout and others: alphabetical, QWERTZ, AZERTY, Colemak or Dvorak. In the shell settings, you can enable bonus panels by expanding the keyboard with various options. These include: clipboard management, search, input speed, cursor control, etc.
In addition, you can change the keyboard layout: normal, left or right, floating keyboard. The height of tooltips, space, compact and standard layouts is adjustable.
As for editing text, there are not so many options in Minuum Keyboard: correction of capital letters, smart punctuation, word guessing.
By default, in the list of languages for which dictionaries can be downloaded, there are only German, French and Italian. To add the Russian language, you must enable Internet access and wait for the corresponding line to appear in the Language & layout section.
Despite its strikingly minimalist look, Minuum Keyboard offers many themes. They are divided into flat, soft, diamond-shaped, natural and others. Particularly curious are chameleon themes that change the background color of the shell depending on the current application.
Summary... Minuum Keyboard will appeal to tablet owners and those users who value typing speed and the ability to auto-correct typos. At the same time, the smartphone version is quite suitable for comfortable working with text, since in Minuum you can change the layout and adapt the keyboard to the size of a small screen.
Hacker's Keyboard
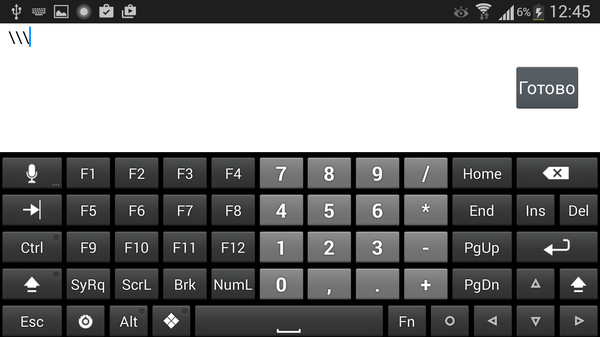
Hacker’s Keyboard is a program for those who need to make a kind of "mobile hack" to return a standard PC keyboard to the device. Almost all keys of this keyboard are present (for example, function keys F1-F12) and are in place.
For the Russian language in Hacker’s Keyboard, regular and phonetic layouts, 4 and 5 rows of keys are available. A Russian-language dictionary is available separately on Google Play. When typing, you can include hints, word suggestions, auto-completion, punctuation.
There are enough interface settings in the keyboard: you can change the height of the keyboard, the number of rows, the size of the text, themes. You can customize gestures and reassign individual keys.
There are separate settings for the ConnectBot SSH client in the application - the PC keyboard, among other things, allows you to work in the terminal without restrictions.
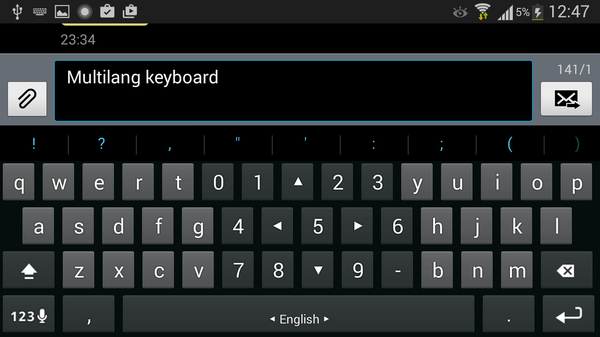
MultiLing Keyboard is a lightweight multilingual keyboard for Android. There is a Russian layout, in addition, a large number of alphabetic layouts are presented here: T9, compact, phonetic Cyrillic, left and right, Qwerty / Azerty / Qwertz, Dvorak, Neo and others.
For auto-completion, you need to download an additional dictionary on the developer's website. The setup process is not as convenient as in other programs: you need to spend a few minutes trying to find the required dictionary, making your way through the advertising modules. Nevertheless, in fact, everything works, the support for the Russian language is well implemented. Autocorrection is available, abbreviations can be used, hints work. The application custom dictionary is imported and exported.
For quick input, you can use gestures and hard keys. For certain buttons (space, period, Shift, etc.), the action is configured when they are pressed for a long time.
As for the visual settings, you can change the theme, change the height of the keys and the distance between them, the size of the fonts. Thus, the MultiLing Keyboard adapts well to any fingers. It should be noted here that the display setting is not that convenient: there is no way to quickly look at the keyboard and test the text input.
In addition to customizing the appearance, you can activate split mode: split keyboards for landscape or portrait display. Split is especially convenient on tablets.
First of all, Go Keyboard is a keyboard that focuses on visual diversity - icons and themes. By the way, there are more than 1000 themes available in the market for every taste and color. True, by default, the choice in the program is small, and it is not so easy to find a suitable one among hundreds of topics. In addition to themes, in the settings, you can easily change some parameters of the keyboard display: height, font sizes, and so on. A separate section of parameters is reserved for sounds - here are collected nothing else than funny voice acting options. There are also extensions (plugins) in GO Keyboard, formally there are only three of them and they do not offer anything significant.
The program is intuitive: at the beginning of use, the user is shown "by the hand" how to switch the text input, after which in the settings you can turn on the Russian language and download the dictionary for autocompletion. The Russian layout is presented in two versions - YASHERT (phonetic layout) and in 4 rows. In general, the support of the Russian language is implemented well, but the impression is spoiled by the quality of the Russian localization: there are mistakes that are misleading.
On the functional side, Go Keyboard, perhaps, cannot offer flexible settings. However, the following features are noteworthy: predictive input, lexicon, autocomplete, hints. If necessary, you can export or import the lexicon to the SD card, but there is no online synchronization of the settings and the dictionary.
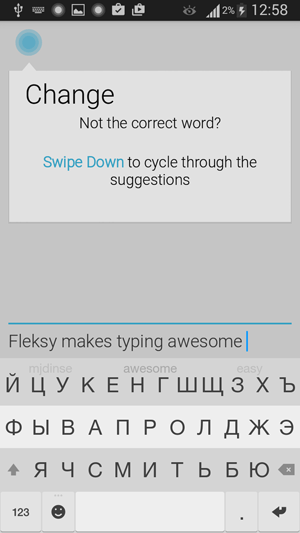
Fleksy developers claim their development is the fastest mobile keyboard in the world.
After installing Fleksy, it is suggested not only to turn on the keyboard and download the dictionary, but also to watch an interactive lesson on using gestures - even the lazy will show interest. The application does not burden the user with many combinations and gestures for memorization - instead, a basic set for mastering is provided. After that, it becomes clear that Fleksy has enough gestures to simplify typing and editing text. For example: swipe down - correct a word, up - undo the correction, swipe left - delete a word, double space - smart punctuation.
Although Fleksy's interface is not localized, Russian input is supported. In the settings, you can enable auto-correction of errors, display of options, correction of capital letters, study of words (saving to the dictionary) and import of contacts. There are not so many other settings in Fleksy, which again indicates minimalism.
The keyboard design is flat and minimal, with 30 color themes available to choose from. In addition, the transparency is adjustable, the size of the keyboard buttons (3 sizes), the space bar is removed, which makes the layout even more compact.
Fleksy supports extensions, and some interesting ones should be noted among them: the addition of a number row, the ability to quickly hide the keyboard, shortcuts, hotkeys, etc. free version a maximum of three expansion slots can be used.
The typing process has not become easier with the advent of touch screens: the keyboard is several times smaller than even a laptop keyboard, not to mention a computer keyboard; and the symbols are at least slightly different (we are talking about special symbols), and in general, communicating with the touch keyboard requires some skill and the necessary minimum of knowledge.
Dexterity in typing will appear by itself - just register in some social network and start "close" communication.
Today we will talk about how to correctly and quickly type and edit, if necessary, text on virtual keyboard your Android smartphone.
We will not delve into working with a specific Android background and talk about a single keyboard: the basic principles and rules for typing are the same for all smartphones, the only difference is in a specific keyboard installed on your specific device.
So, first of all, we need, in fact, to call the keyboard itself at the moment of typing.
It's simple: to invoke the keyboard, you just need to click on the field / window for entering text in which you need to type text. The keyboard will automatically appear at the bottom of the screen and you can start typing. If the keyboard appeared, as you think, at the wrong time, then in order to remove the keyboard from the screen you need to press the "Back" button located on your smartphone.
Actually, the printing process itself is no different from the analogous process of entering text on a PC keyboard.
If you need to change the input language, you need to click on the button with the globe. You can adjust the number and availability of the languages you need in the Settings of the Keyboard application.
By the way, in some versions of the keyboard, the input language is changed by long pressing the space bar or by sliding continuous horizontal (along the key) movement of the finger along the space bar.
As with typing on a PC, in a smartphone, in order to write a capital letter, you have to press and hold the "Shift" key. If you need to type several capital letters in a row, this key will have to be held until the end of typing.
If you need to type a lot of text in capital letters, then you need to press the "Shift" key twice in a row, thereby transferring the entire keyboard to the typing mode " Caps lock". And in this mode, all letters will be typed in capital letters.
You can correct the written word when typing the wrong letter by deleting the unnecessary letter with the delete key - the left arrow with a cross. Pressed once - one character was removed to the left of the vertical stick-cursor. Pressed twice - two characters were removed, and so on. If you need to delete a lot of text at once, then you need to hold down the delete key with your finger and hold it. But here you should be careful: with every second the speed of text deletion increases and you will need to stop in time so as not to delete unnecessary ones.
When you need to move the cursor to the middle of the text (or to any other place in the text), then you just need to touch your finger to the desired place on the screen. For these purposes, some keyboards have special arrows that allow you to move the cursor over the text to any place you need in the text writing field.
If you need to type an additional character, which is drawn on the key, you need to press the selected key and hold your finger on it for a few seconds. If there are several additional characters, then you can select the one you need from the list by swiping your finger across the list without leaving the screen.
To switch between keyboard screens, of which there may be several, you need to click on the switch between screens located in one of the lower corners of the keyboard. Usually, additional screens contain a variety of graphic symbols, smilies, numbers, and so on.
If we talk about the standard Google keyboard, then you will open the list of emoticons in it by long pressing the "Enter" key, and you will open the screen of additional characters by clicking on the button located in the lower left corner of the screen.
As you type, you will be constantly presented with suggestions for the words you are typing. By clicking on the hint, you can "type" everything at once the right word, and in some cases, stable forms of speech, and a whole sentence.
If you are so adept at typing, then the popular continuous typing method called "Swype" will suit you. In this keyboard mode, you will not need to "poke your finger" on each individual key - you just slide your finger over the keyboard keys without lifting your finger, starting from the first letter of the word to the last. So typing a little faster, but you need a certain dexterity and coherence of the actions of your fingers.
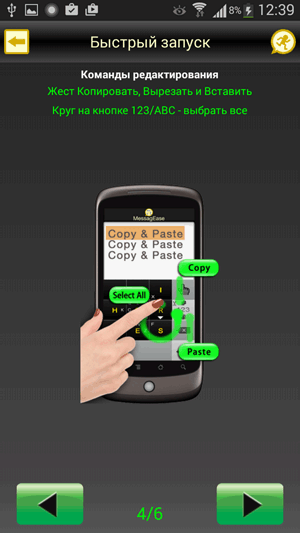
In situations where you can copy the text instead of typing, you do the following: select the beginning of the text by long pressing on the first word of the text fragment you need, "stretch" the resulting selection with your fingers by pressing and holding the selected text markers that will appear on the edges of the selection ... Then you choose what exactly you want to do with the marked text - Copy, Paste or Cut - by selecting the corresponding action buttons, which will appear either directly near the cursor or at the top of the screen.
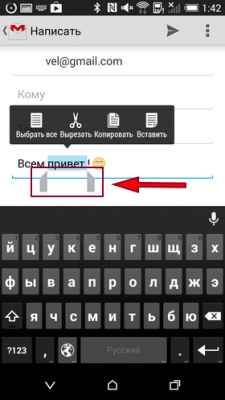
In order to insert text, you will need to perform the procedure from the beginning.
By the same principle, you can work with text - select, copy, paste or cut text - both in the text of the letter opened in the mail client and in the browser window while working on the Internet.
Well, you already know the basics of working with the keyboard and typing on Android smartphones. And then, as they say, it's a matter of practice: you type / type more text - more and better you do it.
 Wireless Charging Smartphones A5 Supports Wireless Charging
 Why do not MTS sms come to the phone?
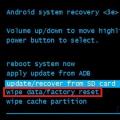 Why do you need a full factory reset on Android or how to return Android to factory settings