Connecting external keyboard to Samsung 5. Best Bluetooth keyboards for Android
Hello.
I think no one will deny that the popularity of tablets has grown greatly recently and many users cannot imagine their work without this gadget :).
But tablets (in my opinion) have a significant drawback: if you need to write something longer than 2-3 sentences, then it becomes a real nightmare. To fix this, there are small wireless keyboards on sale that connect via Bluetooth and allow you to close this flaw (moreover, they often come with a case).
In this article, I wanted to take a step-by-step look at how to set up the connection of such a keyboard to a tablet. There is nothing difficult in this matter, but as elsewhere, there are nuances ...
Connecting the keyboard to the tablet (Android)
1) Turn on the keyboard
The wireless keyboard has dedicated buttons for enabling and configuring the connection. They are located either slightly higher above the keys, or on the side of the keyboard (see Fig. 1). The first thing to do is to turn it on, as a rule, the LEDs should start blinking (or on).

Rice. 1. Switching on the keyboard (note that the LEDs are on, ie the device is switched on).
2) Setting up Bluetooth on the tablet
In the settings you need to open the section " Wireless networks "and turn on the Bluetooth connection (blue switch in Fig. 2). Then go to the Bluetooth settings.

Rice. 2. Setting up Bluetooth on the tablet.
3) Selecting a device from the available ...
If your keyboard is turned on (the LEDs should be blinking on it) and the tablet starts looking for devices available for connection, you should see your keyboard in the list (as in Fig. 3). You need to select it and connect it.

Rice. 3. Connecting the keyboard.
4) Pairing
Pairing process - establishing a connection between your keyboard and tablet. It usually takes 10-15 seconds.

Rice. 4. Pairing process.
5) Password for confirmation
The final touch - on the keyboard you need to enter the password to access the tablet, which you will see on its screen. Please note that after entering these numbers on the keyboard, you need to press Enter.

Rice. 5. Entering the password on the keyboard.
6) Completion of connection
If you did everything correctly and there were no errors, then you will see a message that the bluetooth keyboard is connected (this is wireless keyboard). Now you can open notepad and type a lot from the keyboard.

Rice. 6. The keyboard is connected!
What if the tablet does not see the bluetooth keyboard?
1) The most common is a dead keyboard battery. Moreover, if this is your first time trying to connect it to a tablet. Charge the keyboard battery first, then try connecting it again.
2) Open system requirements and a description of your keyboard. Suddenly it is not supported by android at all (pay attention also to the android version) ?!
3) There are special applications for " Google play", For example" Russian Keyboard ". By installing such an application (it will help when working with non-standard keyboards) - it will quickly fix compatibility issues and the device will start working as expected ...
Connecting a keyboard to a laptop (Windows 10)
In general, connect additional keyboard a laptop is required much less often than a tablet (after all, a laptop has one keyboard :)). But this may be needed when, for example, the native keyboard is flooded with tea or coffee and some keys do not work well on it. Let's see how this is done on a laptop.
1) Turn on the keyboard
A similar step as in the first section of this article ...
2) Does bluetooth work?
Very often, Bluetooth is not turned on at all on a laptop and no drivers are installed on it ... The easiest way to find out if this works wireless connection- just see if there is this icon in the tray (see Fig. 7).
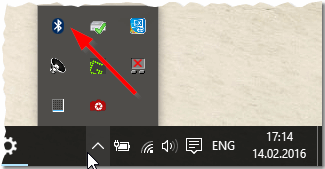
Rice. 7. Bluetooth is working ...

Delivery of drivers in 1 click:
3) If Bluetooth is turned off (for whom it works, you can skip this step)
If you have installed (updated) the drivers, then it is not a fact that Bluetooth works for you. The fact is that it can be turned off in Windows settings... Let's take a look at how to enable it in Windows 10.
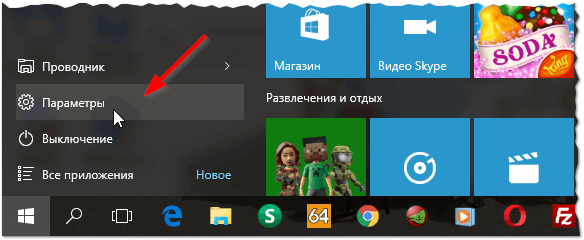
First, open the START menu and go to the parameters (see Fig. 8).
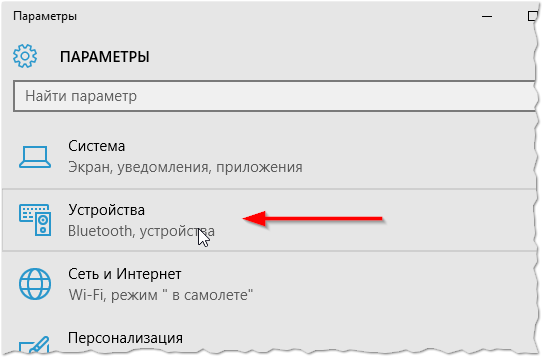
Rice. 9. Go to Bluetooth settings.
Then turn on the Bluetooth network (see Fig. 10).

Rice. 10. Enabling Bluetoooth.
4) Search and connect the keyboard
If everything was done correctly, you will see your keyboard in the list of devices available for connection. Click on it, then click on the "link" button (see Fig. 11).

Hello dear users. This thread describes a way USB connection devices such as flash drives (Fat32 and NTFS), mouse, keyboard, card reader, HDD, etc. via USB Host OTG(abbr. from On-The-Go) is a further extension of the USB 2.0 specification, designed to easily connect peripheral USB devices to each other without the need to connect to a PC. Naturally, not all devices with USB will work in Host mode with a phone, for that there are restrictions (no mice work on MIUI firmware at all):The first limitation is, of course, the phone's support for a specific device. Basically, the phone may not support the device due to the lack of a driver in the firmware.
The second limitation is the power of the device. If the phone "does not pull", then the message comes out " Hight-power USB device connected"(Not on all firmwares). But even here a solution can be found. The most reliable and" correct "way to organize additional power supply for USB-Host is via USB-Hub with additional factory power supply.
That is, you insert a hub with power into the adapter, and therefore you already insert devices with increased power consumption into the hub.USB Host can be bought:
In Moscow on Savelovsky for 200r: get off the metro to the right and follow the passage to the shopping center. Then look for the pavilion near which the "anti-radar" stand
Also USB Host Cable for Samsung Galaxy S2 can be searched in online stores
Or you can make an adapter for USB Host yourself, for this you will need:
Chinese USB plug or cable suitable for the connector. DO NOT BUY "CHARGING" BECAUSE IT MAY NOT HAVE 5 CONTACTS IN IT, BUT ONLY 2(Mandatory Chinese, it can be easily disassembled)
- USB type A socket (as in computers)
- 4-core wire (if it was not included with the plug)
- Soldering iron
- Multimeter (to check the correct soldering)
- Straight handles growing out of the right placeLet's start installing USB Host:
We disassemble the microUSB plug
We solder together the 4 and 5 contacts with a 10 Ohm resistor (0.125 W) or simply solder them together (It is the closed contacts 4 and 5 that will make it clear to the phone that this is the Host, and not something else)
We solder the wiring to 1, 2, 3 and 4 + 5 pins
We solder the wires respectively to the "big" USB socket
We insulate with tape or cambric-heat shrink
Soldering wires
Devices such as mice, keyboards, card readers and adapters are connected in the most the usual way like on a PC.
To connect a USB-HDD we need:
Q5 USB Memory Manager... The program is designed to mount flash drives in the Chinese tablet GPad Q5, but we only need it to determine the "physical" path to your not yet mounted sections of hard disk
We insert the cable into the phone USB-Host together with USB-HDD(in experience, 500 GB HDD partitions were divided into Fat32 and NTFS partitions - both worked)
Launches the program Q5 USB Memory Manager and click on the very first drop-down list (Please select block device)
We are looking for lines like sd **(for example sda1, sda2, sdb1, sdb2, etc.). These are our sections, it remains only to mount them.
We create folders in which we will mount our partitions. As you understand, there are so many sections and folders. For example "/ mnt / sdcard / part1", "/ mnt / sdcard / part2", "/ mnt / sdcard / part3", etc.
Download and install the program Android Terminal Emulator(this is a program like " Command line"on Windows) or the program GScript from the market, or DirectoryBind
Launch Android Terminal Emulator or GScript or DirectoryBind and write the following command (script):
Mount / dev / block / sda1 / mnt / sdcard / part1
Now we have mounted the sda1 partition, in the / mnt / sdcard / part1 folder
To mount the next partition, replace sda1 in the script with what you saw in the Q5 USB Memory Manager (sda2, sda3, etc.) and replace the folder where you will mount the next partition (part2, part3, etc.) .). You get something like this:
Mount / dev / block / sda2 / mnt / sdcard / part2
Across USB Host Samsung printers work: SCX-4600 and ML-1665 exactly. There will be no messages when the printer is connected. Just click on the document and click - print, after which the printer will give us a sheet with a printout.
Knowing the pinout of the plug, you can mount USB Host for other phone models!
Download from the site:
If you are often active with your phone or tablet, you know that screen dialing may not be fast enough to replace your laptop or PC keyboard. Luckily for you, high quality portable Bluetooth keyboards are a viable option.
Of course, many companies create their own models, so you might be overwhelmed available options... However, you don't have to search long. We have narrowed down the list of applicants with our rating best bluetooth keyboards for Android phones and tablets. Better yet, virtually all keyboards are reasonably priced, allowing you to buy an unintended mouse with your remaining money.
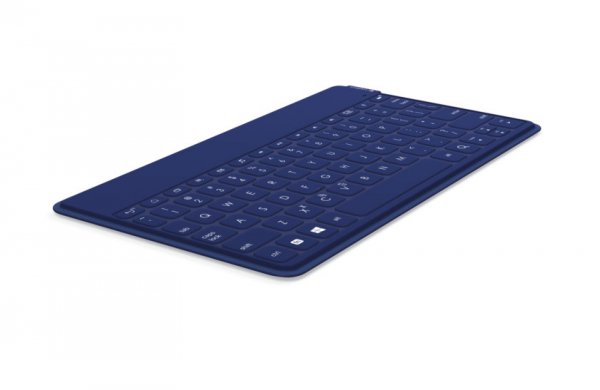
Anker Ultra Compact Slim Bluetooth Keyboard

Mobility is the main feature in this field. The main feature of the Anker Ultra is that the keyboard is very thin and easy to transport. At 2/3 the size of a standard keyboard, the Ultra Compact Slim has no problem loading into a backpack. The top of the compact body houses the keyboard battery, which can last up to six months before charging the keyboard (which takes about two hours).
The Anler Ultra also has a matte finish on the keys, which means they won't slip under your fingers. The icing on the cake is the fact that the keyboard comes with an 18-month warranty and is priced at just $ 19.99 (£ 1,300). Can you complain about a keyboard for this price?
Logitech Bluetooth Multi-Device Keyboard K480
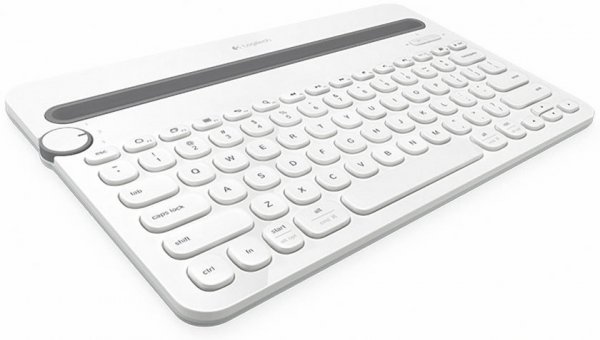
Anker may offer good portability, but when it comes to versatility, Logitech Multi-Device remains the leader. For $ 29.99 (£ 1950), you get a keyboard that works with just about every Bluetooth device, be it a Mac or a phone. What really helps the design of this keyboard is the small dial on the left side. It offers three options, each tailored to its own device. You simply sync the devices to each setting and then turn the dial to switch between them.
Have a tablet and a phone? Just turn the dial and switch from one device to another. The Milti-Device keyboard also has a stand in which you can place your phone or tablet with a comfortable viewing angle for daily tasks like reading or watching a video.
Lenovo Compact Bluetooth Keyboard with TrackPoint

Lenovo loves its shiny toys and the Compact Keyboard is no different. The keyboard itself is made in the same way as the ThinkPad series notebooks, so you can count on premium quality. The Bluetooth keyboard offers NFC functionality to provide fast connection with NFC-compatible devices, and a built-in battery that will last a month. The biggest addition to this keyboard is the integrated TrackPoint, so you don't need a mouse to work.
Naturally, this is the most expensive keyboard on our list, with a retail price of $ 79.99 (£ 5,200), but even with a high price tag, you get a full bang for your buck.
Rolly Keyboard

The LG Rolly Keyboard is one of those keyboards that you should look twice with to make sure your eyes aren't fooling you. Perhaps the best in terms of portability, the keyboard is divided into four sections that fold into a small "roll" that also protects the buttons during transport. Along with instant Bluetooth connectivity, you get one of the best student keyboards on the market. Upon release, the keyboard came out at an astonishing $ 119.99 (£ 7,800), but now you can find a keyboard for a reasonable $ 59.99 (£ 3,900).
Logitech Keys-To-Go
With a competitive price tag of $ 49.99 (£ 3,250), Logitech's Keys-To-Go keyboard draws much of its inspiration from the Surface Touch, but comes with a significantly lower price tag. Fabric Skin covers the entire keyboard panel for added comfort and protection from dirt, dust and inevitable drops. Designed with Android users in mind, the keyboard offers shortcuts (e.g. Music, Latest Apps, Home button) to ensure quick and easy navigation. Three months battery life is standard on most keyboards on our list, and with this keyboard you also get a portable smartphone stand.
Microsoft Universal Foldable Keyboard
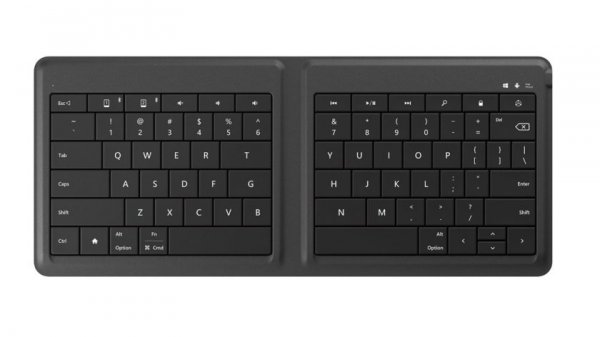
When you opt for a Microsoft keyboard, you're almost always guaranteed to get a good product, and a versatile foldable Microsoft keyboard is no exception. With a modest $ 55 (£ 3,500) price tag, the keyboard works with any Bluetooth device you choose to pair. The keyboard also supports Bluetooth 4.0, which means it will connect faster and more reliably than the competition. The most notable feature of the keyboard is the ability to fold it in half. Not only will this greatly facilitate the transportation of the keyboard, this function also works as a power off button. Open the keyboard to start connecting to the device, and then close to turn off the keyboard. On the top of the Microsoft Bluetooth Keyboard, you'll find a factory-made coating designed to protect your device from external damage and water.
Perixx Periboard-805L
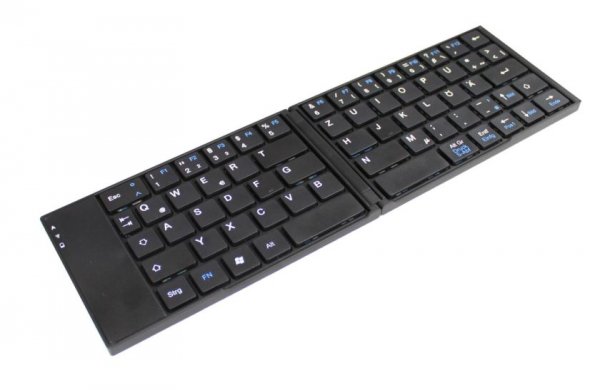
Another foldable keyboard on this list, the inexpensive Periboard 805L, looks premium and feels significantly more expensive than it is. For $ 29.99 (£ 2,000), you get a keyboard with a magnetic folding mechanism that doesn't turn the keyboard on / off, but instead offers a very attractive design. Crafted in polished aluminum, the Periboard 805L is designed with durability in mind. Akin to the aforementioned Logitech K840, you can also switch between multiple devices with the press of a single button. When connecting an Android device, however, make sure you are using Android 3.0 and the following versions, the older OS will not be compatible (although it is difficult to imagine that you will find an OS older than 3.0).
So, before you are compatible with Android Bluetooth keyboards, which we recommend for purchase. Do you know best keyboards that we haven't mentioned? Write us.
 Why does the blue screen turn on on the iPhone Blue screen on the iPhone 5s what to do
 Everything you need to know about Apple Music
 How To Set Up An iPhone Like New From Zero - Detailed Instructions