Ide sata adapter for motherboard. The cheapest way to connect an IDE device to your motherboard. How to connect an old IDE hard drive to a new computer
Hello everybody! Earlier I already wrote an article on how to connect an ide hard drive to the motherboard using a controller. Today I will share with you another great solution for connecting ide device to a new motherboard. In addition, this solution is inexpensive and versatile enough.
While updating the hardware of one computer, I was faced with a choice: is it worth buying a new optical drive, or you can use the old one, which has an IDE connector. Naturally, this connector is not on the new motherboard, and on my suggestion not to install a drive at all, the owner of the computer firmly indicated that he uses disks often and with pleasure.
The cost of a new optical drive with a modern SATA connector is not so high - about 600-700 rubles, but then it is not clear what to do with the old device, because it works great. And the money saved is better spent on improving the performance of a new computer.
After surfing the Internet a bit, I came across this wonderful thing:
Similar adapters can be ordered from China at ridiculous prices here: aliexpress.com is a proven reliable store with a guarantee, whose services I use quite often.
This is a SATA to IDE adapter and vice versa IDE to SATA. It has a fairly compact size and costs only 200 rubles! Obviously, buying such an adapter is more profitable than buying a new drive.
The best part is that it works both ways. That is, we can connect an old IDE device to a new motherboard, or vice versa, a SATA drive or hard drive can be connected to a motherboard that does not have SATA connectors. And in fact, and in another case, we can significantly save.

In general, connecting a device through such an adapter does not cause any difficulties, but you need to be careful here. The adapter has markings for SATA pins (see right photo above). One SATA connector is used when connecting an IDE device to the motherboard, the other vice versa, if you need to connect a SATA device to an old motherboard.
In addition to various connectors, the controller has a jumper to select the mode:
- 2-3 IDE mainboard to SATA HDD;
- 1-2 SATA mainboard to IDE HDD.
Accordingly, by bridging the necessary contacts 2-3
or 1-2
, we tell the device what kind of connection we need.
In any case, just by experimenting with wires and a jumper, you can achieve the desired result, and you can not be afraid that something will burn out (checked on your own experience?).
Connecting an IDE hard drive or drive will look like this:

Having connected an optical drive through such an adapter, I decided to buy myself exactly the same one. Let it lie, I'm sure it will definitely come in handy for such a price.)
Here is such a simple and cheap solution for connecting IDE devices. I hope this article will help many to make the right choice)
P.S. For those who cannot connect a hard drive through an adapter (not detected in the system or in bios), they can try to set jumpers on the IDE drive itself to the master or slave position. Try different options. Everything will definitely work out! (Thanks! For the addition to Alexei Shchukin)
A hard drive or hard drive is an integral part of any computer.
It is also one of the most expensive components, so the wrong choice, connection and use can lead to the failure of both the hard drive itself and the computer. And this is very unpleasant and costly.
To prevent this from happening, this article will cover the basic ways to connect hard drives to your PC.
Types of connectors for connecting hard drives
So, the main connectors for transferring data between the motherboard and the hard drive are SATA and IDE.The IDE is a legacy connector.


Now they are practically not used. Only if you are assembling a PC from used components, you can still purchase a disc with such a connector. It may cost a little less than SATA. Also, older motherboards can only have an IDE connection. In this case, a corresponding disk is needed.
Sometimes, of course, you can purchase different adapters, but this is an extra headache and additional expenses, and sometimes incorrect operation of the equipment.
SATA connectors are more modern and, accordingly, have a higher data transfer rate than IDE. It can reach 3 Gb per second.

The SATA data cable looks like this.

The cord is small in width. The connectors consist of a minimum number of contacts. The L-shaped connector connects to the hard drive. Direct to the motherboard. A loud click is heard when the connection is complete.

To pull out the cord, press the metal lever on the connector and pull gently. Do not use a lot of force when disconnecting, as you can pull out the socket itself from the motherboard. You need to make sure that the latch is fully released.
The IDE cable has a wide ribbon cable and a large number of contacts.

To eliminate connection errors, the connector has a side cutout.

Most often, cords have multiple connectors. One for the motherboard and two for IDE devices, two hard drives or disk and CD / DVD drive.

As for motherboards, they can have:
1. Only IDE;
2. IDE and SATA;
3. SATA only.
The latter is applicable in modern top-end motherboards. With such a board, there is no point in buying a drive with an IDE connection, even if it is temptingly cheap.
Connecting the power cord of the hard drive
It is not hard to guess that the power connectors in these two types of disks are also different.For the IDE, it has the following form

There are four contacts and they are quite powerful.
For SATA, the connector is wide with a twist on the edge.

Thanks to this twist, it is almost impossible to connect the cord incorrectly.
Much in this moment depends on the power supply. The early ones may not have connectors for SATA devices at all. But it's not a problem. Here a special adapter will come to the rescue. Its cost is penny.


Modern power supplies already have several SATA cords.
All this must be borne in mind when assembling a PC, so that there are no problems with incompatibility and subsequently spending money on different adapters.
Installing a hard drive
We select the "shelf" in the case where to install the hard drive. Setting it too low will not provide sufficient heat dissipation from the bottom of the disc. Overheating is not allowed.Too high mounting can be difficult due to RAM strips and other equipment. It all depends on the characteristics of the motherboard and the connectors on it.

Avoid static electricity, which can damage not only the hard drive, but other PC components as well. To do this, remove synthetics and woolen items from yourself. Also, before each manipulation, touch a grounded object - it can be a heating battery or a water tap. This way you can remove the static from yourself.
Gently insert the disc with the open side down, and try to align the holes on the case with the threads on the hard drive. When everything matches, tighten the screws.

It is very important that the screws are not too long, otherwise the disc may be damaged. Usually a 3mm screw length is recommended.
Be careful when handling the hard disk. Excessive shaking, bumps, falls, etc. can damage an expensive device.
When the screws are clamped and the hard drive is firmly fixed in the case, connect the ribbon cable. First to the motherboard, then to the hard drive.
Connecting SATA connectors.
Instructions
Buy a SATA-IDE adapter.
Disconnect power and all connection cables from your computer. Open the cover of the system unit. Touch the radiator for a few seconds. This is to discharge static electricity from your hands, otherwise it can damage sensitive computer components.
Take a SATA cable - you will need it to connect your adapter to the motherboard. A SATA cable is usually about 25 centimeters long, most often red in color. You can easily recognize it by the connector: about a centimeter wide, flat, with a slight bend at one edge. Both sides of the SATA cable are equal, so it doesn't matter which side you plug it into the motherboard and which side you plug it into the adapter.
You will also need an IDE ribbon cable to connect your floppy drive or hard drive to the converter. The IDE cable is flat, about 5 centimeters wide, with rigid plastic connectors in the form of two rows of holes. Usually has three connectors, one from the other two. This connector is used to connect to the motherboard or controller.
Find any free SATA connector on the motherboard. They correspond in shape to a SATA cable, only they are surrounded by a protective frame that will help to connect the cable correctly. Plug one end of the cable into the motherboard and the other into your adapter.
Connect the IDE cable between your device (floppy drive or hard disk) and the SATA-IDE adapter. Insert the far single end of the cable into the adapter, and one of the free connectors on the other side into the floppy drive.
Please note: near the place for the cable on your drive there is a group of six pins, which can be connected with a small plastic jumper - a jumper. On the top or bottom of the drive, near these pins, you will find the MA / SL / CS markings. If you don't have a jumper, then nothing is needed. If there is a jumper, pull it out and place it opposite the CS mark. This is necessary to correctly identify your device.
Connect the white rectangular connector from the power supply to your floppy drive. If the adapter has a white rectangular four-prong socket, connect another connector from the power supply to it. Insert the floppy drive or hard drive into the case of your system unit if you took it out.
Plug in the power cord, keyboard, mouse, and monitor cables. Turn on your computer - your adapter is ready to go.
Very often places on hard disk becomes small and there is a need to increase the amount of memory. One way to increase the capacity is to install a hard drive.
You will need
- Knowledge about the structure of the system unit, screwdriver.
Instructions
You have purchased a new hard drive and brought it home for installation. For installation, you must contact the manufacturer's service department, if the case is under warranty and covered with stickers, or install. For self-installation, you must remove the wall of the system unit.
Next, you need to find the cable that goes to the hard drive. Usually in modern motherboards, it is possible to install up to 8 or more rigid ones. On each of the cables there is a cable that needs to be inserted into the connector on disk... There is only one correct connection option. Do not use force, if the ribbon does not fit, you may be doing something wrong. See that the keys on the cable match on the hard disk.
Related Videos
note
Disconnect the power from the computer before disassembling! Be careful, the internal parts are fragile enough.
The growth of digital technology is setting its pace in the world of computers, and few people are surprised that they have to increase the volume of hard drives and their performance. However, old models can serve you along with "newbies". It remains to place them correctly in the computer and bypass the "pitfalls" that can be encountered with such a combination.

You will need
- - winchester;
- - data cable with a suitable connector;
- - free space in the computer system unit.
Instructions
Place a new one in the computer case. To do this, turn off the computer, disconnect the power supply (turn off the button or unplug the power cord), remove both side covers of the system unit, install and fasten the new hard drive on both sides with screws into the free slots of the case. Connect the data cable (ribbon cable) and the power cable. Modern hard drives are usually connected via a SATA (Serial ATA) connector. Make sure your computer motherboard has a similar connector before purchasing. Otherwise, it is necessary to use a hard drive with the old connection technology - IDE. Set the jumpers to the appropriate position (if it is the master disk - in the “Master” position, if the slave - “Slave”). A sticker with the position of the jumpers is usually located on the hard drive case. Install the side covers of the system unit and connect the power.
Turn on the computer and enter the SETUP BIOS utility (this usually requires holding down the Del key at the beginning of the boot). In the SETUP program, you need to make sure that the new and old hard drives are correctly recognized by the system and occupy the desired order. This can be seen in the Standard CMOS Features menu. Having opened it, look at the list of detected devices, for each of which properties will be shown (size, number of cylinders, etc.). If you plan to boot from a new disk, then select the appropriate item opposite your disk in the Advanced BIOS Features menu, specify it first.
Reboot your PC. Monitor the loading of the operating system and make sure there are no failures and abnormal situations (unexpected reboots). If everything went well, then the system will detect a new hard drive with the first start and allow you to work with it. If the disk, then it is worth the correct connection of the cables and the installation of SETUP.
The found hard drive is ready to use: it can be formatted, created new partitions, assign drive letters. To easily use these features, open Explorer (WIN + E) and select the context menu by right-clicking on the new disk. Remember, all information on disks is destroyed! Take steps to archive or back up information to other hard drives or Flash device.
note
Each hard drive needs its own personal loop (data cable). The number of connections allowed is determined by the availability of free slots (IDE or SATA) on the motherboard.
The SETUP utility can be entered with a key other than Del. To determine it, you should pay attention to the prompt about entering SETUP at the initial stage of PC boot.
Helpful advice
There are many specialized programs for working with hard drives. They allow you to create and delete logical partitions, format a disk for different operating systems, check the health of the hard drive and data integrity, test the speed of work, and much more.
Sources:
- how to connect a new hard drive
What to do in a situation if your motherboard does not have a sata connector installed, and you need to connect your equipment to this connector. Hard drives are sold today specifically for sata interfaces. Finding an IDE hard drive is problematic. Of course, this is possible, but it can take a lot of time to find such a hard drive. In fact, the problem can be solved quite simply - buy and install sata- controller.

You will need
- Computer, sata controller, screwdriver
Instructions
Disconnect power from the computer. Unscrew the screws that secure the system unit cover and remove it. The controller must be installed in a PCI slot. If you do not know where the PCI slots are on your motherboard, you can look in the technical documentation for your computer. If you do not have technical documentation, find them on the motherboard yourself: all slots on motherboards are signed. As a rule, they are located in the lower left corner of the motherboard, next to the graphics card connection slot. Depending on the model of the motherboard, there may be a different number of PCI slots. Three should be at least.
Simply insert the sata controller into one of the PCI slots and then secure it with the screw. Where to tighten the screw will be visible after you connect the controller to the PCI slot. Without closing the lid of the system unit, connect the computer to the power supply and turn it on. When the operating system boots, it should recognize the controller automatically.
Almost all controllers have Plug & Play technology, so there is no need to configure them when connected. When the device is recognized by the system, install its software. To do this, use the software disc that should come with the controller. Additional software will expand its capabilities.
Then turn off the computer and connect the required sata devices to the controller. Next, you need to connect the power cable to them. See if your PSU has a sata cable. In the place where the cable is connected to the device, there should be an inscription sata. If the power supply does not have such a cable, you will not be able to connect power to the device. In this case, purchase a sata power adapter. These are in any computer store.
The IDE-SATA adapter was created in order to give a second life to old generation hard drives that have not yet become unusable. This article will describe both interfaces and how to connect them to different devices.
Before proceeding with the description of the IDE-SATA adapter, let's understand what an IDE / PATA connector is. Many users will assure that this connector has lost its relevance.
The three letters IDE stands for "electronics built into the drive", that is, the abbreviation indicates the presence of spare parts inside the hard drive case that work with the PATA connector. It turns out that the device is abbreviated as IDE, and the connector to which it is connected is called PATA.
The modern SATA interface surpasses the outdated version of the hard drive in speed, which starts at 150 megabytes per second, while the maximum data transfer rate for IDE is lower and reaches 130 megabytes per second.
Hard drives with an IDE connector are connected to the motherboard using a 40- or 80-pin ribbon cable. Loops can have several plugs, one of which is connected to a connector on the motherboard, and the rest are connected to hard drives, moreover, several hard drives of this generation can work simultaneously under a certain protocol, and the system will select the primary and secondary device.

This connector is intended both for using an IDE-SATA adapter and for connecting to the motherboard. Unlike the previous version of the interface, the SATA connection has a higher data transfer rate.
Since the SATA interface is serial, the data transfer method is carried out by sending one bit after another in a continuous stream, while the previous version of the connection to the motherboard had a parallel interface that transmits data over a certain number of bits at the same time.
In addition to faster data transfer, the interface boasts lower power consumption, which will lead to an increase in service life due to reduced heat generation.
The difference with the outdated version lies in the connectors themselves: PATA had 40 pins, while SATA shows only seven. In addition, the improved cable provides increased durability over multiple connections.
If the old version meant the maximum number of connected hard drives in the amount of two pieces using one cable, then SATA has the ability to ensure the operation of each device separately by connecting them to the motherboard with separate cables.

To connect the SATA interface, you need two cables, one of which will be connected to the motherboard and the other to the power supply. If you use the old interface, you will need an IDE-SATA adapter. Sometimes a four-pin Molex cable ("Molex") is used to connect to the power supply, which supplies voltage of 12 and 5 volts, the wire width is 2.4 cm.
The first generation of SATA is now rarely used, since its bus worked at 1.5 gigahertz, and the data exchange rate was only 150 megabytes per second.
The next generation, which first appeared in 2004, looked no different from the previous version, but the bus frequency was increased to 3 gigahertz, and the bandwidth doubled, that is, up to 300 megabytes per second.
The third generation, and the last one, became available in 2008. In the best traditions of this interface, the data transfer rate has been doubled, namely, up to 600 megabytes per second.

Since the third generation was the last one, and the technologies do not stand still, two modifications of this connector were released, which work with adapters for IDE-SATA hard drives.
SATA 3.1 became available in 2011 and received an innovation that activates a protocol that allows you not to consume electricity in sleep mode. Data transfer has remained at the same level as that of the base third generation.
The second modification, which is called SATA 3.2, is also known as SATA Express. In 2013, the developers of this connector decided to combine two interface families - PCIe and SATA. In the operation of two interfaces, PCIe is considered to be basic, since its data transfer rate is much higher, which benefits SATA.

This interface was assigned to a separate group, since its task is to connect devices that are external. For better definition, the letter "e" has been added to the name, which stands for External, that is, "external". The widespread use of the new connector has become popular since 2004.
In the first version of this interface, there was one significant nuance, which consisted in the purchase of a separate cable for connecting devices. Later, when the eSATAp modification was released, it became possible to connect it via a USB 2.0 cable, and data could be transmitted with a voltage of 12 and 5 volts.

When it became clear what both connectors are, you can figure out how to connect an IDE-SATA adapter. So, if you have an IDE optical drive that needs to be connected to a modern motherboard, then you can use a special adapter.
Most motherboards use IDE to SATA adapters in both directions. In other words, if the device is new and the board is old, then the adapter will be the perfect solution to the problem, and vice versa.
IDE-SATA connection

So, there are four connectors on the adapter, each of which performs its own role:
- The four-pin connector is for connecting the power supply for the adapter.
- The first SATA connector is used to connect a similar device to an older motherboard.
- The second SATA connector is designed to be connected to an IDE device from a more modern motherboard.
- The last connector is a 40-pin IDE interface that connects to the corresponding ribbon cable.
In order not to get confused and to correctly correct the operation of the adapter, the engineers installed a controller on it, which must be switched in accordance with the selected operating mode. Then the IDE-SATA to DVD drive adapter will work perfectly.

The laptop hard drive is connected to the IDE cable using an IDE 2.5 to SATA 3.5 adapter.
If in the stationary version the adapter was necessary in order to extend the life of the old hard disk, then in this case it plays the role of a data transmission cable. The fact is that when buying a new laptop, you can face such a problem as moving information from an old hard drive to a new one. That is why the IDE to SATA adapter for the laptop was invented.

For standard data transfer from one hard drive to another, a solution that uses a flat cable to connect to a stationary PC is quite suitable. The ribbon cable is connected at one end to an IDE hard drive, and at the other end is connected with an adapter to SATA.
An adapter of this format is definitely suitable for those who lighten their laptop using only external optical drives, since there is no built-in drive.
Defining the interface on the motherboard
So, before purchasing a new hard drive, first check which version your motherboard supports.
The first way is to use the Internet and go to the motherboard manufacturer's website, where its characteristics will indicate not only the connector series, but also their number.
The second method is visual: you will have to look on the motherboard itself for clarifying inscriptions next to the connectors for hard drives.
The next way to determine is to use a special hard disk testing program called CrystalDisk Info. It is able to give a full description of the hard disk used, tell about its characteristics and operating condition, clearly show in which modes it works and which one it supports.
If it so happens that the hard drive purchased out of ignorance does not correspond to the specified connector, then you do not need to return it immediately. It was for such situations that adapters were created from one version to another.
In the last week, several letters have arrived with one problem, something like this, I'm sure your friends will be interested in you.
Note: If you need to connect a simple hard drive or an IDE or SATA interface drive to your laptop, or maybe you want to connect a laptop hard drive to a simple computer, then read our new articles:
- Our reader Alexander from Yaroslavl asks how to connect a SATA hard drive to his motherboard, if there is no such connector on it at all, but there is a free IDE controller connector. Is it possible to find IDE-SATA adapter and solve his problem.
- Another letter. Hello, I have a question for you. There is a system unit, there are two connectors for connecting SATA interface devices and they are naturally occupied, one connector is occupied by a floppy drive, and the other by a hard drive, which has a capacity of only 250 GB. There is one more IDE controller connector - it is free. The other day a friend gave me a 250 GB SATA hard drive. True, not new, but quite working, so I'm wondering how I can connect it to my system unit, so that two hard drives would work at once, then the amount of total disk space I will have is 500 GB. Friends suggested that there is an IDE-SATA adapter, and it can solve my problem. Is it so? My operating system is Windows 7. And yet, is it possible to make the second hard drive visible in the BIOS and install a second operating system on it? Alexey.
- Now some of your attention. With a similar question, just the opposite, another of our readers asked, he needs to connect the hard drive of the IDE interface, but he has only one IDE connector in the system unit on the motherboard and two devices are connected to it with one loop: a 250 GB hard drive and a DVD-rom ... There are also two free SATA controller slots. The reader asks, is there a SATA-IDE adapter and can it be used to connect an additional IDE interface hard drive to its motherboard?
IDE-SATA adapter
The meaning of all the questions comes down to: How to connect a device to the motherboard - there is no free connector on this motherboard for connecting. And the first case is the most interesting, on the motherboard there is no connector at all for connecting the device we need.
The solution for all problems will be the same. How do you ask? Read on. Friends, believe me, it's best instead IDE-SATA adapter use unfamiliar to many and sold in almost every computer store 3-port SATA and IDE controller - VIA VT6421A or it is also called - adapter PCI Card SATA + IDE (combo), it will cost us about 300-350 rubles. There are three connectors on it SATA and one IDE.
We do not need such a number of hard drives today, and with its help we will connect only two hard drives to our motherboard - one SATA interface, another IDE, then turn on the computer and see how everything will work. Looking ahead, I will say our two hard drives will work in the mode UDMA / 133 the throughput of hard drives will be 133 Mbit / s, to be honest, not so bad. Yes, I almost forgot, we have an article on how to use this adapter.
Let's take a simple system unit. We perform all actions on a turned off computer.

As you can see, two SATA controllers are busy. One is connected to a Samsung hard drive, the other is a DVD-rom. There is one more IDE interface connector, we will not connect anything to it on purpose, we will complicate the task so to speak, we will manage our PCI Card SATA + IDE (combo), hard to learn easy to fight.

Pay attention to it, as mentioned above, there are three SATA connectors, and one IDE connector.


We insert it into PCI controller slot our motherboard and secure with a screw.


First we connect IDE interface cable Maxtor hard drive and PCI Card SATA + IDE adapter (combo). The end of the cable that needs to be connected to the motherboard is inserted into the IDE connector of our adapter. We connect the other end of the cable to our Maxtor hard drive.


Now it's the turn of Western Digital's second SATA hard drive. It will be more convenient to first connect the power cable to the Western Digital hard drive. As you can see on my SATA-Western Digital hard drive there is a connector for connecting an IDE power cable, in your case this may not be the case (this is quite rare) and you will have to use a special IDE-SATA adapter.

We connect the power cable to our hard drive through the mentioned adapter.

Then we connect our PCI Card SATA + IDE (combo) adapter and the Western Digital hard drive with a SATA interface cable.

We check if everything is connected correctly and turn on the computer.

Immediately, the miracle does not happen in the parameter Hard Disk Drives we can only observe the Samsung hard drive connected directly to the SATA connector on the motherboard. Unfortunately, I did not see both of our hard drives connected to a PCI Card SATA + IDE (combo) -BIOS adapter.

And friends, making it so that the BIOS sees a hard drive connected via a PCI controller is almost impossible, unfortunately the BIOS firmware will not help either.
But on the other hand, both hard drives saw the boot disk of the program, which means that on both hard drives connected by our adapter, you can store system backups and, if necessary, expand them to the main partition with Windows, which we did right away. First, we created a backup of the system, and then deployed it in place. The system booted safely. Take this friends into service.

We continue loading the operating system, by the way Windows 7.
The most difficult thing that awaits us is to find drivers for our adapter for Windows 7. If it does not find the driver and does not install it automatically, we will have to surf the Internet in search of the right driver, but we also have good articles on this topic, so you friends have nothing to fear.
Windows 7 booted up and we immediately go to the Device Manager to see how we are doing. There is a search and installation of equipment. As we can see our adapter is defined in the device manager as VIA Bus Master IDE Controller,


and then the system installs drivers on our two hard drives, Maxtor and Western Digital.

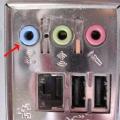 How do I enable line-in?
 Recovering deleted files from a USB flash drive
 Installing windows 8 64 bit