Desktop management over a local area network. Remote control programs for a local area network. Remote computer control using Team Viewer
TeamViewer (rus. Timviewer) is a free program (for personal use for non-commercial purposes) that allows you to establish incoming and outgoing remote connections to access other computers, exchange files between the controlled and controlled machines, make video calls, take part in web conferences and much more.

Some TeamViewer for Windows features
- Remote control of a computer or mobile device based on Android, iOS;
- Wake-on-LAN - turn on your computer from another computer using Timviewer in the local network or through a router;
- File transfer capability;
- Instant messaging: group chats, web chats, offline messaging, etc .;
- Remote printing;
- Installation as a system service to provide access to remote devices at any time;
- Synchronous clipboard;
- Support for multiple monitors;
- Saving individual connection settings for subsequent connections to computers with sorting them by groups, contacts;
- Controlling remote devices using hot keys;
- Cross-platform - Supported operating systems Microsoft Windows, Chrome OS, iOS,;
- Availability of a portable version of TeamViewer Portable.
And this is not all of Timviver's capabilities.
It is worth highlighting the simple and friendly TeamViewer user interface in Russian, which helps to easily understand this program even for beginners who have not worked with such software before.
We also note the high level of security of TeamViewer 13 communication: the use of a cryptographic algorithm (private / public RSA 2048 key) for data exchange and random passwords for one-time access, AES session encryption (256 bit), additional two-factor authentication, etc.
Download TeamViewer for Windows
The latest version of Timviewer in Russian for Windows 32 and 64-bit is available for download on this page.
Download TeamViewer 13 for free, no registration required.
TeamViewer is a free program for remote computer control over the Internet.
Version: TeamViewer 13.2.26558
Size: 19.7 MB
Operating system: Windows
Russian language
Program status: Free
Developer: TeamViewer GmbH
Official site:
What's new in version: List of changes
TeamViewer is designed for remote access to a remote computer. When using the program, the user remotely controls another computer via the Internet.
Using TeamViewer will help you solve any problems with another computer that is located elsewhere. It will be possible to assist in setting up a remote computer, it will also be possible to control your computer from another location.
To do this, only two conditions must be met: the partner computers must be connected to the Internet and TeamViewer must be running on them at the same time. When using the program, data is encrypted, a secure connection will be established between the computers.
After launching the program on the local and remote computers and establishing a connection between them, the user can proceed to control the remote computer. Thus, it will be possible to configure the remote computer, provide assistance in solving problems, provide support, show work in programs, etc.
TeamViewer is free for non-commercial use. This program does not even need to be installed on your computer. It will be enough just to launch the executable EXE file, and then you should choose the method of launching the program.
Naturally, if necessary, the TeamViewer program can be installed on the computer. After registering with TeamViewer, the user will have access to administrative rights.
On the official website of the German company, the developer of TeamViewer, versions of the program are available for download for operating systems: Windows, Mac OS, Linux, Android, iPhone, iPad, Windows Phone. The Russian version of the program is offered for download.
The popularity of the program is evidenced by the fact that TeamViewer has already been downloaded more than 200,000,000 times.
download TeamViewer Russian version
After downloading, the program can be installed on your computer. At the same time, TeamViewer is ready to use without installation on a computer.
Installing TeamViewer
To start installing or running the program, you will need to click on the executable file in the ".exe" format.
To run the program without installation, select the "Run only" option.
In all cases of using the program, it will be necessary to mark the item "personal / non-commercial use".
If you check the box opposite the item "Show advanced settings", then when installing the program on the computer, several additional windows will open.
After selecting the TeamViewer installation settings, click on the "Accept - Finish" button.

First, a window opens with help information on how to use TeamViewer.

The main TeamViewer window then opens in the "Remote Control" tab. In the central part of the program window there are two panels: "Allow control" and "Manage computer".
The program menu items are located in the upper part of the window: "Connection", "Additional" and "Help".

If you click on the "Computers & Contacts" button, an additional window will open from where you can, after registering with TeamViewer, manage computers and contacts, without having to remember IDs and passwords.

TeamViewer settings
You can enter the program settings by following the menu path "Additional" => "Options". TeamViewer is already set up by default and ready to use. If necessary, you can customize the program to suit your needs.
In the "General" tab, you can select the display name, network settings, link the device (computer) to the TeamViewer account.

In the "Security" tab, you can add a personal password for access without confirmation. Strength can be set for a random password. Standard mode (4 digits) is enabled by default. You can improve the security to 10 characters, or disable the random password altogether.
You can also change the rules for connecting to your computer.

By entering the "Remote Control" tab, you can change the display settings. Here you can select the quality of displaying the screen of the remote computer, displaying the wallpaper on the remote computer in the program window.
At a low speed of the Internet connection, displaying wallpaper will slow down the session, therefore, by default, the item "Hide wallpaper on a remote machine" is activated.
In TeamViewer, you can record a remote session.

With TeamViewer, it will be possible to hold conferences among several participants.
Remote control of your computer
The "Allow Control" panel is used to display data for remote control of your computer. Here you will find information about the ID of this computer in the TeamViewer system, as well as a password that can be changed if necessary.
In the "Personal password" field, you can enter your password to access a specific computer from anywhere.
You will have to transfer your ID and password to your remote partner, who will remotely control your computer.

After connecting to your computer and entering the data received from you, your remote partner will control your computer.
Remote access to a remote computer
In the main window of the program, on the right side, there is the "Manage computer" panel, which is designed to enter data from another computer.
In the “Partner ID” field, you will need to enter your partner ID. These data (ID and password), you will need to obtain in advance from the user of the remote computer that you are going to control.
In this case, the item "Remote control" must be activated. After that, click on the "Connect to partner" button.

The "TeamViewer Authentication" window is then opened. In this window, in the "Password" field, you will need to enter the received password, and then click on the "Login" button.
On your monitor screen, you will see a window that displays the desktop of your partner's remote computer. By default, the display of wallpaper will be disabled on the Desktop.

At the top is the "toolbar". Using the commands of the toolbar menu, it will be possible to manage and configure the program without going directly into the settings.
The Actions menu has the following commands:
- "Switching sides with a partner" - in this case, you will switch management with the partner. Your partner will now be in control of your computer.
- "Ctrl + Alt + Del" - transfer control of keyboard shortcuts to the partner's computer.
- "Enable computer blocking" - the partner's computer will be blocked.
- Remote Restart - Log Out, Restart, Restart Safe Mode. You can end the session or restart the remote computer in the desired mode.
- "Send keyboard shortcuts" - the keyboard shortcuts that you press on your computer will be sent to the remote computer.
- "Block input from the remote machine" - The mouse and keyboard will be blocked on the remote computer.
- "Show black screen" - a black screen will be displayed on the partner's computer and he will not be able to see what you are doing on his computer. In this case, the "Block input means of the remote machine" function must be active.
From the Windows menu, you can customize the display of commands and buttons for the Windows operating system.
The View menu controls view settings.
The Audio / Video menu controls computer sounds, video, voice and chat.
The File Transfer menu is responsible for transferring files using TeamViewer.
The "Additional" menu contains other program settings. You can switch to full screen mode or minimize the toolbar.
Once connected, you can proceed to control the remote computer. It will be possible to install or uninstall programs, view documents, perform various actions to configure the operating system or programs.

Through TeamViewer, you can not only directly control the remote computer, but also exchange files.
Transferring files to TeamViewer
To do this, on the toolbar, you can click on the "File Transfer" menu button, and select "File Transfer" in the context menu. This will open the File Transfer window, split into two windows. The left window contains the files of the local computer, and the right window contains the files of the remote one.
To send a file or folder, you will need to select the required object on the computer from which the transfer will be carried out using the "Address" field. After selecting the object, you will need to click on the "Send" button. Previously, on the receiving computer, using the "Address" field, you should select the location where the file or folder will be transferred.

You can also move files using the "File vault". You can open the file storage window from the "file transfer" menu or from the side window of the program by clicking on the corresponding icon.
You will need to drag the file, on the computer from where you will move the files to the storage, into the File Storages window.
In this image, you can see that the file has been moved to the file storage on the remote computer (dark window). After moving, the file became available on the local computer (light window).

Communication via TeamViewer
In TeamViewer, you can exchange messages in chat, conduct voice negotiations, hold conference calls, and record video during communication.

In the program, you can take screenshots of the window of the remote computer.
Recording videos in TeamViewer
In order to record a video session, you need to enter the "Additional" menu, go to the "Record" item in the context menu. Here you can find the Start, Pause and Stop items for video recording control.
Using these commands, you can record a video file that will display your actions in the window of a remote computer. After the end of recording, the video file will be saved in “.tvs” format. This file can be converted to ".avi" format for viewing on any computer.
To do this, you need to enter the main program window, open the "Advanced" menu, and select "Play or convert a recorded session ..." in the context menu. After that, the "Open" window will open, in which you should select a video file with the ".tvs" extension.
In the "Convert session recording" window that opens, click the "Convert" button. If necessary, you can change the conversion settings before starting the process of converting a video file. To do this, you will need to click on the "Configuration ..." button, and then in the window that opens, change the settings.

After the conversion is complete, you can play the recorded video session using a regular player.
Conclusions of the article
TeamViewer allows you to remotely access your computer, share files and control the remote computer to help your partner.
TeamViewer - computer remote control (video)
Surely not every PC user (especially a beginner) knows that a computer can be easily controlled from a distance, and fully! Those. as if you are sitting and working at your own computer, but from a distance, and do it, for example, from a tablet or another computer. This can be very convenient and, for example, I use this opportunity regularly. Why do I need it? I work a lot on the Internet, but I can't always sit at my computer. Sometimes I need to go somewhere or to someone, but some urgent business appears and I need my computer to open some program, start something, look. Carrying a computer with you always and everywhere is very problematic. It weighs about 4 kg for me, which feels good when carrying it :) But on the other hand, I always have a tablet or smartphone with me, from which at any time and from any place I can connect to my computer, which I leave on at home. And so I can work on it just as if I were at home. Another reason for remote access is the ability to ask some acquaintance or colleague to help you to deal with any problems in the settings, programs on your computer via remote access. Also, you yourself can help someone solve some problem on the computer by connecting remotely to this person. And the last thing ... It so happens that the required computer is in a hard-to-reach place or you need to go to it. In this case, too, the easiest way is to connect to it remotely and you're done!
In this article of mine, we will just talk about how to remotely control a computer from any device, and with the help of this guide you will learn how to do it easily even as a completely newbie! We will consider the most, in my opinion, the most convenient program for this business - TeamViewer, and today I will tell you about the main most necessary and useful functions of it. Besides, it is also free for non-commercial use! There are only 2 conditions for remote device control: Internet connection on both devices, and TeamViewer on both devices.
Today, the TeamViewer program is supported, one might say, by all devices:
Smartphones based on Android, Windows Phone 8 operating systems;
Tablets on the same Android systems, Windows Phone 8;
IPad of all modifications;
Computers based on the operating system Mac, Linux, Windows.
For all these devices, the TeamViewer application can be downloaded free of charge.
It is also interesting that you can control and vice versa - smartphones and tablets from a stationary computer.
So, let's start to understand the program step by step, starting with the process of its installation.
Installing TeawViewer
First you need to download the program itself. It is best to download from the official site, as there will always be the latest version. Go to the official TeamViewer website using the link:
teamviewer
At the top of the page that opens, you can't help but notice the large button "Free full version". Here we press it:
After downloading the file, find it on your computer and launch it. The file will have the name: "TeamViewer_Setup_ru":
In the next window of the program, you will be asked to select an option for using TeamViewer. These settings can be changed after installation at any time. If you want to control this computer (on which you are installing the program) remotely, then immediately select the appropriate item. Otherwise, just select "Install".
Below you must select the item "Personal non-commercial use", since the program is distributed free of charge only for this use case.
At the end, put a checkmark "Show advanced settings" and click the "Accept - next" button:
Windows User Account Control may ask you for confirmation to proceed with the installation. Just click "Yes":
In the next window, we check the path where the program will be installed, and change it if desired. But I recommend leaving the default path. The options below can be omitted. All of them, if necessary, can be set after installation. Click the "Finish" button:
A quick installation process will begin, which will take from a few seconds to a minute.
This completes the installation of the TeamViewer software! Let's move on to its settings and application.
TeamViewer setup
Setting up uncontrolled access to the computer:

Now we can freely control this computer from any other device, wherever we are in the Internet access zone :) But for this we will deal with the information that we (or anyone else) needs to know so that we can connect to this computer remotely.
Data required for remote control of any device:
Perhaps the most important thing is to know the data by which you can connect remotely to the current computer.
To connect to this computer from another computer / device with TeamViewer installed, you only need to know:
ID of this computer;
Password for accessing this computer via TeamViewer (not to be confused with the password for logging into Windows!).
All these data are located in the main window of the program:
According to my example (see the image above) for remote access to this computer at the moment I need to specify ID: 900 288 832 and password: 6sx71k on the remote device.
The TeamViewer ID does not change for each specific computer. Those. the one that is indicated in the window you will always indicate when connecting remotely. There are 2 types of passwords in TeamViewer: temporary (random) and personal (permanent). Now more about this:

Hope you understand the difference in passwords :)
Now let's go through the main most important settings of the program.
Basic program settings:
To go to all the program settings, open the "Advanced" menu at the top and select the "Options" item:
We will immediately go to the "General" tab. Here you can enable or disable the automatic start of the TeamViewer program on Windows startup. If you are going to control this computer remotely, then I strongly recommend leaving this item enabled. Then you do not have to start TeamViewer manually, and even more so if you are far away, and TeamViewer will not be running on this computer, you will not be able to connect to it.
Below you can see a message that you are linked to a previously created account. If you click the Delete button, you can break this link.
On this tab, there are no more important settings that are not set by default. Go to the next tab "Security".
On the "Security" tab, we can change the "Personal" password by specifying a new one and repeating it at the very top. Below you can set up a "random" password by specifying the number of characters. By default, this password will always be 6 characters long.
In the last section, "Rules for connecting to this computer," you can allow or deny remote login using a Windows password. It is safest to leave this parameter set by default, i.e. - "Is not allowed". The easiest way to connect is through the TeamViewer password, and it will be safer that way.
Remote control tab. There are important settings here. All of these settings are global - i.e. for any connection. But if you have created an account for yourself (as mentioned), then for each computer added to your personal list, you can set your own connection parameters, but more on that later.
This is how the settings look on this tab:
At the very top, you can adjust the image quality when connected to a remote computer. It is better to leave either "Automatic quality selection" or "Optimize speed". I always set the speed optimization to connect to a remote machine and work practically without delays, even via mobile Internet. There is only one drawback - the image quality (the way we see the remote computer) will not be the best, but sometimes this is not even noticeable.
Below, as you can see, the option "Hide wallpaper on a remote machine" is enabled. This means that when connected to a remote computer, the desktop background there will just turn black. I always leave this option on, so as not to waste resources downloading, at times, a large background image.
Even below are additional settings that are configured for each according to their preferences. For example, if the "Play computer sounds and music" function is enabled, you will hear all sounds of the remote computer accordingly.
It can be useful to enable the "Pass shortcut keys" option. If you enable this option, then having connected to a remote computer, you can use your usual keyboard shortcuts. For example, quickly open the task manager - "Ctrl + Shift + Esc".
In general, here you configure it as you need it.
Let's go straight to the Computers & Contacts tab.
On the "Computers and Contacts" tab, your account settings will be displayed, in which you will then see all the remote computers and users you added. On this tab, you can change account information, as well as display settings for computers.
On this, we have sorted out the basic settings. Now let's move on to the main thing - remote computer control.
The principle of remote computer control
To control a computer or any other device (they must also have TeamViewer installed and configured!), We can, as I said, from any point where there is access to the Internet and we just need to know the ID of the controlled device and its password (random or permanent ). Knowing these 2 parameters, we can control the computer.
Let's try to connect to the computer remotely:
We indicate the password if you know the "personal" password of the remote computer. Otherwise, leave the field blank.
Specify the network name of the remote computer (for your convenience). It will appear in the list of your computers.
Optionally, you can specify a description of the added remote computer for convenience, if you have a large list of them.
In the "Window" list, I selected "Full Screen Mode". This means that when connected to a remote computer, TeamViewer will display the remote computer in full screen. It will look like you are fully working on that computer. You can choose another option, for example, "Window mode", and then the remote computer will be displayed in the window.
In the "Quality" list, I always choose "Optimize speed" so as not to sacrifice performance, especially on a slow connection.
Identity mode is always best set to TeamViewer Identity. Then you just need to know the password set for this or that computer in TeamViewer to connect to it.
In the main TeamViewer window, where the "Manage computer" section is located, specify the ID of the computer that we will control in the "Partner ID" field.
If you created an account, then we can immediately add the computer to our "Favorites" list by clicking the button with the star:
Before us will open a window with settings for access to a computer, which we add to the list:
In the image above, I have marked the fields and lists where it is best to make changes:
The rest of the settings can be left with the "Inherited" value, because, as a rule, there is no need for them and, as a last resort, you can adjust at any time.
When the settings are specified, click the "OK" button.
The computers that you will add to your list will be visible in a separate window, as in my example in the image below:
In the example, I added a computer named "Test TeamViewer".
Now that the computer is on the list, to connect to it, simply double-click the left mouse button on its name. If you immediately specified the password, then it will not be requested and the connection will immediately occur (within a couple of seconds).
Another way to quickly connect to a computer, if for some reason you did not start an account and do not add computers to your favorites list, is just enter the ID in the appropriate field and click "Connect to partner":
By default, there is just the "Remote control" mode, which is what we need. And we can turn on the "File Transfer" mode at any time already during a remote session.
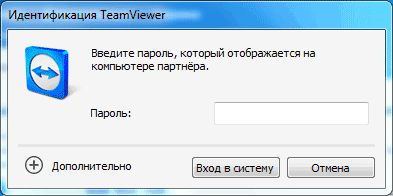
Now a window will be displayed where you need to enter the password to connect to the remote computer:
Enter the password and click the "Login" button.
Connection usually takes a couple of seconds, but this depends, respectively, on the speed of the Internet from one side and the other. After connecting to the remote computer, the window will look like this:
As you can see, the screen of the remote computer is black. As you probably remember, in the settings we left the option "Hide wallpaper on the remote machine" enabled. As a result, the wallpaper on the remote machine turned black, which will reduce resource consumption, and immediately after disconnecting from the remote computer, its desktop wallpaper will return to its previous appearance.
It's so simple and easy to connect to a remote computer :)
You can fully control your computer at any distance, and at the same time it will look exactly as if you are sitting at that computer.
Let me remind you once again that the same can be done from almost any device. If you, for example, have an iPad, then download TeamViewer on it (it's always free!), Enter the ID and password of the remote computer, and that's it! You will connect and be able to control it directly from the tablet, and it is also very convenient!
Now let's look at some of the functions available to us during a remote session.
Functions available during a remote computer session using TeamViewer:
So, we are connected to a remote computer. At the top we see a panel with a set of functions. Let's go through the most necessary ones:
The button numbered "1" allows you to break the connection with the remote computer at the moment.
After any termination of a TeamViewer session on both devices, a window will appear indicating that the free session has ended. Just always click OK:
You can also instantly disconnect the connection while behind that remote computer. For example, someone remotely assists you in setting up the system or fixes some problem. If suddenly that person began to do some actions on your computer that, in your opinion, he absolutely does not need to do, then you can cut off the connection with only one button in the form of a cross (see the image below):
The button numbered "2" allows you to hide this panel of functions of the remote session.
The button numbered "3" allows you to instantly switch to full screen mode, which I use 99% of the time.
A very useful function is the transfer of files from the local computer to the remote one and vice versa. This can be done by simply dragging and dropping the necessary files from your computer window to the remote computer window.
Another way is to use a special manager - "File Transfer". It opens from the same panel that is fixed at the top. We select the item "File Transfer", and then again "File Transfer":
A special manager - explorer will open. There is also nothing difficult here. We indicate from which folder of the local computer the file will be transferred, then we indicate the folder where the file will be transferred to the remote computer. Then we select the file itself on the local computer, which we will transfer and press the "Send" button:
The file will be transferred to the remote computer. In my example, I was transferring an image file called "" from the Downloads folder to the desktop of the remote computer:
After transferring the necessary data, you can close the file transfer manager, and a window will be displayed with the statistics of the transfer of your files, where you need to click "Close" again:
Or you can minimize this window.
There are 3 more very useful functions that are available during a remote session. This is the ability to voice communication, video broadcasting and chat support.
All 3 of these functions can be activated by selecting the Audio / Video menu:
Here you can change the scaling, for example, enable full screen mode. Here, in the "Quality" submenu, you can select the quality you need for displaying content on the remote computer, for example, by turning on "Optimize speed". Also here you can change the resolution of the remote computer (for example, if the resolution of your local computer is very different) and show / hide the wallpaper on the remote computer. Everything else is not so essential and necessary ...
Well, this is perhaps the most useful thing you need to know about how to remotely control a computer using TeamViewer :) Cool program, isn't it? :)
The most important thing is that it is extremely simple, convenient, even a beginner can handle it. And, of course, it's free! In general, to be honest, I have not seen the best worthy replacement for the TeamViewer program.
And now I think that in a couple of weeks I will complete the article, and you will be able to familiarize yourself with the next testing of the new autoclicker!
Well, now I say goodbye to you for a week ... Good luck and always good mood! ;)
Remote access to a computer via the Internet will allow you to control your PC, even if it is thousands of kilometers away from your location.
The technology works on the principle of assigning a unique identifier to the user in the global network. This data is used to connect to remote control.
The function can be configured both using the system functions of the Windows operating system, and using additional programs (their use is usually free).
Notice! In order to access a remote computer via another PC, the remote PC must be turned on and have an Internet connection. Also, a function or program that provides a remote connection must be connected on both devices.
Using the Internet ID Function in Windows
Assigning a unique identification number on the network greatly simplifies the connection process.
By using this feature, computers do not have to configure the connection back process every time.
Also, the Internet ID function is quite easy to use and even an ordinary user can configure its work.
How does Internet ID work? The connection of two computers is due to the connection to a single Host.
The interface is displayed using NAT or a standard firewall.
Follow the instructions below to set up remote access to a PC yourself using the Internet ID option:
- First, you need to get an identifier with which two computers can connect the connection. The procedure for issuing an identifier is carried out by the host free of charge;
- In some assemblies of Windows, the previously installed utility may be missing. You can download it from the link http://db.repairdll.org/internetidadmin.exe/ru-download-50.html.
- Install the tool on both computers and get to work;
- After installation, the host icon will appear on the desktop toolbar. Click on it with the right mouse button and select the connection settings item;

- Then, in a new window, click on the corresponding button to obtain an Internet ID. This procedure must be done on a computer from which another PC will be controlled;

- After a few seconds, a window will appear with a text field, in which an identifier will be indicated, which provides a remote connection of two PCs. Remember it, because without specifying the identifier on another PC, you will not be able to configure the connection;

- Now you need to perform several actions on the client personal computer (to which you will be connecting). Run the installed utility, select the operation mode as "Client";
- Press the button for creating a new connection and in the window that opens, specify the name of the connection and the identifier itself. You can choose any name, and the Internet ID must match the one that was issued on the first PC. Click on the OK button;

- Next, the connection properties will open. Select the connection mode through the identifier, as shown in the figure below, and enter it again in the corresponding text field;

Now wait a few seconds and wait for the connection to complete.
In subsequent attempts to gain remote access to another PC, it will be necessary to enter only the identifier on the administrator's side, and on the client's side - select the previously created connection template.
In addition to the proposed method for configuring remote access, you can use special programs that are even easier to configure.
TeamViewer software

The main feature of the utility: the user does not need to deal with the client and server parts of the program separately.
You just need to install the program on both computers and set up the connection in a few clicks.
After the first start-up, the application window displays a personal computer ID and an access password.
To connect to another computer, just enter its identifier in the Partner ID field and click the Connect button.
TeamViewer benefits:
- The presence of several modes of operation of two computers at once: remote access, file and folder transfer mode, VPN;
- During the connection, you can open a chat window, this will allow two users to communicate in real time without being distracted by other messengers;
- To provide full-scale system administration of another PC, you can connect the 24/7 remote access option. In the inactive mode, the function consumes few resources and does not load personal computers;
- Work speed and stable connection. Due to the presence of high-quality hosts, users do not face the problem of access failure (this happens only in the case of a bad connection to the global Internet);
- Please note that TeamViewer cannot be used for commercial purposes. The developer has built a utility for determining the commercial connection into the program. If it is detected, access to the PC will be immediately blocked.
If you want to use modules for corporate connection, you will need to buy a paid version of the application.
Ammy admin
This program allows you to access the function of remote control of other PCs. The functionality is very similar to the Team Viewer described above.
Available modes of operation include the ability to view and remotely control another personal computer or laptop of the user.

The program can be used without installing it on two devices. It is enough to open the portable version on computers.
The utility is not intended for use in commercial organizations and enterprises.
You can download Ammy admin on the developer's official website at http://www.ammyy.com/ru/.
To get started, run Ammy admin on both computers. Then enter the server computer ID on the client computer. Click on the "Connect" button.
The connection diagram is also shown in Figure 8.
This application is more suitable for organizing a one-time connection than for long and regular work.
Among the advantages over other similar software are a simplified connection process, an intuitive interface and high speed of work.
Among the disadvantages of the application, it can be noted that it is not available on mobile devices and tablets. There is also no folder and file transfer mode.
The use of the program is limited to fifteen hours per month. This feature is designed to eliminate the possibility of commercial use.
Lite Manager
This utility has a user-friendly interface and a wide range of options. The application has two parts: for separate installation on the server and client side.
Unlike the previous utilities, LiteManager will be more expedient for more advanced users who need to organize regular access to a remote computer.

Also, unlike TeamViewer and Ammy admin, a unique identifier for the server PC is assigned only once (at the first start).
In the future, it does not change.
This will allow you to quickly remember it and not have any further problems with its introduction on the client side.
Also, users have the opportunity to independently set their own identifier on the network.
The program itself is paid, however, if you do not need to use it for commercial purposes, you can download the LiteManager Free version.
It is free and its work is limited only by the filter that determines the possible commercial connection.
The application provides a large number of modes for connecting two PCs, namely:
- Remote access;
- Data transfer;
- Chat organization mode;
- The ability to access the registers of two PCs;
- Task Manager.
The program also provides the function of recording a screen in real time, inventory options and installing programs on a client PC using a server.
Among the shortcomings of the program, it is possible to note its absence on mobile operating systems. Access to the BIOS of a remote computer.
The utility cannot set up a connection without specifying the IP address of the server PC, that is, connection by ID is impossible.
All modern remote access applications are fast and user-friendly.
Choose the appropriate connection method based on whether it will be regular or one-time.
Thematic videos:
Remote control of a computer is a connection from one PC to another via a local or Internet network and control of a device at a distance from several meters to several thousand kilometers. This software is used primarily by programmers to correct errors made by employees of various companies when working with programs.
However, it is not possible to use programs that provide remote access for corporate purposes. After all, situations often arise when you need to help parents or just inexperienced friends to deal with some of the nuances of a computer, and it can be very problematic to do this over the phone. This is where the computer control program comes to the rescue. Through a remote computer, you can connect and do everything you need to, clearly show how to proceed next time.
Programs for remote control of computers on a PC
There are many programs that allow remote access. Despite the fact that they all perform the same functions, the software has very significant differences. Of course, it is unlikely that it will be possible to cover all programs, because every now and then new products appear, and those that could not win the trust of users disappear. Therefore, below will be presented a rating of programs for remote computer control. The top is compiled according to the opinions of users, i.e. based on the number of downloads of a particular product.
Top programs for remote control of a computer via a PC are represented by the following developments:
- TeamViewer.
- Radmin.
- UltraVNC.
- Splashtop.
- Supremo.
TeamViewer
TeamViewer is one of the most popular programs among users. The slogan of this product sounds like “All in one!”. The program is easy to use and completely free for non-commercial use.
One of the advantages of TeamViewer is that the product does not have to be downloaded and installed on a PC, the program is available for use online. For those who decide to download the program to their computer, downloading and installing the program will also not cause difficulties and will not take much time.
After starting, the program will display a window with the computer's ID and password for the possibility of remote connection to it, and a second window that allows you to connect to other PCs by entering their data. This software is used as a program for control, monitoring of a remote computer.

The advantages of development include:
- several modes of operation (remote connection, demonstration, file transfer and chat);
- free use for personal purposes;
- possibility of round-the-clock access to a remote computer;
- high speed of work;
- simple and intuitive interface;
- the ability to install utilities to expand functionality.
The program also has disadvantages: the program does not always cope with long sessions and is not suitable for administering multiple computers. To fix these shortcomings, you will have to buy additional modules. However, when used for personal purposes, such software shortcomings are hardly noticeable.
In general, the software is great for private use and short-term sessions, but it will not satisfy all the needs of programmers administering entire computer networks.
Radmin
Radmin is a program for remote control of computers, which was at its peak of popularity ten years ago. But despite the decline in popularity, software still occupies a certain place in the market and remains one of the best in this area. Development is paid, but the developers provide the opportunity to take advantage of a 30-day trial period.
The program itself consists of two parts: Server and Viewer. Server is launched on the computer to which the connection is made, and Viewer - on the one from which it will be connected. You can download the program from the developers' site in full or in parts; there is also an online version of the Viewer. There is also Radmin Server 3.5 NTI - a program for remote hidden control of a computer.
Unlike TeamViewer, Radmin does an excellent job of managing a large computer network and is therefore great for the IT department of a company. Also, the advantages of the program include a high level of security, the presence of a chat (text and voice), prompt troubleshooting on a PC. There is also a disadvantage: the development is quite complicated, so only an experienced user can handle it.
As a result, Radmin is the complete opposite of TeamViewer. The product is great for IT departments of companies with branches in different cities, but not entirely convenient for use by an individual.
UltraVNC
According to users, UltraVNC is the smartest free software for remote control of computers. Just like Radmin, this software is divided into two parts (UltraVNC Viewer and VNC-server), respectively, for the computer from which they are connected and for the one to which they are connected. There is also a VNC client that combines both parts in one.

UltraVNC is one of the most secure programs listed. Development is very convenient and easy to understand when creating a simple connection. There is also advanced functionality that will require a high level of knowledge to use.
In general, the program is suitable for any type of user. Beginners who only understand the basics of setting up remote access will be able to effortlessly connect to another computer using the UltraVNC program, and professionals, after digging a little, will be able to find the widest range of functions among all the programs presented in the top.
Splashtop
Splashtop is the newest of the presented programs, but it has already become one of the most popular. According to developer statistics, the program has already been installed by more than 15 million users around the world.
What is the reason for such popularity? Splashtop is a progressive application that allows the user not only to configure the computer remotely, but also to use absolutely all of its functions (play games, watch movies, use applications, etc.).
As for the interface, in Splashtop it is very simple and easy to use. Also, the software boasts a high data transfer rate. It is possible to administer a computer network, however, only up to five devices. Splashtop is suitable for any device and operating system.
The development has only one big drawback. This is not a program for remote control of a computer via the Internet, access is possible only through a local network.
Supremo
Supremo is a great copy of TeamViewer with a bit of Radmin and completely free to use. In this development, almost everything, from the design to the settings, is borrowed from TeamViewer. The only significant difference is the need to allow the connection from both sides, that is, the computer to which they are connected must agree (by pressing the button and “Start”), otherwise the session will be terminated. The Supremo program is one of the simplest and most understandable on the Internet, in addition, it has very effective protection.

Just like Radmin, Supremo is great for working with large computer networks. However, unlike Radmin, it does not require complex settings when connected, which makes it suitable not only for administration, but also for one-time use.
There is only one significant drawback - the software works only with Windows. Any other operating system is incompatible with development.
Summing up, we can say that Supremo is the best program for remote computer control. The software has its drawbacks, but they will be noticeable only to the most experienced users who need the most complex remote connection functions.
Programs for remote control of computers on Android
Today, you can set up a remote connection to a computer not only from another PC, but also from a phone or tablet on the Android system. And vice versa, there is a program for remote control of "Android" from a computer. Of course, the choice of software is not so great here due to the novelty of the function itself. There are only three programs for remote computer control via Android.
Logmein
Logmein is a powerful application with a wide range of functions that allows you to access not only the computer desktop, but also the file system. The program for remote control of computers has a simple, intuitive interface, even though there is no Russian translation. The data transfer rate is very fast for a mobile application.

The disadvantages of the application are the slow loading of the interface and the need to install the client on the PC to connect remotely (the client for the computer has been translated into Russian). Another disadvantage is that the program is paid, but you can use a trial period of 14 days.
Parallels Access
Another app with a two week free trial is Parallels Access. Among its main advantages are:
- simple and really beautiful interface;
- a huge variety of functions;
- high speed (both work and transfer);
- simple connection;
- built-in file manager.

It was not possible to identify significant disadvantages of the application. The only thing that can scare you off is the payment, but even here it is quite acceptable.
Chrome Remote Desktop
Chrome Remote Desktop is a very simple application for setting up remote access. Even a beginner can figure out the setup.
The feature set is very sparse. The graphics in the application are poor, but Google's creation boasts the fastest connection speed of any application. To work, in addition to the application itself, you will need the Google Chrome browser.
In general, the development is not very good. The emphasis here is on speed and simplicity, and this is exactly what the software does. The Android app is free.
Security when working with remote access
Remote access is a very useful feature, but it can also harm the device, so if your PC has a program for remote control of computers, you should follow the safety rules.
Firstly, a good antivirus with the latest updates must be installed on your computer or tablet. Do not accept unknown or potentially unsafe files.

Secondly, do not forget that many of the presented applications allow you to connect to your computer without permission. So don't leave an app running offline if it's not in use at the moment. Be sure to disable the activation function at Windows startup.
If the program blocks unauthorized connections, you should not allow unknown users to connect.
 Architecture of a distributed control system based on a reconfigurable multi-pipeline computing environment L-Net "transparent" distributed file systems
 Email sending page Fill relay_recipients file with addresses from Active Directory
 Missing language bar in Windows - what to do?