Install a new Windows on a laptop. Practical tips on how to install windows xp on a laptop
This guide will show you how to properly install Windows 7 on your computer, laptop or netbook. The issues of activating the operating system, its Russification, installing drivers and utilities will also be considered.
Before proceeding directly to the installation, you need to prepare a disk or USB flash drive with the Windows 7 distribution kit.
Preparing for installation
There are two main ways to install Windows 7 on a laptop, netbook, or computer:
1) installation from DVD with Windows 7 distribution kit;
2) installation from a USB flash drive or memory card with Windows 7. This method is suitable for netbooks and laptops without a DVD drive.
To create a DVD or USB flash drive with Windows 7, we need:
1) a distribution kit with Windows 7 in the form .iso image.
2) utility. If you have Windows XP, then you need to install a patch for it to work KB932716, and Microsoft. NET Framework 2 .
3) a blank DVD or flash drive. A USB card reader with a memory card is also suitable as a flash drive. The size of the flash drive must be at least 4 GB.
Important note: it is highly discouraged to use various Windows assemblies from "craftsmen". It's not at all about the licensed or unlicensed Windows. Not at all. The fact is that the original assemblies from Microsoft before release are very well tested for various errors or flaws. Hardware manufacturers also test their own drivers and software on such assemblies. Some "craftsmen" modify the original distribution, add, modify, and remove some Windows components. How it all works, of course, no one seriously tests. The fact that a certain assembly works well on one laptop or computer does not mean that it will also work well on another. Problems with such assemblies most often arise during the installation and operation of some drivers. If you want to avoid most of these problems, use the original Windows builds.
Note for Windows 7 versions: original Windows 7 distributions contain all editions of Windows 7 from Home Basic to Ultimate in 32-bit or 64-bit version.
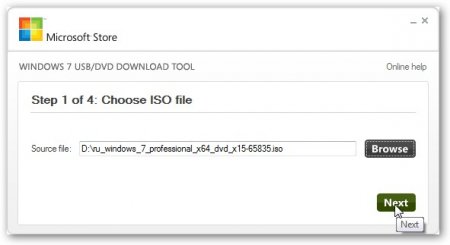
Let's get started. First, you should run the utility Windows 7 USB / DVD Download Tool:
Click on the button Browse and indicate where you have saved the image with Windows 7. Click on the button Next:
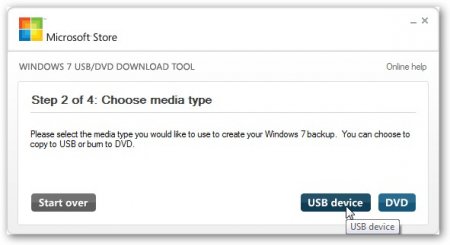
Now we choose where to write the Windows 7 distribution kit: to a USB flash drive (button USB Device) or to disk (button DVD). Consider, for example, writing to a USB flash drive:
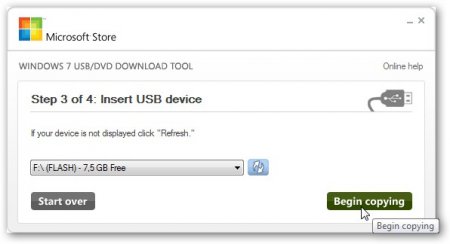
In the window, select your USB flash drive. Before recording, it is worth copying all important information from it, since all the contents of the flash drive will be deleted. .
To start recording, click on the button Begin copying:
The utility will warn us twice that all data on the flash drive will be erased:
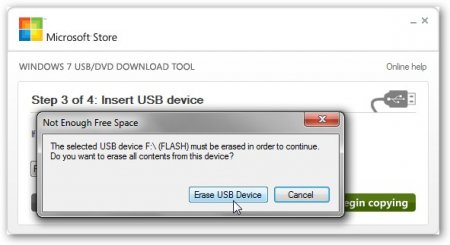

In a couple of minutes you will have bootable USB drive... If something does not work out for you, then in this guide: Installing Windows 7 and Windows Vista from a USB flash drive, there are two more ways to create such a flash drive.
Writing the distribution kit to disk is the same:

So. The Windows 7 flash drive or disk is ready.
Before proceeding with the installation of Windows 7, you must make a backup copy of all the necessary information, which is located on the C: drive. The fact is that during installation this section will be formatted and all information on it will be lost.
You can also go the other way, which is described in these materials: and Automatic Windows recovery on a laptop using Acronis True Image. You first make an image of the entire C: drive (that is, all the files that are on the C: drive are packed into one large file), and then, if necessary, you can return everything as it was before Windows installations 7. I also recommend that you familiarize yourself with these materials: and.
Now you can proceed to the installation of Windows 7 itself.
Installing Windows 7
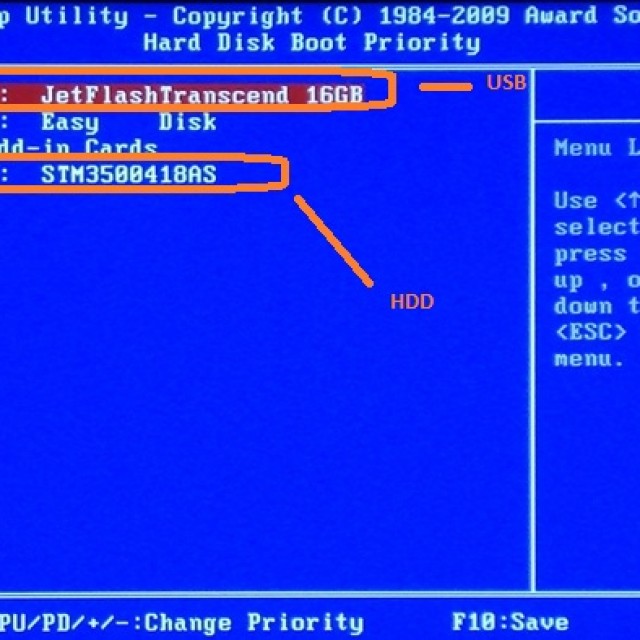
First of all, make sure that the system will boot from a DVD or USB stick. To do this, go to the BIOS (on Acer laptops, Packard bell, eMachines and others, for this you should press the F2 button when loading), then go to the tab Boot and buttons F5 / F6 put your DVD drive or USB flash drive in first place:

Then go to the tab Exit and select the item Save ...... After that, the laptop or PC must boot first from a DVD or USB flash drive, and then from a hard drive.
Comment: if you install Windows 7 from a USB flash drive, then first you need to connect it, and then turn on the laptop itself, go into the BIOS and set the boot order.
Now you need to insert the disk or USB flash drive into the laptop. At boot, you will be prompted to press any key to start the installation:

Press any key In a moment, a window like this will appear:


Press the button Install to start the installation.
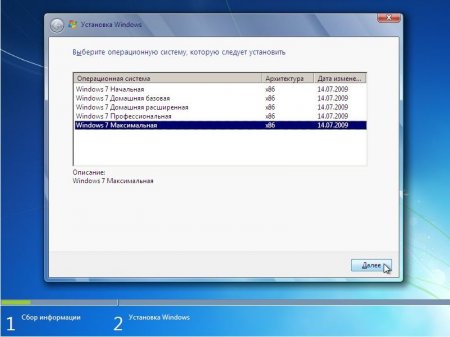
Now you need to select the edition of Windows 7 that you are going to install. It is very important to choose exactly the version that is indicated on the piece of paper with the serial number. If you choose the wrong edition, then there may be problems with activation. When you select the required edition, click Further:
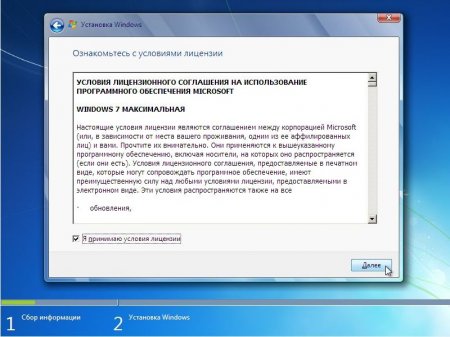
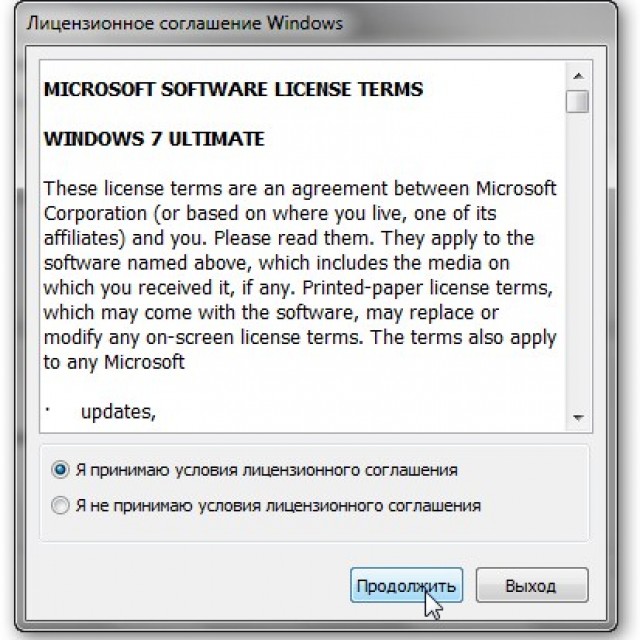
Agree to the License Agreement and click Further:
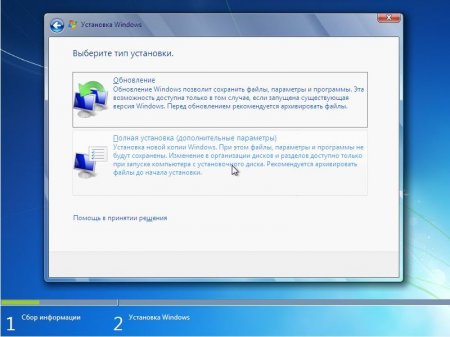
Choose Complete installation.


Note: Acer notebooks have one or two hidden partitions. They are called PQService and ACER. DO NOT PUT Windows 7 on them. More details about these sections are described in these materials: and Working with the automatic installation of Windows on a laptop.
All information from the selected section will be deleted. The installer honestly warns us about this:
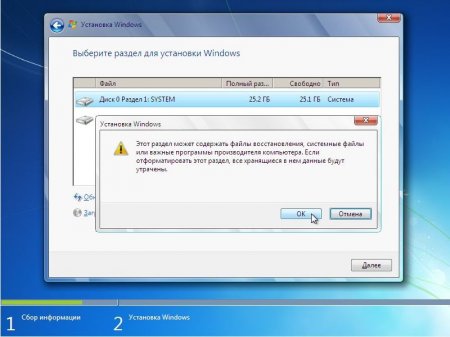
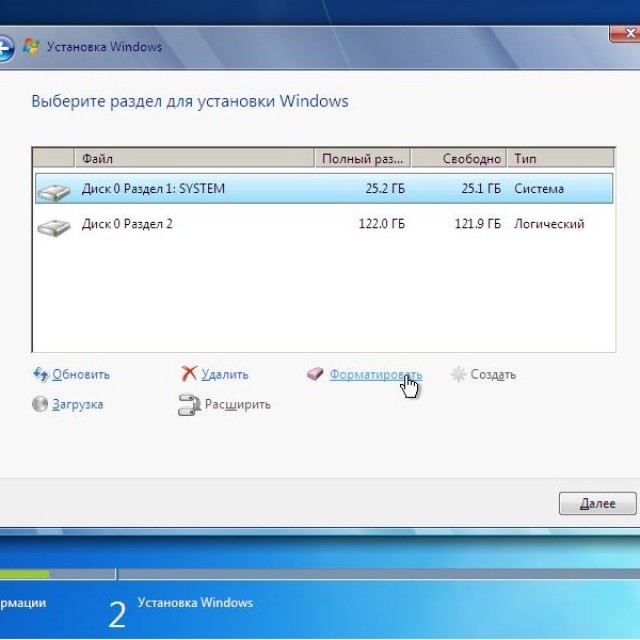
Select a formatted section and click Further:

Now it's worth a little wait:

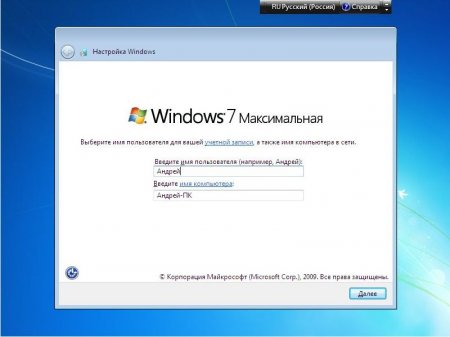
When the installation is complete, you will need to enter a username and computer name:

Introduce serial number from a piece of paper on the bottom of the laptop:
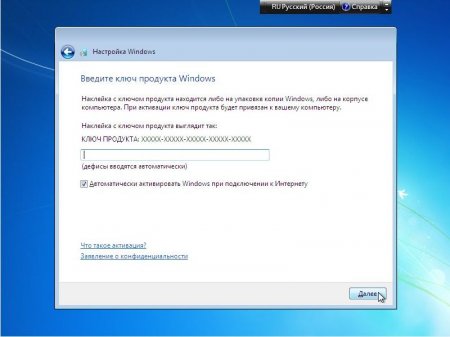
The serial number can be omitted. You can use Windows 7 without activation for up to 30 days. This counter can be reset several times.
We indicate the time zone, date and time:

If your laptop or computer is connected to a wired network or is in a wireless coverage area, then Windows 7 will prompt you to configure it:

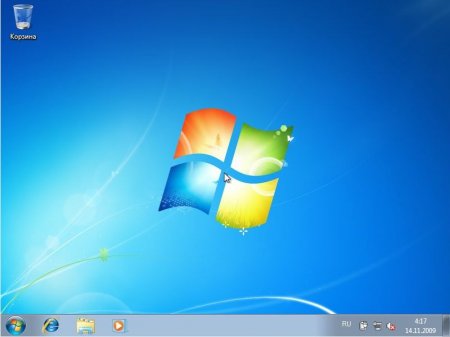
That's all. Windows 7 installed:
Installing the Russian language
If you installed the English version of Windows, then you can install the Russian language as well. The ability to install a different language is officially supported in the Corporate and Ultimate editions. For other editions, workarounds need to be found.
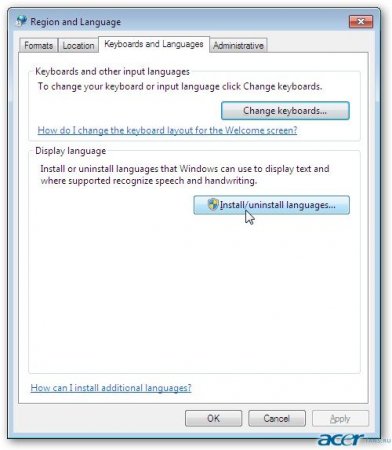
Click on Start and go to Control Panel... Selecting an item Change display language:

Go to the tab Keyboards and Languages and click on the button Install / Uninstall languages ...
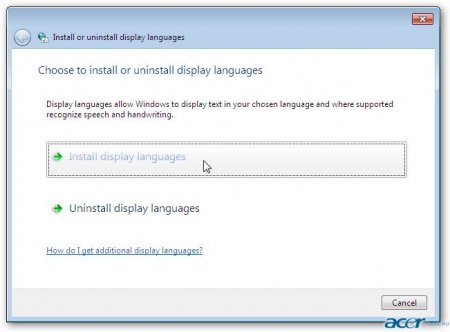
Click on the button Install display languages:
Click on the button Browse computer or network:
![]()
Click on the button Browse and indicate where you saved the file from language pack which was downloaded from these links: download(32-bit) download(64-bit)
![]()
When the file is selected, press the button Next:
![]()
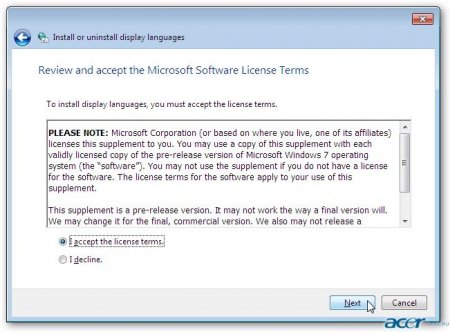
We agree to the terms of the license agreement and click Next:
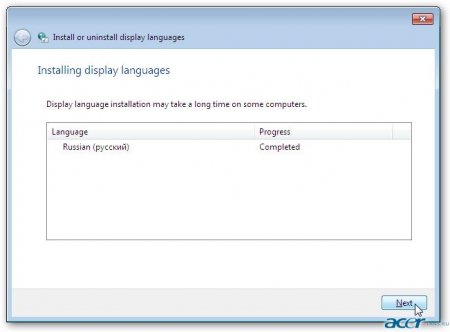
The installation of the language pack should start:
![]()
When the installation is complete, click Next:
We choose Russian and click Close:
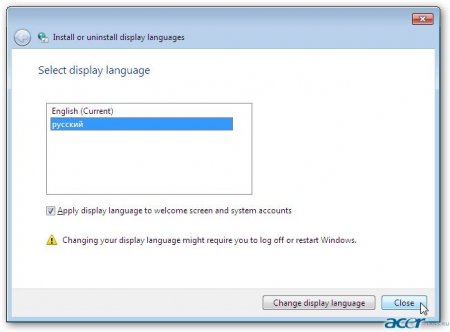
Select in the window Russian and press Apply:

We reboot the laptop or computer. We go back to Languages regional standards and click on Change system language ...
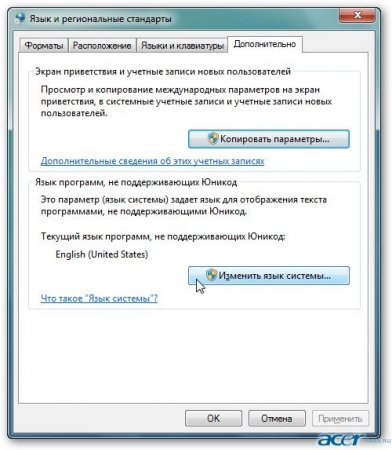
We choose Russian and click OK:
![]()
Now the system fully supports the Russian language and fonts
You can also use the service to set a different language. Windows Update
Windows 7 activation
For Windows activation 7 laptop or computer must be connected to the Internet. To start activation, click on the button Start, click on A computer right-click and select the item Properties:
![]()
Click on 3 days left ...:

Click on the button Activate Windows over the network:
![]()
We are waiting a bit:

As a result, the following window should appear:
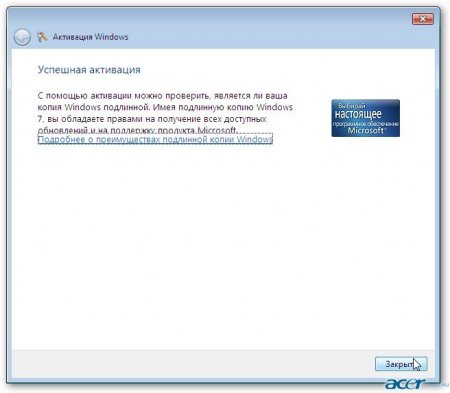
This indicates that your copy of Windows 7 is completely legal.
Installing drivers on Windows 7
You can find drivers for Windows 7 on this site using
The drivers on this site are constantly updated
How to install drivers is described in this material:
1. Chipset
2. Video card
3. Sound card
4. Card reader
5. Wi-Fi and Ethernet adapters
6. Other drivers
7. Drivers for touchpad and Launch Manager.
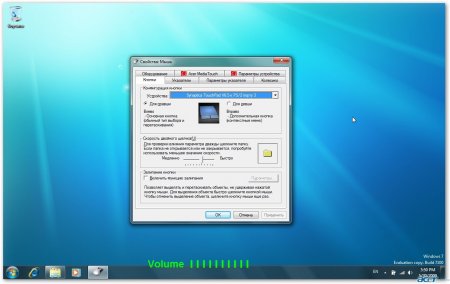
I will dwell in more detail on the driver for the touchpad (responsible for the touchpad and touch buttons) and Launch Manager (responsible for the operation additional buttons, volume control, etc.).
To install a driver for Synaptics touchpad, you need to run the installer with Administrator rights:
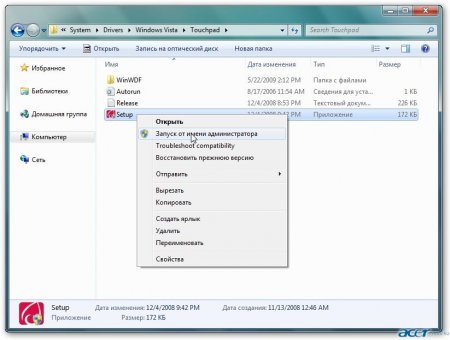
To install Launch Manager, right-click on Setup.exe and go to Properties:
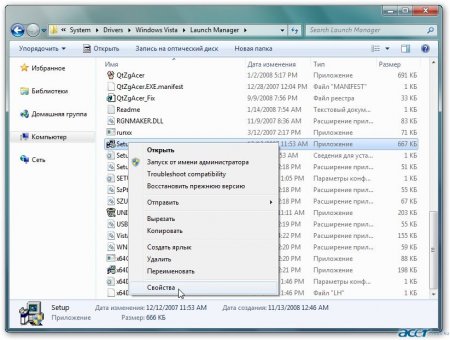
In the tab Compatibility select Windows Vista and press Apply:
![]()
After that run Setup.exe.
As a result, everything should be fine-tuned and working:

How to speed up Windows 7 is described in this article: Optimizing Windows
All questions about installation and Windows setup 7 we set not in the comments, but in the corresponding forum topic:
Edited: FuzzyL- December 5, 2012
Reason: Manual update. Version 2.1
So, you bought a computer, and it does not have your favorite operating system - Windows XP. What to do in this case? Read the beginner's guide, notebook. The procedure, in principle, is not particularly difficult, the main thing is to repeat the installation steps step by step.
Installation introductionWindows
First of all, you should find out on which interface your HDD- IDE or SATA. Why is it important to read such documentation? Because the original Windows distribution lacks software for some SATA chips from Intel. This interface will not be recognized, as well as the device connected to it. And then
Fortunately, most devices allow you to enable the so-called IDE-compatible mode. This is done through BIOS. And if this option is activated, Windows recognizes any SATA hard drive as “its own”. However, if your chipset is not from Intel or AMD 7, the compatibility option will not be needed.
Burning the installation distribution
Before using Serial Ata drivers, you need to find or create an installation set of necessary files in a packed form, which contains the operating system, drivers and application programs. There are several approaches to creating a set of SATA drivers:
- Writing to a floppy disk. At the time of installing windows, a message will flash that when you press the F6 key, you can install additional drivers from a floppy disk. But if there is no USB drive, then there is no point in such an installation.
- After installing the system, install the necessary software there, and then turn off the compatibility mode.
- Embed SATA drivers into the original distribution.
We will dwell in more detail on the possibility of installing Windows XP on a laptop with built-in SATA drivers. The steps in the installation process are shown below.
- Burn a compressed copy of Windows XP (distribution) to a CD. It is assumed that the driver integration was successful.
- Set the CD-ROM drive to the BIOS as the first boot device. In this case, the system will start automatically.
- When the system has already been installed on a PC or laptop, it remains to install the SATA drivers from the CD.
How to install windows xp on laptop. Driver integration step by step
- Copy the distribution kit, as it is, to any unallocated partition, for example, D, to a specific folder. Download drivers from Internet resources dedicated specifically to this topic.
- Alternatively, unpack the system CD image in .iso format using a suitable archiver.
- Install the program for building windows - nLite.
- Run it for execution. Indicate the location of the distribution kit.
- Select the items "Drivers" and "Boot ISO image».
- Click the "import" button and specify the location of the drivers (folder).
- Then we select a specific driver from intel or amd, depending on the chipset manufacturer.
- In the "apply changes" dialog box, we agree and click "yes".
- Burn the final version of the distribution kit to a CD using the Direct Burn-Burn option.
- We agree again, now for the recording process. After its completion, the system distribution kit with SATA drivers is generated.
How to start the installationWindows
Before turning on, enter the BIOS while holding down the ins, del, F8 or other key. When loaded, the bottom of the screen will tell you what to click.
Find the Bootable or Boot tab, go to the list of recognized devices.
Use the +/- keys or possibly F5 / F6 to change the boot order of the system from the devices. Your CD-ROM drive should be listed first.
We save the changes and reboot the laptop.
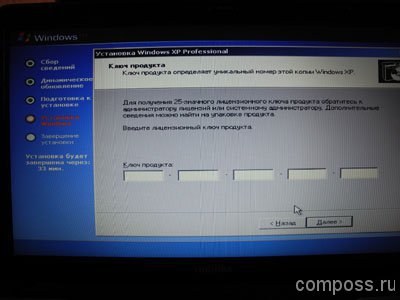
Next, the installation wizard will take over the task of how to install Windows XP on a laptop. You may need to enter your product key and answer a few questions about regional settings. Also, in the process of the wizard, there will be questions about installing the network, that is, installing standard version TCP / IP protocol or with a choice of individual subcomponents. The entire workflow takes about 30-40 minutes on average.
Do you want to know how to install Windows 7 on a laptop for free? Faced the need to reinstall your operating system, but do not know how to do it? Our step-by-step installation guide will help you find answers to these and many other questions.
We will tell you about three options for booting Windows 7: from a USB flash drive, a CD, and directly from a computer. In addition, you will learn how to configure BIOS for any of these options. Our instructions for dummies will help you reinstall Windows and solve other related problems on your own.
Undoubtedly installing windows much easier than, for example, installing an android, nevertheless, we have to figure out something.
Important: read before starting installation
When installing Windows 7, the first step is to determine the characteristics of your computer. If its RAM is less than 2 GB, then a 32-bit operating system (OS) with an 86-bit platform is suitable for you. Most modern laptops have brackets random access memory with a volume of more than 2 GB, in this case, you can safely install a 64-bit OS.
Information about the amount of memory can be obtained by opening the properties of the computer. Right button click on the "My Computer" icon on the desktop, select properties from the menu, and see what the Installed Memory (RAM) is.
Preparing to install the OS
Do not forget that the partition on which you are installing will be formatted and the information will be deleted. All the data you need should be saved in the section of the computer that will not be formatted, or on external media.
To install, you need a bootable CD or USB flash drive where Windows 7 is located. Another option is a virtual system image, the specifics of working with which are described below.
Burning the distribution disc
To create boot disk from scratch, we need:
- a clean blank that needs to be checked for damage and dirt, since any defects can lead to failure during recording;
- ISO image of the OS downloaded from the Internet;
- program for recording.
There are a lot of programs: Nero Burning Rom, UltraIso, CDBurnerXP, InfraRecorder. In this case, we will use the modest Small CD-Writer utility, which must first be downloaded and installed.
After installation, we perform the following actions:
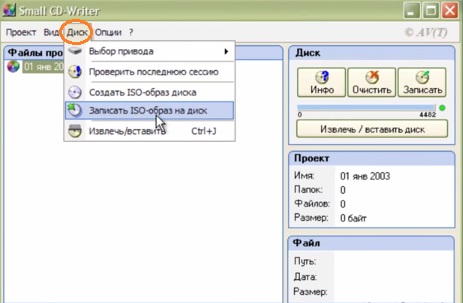
Thus, if the startup process on the computer is not disabled, and everything has been correctly recorded, then a menu should appear from which you can start installing Windows.
Sometimes PC users wonder how to install Windows 7 on a laptop without a disk and a flash drive? This installation method is possible, but only if there is a valid operating system on the computer:
BIOS options for booting from DVD
If you need to boot from CDs, you need to perform the same manipulations as when booting from USB, with the only difference - when specifying the boot location, instead of Hard Disk, you need to select CD ROM.
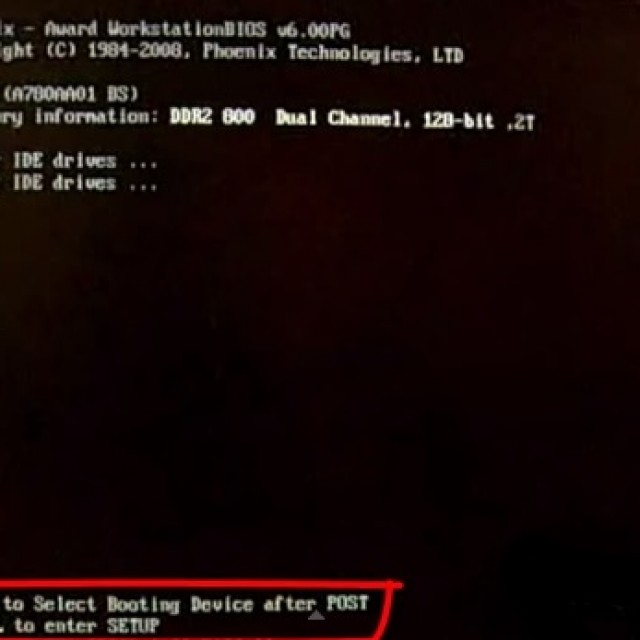
By the way, on some computers you can specify the boot device without going into the BIOS settings. If during the reboot at the bottom on the black screen you see the inscription Select Booting Device, then you have such an opportunity!
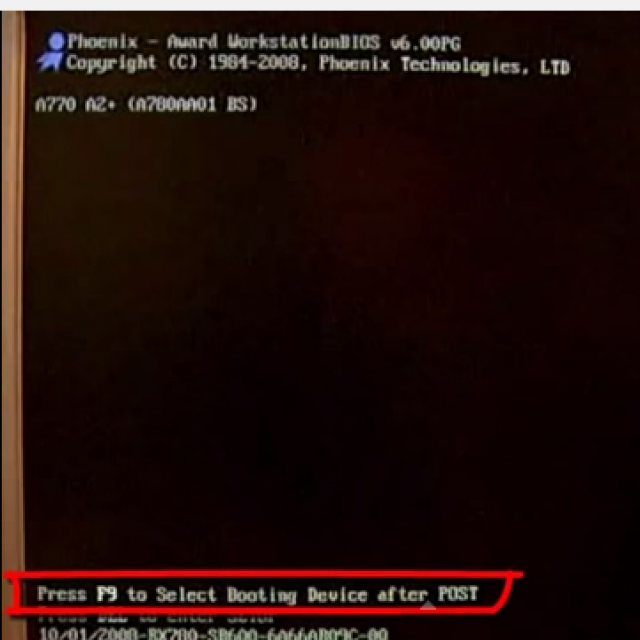
Pressing the corresponding key brings up a simple menu.
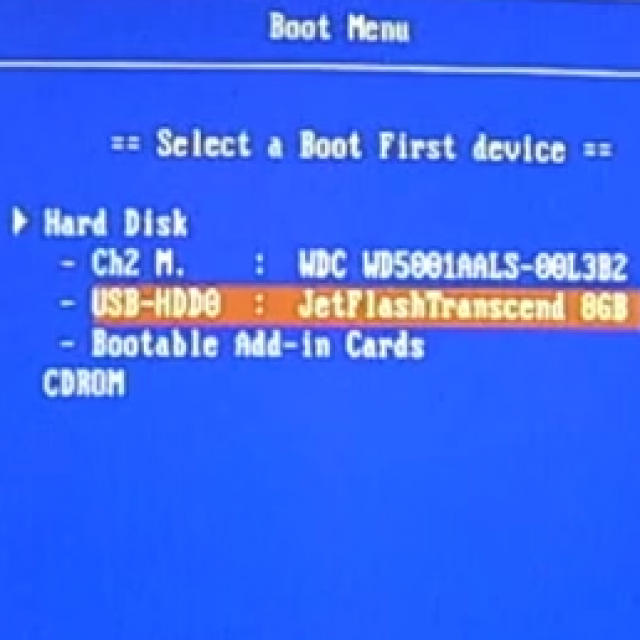
For selection hard disk or a flash drive we need:
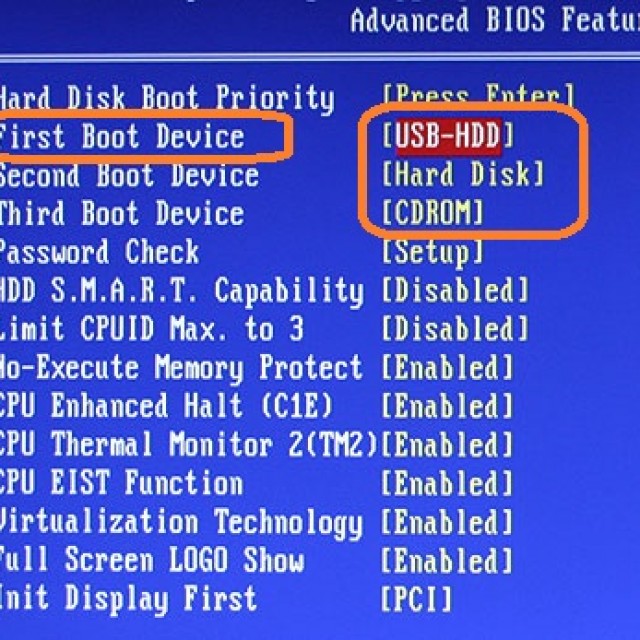
After installation, you need to return to BIOS and set First Boot device- your hard drive.
Installing Windows 7 on a new laptop
If you purchased new computer, on which the OS is not installed, you will need to install via BIOS. In addition, it may be necessary to install Windows through bios (BIOS) after replacing the hard drive or in another case when other methods are not available.
You will need removable media- disk or bootable USB flash drive.
First you need:
In our case, this option is not suitable, since we are installing Windows on an empty laptop without an OS.
Therefore, we have two other options: if you need to boot the system from a CD, select CD ROM, and if from a flash drive, then USB-HDD.
After the performed procedures, the computer will start to reboot, and during boot on a black screen you will see the inscription "Press any key to boot from cd or dvd". We press any button, after which it begins loading windows from the selected device.
Installation start
We made the BIOS settings, connected USB to a laptop, or put a CD in the drive. A reboot takes place, then the text appears on the screen: "Press any key to boot from CD / DVD". Click on any button, thereby starting the installation of the OS.
Installation language
We will be asked to select the installation language, then the input language, as well as the language of the Windows OS interface.
Then click Install Now and read the license agreement, which must be confirmed by checking the box next to the inscription: "I accept the license agreement."
type of instalation
One of two ways can be used here:
- full installation, which is supposed to format the hard drive. It is also called a "clean install";
- an update to an earlier version of the OS currently installed on your laptop.
In the event that you have no important data left on the disk being formatted, it is preferable to choose the first option.
Video: Install Windows 7. Step-by-Step Guide
In which section to install
A pre-partitioned hard disk has several logical partitions. The OS partition must be formatted for a clean install.
If you want on your laptop, along with the already installed OS, for example, with Windows 8, Windows 7 acted as the second system, then it should be installed in another logical partition of the hard disk. Make sure that there is enough free space in the marked section for these purposes.
If you install Windows 7 into an unformatted partition with an identical OS version, then all old data will be placed in a separate Windows.old folder, and you will be able to view the files old system, or you can delete it.
Formatting a partition
We select the section we need. Please note that we now have the opportunity to delete, format or create a new partition on the hard disk. Windows Installer can only access Quick Format, which is used to complete removal data.
Copy files and reboot
The program will copy the files, rebooting several times in the process. Then the OS will configure and check the hardware, after which it will ask you to enter the computer name, as well as your name, in order to create an account.
Activating Windows
The system will ask you to provide a product key. You can also skip this step. Without activation, you can use Windows for another 30 days. After the product key is entered, you must confirm the activation.
Unlicensed versions of the OS can be activated using special programs.
Installing drivers
After the OS is installed, you need to take care of the drivers, without which the computer will not be able to work properly. Currently, there are various builds of Windows with built-in drivers, but there is nothing better than using the "native" ones, which are usually found on the disk that came with the laptop, or posted on the manufacturer's website.
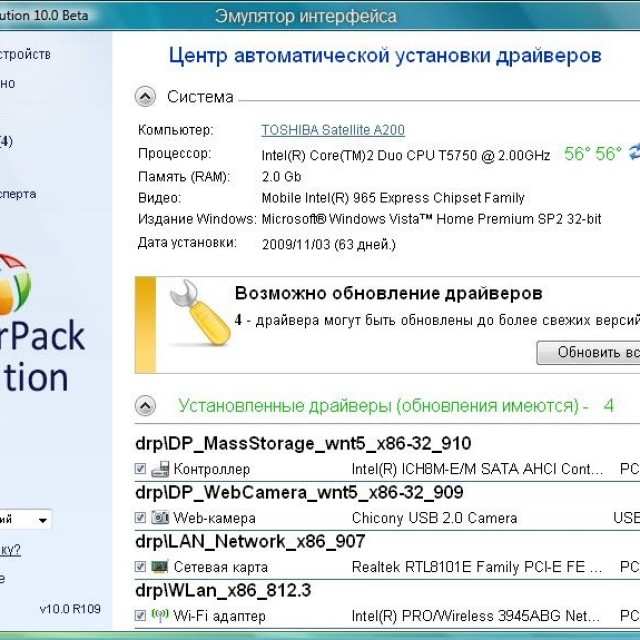
Photo: automatic installation drivers
Programs and utilities for working in the system
There are many different programs and utilities that you cannot do without when working on a computer. First of all, you need an antivirus, which it is advisable to install before going online. Then you will definitely need an archiver, an Internet browser, and various codecs. And if you work with documents, then you also need office programs such as Microsoft Office.
OS optimization
Optimization is needed to improve the performance of your computer.
The main points that can be noted to improve its work:
- disable visual effects. Sometimes external effects interfere with good performance, this is especially noticeable if not enough is used in the computer filling powerful processor or a small amount of RAM;
- disabling autorun of unnecessary programs. Unnecessary programs in autoload load the processor and prevent it from performing the necessary actions;
- disabling unnecessary services. We absolutely do not need some services used by our computer;
- removal of gadgets. Gadgets make it easier to work on a laptop, but at the same time, they waste system resources. You shouldn't install them unnecessarily;
- removal of unused programs;
- removing unnecessary shortcuts from the desktop.
Video: Optimizing the Operating System
Windows 7 itself can tell you the necessary steps for optimization:
- click Start;
- go to the control panel, select "Counters and productivity tools";
- and now next to the "?" search for “Tips to improve your computer's performance,” read and follow the instructions.
Installation errors
Occasionally problems arise when installing Windows. For example, the OS cannot be installed. Or the laptop throws an error while using it.
Users often face such difficulties as:
- blue screen - most often this error occurs due to various problems random access memory. First of all, it is worth checking if the dust has gotten into the slots;
- the laptop turns off - this problem can occur for very different reasons, but one of the main ones can be overheating of the laptop. Maybe it's time to clean it up. It is also likely that the difficulties are associated with wrong work power supply;
- does not see the hard drive.
To solve this problem, you can try the following method:

Installation cost
Difficulties that may arise during the installation of Windows 7 may stop you from thinking about reinstalling it. The price of the issue is the stable operation of your laptop.
Most likely, you wondered whether it is worth contacting specialists, or still save money and do everything yourself.
Leading computer service centers offer their repair and installation services. The price may vary depending on the complexity of the work. The minimum cost starts from 300 rubles. The maximum is usually not indicated.
Service prices
Taking advantage of this step by step instructions for dummies, you can independently go through all the steps necessary to reinstall the operating room Windows systems 7. And also for its adjustment and optimization.
Sometimes it becomes necessary to reinstall Operating System(OS) to your laptop (computer). This can be for a variety of reasons: New laptop, completed without an OS to reduce the cost of it, the defeat of the system by viruses, the replacement of the OS with another (newer or vice versa - the old one used to it).
This article will help you install the OS on your laptop yourself!
It should also be noted that this article is intended for installation from disc, that is, for laptops that have an optical CD / DVD drive. For devices that do not have such a drive (netbooks), this instruction is suitable only if an external drive is connected to the device, if USB help, for example.
So, let's begin:
First of all, we need to say about what we need. We only need a disk with the Windows OS distribution kit (preferably "clean", that is, NOT "assembly"). The recorded disc must be "bootable". That is, if you just rewrite, somewhere downloaded, Windows to disk - you will not succeed. How to burn a "boot disk" with Windows will be discussed in another article. If it is interesting - ask in the comments - I will help you.
Let's get back to our problem. We believe that we have a Windows disc properly and correctly burned!
Then I will write in stages, with maximum comments on the stages (I remind you that it will not be clear, you can always clarify in the comments to this article).
1. Turn on your laptop.
2. Immediately after turning on, press the "F2" key (in some laptops it can be the "Delete" key or another, see the instructions for the laptop) to enter the BIOS (no need to be afraid of this word, but unnecessary experiments in the BIOS are also better for now not to do).
3. Insert the Windows disc into the laptop's optical drive (press the drive deck open button). Close the disc deck.
4. In the BIOS, go to the “Boot” tab (you can do this using the navigation arrows on your keyboard).
5. On the "Boot" tab, you need to find the parameter that is responsible for the sequence of devices from which the OS will boot. Most likely, it will be called "Device from boot", or something like that.
6. Install your optical drive (CDROM) in the first place in the download. This can be done in different ways depending on the BIOS version. In some BIOSes, this is done using the "F5" or "F6" keys (there are hints on the right side of the BIOS, albeit in English) - select CDROM and press the key until CDROM is at the very top in the first place. In some of them you will select the line with the first place with the "Enter" key and then select the device you need from the list (do not forget, this device is our optical drive with a CDROM disc). By the way, in the latter case, I would recommend leaving CDROM in the first place, and choosing the “Disabled” option for all the rest. Don't worry, after installation we will return everything as it was.
7. Press the "F10" key, agree with the changes made, that is, press "Enter". Reboot started.
8. After rebooting, do not miss the moment when the laptop prompts you to agree to boot from disk. An inscription will appear on the screen, for example "Boot from cdrom press any key" (to boot from a disk, press any key) and several dots. We quickly press "Enter", space or any other key. Boot started from the disc inserted into our drive.
9. After a couple of minutes, information will appear with the available ones at our disposal, sections of hard disk (these will be "Partition C, D", etc., by the way, there can be only one partition, which will mean that the disk is not partitioned into partitions, which is not correct, and we will solve it).
10. Formatting Section C. Depending on Windows versions this is done with minor differences.
In Windows XP, we need to select (with the keyboard navigation arrows) Partition C and delete it by pressing the "D" key (follow the prompts on the monitor), confirm the deletion with the "L" key. An "unallocated area" appears in the main window with sections. We select this area and create the section again by pressing the "C" key. We collect 40,000 (40GB) for the proposed amount of allocated memory, or as much as you deem necessary. You can also leave the amount that is offered by default if you already have other Sections (disk D, E, etc.). If they are not there, then in a similar way you can create the quantity you need with the sizes you need. After partitioning the disks, select "Partition C" and press "Enter". Formatting the Section into file system NTFS or FAT32 (I think FAT32 is the best option for Windows XP). The installation of Windows on the C drive went.
Windows 7 is slightly different, but the meaning is the same. Following the prompts, we can delete, create, format any partition on the hard drive. Then select "Section C" and press "Enter". If you need to explain this point in more detail - write in the comments - I will definitely help you.
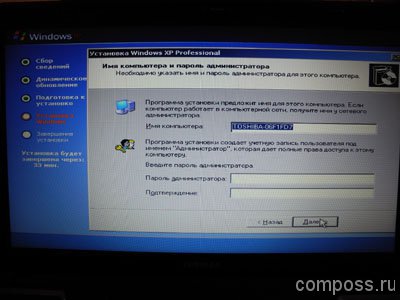
11. During installation, the laptop will offer to set the time, select a language, come up with a name laptop... I think you can handle this without unnecessary help. One thing that I recommend that you do not rush to assign an Administrator password (you can always manage to do this directly from the OS installed), and also refuse to update and register via the Internet.
12. After about 30-40 minutes, the OS will be installed, and you will see a brand new, just-born Windows in front of you.
13. Return to the BIOS again (how to do this is described in point 2) and install instead of CDROM - your hard drive, most likely it will be its name: Samsung, Seagete, Hitachi, etc., with its marking. We press "F10" and "Enter". We reboot and boot from the hard disk (you can get the disk from the drive).
Of course, after installing the OS, you will also need to install drivers, various programs, etc., but this will be considered in other articles.
Thank you for the attention!
P.S. The article can be supplemented or edited, based on the recommendations in the comments, as well as when answering questions in the same comments.
How to install Windows XP on a laptop? If you have not installed Windows before and are faced with it for the first time, then before proceeding with the installation, be sure to read the lesson There is also a lesson on. After installation, be sure to install the program Ccleaner... I wrote a lesson on how to install and use the program.
Install XP on a Toshiba Satellite L655 laptop. The problem is this:
Windows cannot start due to a corrupted or missing file: WINDOWSsystem32configsystem you can try to repair this file by running Windows Setup from the original installation CD-ROM. Select 'r' in the first dialog screen to start the recovery procedure
We will not rebuild. We will reinstall the OS. At the same time, we will learn how to install the OS. Namely Windows XP.
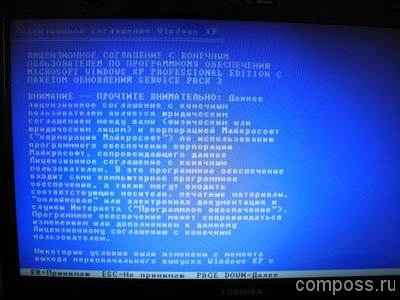
I only have a Licensed Disc in my armament. Windows XP service Pack 3:
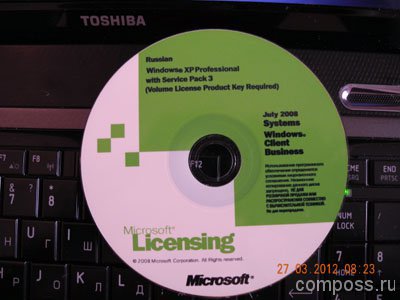
But this does not mean that you should have the same. You can take Zver, Chip or any other assembly. You can even pirate. Vista, 7 and 8 don't count as we have XP lesson.
So, insert the disc into the drive, turn on the laptop and immediately hold down the key "DEL" or "F2" on the keyboard until the computer enters BIOS... All BIOS may look different depending on the manufacturer and version. But the settings are basically the same. In our case, this is how the BIOS looks like:
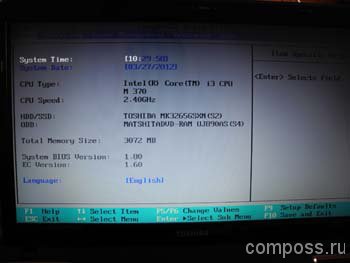
Select a tab "BOOT"... If there is no such tab, go through the tabs and find which one contains the device boot options.

You should also have something like this. You will immediately notice if you go over the tabs. Now our task is to make the laptop boot from disk. And for this we need to swap items 1 and 2 (see photo), i.e.
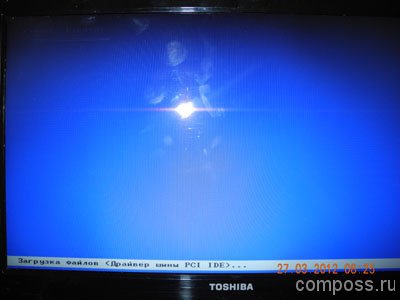
the first to do CD / DVD... in my case, to swap items, you need to select the item and click f5 or f6... You may have it differently: + and — , or through Enter... After that, go to the tab Exit, choose Save & exit setup... and press ok. That's it, BIOS setup is complete. Your laptop restarts, we are waiting for the message to appear on the screen "Press any key to boot from CD ..." which means "Press any key to boot from CD"... We press any key and the installation program appears immediately.
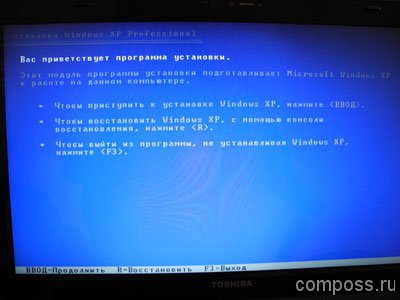
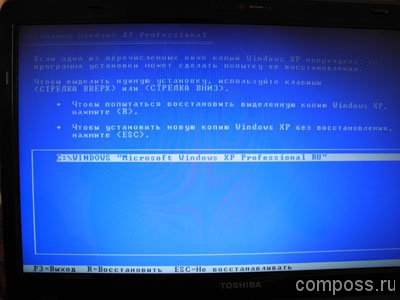
After checking the system configurations, you will be prompted to Install a system or restore an existing system. Here you need to choose Enter and proceed with the installation:
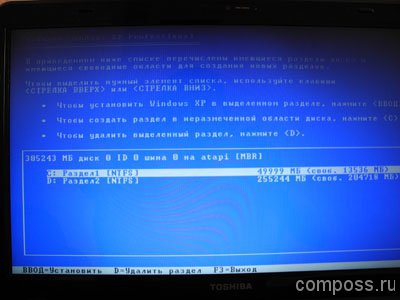
Push C = continue installation:
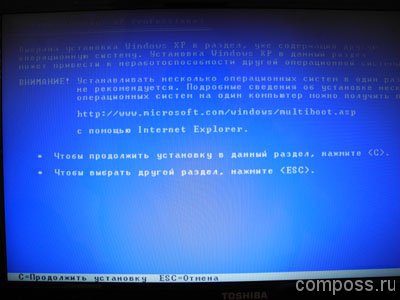
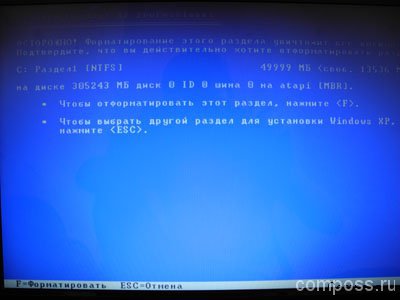
We choose "Format partition in NTFS system":

We press F:

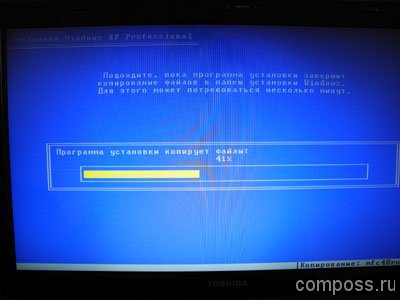
And the program starts copying files:
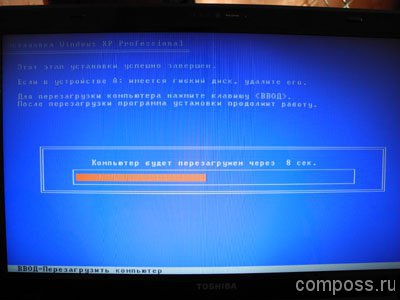
After that, the computer will be restarted:
Attention!!! after rebooting, you will be prompted to press any key again - "Press any key to boot from CD ..." - do not press anything And then you will start the installation again !!! Or if you want such an inscription to no longer appear, you can go to BIOS and load from the hard drive (i.e. put everything back in place) You know how you did it.
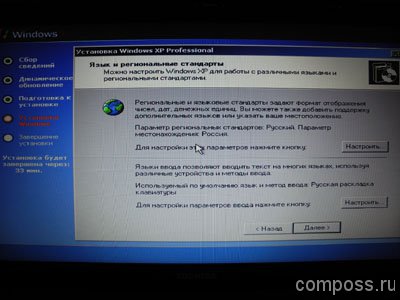
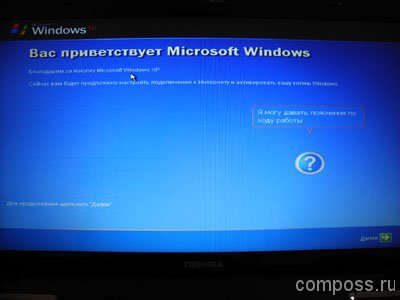
After the reboot, we continue the installation, but in a slightly different environment:
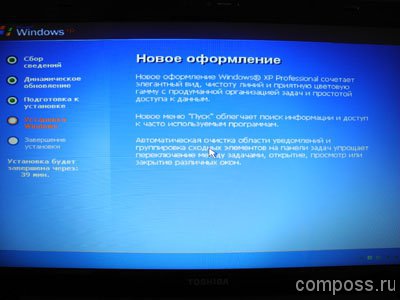
You can not configure anything and click FURTHER:
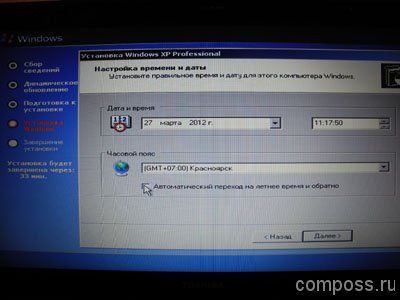
Set up the date, time and time zone and click further:
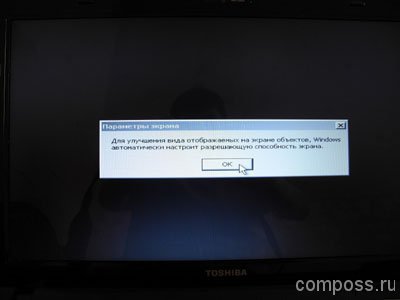
If this message appears, click OK:
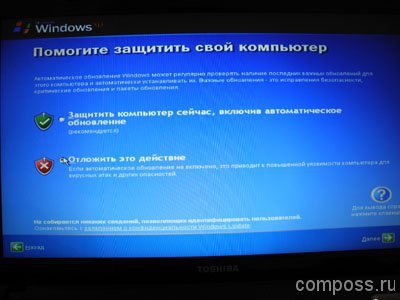
Select item "Postpone this action", and click NEXT:
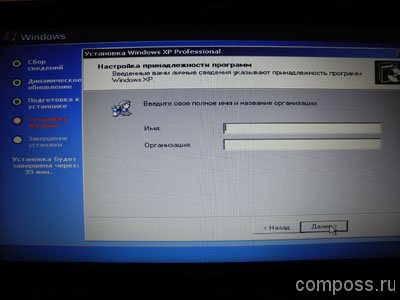
We write the name account... You can have up to five accounts, but this is optional. FURTHER:
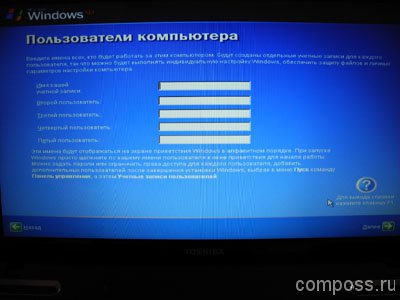
We press ready:
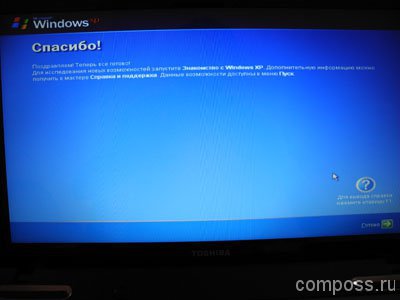
Installation completed! HURRAH!!
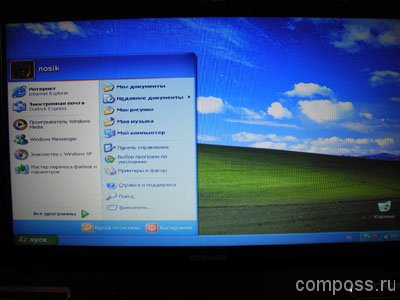
It remains only to install the drivers for the normal operation of the computer. If you store them well, you have driver discs (usually they come with your laptop when you buy them). Or you can download it from the website of the laptop or hardware manufacturer.
 How to deactivate the "You've received a call" service from MTS?
 Factory reset and hard reset Apple iPhone
 Factory reset and hard reset Apple iPhone