Creation of a popular group in classmates. How to create a group in classmates
For a long time, social networks have been used by participants not only to talk to their friends, colleagues or relatives. Many sites, online stores, offline companies and just individual entrepreneurs understand that through social networks you can attract potential customers to sell goods or services. Therefore, I simply could not get around the topic of how to create a group in classmates.
If you have a hobby, then this can also serve to create a group on a social network. There you can exchange experiences and communicate with your colleagues.
Before you learn how to create a group in classmates, you need to decide for what purpose you want to do it. You also need to come up with an interesting and understandable name for the community, what kind of information you are going to share, well, and who you are planning to invite to your group. After all, just creating a group does not mean that people will look for you on this social network.
In this article we will talk about one of the most popular Odnoklassniki network. If you need to create a group for a more advanced audience, then be sure to create a group in contact. I already wrote about this on my blog in the article: "".
Group creation
First, you need to go to your page in classmates. Move the mouse cursor over the horizontal line to the right of your photo on the item "Groups", click on it.

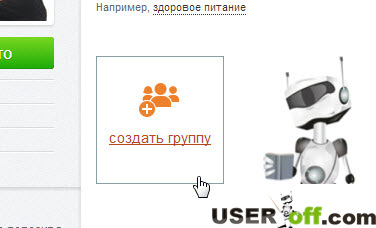
You will see the item "Create group", click on it.
Next, you need to select the type of group, in the window that opens there are two items: "By interests" and "For business" - select the one you need and click on it with the left mouse button. I will describe further actions by choosing "by interests". But everything is the same if you choose “for business”.

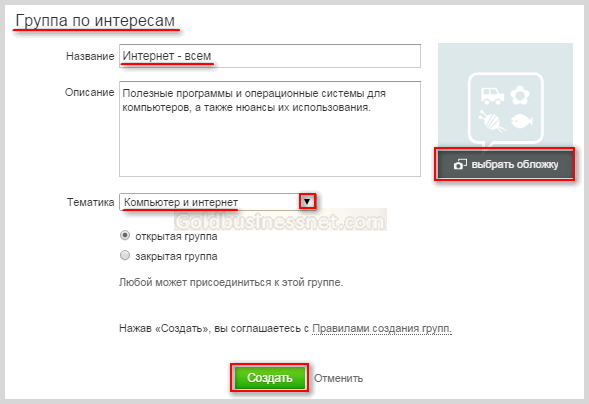
Fill in the items "Name" and "Description". The title should reflect what the band will be about. Describe in a few sentences what group you want to create.
Below you need to select the item "Type of activity".
If you create a group "For business", you will have another column "Category", which you also specify. There is also an item " Contact Information"With the parameters" City "," Address "," Phone "," Website "- if you want your contacts to be registered in the group, click on this line (" Contact information ") and fill in the required fields.
When you create a By Interest group, there is one more option to select. If you want people to be added to the group only with the permission of the administrator - click on the circle next to the phrase "Closed group". If you want to create a group that anyone who wants this social network can join, then click on the "Open group" circle.
Now it remains to choose a picture. In the same window, in the upper right corner, there is a square with the caption “choose a cover”. You will see a window in which you find the desired picture, click on it, then at the bottom of the same window, click on the "Open" button. If the photo does not load, then it has big size- such a photo needs to be reduced.
After all these steps, you can now click "Create". This is how it turned out for me:

I told you how to make a group in classmates, but there are a few more nuances.
A group without members is not a group, I think you agree with me. You probably have friends in your contacts who will be interested in your group. Let's get them and invite them. Under the main group photo, click on the phrase "Invite to the group".
![]()
Under the name and surname of a friend, click "Select", you can mark several friends. And do not forget to confirm your choice by clicking on the "Invite" button at the bottom of the page.

If you made a mistake with the choice of the friend whom you want to invite to the newly created group, you can cancel this action. Move the mouse pointer over the selected friend and under his name, instead of "selected" change to "cancel" - click.
Under the group photo there is an item "change settings" - in it you can correct the information of your group, as well as indicate what was not there when the group was created. Namely, enter the city.


Hello dear readers of the blog site! Today we will talk about groups on Odnoklassniki (about registration in this social network) and a little about ways to promote them. For a webmaster, the creation and promotion of their own group can also have a positive impact on the promotion of their own website.
The further the Internet develops, the more web resources appear on the network. Accordingly, competition among sites is steadily growing and the struggle for users who could make target audience your followers, potential customers, or people interested in the products you offer. Therefore, in order to achieve serious success, it is necessary to use all possible ways promotion of your brand, where social networks are not the last.
Groups in Odnoklassniki and their classification
Let's immediately consider what groups exist in general and how they function in the Odnoklassniki.ru social network. First, let's go to the "Groups" tab, having previously authorized and logged into your account (about the main functionality of "My page" in Odnoklassniki):

On the left, there will be a list of sections: new, popular, thematic (auto and moto, blogs, children, design, etc.). By clicking on the desired section, you will get all the groups presented in it. Right there, by default, in the pictures under the search bar, you will see the top groups from the "Popular" category. To find a collection of groups of the desired topic that are not in the left column, enter the corresponding query in the search box, and then you will get the desired result:
From a set of various groups of this topic, you can choose one that you like and click on the picture with the left mouse button. As a result of this action, move to separate page Odnoklassniki, where all the information available for this group will be present:
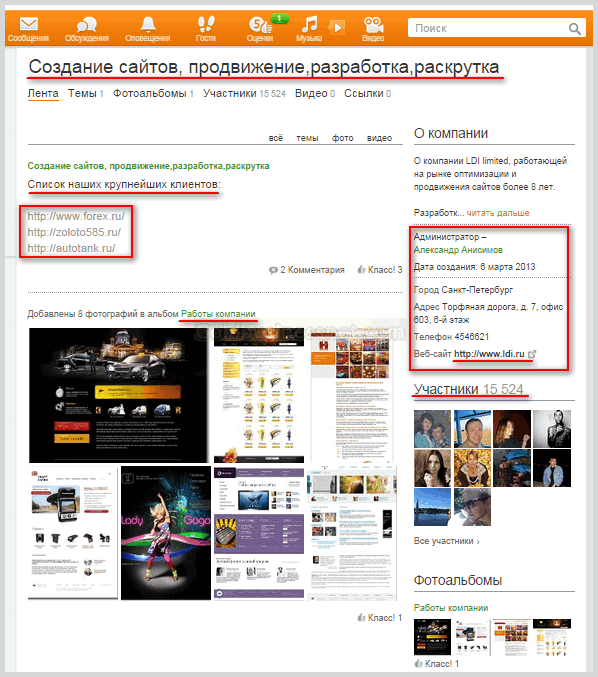
In this case, the group in Odnoklassniki has already been promoted, judging by the number of participants. Moreover, it operates on a serious commercial basis, providing services for the creation of sites and their promotion. Links to client sites are also provided here, which also have their own benefit, since their links are prominently displayed, which facilitates user transitions.
In addition, there is information about the administrator, phone numbers, the address of the office location and other information useful for members of the group and users of Odnoklassniki are given, including the address of the main website. You can immediately join this group if you found something useful for yourself here by clicking on the button of the same name located under the logo:

In the same way in Odnoklassniki.ru you can find a group of almost any topic. In addition to the fact that groups on Odnoklassniki are classified by subject matter, some of the most famous of them receive special privileges, with the help of which such pages receive initially higher positions in search results and are more trusted by users. These are the groups that acquire the status of official, the distinguishing mark of which is a blue check mark located in front of the name:

Unfortunately, the "official" status for a group or a page in Odnoklassniki is most likely inaccessible to a mere mortal like you and me, since it is assigned mainly to the profiles of famous artists and popular actors, the media, as well as companies that have their own registered brand. But what the hell is not kidding, just in case, I will give the address of the page where you can apply for official status for your group. But first you need to add it.
Creating a group in OK
In order to create a group in Odnoklassniki, in the same section "Groups" you need to click the link present there on the left side "Create a group or event"... After that, you will be faced with the task of choosing the most suitable option from the three available:
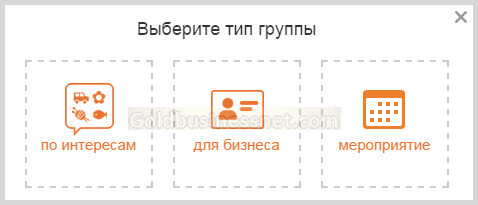
If you want to create a community by simply uniting people on a particular topic, communicating and exchanging information, including on professional issues, then an interest group is most suitable:
For webmasters, it would be more correct to choose the type "For business", since in this case it is possible to specify a link to your project. Having created a group, you can publish in it announcements of fresh articles (notes) from your blog or website, thus promoting your project. For example, you can look at the page of the group I created and even join it if you wish.
If the materials turn out to be interesting enough, you will get new members to your group, who will mark your posts with "Class!" Ratings, which are analogous to likes on Facebook or VKontakte. Naturally, a serious commercial project like an online store is also more efficient to promote using the same path:
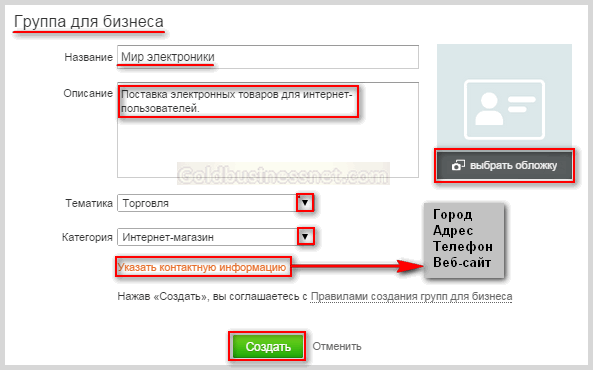
In this case, the created group will contain data that includes not only a link to your web resource, but also Additional Information, which contains a phone number for contacting customers and the location of the company's office. You can also create an event in Odnoklassniki, I call this type a temporary group, since its existence is limited by the time frame:
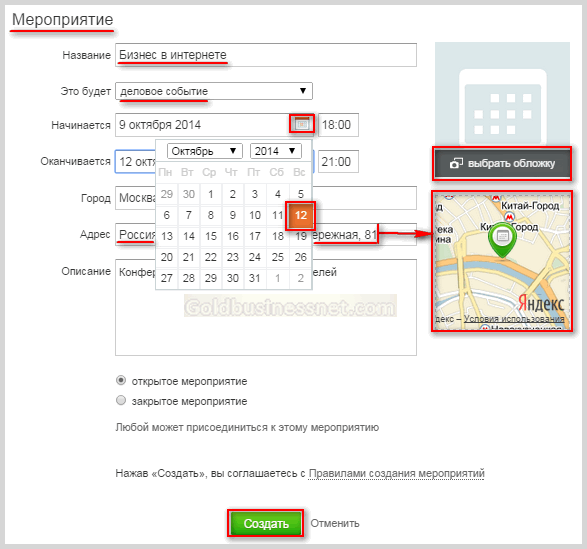
When creating an event, you can set the time of its holding up to minutes, and after specifying the exact address on the right, a map from Yandex is generated in the form, indicating the location where this event is planned. In addition, for completeness of data, you can enter it short description, as well as to establish the degree of publicity (open or closed). When you check the "Closed" option, an outside user can become a participant only with the approval of the event administration.
We just have to figure out how to delete a group in classmates. I will not go into details now and argue why this might be needed. Just on the page of your group under the sign of its logo, if you installed it, of course, find the "Delete" link with the trash can icon:

Of course, such a radical step as deleting a group or page requires confirmation, which will be announced in a small pop-up window:
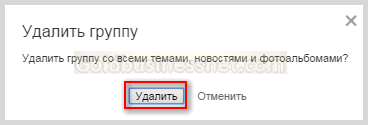
If during the uninstallation process you still change your mind, press the "Cancel" button and the process will be stopped. If you remain adamant in your decision, then click on the corresponding button next to it. Just keep in mind that in this case all topics, photo albums and news published by you will be deleted together with the group.
Odnoklassniki.ru is a social network, which means that it was created primarily for communication between people in world wide web... Actually, other similar sites were created just for this. However, as time went on and it became more and more clear that one simply could not keep users on the site by communication, so all kinds of services began to appear, including, for example, audio hosting with the ability to listen to your favorite songs, or a section with videos.
Another interesting service is the presence of groups, which are such sites within the site (social network), dedicated to a particular topic and located directly on Odnoklassniki. For example, if you like, say, the songs of Viktor Tsoi, then you can create a fan community of this great singer. Here's just how to make your own group from scratch and completely free in Odnoklassniki? Believe me, there is nothing complicated here.
First of all, go to your page on Odnoklassniki or to any other page of the social network - the main thing is that you can see the menu that is located in the central part of the page. In it, click on the "Groups" item.

Here is a list of current or new groups. It looks something like this:

On the same page on the left there is a menu - groups by sections, and right above these sections there is a button "Create a group or event", which you need to click on.

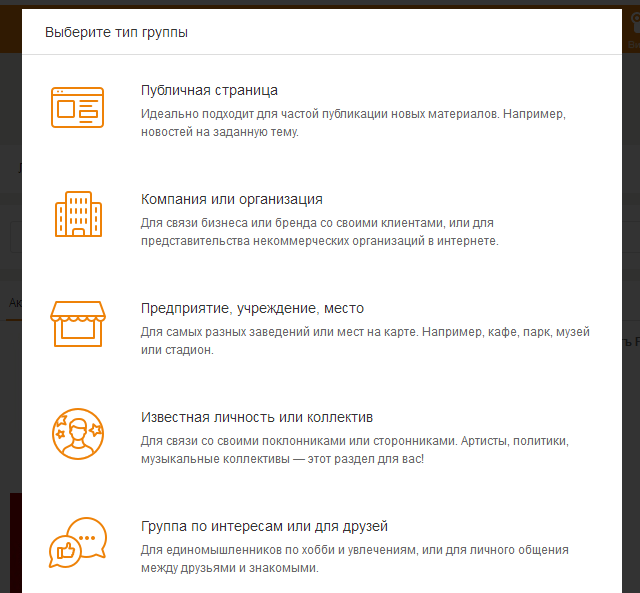
- Public page
- Company or organization
- Enterprise, institution, place
- Famous person or team
- Interest group or friends
- Event
- Bulletin board
- Shop
This list is periodically expanded.
You need to select the type of group. Which? Look at the circumstances. If the group is dedicated to interests, then select "Interest group or for friends."
For our example, we have chosen this particular type of group. It is necessary to indicate the name of the group, add a description, indicate the topic, age restrictions, contacts if necessary, select a closed, open or secret type of group. When you add all the data, click "Create".
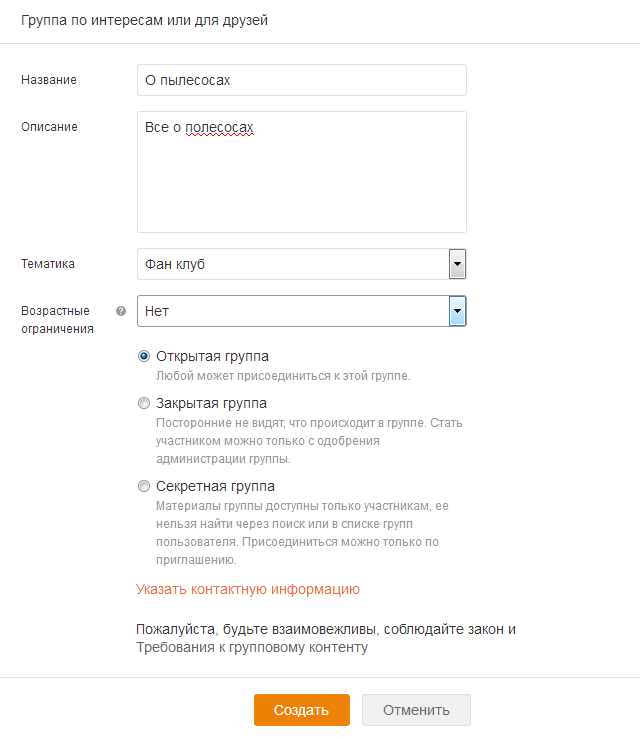
You did it!

Thus, you can create a group for your own site, for school, for games, for joint purchases etc.
How to create a group in Odnoklassniki from your phone?
If you are unable to create a group on the desktop version of Odnoklassniki, use your phone, tablet or any other mobile device.
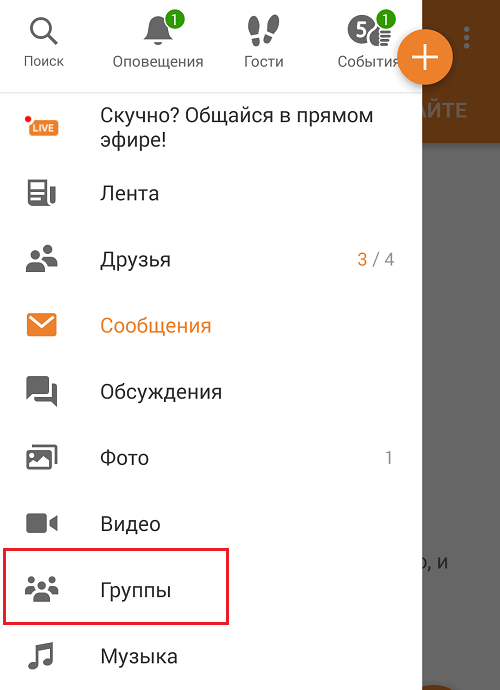
Run a branded mobile app Odnoklassniki, open the menu, in it, click on the "Groups" line.
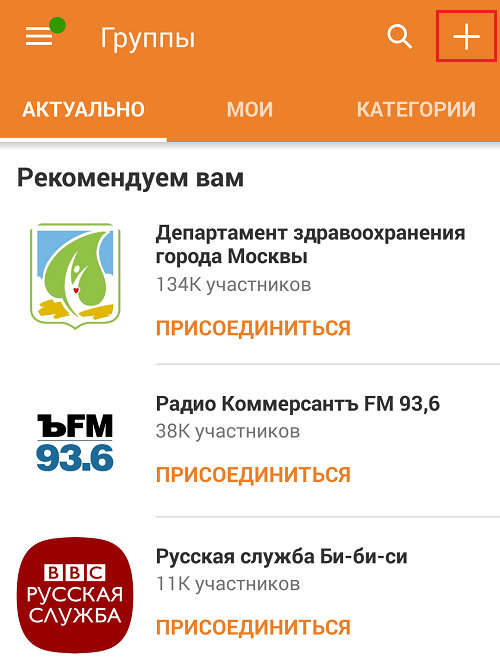
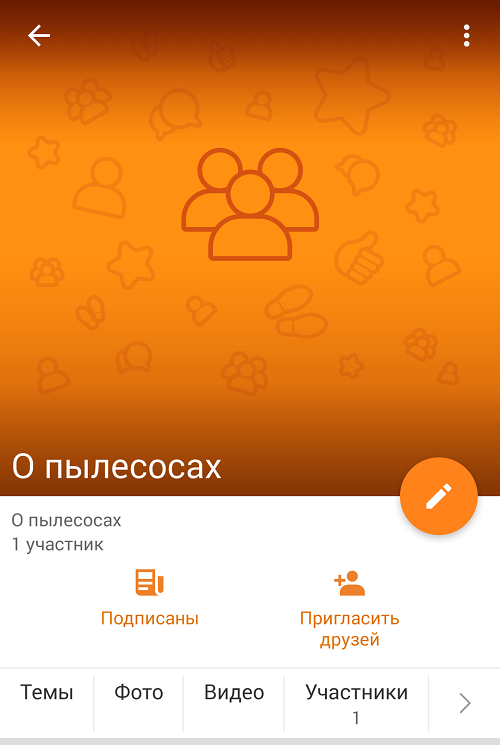
Here is a list of current groups. See the plus sign in the top right corner? Click on it.

Your group has just been created. As you can see, this process is even easier on a phone than on a computer.
The settings are in the menu that appears when you click on the three dots at the top of the window. In the settings you can change or add the necessary information.
This article discusses questions on how to create and properly configure your group on the social network Odnoklassniki.ru
So you have decided create your own group in the social network Odnoklassniki.ru The goals for creating a group in Odnoklassniki can be very different: promoting their services, making money on the group, asserting themselves, etc. In any case, the group you created should bring not only pleasure, but also profit, since everyone wants to eat.
Before, how to create a group, we need to decide on its topic, that is, what it will be devoted to. In classmates, you can create groups for business or interest groups. We recommend creating interest groups, as it will be a little easier to lure people into them.
What topic to create a group on Odnoklassniki
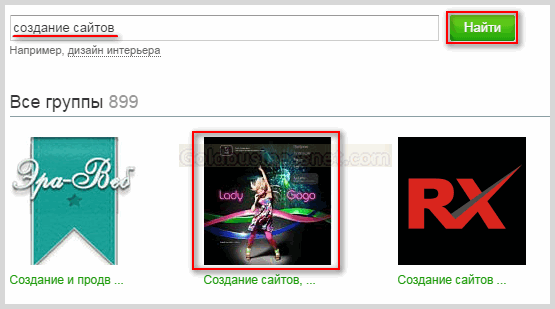
It's simple, you can create a group on any topic that does not violate the law and the internal rules of the Odnoklassniki themselves. The main thing is that this topic is close to you and you like it. After you decide what topic to create a group on, it is advisable to monitor Odnoklassniki for the presence of groups on your topic. So we can assess the competition in our topic in order to understand how difficult or easy it will be for us in the future to promote the group and bring new members to it. This is done easily: just go to the search by groups, enter the name of your topic and see what groups the search gave you. Go to these groups, at least in the first 25 pieces, evaluate the quality of the content published in them and, most importantly, the number of participants in them. Group search in Odnoklassniki ranks groups by the number of participants. The more participants there are in the group, the higher it is in the search for a particular key phrase. For example, we decided to create a group on the topic "Promotion of groups and accounts in social networks! "Dedicated to our store
How to create a group on Odnoklassniki
We go to the search by groups and type in the search query “ Promotion of groups". The search returned 120 groups relevant to our search query... In the very first place is the group, in which (at the time of this writing) there are about 15,000 members. That is, in order for our group to break into the TOP of the search in the future, we will have to recruit more than 15,000 members to the group, and we will become the first. Thus, we will be able to "catch" new people from the search, who themselves will find our group and join it. These will be the most valuable and active users of our group, since they found it and joined it themselves. Since the topic of our group is quite specific, it will be difficult at first to recruit even the first thousand participants, but we will talk about how to do this easily and quickly in the next article.
Let's proceed directly to the creation of our group. To create a group on Odnoklassniki, you need to go to the "Groups" menu. There you will open a search by groups, a catalog of existing ones, the most popular in this moment groups, as well as a list of groups in which you are a member. A square button "Create group" will be visible next to this list:
Click on this button and select the type of group "By interests":
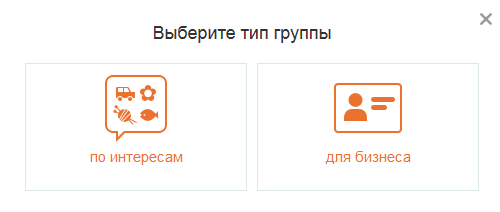
You can, of course, choose the type "For business", but without experience working with groups in Odnoklassniki, we would not recommend doing this yet. After the group type has been selected, you can proceed to its settings:
![]()
Fill in all the necessary fields for our future group: name, description, subject. Indicate privacy - open or closed group. Any user can join an open group. You can join a closed group only after approval by the administration of the group. The choice of this option depends on the topic of your group. After that, select the cover (avatar) of your group - this will make it stand out from the rest. And press the "Create" button. Our group in Odnoklassniki has been created, but that's not all ...
How to set up a group in Odnoklassniki
After clicking the "Create" button, we found ourselves inside our group. Now you need to tweak it a little more. To do this, in the group menu on the left, where its avatar is, click "Change settings":

Here we see all the same settings that we introduced earlier, but there are some items that were not there before - these are "city" and "keywords". Here's what we'll fill in:
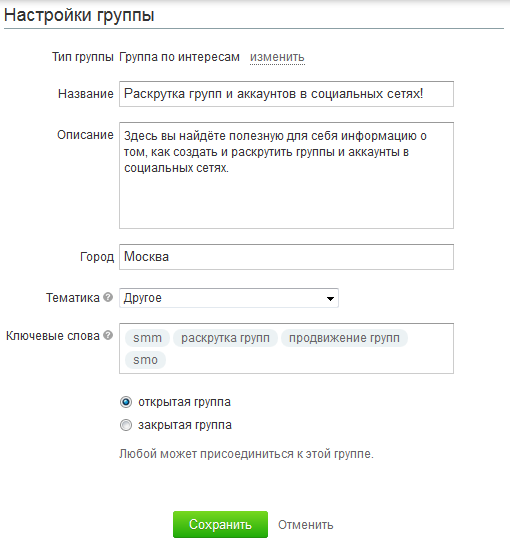
Here we indicated the city: Moscow, you can indicate the city whose audience you are interested in. Also include keywords related to your topic. They will find you in the search, so go to the choice keywords Seriously. Then click the "Save" button for our changes to take effect. But that's not all of the settings. On the right you see the "Publicity Settings":
Go to these settings and set the basic user rights in the group there:
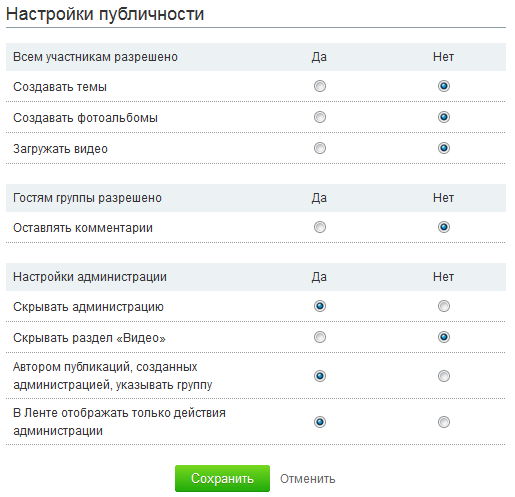
Here you can also display everything to your taste. The settings in this section depend on your plans for the group and how you plan to develop the group. If you want users to also be able to add content to the group, then put "Yes" in front of the item "All members are allowed to create topics." The same goes for creating photo albums and videos. But then be prepared for a large number of spam topics that you will have to delete. If you want even guests to be able to add comments to posts, then put "Yes" in front of the item "Guests are allowed to leave comments." If it is "No", then before adding a comment, the user will be asked to first join your group - this increases the number of subscribers to the group. In the administration settings, it is better to hide the group administrator, since then a hunt may begin for his account in order to take possession of the group, although not a fact. All this is at your discretion. After making all the changes, click the "Save" button again.
So, our group is set up, but before you start inviting people to it, you need to create at least a few posts so that users are interested there and have something to comment on. Let's create the first post in our new group. To do this, go to the "Topics" or "General" section - no difference:

In the green rectangle we see the inscription “Create new topic"And click there. A convenient editor opens, through which you can add posts to the group, for example, this post:

First, publish at least 15-25 posts in the group, and then proceed to inviting new members to your group. Remember, users do not join an empty group! About, how to invite people to a group on Odnoklassniki, we will consider in the next article.
We wish you success and interesting posts in your groups on Odnoklassniki!
 Which is better iPhone 6s or 6 plus
 Where are screenshots and games in the Steam folder?
 How to delete or restore all deleted VKontakte dialogs at once?