Creation of a VKontakte menu group. How to create an internal page for the Vkontakte group menu? What to remember about wiki markup
The beautiful design of the Vkontakte group is one of the keys to its successful promotion. But besides beauty, user-friendliness is also very important. Unfortunately, there are not so many design options for the group, in contrast to the possibilities for the design of the created site. However, there is one interesting option - it is to make a menu. In this article you will find out how to make a menu in the Vkontakte group.
What is the size of the Vkontakte group menu?
Before you create something, you need to decide on its size. This is very important, as the wrong size of the image can be terribly distorted. So, what is the size of the Vkontakte group menu need to choose?
In the previous article about the design of Vkontakte groups, we examined in detail the size of different elements (avatars and others), I recommend that you familiarize yourself with it. But, as they say, "repetition is the mother of learning," and therefore in the picture below you can familiarize yourself with the correct sizes of all elements of the Vkontakte group.

As a rule, the menu of the Vkontakte group consists of two elements: a picture, when you click on it, the menu appears and the menu itself. The fixed picture in the description of the group with or without a menu should be 510 pixels wide in width, and the height should be equal to the width or less - this is already taking into account the new design.
The size of the Vkontakte group menu is 607 pixels wide. It can be very different in height. So there is enough space for any design solution.
How to insert a picture into the description of a Vkontakte group?
Elementary. All you need to do is take a suitable image of the right size and add it to the group wall on behalf of the community.


For many, it will be much more difficult to create a picture. Good, new design Vkontakte is less capricious about the size of the image, and if the image you have chosen corresponds to the dimensions described in the article above, then it will be displayed well. So you can download a ready-made image, crop it in width or height and you're done.
But if you want to create a unique and beautiful image to describe the Vkontakte group, you need to use the Photoshop program. In fact, it is not as difficult as it might seem to a beginner. But you will have to spend your time studying it. I can recommend you a wonderful video course - "Photoshop from scratch in video format 3.0". With it, you will quickly master this program.
How to make a menu in the Vkontakte group? Instructions
Now let's move on to creating the menu. Let's compose the process of actions in the form of instructions. To make a menu in the Vkontakte group, you will need to follow a few simple steps:
- The first thing we need to do is go to the group settings and activate the "Materials" section. The value should be set to "limited" or "open".
- Next, we prepare a picture for the Vkontakte group menu. If you don't want to mess around, you can make the menu in text form, but it will be less attractive. Take the following picture as an example, which can be seen below.
- By the way, this picture was created in Photoshop in less than half an hour. It would be more difficult to do this in another editor. So I recommend that you familiarize yourself with the course I wrote about above. After the picture is selected, it needs to be cut into pieces and saved on the computer.
- Then you need to create an album for photos on your personal Vkontakte page. This album can even be made completely closed. After creating the album, fill it with all the parts of our image.
- Then go to your group and in the latest news section click on the "Edit" button.
- After that, a page will open, which you can give an arbitrary name and write the following text in square brackets. Then click on the "Save page" button.
- Then go back to your group page or refresh it (if it's already open). Click on the "Open Menu" link. After that, an additional link to the page that we have created will appear. Click on it.
- Next, this page will open. Since it was just created, there is nothing in it and we need to fill it. Click on the link "Fill with content".
- Next, we write the following code, as in the picture below. In it you need to indicate the number of the photo (to do this, you can open the photo uploaded to your album and copy its address like this "photo15535684_427525646"), the size of the photo (you can find it in the properties of the photo), and also indicate the link to which this photo leads.
- To make sure that we did everything right, click on the "Preview" button. Below the code, the made menu of the Vkontakte group will appear. If everything is displayed correctly, then click on the "Save" button, and if not, then we look for and fix the errors.
- Now we need a picture that will become the splash screen of our menu and will be in the description of our group. The dimensions of the picture for describing the Vkontakte group we wrote above, but if someone has forgotten - in width from 510 pixels, and in height equal to or less than the width. You can use larger sizes, but in the same proportions.
- Then we open our created page with the made menu of the Vkontakte group and copy the link to it. To copy the link correctly, you need to click "Edit Page". After that, the previously written code will appear and you can copy the address from the browser line, which should look like this: "https://vk.com/page-119301077_51764020".
- Next, go to our group and paste the copied menu address in the form for sending messages. And then the photo, which will be the screensaver. After that, click on the "Send" button.
- Now all that remains is to pin this entry. Do it in the same way as I did in the picture below.
- This is how our made menu for the Vkontakte group will look like. If you want to watch it in person, then here


The picture was cut using Photoshop's Cut Out tool and then saved. Each of the highlighted parts has become a separate image.


How to make the VKontakte group menu useful
How to create a VKontakte group menu: technical stage
So, we figured out the purpose of the group menu, let's get down to the technical part. Go to settings: Community Management> Content> Connect:

We save the changes and go to the group. The "Latest news" tab will appear under the group description, let's start editing it:

Switch to the "Editing" tab (1), change the name of the menu (2), enter your information (3), save it and return to page (4).

Since 2011 editing VKontakte groups menu became much easier, the VK admins added a visual editor, so it's even easier to figure it out. I will make a reservation that VK servers may not work as smoothly as you would like, or when working with the code, you may forget something, so save source v text files on a PC. To do this, go to "Source Code" and copy the result code.
If something is missing or you want to go back a few steps, go to the "History" tab and return to the desired save:
As I said above, we will start studying the wiki markup a little later, now we will fill our VKontakte group menu to a minimum. I will show it by the example of my group. I need traffic, so the content of the group menu is as follows:

As you can see, I prepared the information in the Word document, edited the text (selection), added links and simply inserted this text into the "Editing" menu of the VKontakte groups.
You can stop at this, but remember that the user does not really want to leave his "warm place" and go to the pages of our site. Therefore, for the comfort of our readers, we will add the internal pages of the group, which will lead to the article. Let this article be incomplete, but before going to our site, a person needs to understand that he wants this, and not we "drag him" there, ie need intrigue, interest.
If you go to the menu of my group vkontatka, you will see that some links lead to internal pages (2), others to external pages (1):

I'll add in real time, one more internal page:

So we have a new (internal) page in our VKontakte group. Now we need to fill it in:

- We press the button "Fill with content".
- We fill the group with content. Editing it.
- We configure "Access to the page". If you check "only group members can view the page", this will motivate visitors to join the group. We save the page.
- We copy the necessary numbers in the address bar of the page that we just saved. To do this, go to the "View" mode and copy the page ID - these will be the numbers that we need.
- We return to the page "Source code" of the VKontakte group menu (I recommend not to close it while creating new page... although you should have it open anyway) and insert the numbers into the correct line. Between the link text (Marina Lazareva (video)) and the link itself (43820829), set the "|" (it is on English layout keyboard, keyboard shortcut Shift + \). VKontakte group design, which does not require additional knowledge of editors such as Photoshop. In the next articles, I will show you how to create more beautiful VKontakte groups. Now, for those who can't wait to create beautiful design of the VKontakte group, I recommend watching this video:
This is the video, after watching which I realized how to make a VKontakte group menu on one's own. Using a real example, the author shows how to create a VKontakte group menu.
A little later, we will dive into the wiki markup of VKontakte groups in more detail, but for now, make your groups as functional and useful as possible.
Dropbox, read about it on the DragonBlog pages.
With respect and love, !
To the question "how to create a menu for a VKontakte group" there are three main answer options: order from a specialist, create with the help of an online constructor, or tinker, delve into some of the subtleties of the question and do everything yourself.
In this article, we will go through all three options sequentially. By the way, if you are still in doubt about the need for a menu for your group or public, then be sure to read.
So, here are three ways to create a menu:

Each of them, of course, has its own advantages and disadvantages. Below we will talk about the first two in a little more detail. And for those who nevertheless decide to follow the third path and do everything on their own, we have written a detailed guide (instruction).
By the way, for those who prefer to receive information through videos, rather than reading long texts, there is a video:
Path # 1. Order the creation of a menu from a specialist designer
The advantages of this method are relative speed and minimal participation on your part. Cons - the highest price and a chance to get a beautiful, but wrong menu (we have prepared about the main mistakes when creating a menu). In addition, you still need to find a performer. Here we can recommend looking for it on the kwork.ru service, in the section "Design of groups in social networks".
Path # 2. Using the online builder
Here we, of course, will recommend our constructor, on the site of which you are now. You can try it for free. Payment is made only if the result suits you and you decide to upload the resulting menu to your group. The advantages of this path are that it is the fastest. In addition, if necessary, you can always also quickly edit and reload your menu for half the cost of creation. It is more convenient than looking for a designer every time when you need to, for example, add or remove an item from the menu. The disadvantages of the method - here you will have to do quite a bit, but work on your own.
Path # 3. Do it all yourself
The advantages of this path are obvious: it is free, and you acquire new skills. Cons: You need some skill and a lot of time (for the first time). Here's what you need:
- Be able to confidently use graphic editor... For example, PhotoShop. When making a menu, you will first need to make the image of the correct size (up to a pixel, no "about"!), And then cut it correctly (split into fragments)
- Be able to understand the instructions and read them carefully
- Do not give up and do not despair if something does not work out the first time
If you think you can handle it all, then let's get started.
Step # 0. General information about how the VK group menus are arranged
The menu for the group is made from wiki pages, the creation of which is supported by VK. Wiki pages are special pages that can only be created in public pages. They differ from regular posts in that they can use the so-called wiki markup. This markup is special code that is converted to additional formatting objects. To make it clearer, let's explain. For example, in regular posts you can only use plain text, while wiki markup allows you to make parts of the text bold or italicized. That is, she introduces additional features clearance. In particular - the ability to post images, when clicking on which the user will be redirected by the link. It is these additional formatting options that are used to make the VK public menu. How exactly to do this we will describe below.
Step 1. Preparatory stage
If you have an existing group, we recommend creating a new one. For testing and experimentation. Otherwise, in the process of learning, you risk inundating your subscribers with strange and unnecessary updates.
So you've created a new group. Let's now find out the identifier (ID) of your group. The group ID is its unique VKontakte number. Go to your group and click on "Community posts" (if there are no posts in the group, then instead of "Community posts" there will be "No posts"). In you will be redirected to a new page with an address like this:
https://vk.com/wall- XXX? own = 1
Instead of XXX you will have a bunch of numbers (and only numbers!). This is your community ID. For example in our test group it's 154457305.
Now let's create a new wiki page in the group. To do this, create a link of the following type:
http://vk.com/pages?oid=- Group_id& p = Page_name
http://vk.com/pages?oid=- 154457305 & p = Menu
Open the resulting link in your browser (copy it to address bar browser and go to the address). That's it, you have created a wiki page with the name "Menu" (if, of course, you indicated "Menu" as the name of the page in the link). You should see text like this: “The Menu page is empty. Fill with content. " There is a pencil icon () in the upper right corner. Click on it to go to editing the page.
The VK wiki page editor has two modes: graphical and markup mode. The modes are switched by the button in the upper right part of the editor (). When the button is highlighted in blue, it means that the layout mode is on. The visual editing mode is more convenient, because allows you to do without knowing the syntax of wiki markup, but its functionality is extremely limited: only the simplest things can be done in it. Basically, you will have to deal with the layout mode.
Pay attention to two things. Firstly, to the left of the button for switching between editing modes, there is a button for invoking help information on wiki markup (). A very useful thing, especially for beginners. The second point to pay attention to is the address of the wiki page. You will see something like this in the address bar of your browser:
http://vk.com/page-Group_id _XXX? act = edit & section = edit
Part of the address before the "?" is the address of your wiki page. Write it down somewhere: in VK there is no way to see a list of your wiki pages and links to them. To go to the desired one, you need to know its address or use the link to create a wiki page again. When using the latter method, keep in mind that pages, if they already exist, are not recreated.
Step # 2. Making a simple menu for the VKontakte group
So we have our Menu wiki page created. Switch to editor markup mode and add the following code:
Click on the "Preview" button, which is located at the bottom of the editor. You should see a list of three links. The first two are external and lead to the main pages of Yandex and Google, respectively. The third link is internal. She leads to public VK with ID "1" (this official group VK for developers). If your preview shows you the code, and not the links (which you can click on) - then you entered the code in visual editing mode, not in layout mode. Be careful!
Please note that external links in the VK wiki code are formatted with single brackets, and internal ones - with double ones. At the same time, internal VK links are indicated not as the usual website address, but as a pointer to a particular VK object. For example, a pointer to a group has the following notation:
club Group_id
On VKontakte, there are pointers not only to groups, but also to individual photos, posts, wiki pages, user pages, audio recordings, etc. Each pointer has its own notation. We'll use some of them later and take a closer look at them.
Be sure to save the page. Basically, we've just created a basic navigation page. Which is nothing more than the simplest menu for the VKontakte group... Of course, this is not a graphical menu yet, but even it can cope with the main task of the menu - to quickly direct users to the desired public place. We'll look at how to make a graphical menu a little later.
Now let's figure out how and where you can use wiki pages.
Step # 3. Where can I post VKontakte wiki pages
There are two main places: you can create a post with a link to a wiki page or place it in the Content section of your community.
Let's start with the first option. Start adding new entry on the wall of their group. First attach any photo to it. It is better to take a large enough photograph with a width greater than its height. Then paste in the text of the post you are creating a link to the wiki page you created with a simple menu. We asked you to write it down a little earlier. Recall that the link looks like this ( you will have different numbers):
http://vk.com/page-121237693_72827423

Now remove the text links from the input field. The link itself under the photo will not disappear from this. But if you leave the URL of the link in the text box, then it will be displayed as text in the post. Publish the post, reload your browser page with your group's main page and pin the created post. Reload the page again. As a result of these manipulations, you should get something like this:

Click on the photo in the pinned post: your wiki page should appear with a simple group menu.
So, we learned that wiki pages can be attached to posts. In particular - to the assigned post. The second place where you can use wiki markup is in the Materials section.
Go to the community settings and find the management of the sections (services) of the community there. Mark Content as Limited. A new item will now appear at the top of your community home page. It is located to the right of the "Information" item. When you first include materials in a group, this item is named "Latest News" by default. This is how it looks:

Go to this new item. Click on the "Edit" plate. As a result, you will find yourself in the wiki page editor you already know. The only difference is that there is a page title input field. Change it from "Fresh News" to "Menu2". V markup editing mode enter the following code:
"" "Menu option for the" Materials "section" ""
[]
Make a preview (links already familiar to us should appear) and save the page... Basically, this page is the main (root) wiki page for your group. True, there is no special practical sense in this difference from other wiki pages.
Go to home page your group, reload it and see what happens. We recommend that you watch your group from a mobile browser and from the VK application. You will notice that the arrangement of elements and the logic of work is a little different everywhere. You need to have a good understanding of what refers to what and where and how it is shown.
We learned that menus can be placed in two places. It is preferable to make it both in the form of a fixed entry and in the "Materials" section. Remember two things:
- A pinned post will be seen by 98% of your visitors, and only 25-40% of the most curious, as well as loyal old users of your group who know that there is something useful, will get into the section.
- A pinned post with a picture for calling the menu can be supplemented with text. This way you won't lose this pinned recording feature. But you shouldn't overdo it either: the more text, the lower the link to open your menu will be.
Wiki markup is not the most powerful tool, nor is it the most user-friendly. Its functionality is severely limited. In addition, it was developed at the dawn of the development of "VKontakte" and exclusively for its browser version on stationary computers and laptops. Therefore, its work in the application and on mobile devices best described by the expression "as God will put on your soul." Unfortunately, there is nothing better in VK yet.
By the way. You can link from one wiki page to another. It works like this: the user opens (for example, using the image-link in the post) the first wiki page. It also contains links to other wiki pages. Clicking on these links will open the corresponding wiki page. In this way, you can create rather complex and multi-level menus and, for example, instructions. However, we do not advise you to get too carried away with this unnecessarily.
Step # 4. How to make a menu in a VKontakte group. Graphic
So, the basic principles are mastered. Let's move on to designing a graphical menu. Let's make a reservation right away that we will be doing a fairly simple menu: a vertical row of buttons with links. But do not rush to say "no, I wanted a super complicated menu" and close this guide. Let us explain why now.
First, moving from simple to complex is usually the most effective way to master new knowledge. Having learned how to make a relatively simple menu, you will learn 90% of the techniques for creating menus for VK groups.
And secondly, as we already said, VK wiki markup was introduced at a time when about mobile applications few people ever heard. Our conditionally "simple" menu will work as correctly and efficiently as possible everywhere: in the browser version of VK, in mobile browsers and, finally, in the application. Many "complex" menus cannot boast of this. Moreover, in most cases a “simple” menu will work better than a “complex” one, which “falls apart” when viewed in the official VKontakte application. Most often, it is best to stop at this menu option. Yes, there are some pretty ornate menu implementations. You can experiment with them too. But our experience says that they will hardly add any real benefit - conversions, purchases and reputation. And they may well have problems.
Our test menu will look like this:

Only two buttons. The first will lead to the main page of "Yandex", and the second - to the VK Team VKontakte group.
The vertical graphical menu in VK is an image cut into stripes. These stripes are laid out underneath each other on the wiki page. Some of these "bands" are assigned links. When you click on such an image-link, in fact, the transition to this link occurs. One lane is one link. Some bands (for example, intermediate ones, which are located between points), on the contrary, are assigned the absence of a link. Such stripes become "unclickable".
Making a vertical graphical menu for a VK group is reduced to the following sequence of actions:
- The first step is to draw the menu. Width it should be strictly 600px(pixels). We recommend making the menu no more than 900px in height. The result is best saved in PNG format, as a last resort -JPG. Take advantage of familiar and comfortable drawing tools (such as Photoshop or GIMP). The result here is 95% dependent on your creative and technical skills. Even if you do not know how to use graphic editors at all, do not despair. Skills that will be enough are acquired in a maximum of a couple of hours. There is a huge amount of reference and training information on the Internet. In addition, the ability to use a graphical editor at least a little is very, very useful for public administrators. You will not waste your time.
- Next, the picture with the menu is cut into horizontal stripes. You can do this in any way convenient for you: from the familiar to many Photoshop to various online services. If you have no idea how to do this, just ask your favorite search engine a question. We will not describe in detail the technical part of the cutting process: there are dozens of methods, some are suitable for some users, but not suitable for others. When cutting, one simple rule must be observed: the height of one strip should not be less than 60px... Otherwise, you may have problems with displaying the menu in the application and in mobile browsers: the so-called. "White streaks" between images.
- The sliced "stripes" are uploaded to the group album or album on the group admin page. We recommend the second option. In any case, the album with sliced parts of the menu should be in the public domain... Otherwise, those users for whom the album images are not available will not see your menu!
- Wiki markup code is generated and inserted into the desired wiki page.
- The group contains a pinned post with an image-link to a wiki page with a menu. We wrote in detail above how such a post is made. In addition, the code (with minor changes) can be added to the root wiki page (the item to the right of the "Information" item, appears when the "Materials" section is enabled. For more details, see above).
Now let's take a closer look at loading menu parts and wiki code in more detail. We have prepared for you. It contains two catalogs: "1" and "2". The first contains parts of the most primitive and simple cutting option for our menu - into two parts. Download the archive, upload images (1.png and 2.png) from catalog "1" to a new album (on your page or in a group).
We have two "stripes": the upper one (with the Yandex button) and the lower one (with the VK command button). Both will be link images. In wiki markup, this is done with code like this:
"LINK" is the target link. For example, https://yandex.ru/. Besides the usual external links, this can be an indication of a VKontakte object: a post, a user page or a group. For example, so that after pressing the button, the transition to the “VKontakte Team” community takes place, you can specify both its address (https://vk.com/team) and a pointer to it (club22822305). In principle, there will be no difference. External links(those that do not lead to VK resources) we we recommend reducing by using
With the help of wiki markup, you can design the group menu, analytical articles, cases, instructions. Of course, you will need to spend a little more time on this than on the design of the usual posts on the wall. But the more you mess with the content design, the more grateful your audience will be.
How wiki markup works
Wiki markup is the language that is used for page layout. Conditionally it can be called younger brother HTML. It is convenient to write and format text on wiki pages, insert illustrations, videos, links, tables. You can typeset a simple article or create an entire interactive guide with chapters and subheadings.
The width of any wiki page is 607px. The height is limited only by the number of characters, there can be about 16,000 of them.
All wiki markup is tagged, just like HTML. There are single tags (for example,
- line break) and paired (for example, thumbnail).

How tags for text work in wiki markup
In some cases, wiki markup uses a simplified syntax (tags have been replaced with typographic characters). For example, to create a bulleted list, use asterisks "*", and for a numbered list, use hash marks "#".

How typographic marks work in wiki markup
All existing tags and methods of their use are collected in the officialthe VKontakte wiki markup community ... Use this community's content as a reliable cheat sheet. In this article, we will walk through the basic principles of working with wiki markup and show you step by step how to use it to create pages and group menus.
There are two modes in the standard wiki page editor: visual and wiki markup mode (the toggle button looks like this:<>).

This is what the active wiki markup mode looks like.
Primitive text with a couple of pictures can be laid out in visual mode. It is a regular text editor and does not require any knowledge of wiki markup. But if you want a neat wiki page with tables, links, and embedded videos, you can only do that in markup mode - with code.
How to create a wiki page
The button "Create a new page" does not exist in the interface of VKontakte itself. Therefore, we are talking about two methods, standard and advanced (using the application).
Standard
For the group.Go to "Community Management" → "Sections" → "Content" and select "Public" or "Restricted".

How to enable "Content" in a group
Now the section "Latest news" will appear on the main page of the group. This is the place for the intended group menu. To create a new page, you can write its name directly in the "Fresh news" page editing mode, enclose it in square brackets, click on "Preview" and get a ready-made link to a new page.

How to create a new page through "Fresh news"
For the public.To create a new page, you need to find out the id of your public. To do this, go to the "Community Statistics" section. In the address bar of your browser, you will see a code like this:
https://vk.com/stats?gid= 123456789
The desired group id is all digits after "gid =".
Now you need to enter the following code into the address bar of your browser:
https://vk.com/pages?oid=-ХХХ&p=Page_name
Instead of XXX, we substitute the id of the public, instead of "Page_name" - the name that you came up with. You can use Cyrillic, Latin and numbers in the name. Special symbols it is not forbidden to use, but it is better not to risk it: because of them, you may lose the ability to edit the page. We paste all the data in the right places, press Enter, and the browser will open the created page.
Using the app
The VKontakte developers recommend three applications for working with wiki markup for use:"Mobivic" , "Source" and Vicky Poster.
In this tutorial we will take the Mobivic application as an example. In November 2017, it won second prize in the VKontakte Start Fellows program. Works without installation and additional registration in the desktop, mobile version of VKontakte and in the application for the phone (the developer recommends using versions not earlier than Android 5.1, iOS 9 and Windows Phone 8.1).
To create a new page, on the main screen of the application, select the desired group and enter the name of the new page, and then click "Get link".

How to create a new page using the Mobivic application

Links to the new wiki page in the Mobivic application
And here is a life hack for those cases when you have made a complex page with a lot of elements and are afraid that the layout will go on a small screen. Copy the address from the Code for the wiki page. Go to the edit mode of your page and paste it at the very beginning of the code. You will get an image like this:
When the user clicks on it, he will be taken to the Mobivic application, which will show a neat mobile version your page.

Left - the LIVE community menu page open on mobile,
on the right - it is the same, but opened through the "Mobivik"
How to get a link to a wiki page
How do I find the page I created earlier? The easiest and most reliable method is to copy all the addresses of the wiki pages in advance into a separate file, for example, in Google Sheets. Another way is through any wiki application. For example, go to "Mobivik", select the name of the community and the desired page, click "Get link" and copy the address from the item "Link to the wiki page".

How to get a link to a previously created wiki page
How to make a post with a link to a wiki page
Copy the link to the wiki page and paste it into a new post on your wall or community wall. If done correctly, the site will generate a link block below the post text box. Now delete the link text itself, attach the banner and click "Submit". In the desktop version, the banner will also become a link to the wiki page, and in the mobile version, it will open like a regular picture.

The picture attached to the post will become part of the link to the wiki page in the desktop version
Text
Opportunities for text formatting in wiki markup in general do not differ from the capabilities of an ordinary text editor. When editing text directly (make it bold, align to the right, etc.), use the wiki markup tags, do not forget to close them:
Combinations of typographic characters are provided to structure text in wiki markup. For example, the following code “—- "Will put a horizontal dividing line in the text, and such":: "- double indentation before the paragraph.
About 16 thousand characters can be placed on one page.
Links
To make the text visible instead of the address, add the name of the link:
[] - to user profile
[] - to the community home page
[] - to another wiki page
[] - for a meeting on VKontakte
Pictures
The maximum width of an image that can be used in wiki markup is 607px, which is the width of the wiki page itself. The height is practically unlimited (remember that the height of the page itself is 16,000 characters). Images can be uploaded in two ways.
Using the loader in the top menu of the editor.

With the help of code.Load the picture into separate album group, open it, in the address bar we see a long code like this
https://vk.com/club12345678?z=photo-12345_12345% 2Falbum-12345678_12345678
Copy the id of the picture from it (in bold). Then we frame it with double square brackets and paste it in the right places on the page. It turns out something like this:
[]
What's next? Edit alignment, text wrap, size, anchor link. To do this, write the desired parameters after the vertical bar and separated by semicolons. For example, in this code, we set the size for the picture 300x100px and the text wrap around to the right:
Video
First, you need to upload your video to Community Videos. After downloading, open the video and copy its id from the address bar (in bold).
https://vk.com/videos-12345678?z=video-12345_12345% 2Fclub12345678% 2Fpl_-12345678_-2.
We frame it with square brackets and we get the following code:
We get a small picture with a play icon, when you click on it, a full-fledged video player is deployed. In order for the video to be played on the page itself, the VK developers suggest using the tag player.
But here we end up with a disproportionate black border around the video:

To remove it, you need to resize the player to the size of the video itself. For example, in our case, the following parameters came up:

We got a video without black borders, it will play right on the page
Tables
If you want to structure your wiki page content nicely and render it neatly on mobile devices, a table is essential. Here you will need these simple signs:

When working with tables, you can use 4 tags: noborder (makes table borders invisible), nomargin (makes the table the full width of the wiki page) nopadding (removes padding in cells) and fixed (allows you to create a table of fixed sizes).How many cells you specify in a row, as many columns will be in the table.
Here is an example table2 × 2 no margins at the top and bottom of the text inside cells:

The first column is 200px wide and the second 300px wide.
That's what came out of it:

Text, pictures, audio and video recordings can be placed in table cells.
How to make a wiki menu
The VK group menu is not some kind of separate functionality, but simply a wiki page with several pictures, in each of which a link to a specific page is sewn. In fact, everything is simple here.
- Preparing a cover for the menu.You can take any suitable picture and put text on it. Or you can hire a designer who will draw for you beautiful blocks and buttons. We will have a 6-button menu. For this we need a picture where these buttons will be designated. Let's decide on its size.
When preparing an image for the menu, remember that the width of the wiki page is 607 px. The width of the image should not be larger, otherwise the image will shrink and lose quality. As an example, we took an image with a size of 510x300 px.

- Cut this picture into 6 parts(part for each button). It is convenient to do this in Adobe photoshop tool "Cutting". If you don't want to bother, use, for example, the online service IMGonline (cuts pictures into equal parts). We did everything in Photoshop.
With the active tool "Cutting" click right click mouse over the picture and select "Divide Fragment", indicate the required number of fragments and click "OK".

How to cut a picture in Photoshop
Our menu will be designed as a table of 6 cells: three rows and two columns. To do this, we have cut the picture for the menu into 6 equal pieces of 255 × 100 px. The same size will need to be set for each cell.
- Create a wireframe for the table.We go into the editing mode of a new page and make a table. We open it with the tag (| and immediately set three important parameters:
- nopadding - will allow the pictures to touch
- noborder - hide the visible borders of the table
- fixed - allows you to set the exact size of the cells.
We specify the fixed width of the cells - 255px 255px (twice, because there are also two columns). Next, we set the places for the beginning of new lines with the | - tag and new cells (columns) with the | ... We close the table with the tag |) and get the following skeleton:

- We place pictures in cells and set links for them... Open the necessary parts of the picture in the community album one by one, copy their id ( photo-12345_12345) , enclose in double square brackets, prescribe the dimensions 255x100px and nopadding tag for gluing pictures. After the vertical bar, assign a link to each button. We get the following code.
(| noborder nopadding fixed
| ~ 255px 255px
|-
| []
|-
| []
| []
|-
| []
| []
|}
- Ready!Click "Save Page" - and we get a convenient menu for the community.

Ready-made group menu in the desktop version

Ready-made group menu in mobile version
If you made a menufor the group, then it will be easily accessible by clicking on "Fresh news" (by the way, this page can be renamed to "Menu" in edit mode).
If you made a menufor public, then it can be prominently displayed under the community name using a pinned entry.
To pin the menuin a group, publish a post with a banner and a link to the wiki page on behalf of the community (if you publish on your behalf, it will not be possible to pin the page).In public there will be no problems with fixing: there you can pin a post of any author.

How to make a post with a link to the menu in the public

How to pin a community menu
New editor for VKontakte articles and wiki markup
The VKontakte administration announced the launch of the article editor on December 22, 2017 and is positioning it as a tool for publishing longreads.
Some users decided that it was created to replace the wiki markup. But so far it is too early to draw such conclusions, because the editor's functionality is still rather meager. It cannot edit media files (size and alignment) and make tables, and hyperlinks can only be assigned to text. There are no tags and code here, there is only a visual mode, as in the usual text editor.
From this, you can see that it is still possible to create a user-friendly menu for a community or a wiki landing page only with the help of wiki markup. What will happen next - time will tell.

This is how the interface of the new editor of VKontakte articles looks like
What to remember about wiki markup
- The standard method for creating wiki pages is painstaking and not very user-friendly. The easiest way to create a page is through the Mobivic application, Source Code or Wiki Poster.
- The community menu needs to be made a table so that it looks neat on mobile devices.
- When editing a wiki page in the standard interface, you should not switch between visual editing mode and wiki layout mode. Because of this, the layout may go.
It is not necessary to remember all the tags, it is enough to keep the link to
Step 1
To begin with, go to our group and in the "Fresh news" block (in this case, I renamed it to "Menu"), click the "Edit" link that appears on hover. Important! First, you must have an Open Group, not a Page. Since there is simply no such item on the Page. And second, in the Community Management> Information> Content menu, the "Public" item should be selected. 
Step 2
In the "Editing" tab, write the phrase [[Web design theory]], enclosed in double square brackets. Then we click on the "Save page" button. 
Step 3
After that, the "Preview" link will appear next to the button, and click on it. Below will open a preview of our menu, where we see the link "Web Design Theory" that appears at the bottom. 
Step 4
Click on this link and go to the created page with the title "Web Design Theory". Then click on the link "Fill with content". Next, we edit the text as in a regular text editor - insert pictures, texts, videos and other objects. In this case, our created page will have a URL like https://vk.com/page-15865937_43819846. 
Alternative way to create an internal page
There is alternative way creating a page. It is mainly suitable for public pages (public pages), since the method described above is not suitable for them. To do this, we will use the following code
http://vk.com/pages?oid=-XXX&p=Page_name
where instead of XXX we will substitute the id of our group, and instead of the text "Page name" we will write a Menu. Now we need to find out the group id. How to do it? We go to the main page of the group and look at our posts on the wall - right under the block "Add post" will be written "All posts" - click on this link. 
Go to the page and see the url of this type https://vk.com/wall-78320145?own=1 where the numbers 78320145 in this example and there is a group id. We substitute our data into the source code and we get a record like this: http://vk.com/pages?oid=-78320145&p=Menu(with your numbers!). We paste this line into the address bar of the browser and press Enter. So we created a new Vkontakte page.
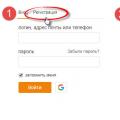 Odnoklassniki: Registration and profile creation
 E is. E (functions E). Expressions in terms of trigonometric functions
 Social networks of Russia Now in social networks