Creating an avatar for the VKontakte group online. Creating a beautiful unified avatar block and VKontakte menu
Probably all Internet users know what an avatar is and where it is used. Avatar, avatar, also avatar, ava, userpic - an image that personifies a specific Internet user, one might say, is his virtual incarnation.
Avatars are needed where there is communication between people and it is required to highlight each user personally. These are primarily forums, social networks, chats, blogs, instant messengers and similar services.
As in life each of us has a name, and we all differ from each other in appearance, so on the Internet for personalization we use nicknames and avatars. The only difference is that online you can choose any name for yourself and how you will look.
An avatar is the user's face in the broadest sense of the word, it is a way to express your individuality, views, interests, etc., to create your own unique image.
How do I create an avatar?
- do it yourself
- use sites that offer collections of ready-made avatars
- order for a specialist
- use online service NS
Not everyone is satisfied with the standard sets of avatars for the forum. Not everyone wants to do it themselves, and not everyone knows how to use graphic editors... Collections of ready-made avatars are often repeated from site to site, and it takes time before you come across something original. By ordering an avatar from specialists, you will receive a high-quality userpic, although you will spend a little money (making an avatar costs from several hundred rubles).
The creation of an avatar in online services also has its own characteristics. All services have one purpose: to give the user the opportunity to create an avatar on their own, online and for free. But the creation process itself is different. Some of the services allow you to use and edit your images that you need to upload from your computer. You can crop and set the desired size of the uploaded image, and then apply different filters (effects) to it to get your own unique avatar.
Another way to create an avatar is to use an online constructor, where an avatar is assembled by selecting and combining different ready-made elements that make up the image.
![]() An excellent example of this is the online service for creating personalized avatars FaceYourManga. This free online avatar maker allows you to make almost a self-portrait. You can choose a hairstyle, clothes, accessories, as well as choose the shape of the face, eyebrows, nose, etc., add freckles, a mole and even a third eye. It turns out very funny avatars!
An excellent example of this is the online service for creating personalized avatars FaceYourManga. This free online avatar maker allows you to make almost a self-portrait. You can choose a hairstyle, clothes, accessories, as well as choose the shape of the face, eyebrows, nose, etc., add freckles, a mole and even a third eye. It turns out very funny avatars!
The service offers many blanks, combining which you can get different images and, if desired, achieve similarity with a real prototype. Try it!
Create an avatar in the online constructor
It is very easy to create an avatar in the online constructor, you only need to go through 3 steps:
- Tune appearance your avatar
- Specify email address
- Get an avatar in an email
FaceYourManga - lightweight and quick way create an avatar for free and without registration!
To create an avatar in the online constructor FaceYourManga, go to the service website, click on the button CREATE!, you will see two gender selection buttons Male and Female(who does not know, male and female, respectively), click on the one you need.
A designer window will open in front of you, in which the toolbar is located on the right, and a preview form on the left, where the result of your actions is displayed during editing. Start creating your avatar! Choose the shape and features of the face, hairstyle, clothes, accessories to your taste.
The toolbar consists of 10 main categories, some of which contain their own submenu. For example, eyes are made up of 2 elements: the shape of the eyes and the eyebrows. If a color palette appears under the preview window, then it is possible to change the color of the selected element. Some elements of the designer can be moved up and down (arrows signed MOVE), thereby determining the best position for it. The area of movement is limited: if it is a nose, it is clear that it cannot be moved to the forehead :)
In chapter FACE we create "our" face: face oval, mimic wrinkles, freckles and moles, mustache, beard, temple shape.
- On the menu EYES choose eyes and eyebrows
- NOSE picking up the nose of the avatar
- MOUTH- mouth and lips
- EARS- ears
- HAIRS- hairstyle
- CLOTHES- we select clothes for ourselves a torso, shirts, caps, etc.
- STUFF- accessories we choose glasses, earrings in the ear, tattoos, etc.
- B. GROUND- choose the background
MAKE UP- applying makeup, you can powder the created face with powder of a wide range of colors.
If you like the created image, press the button FINISH, and in the window that opens after confirming your choice by clicking on Ok.
You can make an unlimited number of images for yourself and your friends. The service allows you to customize and change avatars every time you need them.
Natalia Komarova, 28.05.2009 (25.03.2018 )
When you read a forum or blog, you remember the authors of messages by their nickname and ... by the user's picture, the so-called avatar. The latter plays one of the main roles in the perception of users on the Internet. Despite the large number interesting pictures online, someone may have a similar avatar. And then he will no longer be unique, but you want to be one and only. To make an exclusive memorable avatar, we offer you a set of services in which avatars are made directly from your photos.
1. Avatar Photo!
![]()
The service allows you to create more than 30 original avatars from your photos. For portrait photos, the service is capable of generating very interesting effects based on the face recognition algorithm. For example, you can make you wink or smile, be upset and surprised. There are the effects of a matrix, placing a picture under water, reflection in water, blinking, kaleidoscope, rain, X-ray scanning. With one click, effects such as hearts in the eyes, dollars, rolling pupils of the eyes or turning into a vampire with burning eyes are added =)
The created avatars have a configurable animation size and speed, as well as an adjustable number of frames in the animation. Conveniently, even before you start applying the effects, you can edit the picture (for example, crop it by clicking “Edit photo”).
Without going through registration, you can save your work to your computer in .gif or .jpg format, and after registering, place it in your account. You can also click the "Share" button and the picture will be saved on the free photo hosting Pho.to, and you will receive a unique link.
Disadvantages: you cannot add text to the avatar.
2. CoolWebcamAvatars
![]()
If you have a webcam, then here you can easily create your animated avatar, and everything will be real, since this is your real image
There are several effects available: your video in a newspaper article, on a radar monitor, in neon lighting, negative, mirror reflection and some others. The recorded avatar can be saved without registration, but if you register on the site, it will be shown on home page... Avatars are saved to your computer in .gif format.
Disadvantages: an avatar can only be created if you have a webcam, the avatar size is not adjustable.
3. Lunapic.com


The service is intended both for editing photos and for applying various effects to them. These effects are suitable for creating avatars. There are more than 30 static and 34 animated effects on the site. Among the most memorable are three-dimensional cube, reflections in water, thermal image, horror, circles on the water, pixelation, sparkles. And for some effects, you can choose the color scheme yourself.
Here you can add text (animated!), And apply the animation effect to the previous one. It is possible to create an animation from your own frames, and there are many settings - you can set the delay time and the number of cycles in the animation for each frame.
Perhaps the Lunapic developers have implemented the most complete set of operations for creating and editing avatars. In addition, the entire editing history is recorded and you can return to the desired step at any time.
The only drawback is that it is sometimes difficult to understand how to perform a particular operation. And also the fact that a picture with animated text can be saved only in the .htm format.
4. Loogix

The service contains a small set of effects: 11 ways to create avatars from one photo and gluing 2 or more frames into animation. Among these 11 effects, the most popular are recursion, negative, recoloring a photo in different colors, bloom and blur effect. In the settings, you can set the size of the avatar: 100, 125, 250, 300 or 400 pixels and the animation speed when "gluing" (there are 5 levels of speed in total).
In principle, there is no registration and the resulting avatar can be saved either to your disk, or you can upload it directly from the service page to one of the social networks. networks or social service. bookmarks. And if you wish, publish it in the gallery on home page service. There is also an embed code that makes it easy to place an avatar on your website or blog.
Disadvantages: few effects, no added text or other personalization elements.
5. Aploy


The service creates animated avatars in three steps: first, you collect the necessary pictures, while the service allows you to crop the photo and adjust the dimensions (for example, so that it fits as an avatar in one of the networks (MSN, phpBB, twitter). Then you place the pictures in the order you want and for each of them write the delay time, click "Animate" and the .gif file is ready. Then just download it by clicking the "Download" button. The service does not require registration in order to create avatars. You can also add colored elements to the frames - draw something or sign with your own text.
Disadvantages: signatures are only available in Latin
Hello everyone, this is Roman Litvinov, designer of the Ardens.pro team. Today I came to you with a guide-tutorial on how to create a single block of an avatar and a Vkontakte menu (as a whole). For starters, examples of what it will look like.
Examples:


Avatar markup for VK group
We need a grid to start. To do it, we take a screenshot of the group page and throw it into the project, in my case in Photoshop.

Then, using the CTRL + R keyboard shortcut, call the rulers and place the guides along the edges of the avatar and the clip. In order to extend the guide, you need to hold down the LMB on the ruler and pull towards our layout.

The size of the avatar that we see in the browser without scaling is 200x500 pixels. And fixing in this form is 395x237 pixels.
Cutting
We made the markup, now let's start cutting. Why now? Because this is almost the end of my guide.
For cutting, we need the "Cutting" tool (in the English version of the "Slice tool")

Using this tool, we cut along our guides, specifically inside the avatar and fasten along the edges.
It should look like this.  Next, remove our screenshot from the layers and start the project. We will not develop the design, but I will show what happens. Let's add a photo of a girl to our project. The main thing for us is to get into the area of avatar cutting and fastening.

After working on our design, save the cut parts using CTRL + SHIFT + ALT + S or File-> Save for web ...
In this window, with Shift pressed, select our avatar and press save  But there is still more to come. In the window that appears, select Fragments, select "Selected Fragments Only" and click save. After that, Photoshop will cut off an area with an avatar and a clip from the entire layout.
In the folder where we saved the cut, we will see something like this. 
A single block of an avatar and a menu for the Vkontakte group
Feel free to fill in our avatar and fix it to the test group to see the result 
So, thanks to such actions, you will get a single block of an avatar and a menu in Vkontakte groups.
Completion
I hope my mini-guide was useful and you will be able to make your groups more beautiful and memorable.
Useful articles on related topics:
Funny video (sometimes you can't understand "photoshop" or not)
Attention! Competition:
I will give a set of stickers to choose from to the one who repeats this lesson, and he will be able to make an avatar and fix it in one piece 😉
Like, comment, throw muffins or tomatoes in our group
How to make a cool avatar for a Contact for free?
Or your path to originality
Today, a beautiful and bright avatar in your profile social network no longer surprise anyone. In almost any profile, as the main photo, you can see either a professionally taken picture, or some special collage created using a special application. But such is human nature: having seen something beautiful and attractive from someone, the user immediately wants the same for himself.

Therefore, the question arises: where can you make a cool, beautiful avatar for Contact, and for free? Where can you find an app that will allow you to create a spectacular profile photo in a matter of seconds? And most importantly - what needs to be taken into account in order to make your avatar for Contact as original and interesting as possible?
How to make a beautiful avatar for a Contact: tips and tricks
First of all, get creative. After all, creating an original cool avatar for Contact undoubtedly requires a creative approach. And before proceeding directly to the creation process, pay attention to the following tips:
1. To make a beautiful avatar for a Contact from a ready-made image, select a photo in which your face is located in the center. Exclude photographs where you are poorly visible (take less than 50% in the photo) or cover your face with certain objects (the exception is professional themed photos).


2. If you are using our application r to pre-create a picture, then try to photograph in the most natural position for yourself. Do not try to put on a fake facial expression that you think is beautiful, or stand / sit in an unnatural position. Fake is always visible in the photo - we want to make a beautiful and original avatar for Contact, which will amaze your friends with how similar you are to your real lifestyle on it.
3. Try to come up with a kind of "zest" for your new avatar for Contact - something that will immediately catch your eye and emphasize your character, mood, state of mind as best as possible. From the simplest, it can be the original inscription on the plate, your own photo in your hands, where you are presented in a completely different form, a certain setting (for example, cooking) or original clothes. If you decide to use a ready-made photo to make a new cool avatar for Contact, then here the scope for your imagination and the imagination of the photographer is very wide.


4. Try to make several different avatars for the Contact for free in our application. Thanks to this, you will have a choice of which one is better to place on your page. And then you can change the avatar in your profile at least weekly.
5. Don't forget to save every one you create to your computer. Carried away by the creative process, you can completely forget about this important little thing.
You can always make a beautiful and cool avatar for a Contact completely free of charge through our website. You can use both WebCam Avatar, which will help you take a picture from your webcam and apply interesting effects, or GIF Animator, with which you can apply original effects to an already finished photo.
We hope that our project will be able to help you make a really original, bright, cool and beautiful avatar for Contact quickly, simply and completely free of charge!
 Entering forced mode
 If the drivers have already been installed on the PC
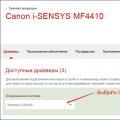 Installing and configuring the Canon i-SENSYS MF4410 printer Installing the canon mf 4410 drivers