Windows partitions and volumes. What are partitions, volumes, logical drives
In Windows, connected hard drives by default they get the type of basic disks during initialization. Basic, they are also basic disks are compatible with all versions of Windows. it regular discs on which the main (primary) and logical partitions are created. The basic disk type is defined for most storage media in users' computer devices.
But, being more common, basic disks offer less functionality than other types of disks — dynamic, floppy, and custom disks. What are dynamic disks, what are their capabilities, pros and cons, how partitions are created on such disks using Windows tools - we will consider these questions below.
1. About dynamic disks
Dynamic disks is a technology borrowed from Microsoft under license and has been shipped with Windows since 2000 and is a software implementation of RAID arrays. The technology is not supported in Windows Home editions.
Dynamic disk technology is additional features on space allocation hard drives for the convenience of working with data, ensuring their safety, as well as increasing computer performance by combining the speed of different disks. Dynamic disks offer capabilities not supported by base-type disks, such as:
- increasing the size of partitions at the expense of space on the entire disk, and not only if there is adjacent free space (unallocated space);
- support for partitions created from the volume of several hard drives;
- support for major RAID configurations.
Among the advantages of this technology is a higher degree of reliability than using cheap RAID controllers. But only when it comes to cheap RAID controllers with their drawbacks such as driver errors or the likelihood of data loss. Naturally, the technology in Windows is inferior to full-fledged expensive RAID controllers. In terms of removing the load from the processor, in principle, any hardware RAID array will be more efficient than one implemented using software tools... But expensive RAID controllers will perform their tasks at the expense of their own resources, and offer wider functionality and provide fault tolerance.
Dynamic disks have other drawbacks as well. They cannot be accessed from devices based on earlier versions of the system (starting with Windows XP Home and below). On dynamic disks, only one Windows systems, another Windows cannot exist on a different partition.
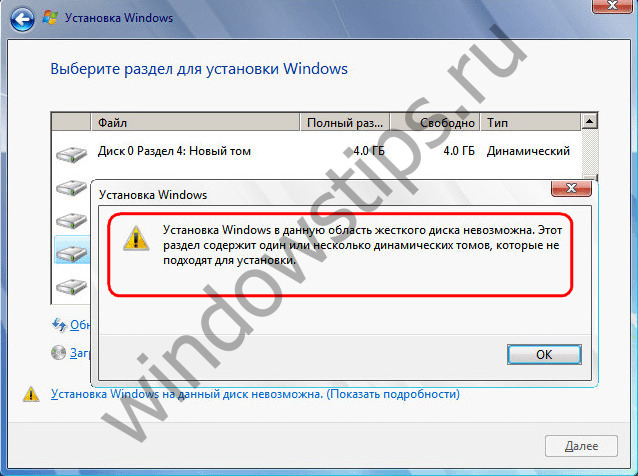
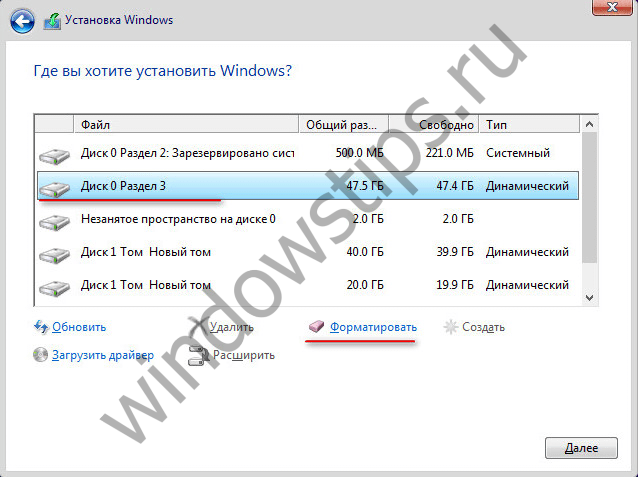
During the reinstallation of Windows (its modern versions 7, 8.1 and 10), only a single partition of the dynamic disk will be available for formatting and selection as the system one - the partition on which Windows was previously located before the reinstallation.
Reinstalling Windows on a dynamic disk can take a long time. Often due to the fact that new system sees the dynamic disk as a disk with errors, it starts the Chkdsk service to scan and fix errors. The intrusive Chkdsk activity is also encountered by users who have connected a dynamic disk to a computer, taken from another computer. To surely avoid problems with reinstalling Windows on a dynamic disk, it can be converted to basic before this process. And after reinstalling the system, perform the reverse process of converting the disk to dynamic.
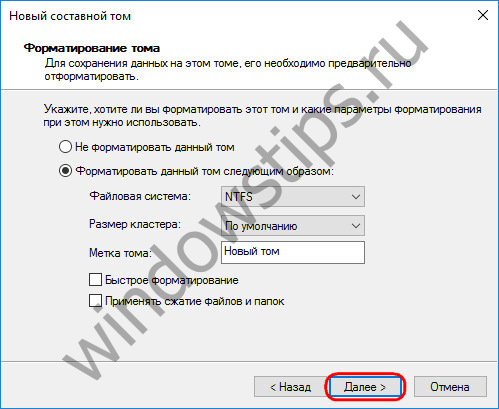
Partitions on dynamic disks, like on basic ones, are configured by default to be formatted to file format when created. NTFS system... The maximum partition size for dynamic MBR disks is 2 TB, and for dynamic GPT disks it is 18 TB. For dynamic disks, there is no concept of primary and logical partitions as there are for basic disks. Partitions of dynamic disks have their own specifics, and they are not related to restrictions on the number of partitions created. As for the number of possible partitions, there is no limit for dynamic disks.
2. Converting basic disks to dynamic
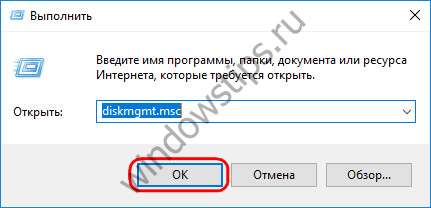
You can convert disks from basic to dynamic by means of Windows itself, using the diskmgmt.msc utility (disk management). In all Windows versions it is invoked by pressing the Win + R keys (launching the "Run" window) and entering:
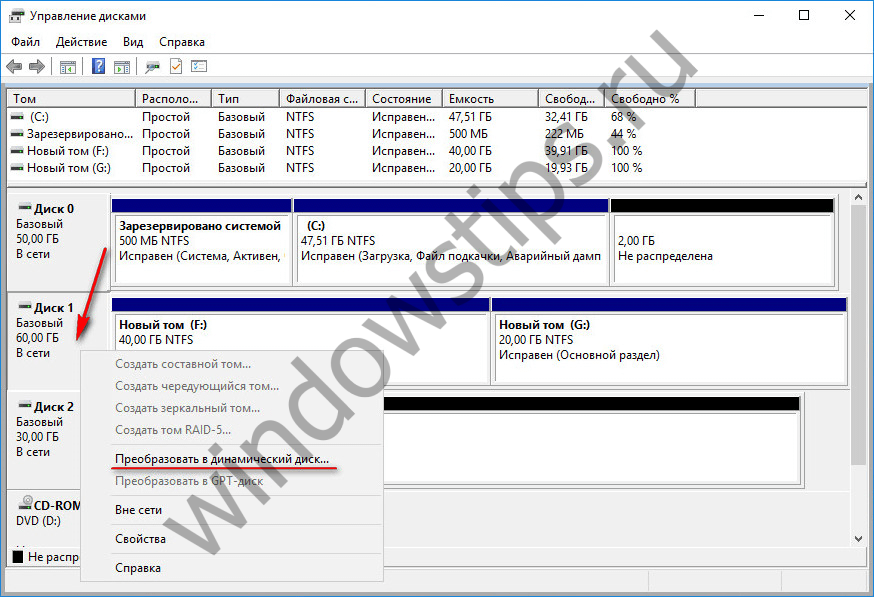
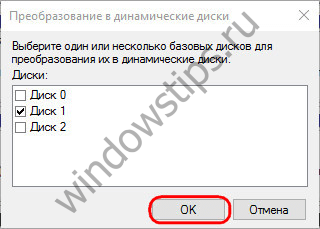
Any of the disks on your computer can be converted from basic to dynamic. This transformation is done in two ways. The first way is the manual conversion, when the disk is called context menu and the option "Convert to dynamic disk" is enabled.
Choosing this method, then you need to either leave only the current drive, or check the boxes on all connected drives for batch conversion.
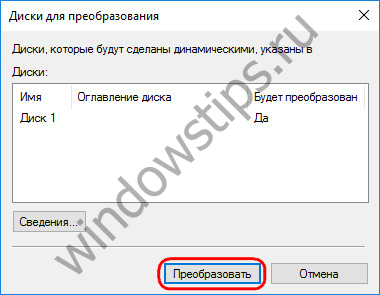
We confirm the decision in the window with a notification that other Windows on other disk partitions will no longer be able to start.
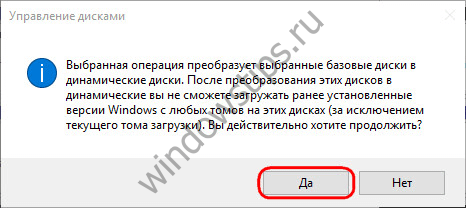
Everything, after these actions, the disk will turn into a dynamic one.
Another way to convert a disk to dynamic is to start dynamic disk operations. And those are provided for basic disk, if only he was with unallocated space. In this case, the type of disk being operated gets the dynamic type by default.
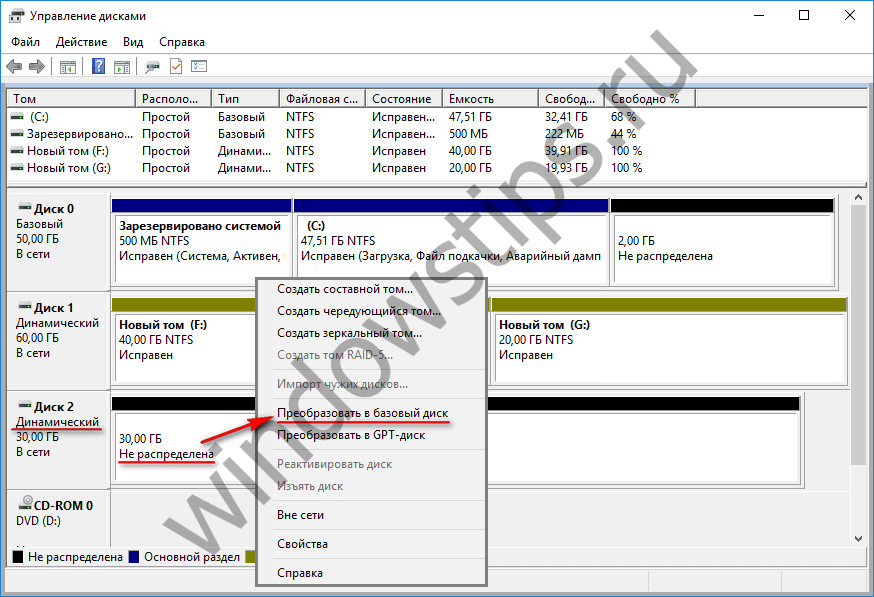
With the reverse process - - the situation is more complicated. Thus, dynamic disks with unallocated space can be converted into basic ones easily: to do this, open the context menu on the disk and enable the "Convert to basic disk" option.
In addition, when you delete partitions on a dynamic disk, it is automatically converted to basic. But if a dynamic disk already has a partition structure, turn it into a basic one Windows tools will not work. But such an opportunity is available in Acronis Disk Director - functional program to work with disk space. The program can convert dynamic disks to basic ones without losing files stored on such disks.
3. Creating partitions on dynamic disks using Windows
What are the specifics of partitions (volumes) created on dynamic disks? How are dynamic disk volumes created?
3.1. Simple volume
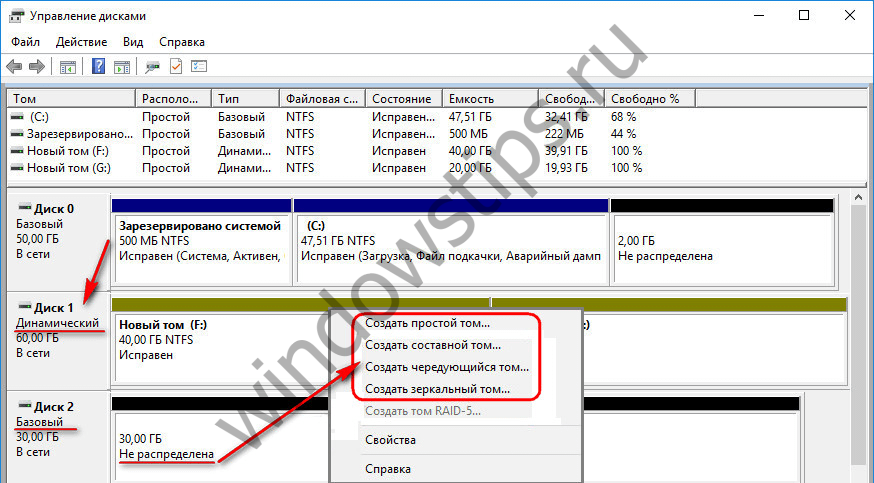
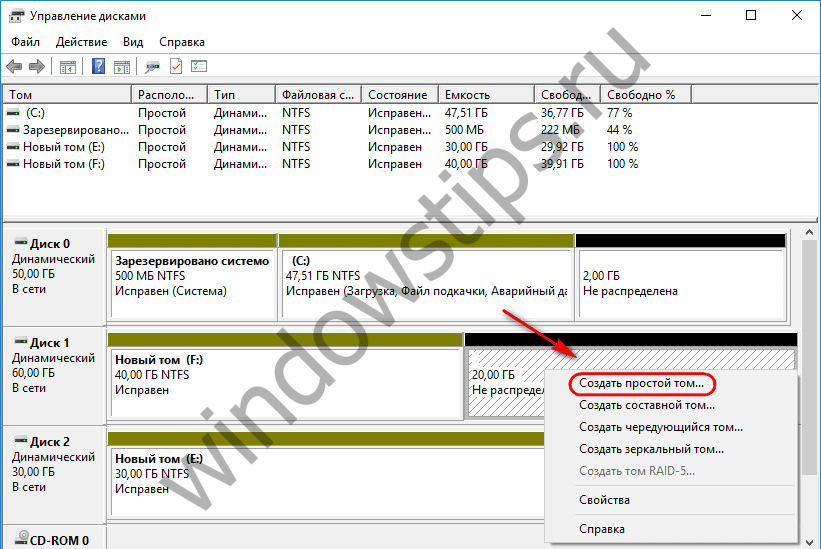
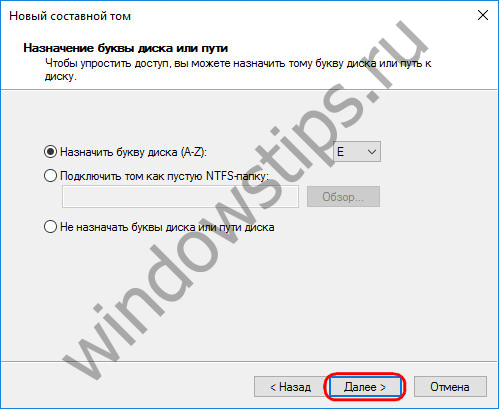
A simple volume on a dynamic disk is a regular partition, just like the one created on a basic disk. It can only be created from free space on one medium. To create it on the free space of a dynamic disk, open the context menu, then select "Create a simple volume" and go through the steps of the wizard.
3.2. Composite volume
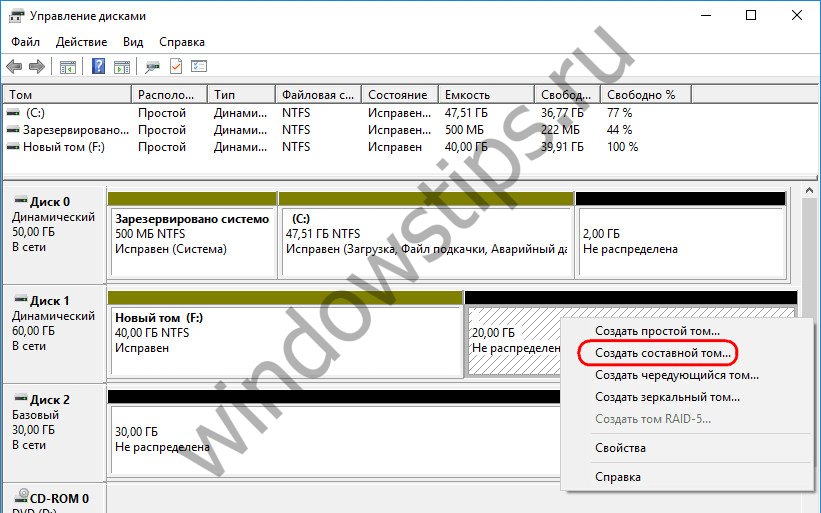
A spanned volume is created from the volume of multiple hard drives. The creation of spanned volumes is resorted to when it is necessary to form one large partition from several hard drives, for example, from old HDDs with a volume of 80 GB. The maximum number of hard disks from the space of which a spanned volume can be formed is 32. When data is moved to a spanned volume, files are written sequentially - first to one HDD, then another, then a third, etc. A spanned volume is vulnerable: if one of the hard disk, user files may be lost even though other disks are still usable. In a spanned volume, everything is interconnected, and without one of the chain links - one of the disks - the partition will simply cease to exist.
To create a spanned volume, on the free space of one of the disks, open the context menu and click "Create spanned volume".
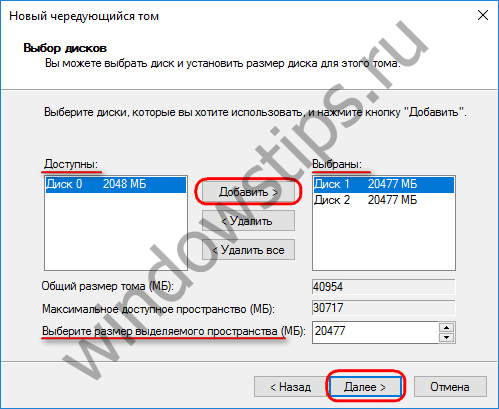
All the main parameters of the partition are set in the disk selection window. In the "Available" column, select the available hard disks and transfer them to the "Selected" column with the "Add" button. Below, for any of the added disks, we can set a specific size allocated for a spanned volume, if not all disk space is allocated.
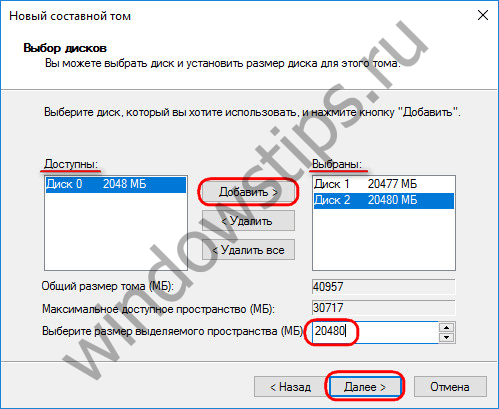
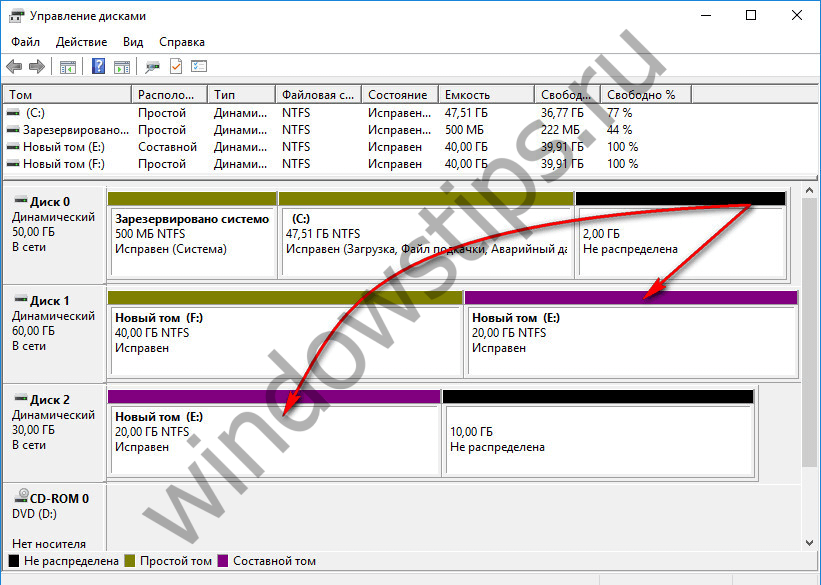
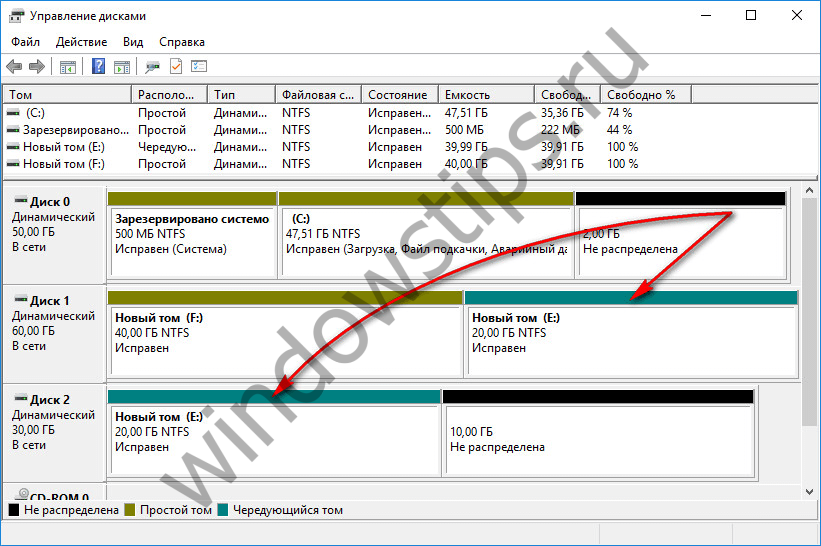
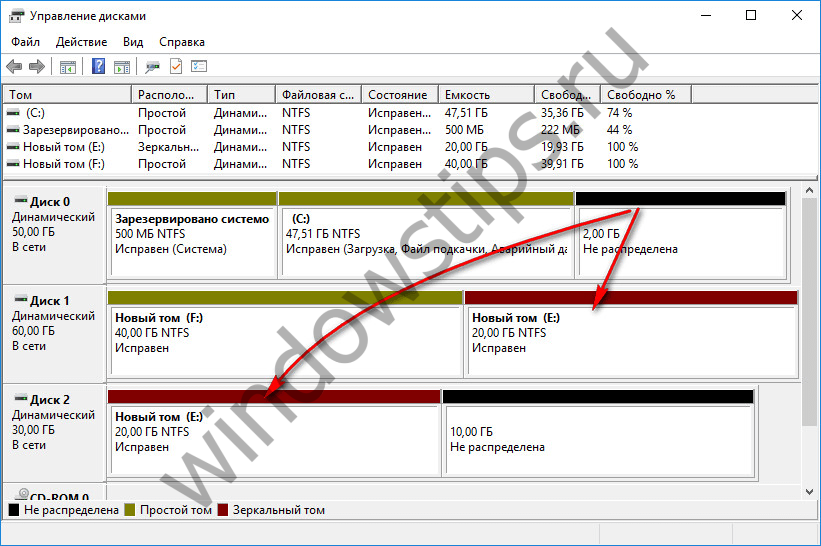
And upon completion, click "Finish". After that, we will see the created spanned volume, located on several disks.
3.3. Striped volume
A striped volume (RAID 0 configuration) is created from two or more hard drives and is populated with data not sequentially, as provided by the arrangement of the spanned volume, but in parallel. Data is simultaneously written to all disks and also simultaneously read from all disks, which allows to increase the speed of operations. True, the speed of data access in any case will be determined by the capabilities of the slower disk. An interleaved volume, like a composite volume, cannot boast of fault tolerance. If one of the disks fails, you will not be able to access the files on the striped volume.
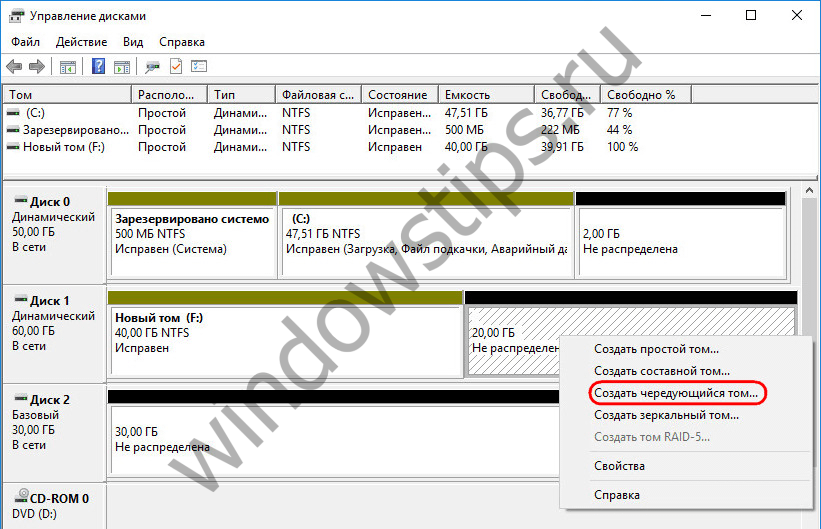
A striped volume is created in the context menu on a free disk space, the option to select is, respectively, "Create striped volume".
In the window for selecting disks, using the "Add" button, add another disk from the list of available ones to the existing disk. The amount of space allocated by the disks must be the same. The striped volume will be automatically sized according to the amount of free space available on one of the drives.
The next steps for creating a striped volume are the same as described for a spanned volume.
3.4. Mirrored volume
A mirrored volume (RAID 1 configuration) is the ability to create a fault-tolerant array of two disks using Windows. This configuration is intended solely to ensure the safety of information; it does not add performance to the computer due to the total speed of reading and writing disks. The data is written to one disk and immediately duplicated to the other disk. And if one of the disks fails, all the accumulated user information will remain intact and safe on the second disk.
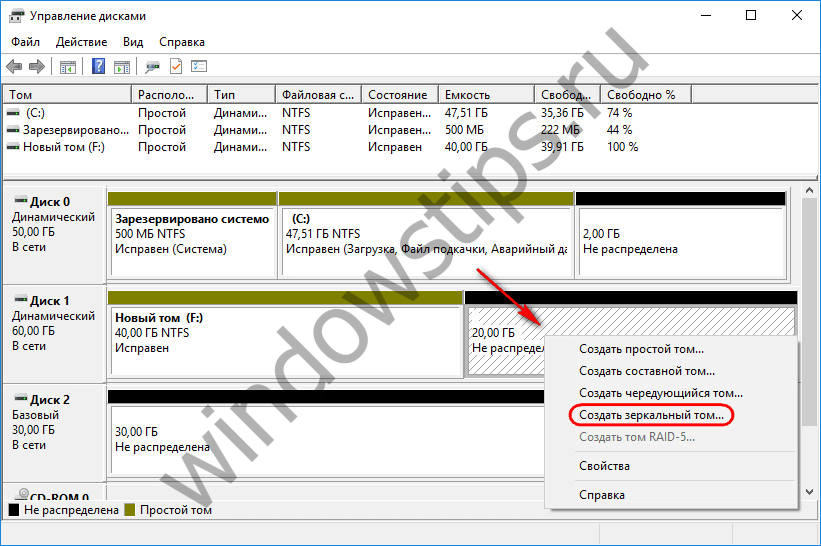
To create a mirrored volume, call the context menu on the free space, select "Create mirrored volume".
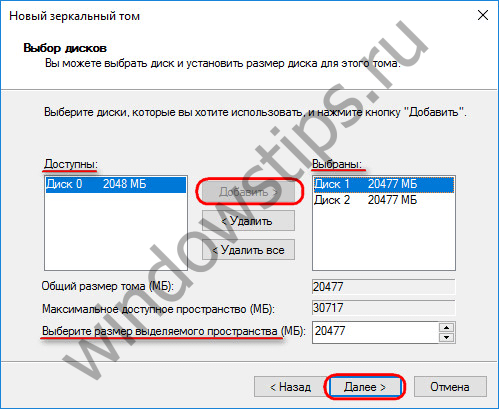
In the window for selecting disks, using the "Add" button, attach another disk to one of the disks. The size of the mirrored volume will be automatically determined by the free space of one of the disks. You can manually set the size of the volume if necessary.
3.5. Volume RAID-5
A RAID-5 volume is, as the name implies, a software implementation of a RAID 5 configuration. Such a volume can be created in server editions of Windows.
Have a great day!
You can create a single volume spread over multiple disks. When doing this, keep the following in mind:
- For a spanned volume, use free space on several disks of the same type... If you have free space on two or more disks of the same type, you are free to combine that space into a spanned volume. It is not fault-tolerant and has moderate read / write speeds. Files are written to the entire spanned volume in random order. If one disk fails, the entire volume becomes unusable, with the loss of all data.
- A striped volume uses free space on multiple striped disk drives. Striping provides faster read / write access to data because data is read and written across multiple disks. For example, in a striped volume consisting of three disks, data from a file is written first to disk 1, then to disk 2, and then to disk 3 in 64 KB blocks. Like a spanned volume, a striped volume is not fault tolerant, so if any of the disks fail, the entire volume fails and data is lost.
On a note! If you only have one disk available, you will not be able to create either a spanned volume or a striped volume. You can expand the size of simple and spanned volumes by expanding them. Striped volumes cannot be expanded. Therefore, when creating a striped volume, consider the size of the volume so that you do not have to delete and recreate the striped volume.
To create a simple or striped volume in the Disk Management snap-in, follow the steps below:
1. In the working window of the Disk Management snap-in, click right click over the unallocated area and select an action Create spanned volume or Create striped volume... After viewing the welcome page, click Next. Windows 7 supports splicing and striping of primary disks, but some primary disks are not suitable for splicing and striping.
2. On the Select disks settings page, select the disks that will be included in the volume and specify the size of the volume segments on these disks. Disks must be of the same type - primary or dynamic. Click Next.
The available drives are listed in the Available list. Highlight the drive and click the Add action to add the drive to the Selected list. To remove a disk from the Selected list, select it and click the Remove action.
Set the space to use on each disk by selecting the disks in the Selected list and specifying the required amount in the box Select the size of the allocated space... In field Maximum available space the largest free area on the selected disk is displayed, and the field Total volume size shows the total disk space currently allocated to the disk.
The terms "partition" and "volume" are the same for many users, but in reality they are fundamentally different in the context of computer architecture. The term "volume" is synonymous with the word "disk" and is a separate storage area with its own file system, while a partition is a basic structural unit that can be split into one or more volumes. Unfortunately, the release of computer hardware with pre-partitioned and formatted disks has resulted in most users having no idea of the difference between a partition and a volume. But if you are going to change the disk structure of your computer, then you should understand this well.
Disk partitions
A partition is a structural unit of a hard disk that divides a storage resource into several virtual units. Partitions are a standard object that is easily recognized by all modern operating systems. At the same time, not all operating systems are able to well detect volumes located on disk partitions. Most manufacturers sell their equipment with only one disk partition, but if this is not enough for you and you want to change the disk structure, you need to use the standard panel Windows management 7. Select the "System and Security" section in it and you will find in it the "Administrative Tools" section of the administration, which, among others, includes a utility for managing the structure of local disks. In addition, you can change the disk layout when installing the operating system.
Section types
There are two types of partitions: primary and extended. Most operating systems only need the main partition to function properly. Only one volume can be created on each primary partition. An extended partition is a special type of partition that can contain multiple volumes (or logical drives) of your choice, the total size of which cannot exceed the size of the extended partition. In total, you can create up to four partitions on one physical disk, one of which can be expanded.
Volume
The volume is analogous to the system disk. After creating a disk structure from partitions, you can create a logical disk or volume from each partition, format it and thus get several separate disks in the operating system, just as it looks like when several physical disks are attached to a computer. Each of these volumes is independent and you can format them without fear of damaging data on other logical drives. All volumes can be managed through the "Disk Management" utility, which is launched through the context menu of the "Computer" section or the control panel.
Benefits of creating multiple partitions and logical drives
Although it takes some time to create multiple partitions and volumes on a single physical disk, there are many advantages to such a disk structure. Partitioning the disk allows you to maintain the health of one partition, while file system(FS) of another partition has become inoperative due to system errors of the FS or detection bad sectors... In addition, the time to scan, format, and defragment small logical drives is significantly faster than full drives. This division also allows you to separate the system disk from other information, which allows you to reinstall without any problems operating system or restore it from an image, while preserving your personal and multimedia data.
 Architecture of a distributed control system based on a reconfigurable multi-pipeline computing environment L-Net "transparent" distributed file systems
 Email sending page Fill relay_recipients file with addresses from Active Directory
 Missing language bar in Windows - what to do?