How to remove a CPU cooler. We remove the cooler from the processor. Installing the cooler on the case.
14133 read
What is a computer processor? Many PC users, especially beginners, call the entire system unit a processor. And this is not at all true. A processor is a small part (slightly smaller than a matchbox) of a computer, which is located in the system unit and fixed on the motherboard. Its main task is information processing. How more powerful processor, the faster the computer works (“thinks”).
The process of removing the fan from the processor
And there's a reason the toughest hardcore prefers water cooling: it's incredibly effective at keeping your system temperature down. However, water cooling isn't just a walk in the park. Both tasks will take some time and effort, but neither should be difficult. Every first use of water cooling is a learning experience as you go, but we'll walk you through the details and help you avoid mistakes that can lead to the biggest losses in your system and your wallet.

Many of us constantly argue over one important question: what is the most important part in a computer? Some argued that this is the keeper of all information - HDD, others talked about RAM, without which we would not be able to manage the files that are located on the hard drive. But the answer to this question lies on the surface and is very simple. The most important, integral part of the computer is the processor. Thanks to the work of this unit, we can synchronize each installed device in the computer, and their stable and correct operation depends entirely on the processor's performance. But in the end, the processor, like any other element of the computer, outlives its set time, and it's time to replace it with a more advanced one.
Select components for water cooling
The advantage of a custom water cooling system is that it is just custom. By choosing exactly the parts you want, you can create a system that suits your cooling needs and your aesthetic sensitivity. To get you started building your system, we'll walk through each important component of a water cooling system, describing what each does and what your options are.
While there is no liquid touching your case, this is one of the most important parts of a good water cooling setup. For water cooling, you will need a case with plenty of space on the inside and a large fan grill, ideally on the top or bottom of the case. While it can be a little cumbersome in your wallet, getting a case that's designed with water cooling in mind will ensure your setup is as smooth as possible.
Processor removal instructions
In order to find out how to remove the processor, you must carefully read this mini-instruction:

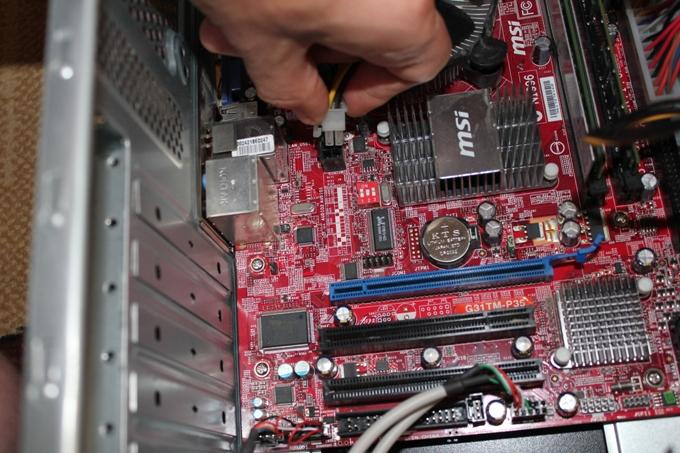
1. First, disconnect the system unit from the network (in the photo it is an even power cable). But it is better to disconnect all connected devices and put the system unit on its side, since in such cases it will be more convenient to work.
A block is a piece of equipment responsible for extracting heat from your computer equipment and into liquid coolant in the water cooling system. You need a separate unit for each component you want to refrigerate. As far as actually choosing which block of water to use, it is usually a matter of brand and the right block for your side.
In a water cooling system, a radiator complements the water block, releasing heat absorbed from the block into the air, which is achieved by forcing liquid refrigerant through many thin pipes attached to metal fins. Air flows through the capillary radiator, absorbing heat from the liquid and expelling it from the case.
Do not forget: you just need to disconnect the computer from the network by unplugging the power cord.
![]()
2. Then it is necessary to remove the side cover from the body.

There are enough heatsinks to support one, two, or three fans. Of course, larger heatsinks and more fans contribute to better cooling, so we usually recommend going with the largest heatsink that suits your case and your budget.
The most recent water cooling equipment in the world did nothing but water flowing through it, and it was done with a pump. If you go with a different pump, be sure to read user reviews before buying - a crappy pump will wear out or deteriorate over time.
3. Disconnect all leads to the processor and fan. These wires give them power.
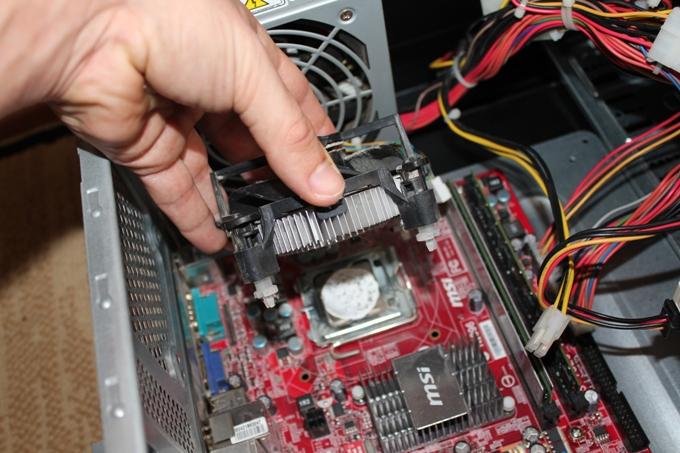
4. Remove the fan with a radiator - the cooling system.
The water cooled tank is pretty simple thing is a water tank with inlet and outlet. You may wonder why exactly you need a large water reservoir in your system, as it does not have an immediate function such as absorbing or dissipating heat. However, the reservoir has a number of important responsibilities.
The reservoir has a port that allows you to actually fill the water cooling system with liquid. The reservoir is usually not completely filled with liquid. The extra air provides a buffer that allows the liquid room to expand and contract as the temperature changes.
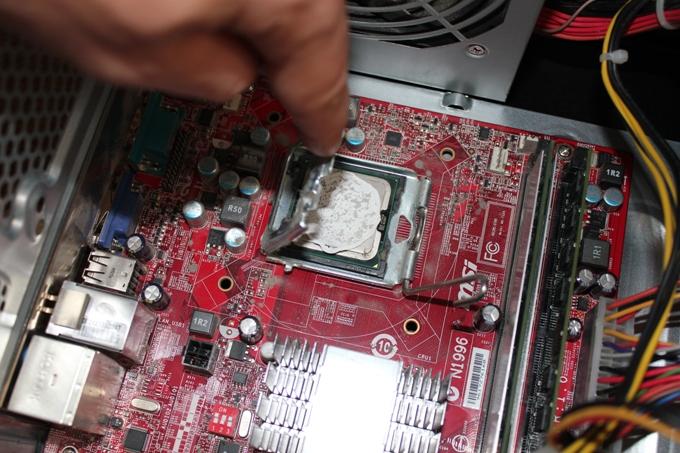
5. Now you can remove the processor, but first of all, you need to inspect its structure. As a rule, the fastening methods are made in the form of pressure levers located on both sides. When pressed, they begin to move away from each other, thereby the processor is freed from the entire structure. On the processor itself, there is also a pressure lever, it should also be removed, after which we remove the processor.
How to replace a connector on a cooler
Since the reservoir is not completely filled, it also provides room for air bubbles in the liquid to be avoided, resulting in greater cooling efficiency and quieter operation. As for which tank to use - well, it's really just a tank, choose the one that suits your case and looks beautiful.
What kind of cooler is making noise?
Finally, you need tubes to put all the other pieces together. Whichever you choose, just make sure all the rest of your water chiller equipment has the same size fittings. Besides the tube diameter, you just need to choose the color. Fittings come in piercing or squeezing styles.
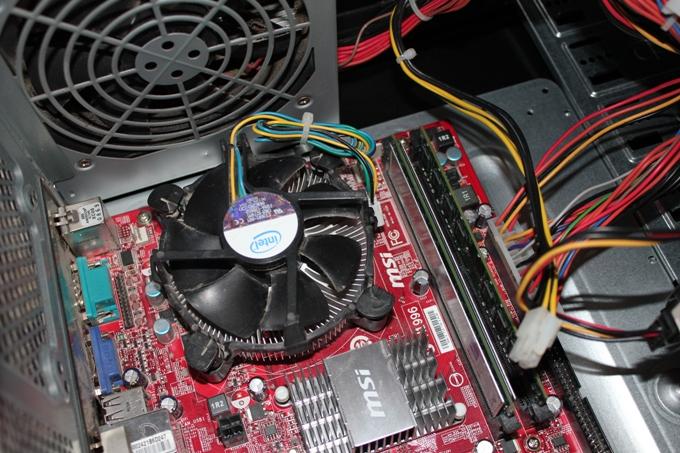
6. Installing the processor is performed in reverse order. Please note that with the correct relative position of the processor above the socket (in its place), it should stand there without any difficulty. Then secure it with a lever.
7. It should be remembered that before installing the cooler and radiator, it is necessary to apply thermal paste to the processor surface, which will reliably protect it from any overheating.
Both will work great, although the compression fittings look better and are slightly more expensive. You will also need coolant to install in your system. Although this is commonly referred to as "water-cooled", most modern refrigeration systems use some kind of refrigerant with anti-corrosion and anti-conductive properties.
Create Your Water Cooling Layout
Once you have selected the individual components, you will need to design the layout of your water cooling system. To do this, it helps you put together a simple diagram showing how you want everything to be connected. Before we start installing anything, take a good look at your case and think about where each component will sit. Is there a clear way for the pipe to work from one component to the next? When the pipe is in place, will it be difficult to access other equipment such as hard drives or optical discs?
The process of removing the fan from the processor
Dust is the main enemy of a computer, most often fans suffer from it. Typically, a computer has three fans. One is on the video card, the second is in the power supply, and the third is a fan that cools the processor. If it gets heavily clogged with dust, the degree of cooling of the processor will drop significantly, which will affect the performance of the computer.
Can you bring back the sides for this case? By considering potential hazards like these now, you can save yourself a lot of headaches further down the road. Finally, it's time to discuss the actual installation of the water cooling equipment.
Now attach the motherboard to the case. We can now move on to the heatsink, the largest component. The heatsink can be mounted on any fan grill that is large enough, and the simplest heatsinks are designed with screw holes that are the same dimensions as standard case fans. So, if your case has a grill big enough for two fans, you can install a dual fan fan on it. If you are installing fans outside the chassis, make sure you have a plan for how you are going to connect them to the power source.
First you need to understand the type of attachment. There are two types: latches and screws. If it is a latch, pull back the two levers and remove it. When fastening in the form of a screw, you must use a screwdriver, carefully unscrew and remove the fan. As a rule, the processor cooling system consists of a fan and a heatsink and is a single collapsible unit.
Continuing with the practice of installing the largest parts, it's time to install the reservoir. A wide variety of tanks are at your disposal to suit your installation. They can be attached to the inside or outside of the chassis, to a heatsink, or to a drive cage. Regardless of your reservoir style, pay attention to the location of the filling port and plan how to access that port when it's time to fill your cooling system with liquid.
Some of the warmest temperatures in your system can be found on your graphics card, so there are definite benefits to water cooling. At the same time, it is also one of the most risky aspects. liquid cooling as you need to remove your existing graphics card cooler by directly exposing it to the processing cores.
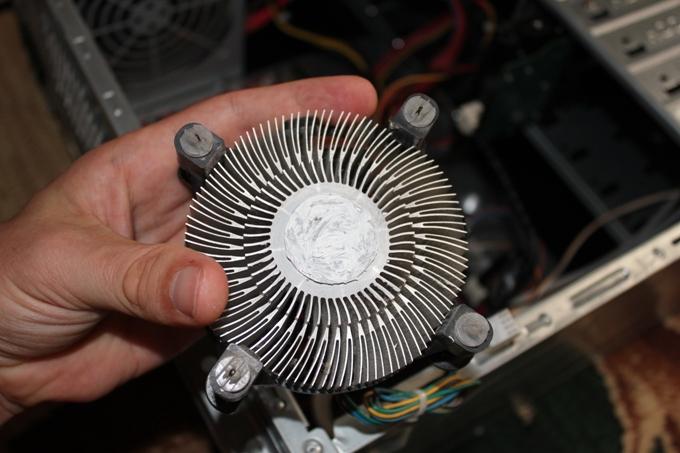
The heatsink exists to dissipate the heat generated by the processor. Over time, the radiator loses its properties due to dust accumulated on it and also needs to be removed and cleaned. Before removing the heatsink from the processor, you need to determine what type of mounting it is, they are of the following type:
Generally speaking, it will look something like this. Remove the built-in graphics card cooler by unscrewing it from the board or boards. Clean out the remaining thermal paste and reapply the paste or heat transfer fluid to the contact spots as shown on your instructions.
Attach the board or boards to the water block, being careful not to apply uneven pressure to the processors. If you don't, it can ruin your motherboard, which will ruin it. The pump should be very easy to install. Then complete your loop by connecting the pump outlet bus to the radiator and the inlet damper to the reservoir.
- on latches using a clamping bracket or pistons (the most common fastening);
- on hot melt glue (mostly found on inexpensive devices).
If the radiator is with a piston mount, then the process of removing it will not be difficult. It is necessary to squeeze the tendrils of the piston on the back of the board and press it, doing the same with all the latches, you will release the radiator. Next, we remove it and change it to a new one, or you can simply replace the thermal paste.
You don't want to dismantle half of your water cooling system to swap space on your hard drive. Now that your water cooling cycle is complete, it's time to add coolant. Give your system a final bump test, making sure each fittings are tightly connected and that all components are connected in one continuous loop. Make sure your system won't leak, and without plugging anything in, start filling the reservoir to the manufacturer's recommended level.
How to replace the connector or extend the wire on the cooler by soldering
Keep an eye on the rest of the water cooling system and be prepared with a towel in case anything leaks. When the reservoir is full of refrigerant, you can start the pump. You don't want to actually turn on your motherboard, so you have to trick the power supply to turn on the pump.
If the radiator is pressed with brackets, then here you will need a screwdriver. The main task here is to bend the bracket from the fastener hole. This procedure requires the use of physical force, but extreme caution must be exercised as a loose screwdriver may damage the device.
Removing the heatsink from the glue is a very difficult and dangerous operation, as you can easily damage both the processor and the board. The only way out- warm up the hot melt glue. But this should be done very carefully, because overheating can become fatal for the chipset.
Until nothing leaks, let the pump run for 10 minutes or so for the air bubbles to disappear. Slowly rock the case back and forth to let air trapped in water bodies or the radiator escape. When all air bubbles are exiting the liquid, you may need to add more liquid to the reservoir to reach the recommended level.
Install All-in-One Water Cooling Kit
These systems achieve cooling performance alongside a conventional water cooling unit, but save you the hassle of building them yourself or ever changing the liquid. They are more expensive than an air cooler, but significantly less than building your own water cooling system. And, unlike full-size water coolers, they are easy to install and don't take up much space in your case.
Now you have learned how to properly remove the processor from motherboard computer, and a fan with a heatsink.
Instructions
Unplug your computer from the electrical outlet. Disconnect from system unit all devices connected to it. Remove the cover of the system unit. It is secured with screws. Unscrew them. Some cases may also have latches. Now pay attention to exactly how the cooler is attached to the motherboard. There can be two options. In the first version, it can be screwed on the front of the motherboard with screws. In this case, in order to remove the cooler, you just need to unscrew four screws. Find a suitable screwdriver and remove these screws. After that, simply disconnect the cooler from the motherboard and remove it from the system unit.
Why install a processor cooler
Installation for this type of cooler is simple. You simply attach the radiator and fan to the exhaust grille on your chassis, which means the pump and reservoir are built into the radiator. Whether you're overclocking or just want your CPU to last as long as possible, it's important to keep an eye on your system's temperature. These two free programs help you do this.
Installing a new fan only takes a few minutes, but you must first remove the old one. Turn off the computer and disconnect all cables from the system, including power cords and peripherals. Some systems require you to remove the screw with a Phillips screwdriver or press down on the latch to slide off the side cover. Touch a bare metal part of the cabinet to discharge static electricity from your body.
In the second version, the cooler can be attached to the motherboard from the back. To unscrew the fasteners, you will first have to remove the motherboard from the system unit. Disconnect all power supply wires from the motherboard, including the power on and restart wire. Remove the four screws around the edges of the motherboard. Next, see if there are any more fastening screws on it. If you find them, unscrew them as well.
After unscrewing all the screws, carefully remove system board from the computer case. From the back of the motherboard, remove all screws that secure the cooler to it and detach it.
Carry out all the necessary operations with the cooler (cleaning, lubrication) and screw it back. After the cooler is connected, install the motherboard into the computer. Screw it to the wall of the computer case, and then connect the power wires, as well as the wires coming from the power supply. Do not rush to close the lid of the system unit. Plug in your computer and turn it on. Check the cooler operation. If everything works fine, shut down the computer and secure the system unit cover. Reconnect all previously disconnected devices.
The dust collected by the cooler that cools the computer's processor lasts for years, since usually no one is watching. Sooner or later, the cooler gets clogged with dirt so much that it can no longer cope with its task, and the processor starts to warm up. Sudden system reboots, freezes and brakes are all symptoms of processor overheating. In such a situation, it is necessary to remove the cooler and clean it from dirt.
Instructions
Unscrew the screws and remove the side case cover.
Depending on the specific design, the cooler together with the radiator is fastened either with a clip located on one of its sides, or with special locks, or with ordinary screws. Loosen the entire structure by pushing on the clips or unscrewing the corresponding screws.
Carefully lift and pull out the cooler and heatsink. Now they can be completely cleaned of dirt and accumulated perennial dust can be removed. When installing the structure back, do not forget to lubricate the processor and the bottom of the heatsink in contact with it with thermal grease to prevent overheating.
If you do not have thermal paste on hand, you can remove the cooler in another way. Quite often, the device of the cooler itself allows you to get to the fan. It is usually protected from above by a grill secured with four screws. By unscrewing these screws, the fan can be pulled out. Free space at the same time, it will be quite enough to clean without disconnecting the entire structure from the motherboard. For cleaning, you can use not only small brushes, but with sufficient accuracy, a vacuum cleaner with a small nozzle.
Related Videos
So, you have decided that the current cooling system installed on your computer does not cope with its tasks and you need to improve its performance. One of the most effective and budgetary ways to solve the problem is to establish additional corps coolers... This is what the conversation will be about today.
You will need
- - One or several case coolers;
- - Screwdriver;
- - Tools for creating holes in the metal case of the system unit - drill, round file;
- - Material to soften the vibration of the cooler (dense foam rubber, soft rubber, etc.);
- - Screws supplied with coolers.
Instructions
To begin with, you need to carefully look at your system unit and determine the places for installing coolers. To do this, you should pay attention to such parts of the case as the top cover, the bottom of the front panel, the side cover, the end of the system unit. Remember that the presence of certain holes depends on the design of the case. It is not always possible to find a place for a cooler in its upper and lower parts. The maximum effect can be achieved only if all the above-mentioned places for installing coolers are available. If you wish, you can make additional holes in the case yourself, or ask familiar craftsmen. As a last resort, you can always find an inexpensive version of the system unit with the required design.
Next, you need to determine in which parts of the case it is worth installing coolers for blowing out, and in which - for blowing. The best option is to install an equal number of coolers for blowing and blowing (but do not forget that there are cases that violate this rule). In order to determine where to put which cooler, we will designate the necessary conditions for creating a good cooling system: you should not direct cold air streams towards the heated one; you should first bring fresh air from the outside to the most heated elements of the computer hardware, and then bring the heated air outside. According to the specified conditions, the following option for installing coolers is offered - a fan for blowing is installed on the front panel, a fan for blowing in, in the upper part for blowing out, on the side for blowing in, and back for blowing out. This design allows fresh air to flow to all cooling areas and then efficiently expels it out of the chassis.
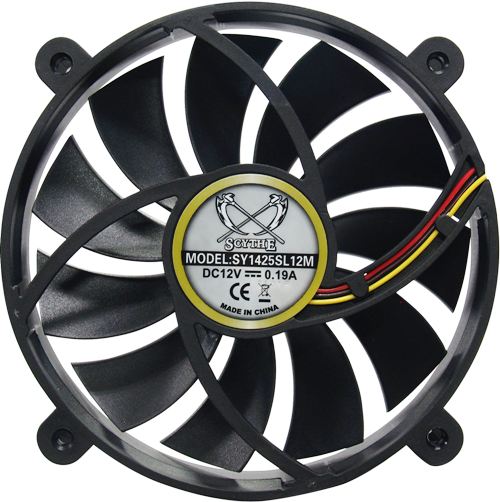
There are two main types of cooler rotor suspension - Sleeve bearing or Ball bearing. The fan can have one or two bearings, and sometimes they are combined different types... Fans with rolling bearings are considered the most reliable. For quiet and efficient operation, select coolers diameters 120 mm. They have a large effective area and usually operate at low revs, which significantly reduces the noise level they generate.
In order not to confuse in which direction the fan will blow - pay attention to the symbol for the direction of air flows, located on the side of the cooler. Usually there are two arrows drawn there - one indicates the direction of rotation of the blades, and the other - the direction of the air flow. When connecting, make sure that the power connectors used are fully compatible with the coolers being installed. When connecting the connectors, the applied effort should be minimal, otherwise you should think about the correct choice of connector.
After everything is installed, make a test run of the system. Occasionally
 How to download videos from Yandex Disk to iPhone: an easy way
 License Agreement for the terms of use of the Dr software
 Airyware Tuner - the best tuner in your smartphone Application for tuning guitar on Windows background