Beeline personal account management: detailed instructions. Beeline support contacts
Modern technologies are rapidly advancing and telecommunications companies (and Beeline among them) are among the first to use all technical innovations in their work. Of course, in such a situation, it is not easy for an ordinary user to understand the abundance of technical information on setting up and new services of the company. It's good when you have someone to turn to, but if there is no one nearby who could help, then sometimes the only thing you can do is write or call the Beeline technical support service.
Beeline technical support phone numbers
The fastest and easiest way to get answers to all your questions is to call Beeline technical support from your mobile. Competent specialists will promptly help you connect / disconnect services, change the tariff and set up the equipment. But Beeline is a big company and offers all sorts of services, so there are different support phone numbers for communication with different specialists.
We have already told you, and in most cases this will help you, however, you can use other phone numbers. It should be noted right away that calls to all of the following numbers in Russia are free, but 0611 can only be called from the Beeline phone and being in the coverage area of its network.
- Telephone support service for mobile subscribers: 0611, 8-800-700-0611 and + 7-495-797-27-27
- Beeline support center for USB modem users: 8-800-700-0080
- Technical support for Wi-Fi subscribers Beeline: 8-800-700-2111
- For questions related to home Internet, home phone and home TV Beeline call: 8-800-700-8000
How else to contact the Beeline support service?
If you do not have the time and desire to wait for the operator's response and wander through the voice menu, you can use one of the alternative methods of contacting the support service.
1) Leave a request for a call back from a technical support center consultant, an answer to a question by e-mail, or a chat with a specialist through the Beeline website. On any page of the site at the very top, on the right, there is a link "Ask a question" - click on it and select the desired item.
- In the "feedback" section, you can write your question outlining all the nuances in detail, and choose how it would be more convenient for you to receive an answer - you can enter your phone number and choose a time for the Beeline support specialist to call you when it would be convenient for you ... Or, you can enter your email address and a reply will be sent to you.
- In the section "chat with a specialist" you can write to the support service in real time, where the specialist will immediately answer, you can ask all your questions, and he will promptly answer. After the conversation, you can evaluate his work and save the correspondence to your computer.
2) Write your question by e-mail to the Beeline technical support address [email protected]... There are also separate addresses of support services for various services:
- For questions about mobile communications, mobile Internet or USB modem: [email protected].
- For questions about Wi-Fi Internet from Beeline: [email protected].
- For questions about home phone, internet or digital TV: [email protected].
3) Write your question to the SMS support center. To do this, write and send your question via SMS to 0611 - you will be answered within a few minutes.
In addition, you can always contact one of the many offices of the company - customer service and support consultants regularly undergo training and advanced training, and they will be happy to help you set up your phone, change the tariff plan, connect and disconnect services, in general, they will do everything to make you stay happy with Beeline.
1.Open the personal account of the cloud PBX Beeline Business. Go to section Rooms:
2. In the section Subscribers select the number to be used by the Telephone Operator and click on it:

3. In the section Services find and enable the option SIP account... Click the button Tune:

4. In the field Number of SIP lines set the value to 10. Thus, you can transfer 10 simultaneous incoming calls to the attendant. Click on the link Generate password... Copy the password from the field New password, it will be needed soon. Click the button Save.

5. If you opened this manual during Line and scenario settings, then copy in your personal account into the form fields PBX connections (SIP) such values:
- Copied in point # 4 password in field Password
- SIP User ID in field User
- Domain in field SIP server
- Authorization User ID copy no need
- SIP proxy in field SIP proxy
 If you are not studying now Line and script setup, then save the above parameters: you will need them when setting up a new line
 Connection of the "Secretary" line
Attention! Create a new user before connecting the line
There are several ways to connect the line Secretary to your PBX:
- Secretary if the caller did not dial the internal number in the voice menu or dialed the secretary's internal number
- An incoming call is transferred to Secretary, only if the caller has dialed the secretary's extension number in the voice menu
- All incoming calls immediately go to Secretary.
1. Go to the section Rooms:

3. Press the button Add button and choose 0 ... Mark the added button with an asterisk. Please select Transfer by PBX... Enter the extension number that you have configured for the Secretary line. Click the button Save:

Connection of the line "Protection against missed"
Attention! Create a new user before connecting the line. You cannot use the same user to connect different telephone attendant lines.
The Anti-Missed Line is needed so that a certain group of employees (for example, a sales department) does not miss a single incoming call. In the Beeline PBX, groups of employees (departments) are included in the Calling Group. The main scenario for using the "Protection against missed" line is as follows:
- an incoming call comes to the outgoing group
- no one from the group answers the call
- a call from the group after a certain timeout is transferred to the extension to which the Operator is connected
1. Go to the section Rooms:
2. In the section Services click on the required dial-up group:

3. In the field If the agent doesn't respond, go to the next one in ... set the value 3 :
4. Enable the option If the waiting time has exceeded ...... Specify the time in seconds after which the call will be transferred to the Telephone Operator. We recommend setting a value equal to the number of agents in List of agents multiplied by 10. For example, if you have 3 numbers in List of agents then specify 30 seconds.
5. Set the extension you have configured for the Anti-Missed Line. Click the button Save:

In this article we will consider setting up an Internet connection beeline / beeline ...
Configure Internet connection beeline / beeline for Windows 7
1. Click the button Start(in the lower left corner), select Control Panel... The Control Panel window will open, in the Network and Internet section, select the item.
2. Select item Setting up a new connection or network.
3. Please select Workplace connection... Click the button Further.

4. When asked how to connect, select. Click "Next. If you see a window asking you to Configure your Internet connection before proceeding, select the Delay Internet connection setup option.

5.
Internet address - enter tp.internet.beeline.ru
Destination Name - Enter Beeline
... Click the button Further.

6.
User - in this field Enter your login.
Password - and here you need enter your password.
Check the boxes for your convenience Display entered characters and Remember Password.
Click the button Create.

7. Connection is ready, press the button Close.

8. Select item Change adapter settings.

9. Find the connection you just created (Beeline), right click on it and select properties. In the tab General make sure the vpn server address is tp.internet.beeline.ru.

10. Go to the tab Options, uncheck opposite point Include Windows Logon Domain.

11. In the tab Safety choose VPN type - L2TP IPSec VPN
Data encryption- select optional
Allow the following protocols- Password verification protocol CHAP.
Click the button OK.

12. Double click on the connection (Beeline) with the left mouse button. Enter your username and password. Click the Connect button, after a few seconds you will connect to the Internet, after establishing the connection, the system will ask you to select the location of the connection - select \ "Public place \".

Configure Internet connection beeline / beeline for Windows Vista
1. Click the button Start and choose Settings → Control Panel.

2. The Control Panel will open in front of you, we need to find the Network and Internet section and click on the item View network status and tasks.

3. In order to create a vpn connection, click on the item Establishing a connection or network.

4. Select item Workplace connection and press the button Further.

5. Click on item Use my internet connection (VPN).

6. If you see a window asking you to Set up an Internet connection before continuing, select Postpone setting up your Internet connection.

7. In this window you need to enter the following data:
Internet address - tp.internet.beeline.ru
Destination name - Beeline
Check the box next to Do not connect now, only install to connect in the future.
Click the button Further.

8.
Enter your registration data:
User: in this field enter your login to access the Internet
Password: in this field you need to enter a password to access the Internet
For your convenience, check the boxes next to Show entered characters and Remember this password.
Click the button Create.

9. Connection created, click the button Close.

10. Select item Connect to the network, you will see a list with available connections. Please select Beeline and click on it right click, in the menu that appears, select Properties.

11. The connection properties will open in front of you. In the tab Are common make sure the vpn server address is tp.internet.beeline.ru.

12. Go to the tab Parameters place the checkboxes as shown in the figure.

13. In the tab Safety arrange the items as indicated in the figure and be sure to uncheck the box next to Encryption required.

14.
Now you need to go to the tab Net.
VPN type select L2TP IPsec VPN.
Uncheck the box next to the item Internet Protocol Version 6 (TCP / IPv6)
Click the button OK.

15. The most difficult actions were left behind. Select a network to connect Beeline and press the button Connect... Enter your username and password and click the button To plug.

16. After successful connection, you will see the following window. Click the button Close.

17. Windows may ask you to select a location for your connection. Please select Public place.

18. Congratulations, you have successfully configured the connection to the Beeline network, click the button Close... Now you can open your browser and start conquering the vastness of the Internet!

Lyrics (1): Any self-respecting company, taking care of its reputation, often pays for it at least by taking on certain obligations voluntarily before the client, and unquestioningly fulfills them. Unfortunately, the Beeline company is the master of its word only in the sense that having given its word regarding the availability of its services, it then refuses to provide them, as they say: "I gave my word, I took my word." This approach is usually typical for small fraudsters and self-respecting entities engaged in unfair competition, in relation to which ordinary homeless people look like respectable men ...
Specifics (2): on the official website of the "Beeline" company for everyone, with exemptions provided for by specific tariffs, there is a service "SMS without borders", costing 1 ruble / 1 SMS with a free connection. Being a reasonable person, I decided to connect this service to my son on the phone, having previously called and agreed on August 16, 2017 with Beeline, the possibility of connecting this service. The operator girl nicely informed me that the service was available to me and sent a phone to connect it, typing which I was told: "connection is impossible", in fact go ... to ... Calling again to Beeline and contacting Ksenia, the latter told me that my question will be resolved in the near future, then sending me a message that on 17.08.2017 my question will be finally closed. But 17.08 passed, 18.08 came, and "Bilan" was silent, thus showing how he really relates to his obligations, his official statements and the client in general. By dialing 18.08, at approximately 19.00 to the Bilan support service, the auto-informant informed me that my application was due to be closed tomorrow, and on August 19, 2017, I received a “nice” SMS message on my phone: “Dear Client! Your application has been processed and closed , the service "SMS without borders" is not available for connection, the information on the site will be corrected, thank you for the information. With care of you, your "Beeline".
Conclusion (3): A significant part of my time was spent on connecting a non-connected service, which, on the basis of official information from Beeline, was declared both on the company's website and was confirmed to me by Beeline employees, that is, by the gop-company itself ".
Summary (4): A company whose official statements are worthless has the right to claim exclusively the status of "Sharashkin's office", the foundation of which is formed by banal Sharikovs and petty fraudsters engaged in unfair competition and not responsible for anything ... In the next month, two , all the mobile communications of my family with the preservation of numbers will be transferred to the services of another mobile operator, fortunately to do this is simpler and simpler. Avoid windbags and scammers.
Internet not working or having problems with settings? Or do you want to connect to the "Home Internet" from Beeline? To solve all questions and problems, the Beeline customer support service works. You can find contact information and a link to enter your Personal Account in this section.
Single free telephone of the support service for subscribers Home Internet "Beeline":
The support service number "Home Internet Beeline" works for Beeline customers from all regions of Russia. All calls to 8 800 700 8000 from mobile and landline telephones registered in the Russian Federation are free of charge for the calling party. The technical support service works around the clock and without interruptions. to Beeline?
Beeline mobile subscribers.
To receive personal information from technical support staff, change the tariff plan or connect additional paid services, please be ready to provide your passport data and a code word.
"Personal account" of the Beeline subscriber
You can perform most operations on your account and pay for the services of "Home Internet Beeline" through your personal Personal account... Using the service management system, you no longer have to call the support service and wait for a connection with a specialist to activate services, change the tariff or help with settings. All this can be done in just a couple of clicks.
Login to the Personal Account "Beeline Internet"You can find the login and password from your personal account in the contract for the provision of Internet access services. In case of problems while working in the "Personal Account" or if you cannot enter the service management system, call the free technical support number "Home Internet Beeline" 8 800 700 8000 (for all regions of Russia).
Settings and online support
After purchasing new equipment (router, modem or other device), you may need to configure it to work correctly in the Beeline network. You can follow the instructions to set up your home Internet yourself. This section contains tips for solving most of the common problems that some subscribers of Beeline Home Internet have from time to time.
If you do not have the necessary experience to configure the equipment yourself or you have problems that you cannot solve using the help section, you can contact the Beeline technical support staff:
- Toll free 8 800 700 8000
- By writing an email
- Through the feedback form on the official website "Home Beeline"
- On the official customer support forum Home Beeline
Specialists of "Home Beeline" will try to solve your problem as soon as possible and answer any questions about services and tariffs for home Internet.
Regions in which "Home Beeline" operates
To connect to the "Home Internet Beeline" network, you can leave a request and check the connection of your home on the official website of the company.
In this article we will consider setting up a beeline / beeline internet connection ... Set up a beeline / beeline internet connection for Windows 7 1. Click the Start button (in the lower left corner), select ...
Transcript
2 Attention! Please read the safety information before using your smartphone. The operation of the device is guaranteed only when using a Beeline SIM card. 2
3 Contents Disclaimer ... 4 Safety Information ... 7 Getting to Know Your Phone ... 9 Getting Started Smartphone Home Screen Touch Screen Control Turning Your Smartphone On and Off Standby Mode Control and Screen Unlocking Notification Panel Android Keyboard Making a Call Sending Messages Internet Taking photos and videos Installed applications Third-party software Personal information and their security Rechargeable battery Charger Accessories Package Specifications Operating conditions Care and maintenance Environmental protection Legal information Certification information Subscriber phone number
4 Limitation of liability OJSC VimpelCom shall not be liable for loss of profit, indirect or actual losses determined by the special circumstances of the case, incidental or consequential losses arising from the use or in connection with the use of the device, regardless of whether OJSC VimpelCom was »Was informed, knew or should have known about the possibility of such losses. The user must refer to the enclosed warranty card for complete information on the terms of warranty and service. THIS MANUAL IS PROVIDED ON AN "AS IS" FORMAT. UNLESS OTHERWISE REQUIRED BY APPLICABLE LAW, HUAWEI TECHNOLOGIES CO., LTD. and OJSC VYMPELKOM DO NOT GIVE ANY EXPRESS OR IMPLIED WARRANTY, INCLUDING, ALSO, AN IMPRINT WARRANTY OF MERCHANTABILITY AND FITNESS FOR A PARTICULAR PURPOSE AS TO ACCURACY, MERCHANTABILITY. IN ALL CASES STATED BY APPLICABLE LAW, HUAWEI TECHNOLOGIES CO., LTD. AND OJSC VIMPELKOM IN NO EVENT SHALL BE RESPONSIBLE FOR ACTUAL, INCIDENTAL, CONSEQUENTIAL OR PREDICTED CONSEQUENTIAL DAMAGES, 4
5 AS WELL AS LOST PROFITS, LOSS OF BUSINESS OPPORTUNITIES, LOSS OF INCOME, LOSS OF INFORMATION, LOSS OF REPUTATION OR LOSS OF EXPECTED SAVINGS. THE MAXIMUM LIABILITY (THIS LIMITATION SHALL NOT APPLY TO LIABILITY FOR PERSONAL INJURY TO THE EXTENT APPLICABLE UNDER CURRENT LEGISLATION) HUAWEI TECHNOLOGIES CO., LTD., And "VimpelCom" OJSC ARISING OUT OF THE USE OF THIS PRODUCT DESCRIBED HEREIN SHALL BE LIMITED TO THE AMOUNT PAID TO BY CLIENTS WHEN PURCHASING THIS DEVICE. Note: All images and icons used in this manual are schematic illustrations and are for illustrative purposes only. If they do not match those shown on your model of device, please refer to the functions of the specific device. Some of the functions of the device and its accessories described in this manual depend on the installed software, performance and local network settings, and may not be connected or limited by local network operators or network service providers. Therefore, the specifications in this manual may differ from those of the device or accessories you purchased. 5
6 Huawei Technologies Co., Ltd. and OJSC VimpelCom reserve the right to change the information or characteristics specified in this manual without prior notice or obligation. Attention! The information in this manual is subject to change without notice. Despite the measures taken to ensure the accuracy of the content of this document, all information, statements and recommendations contained therein do not constitute any warranty, express or implied. For the correct and safe use of your device, carefully read the safety information in this manual. 6
7 Safety information This section contains important information on the operation and safe use of your device. Please read this section carefully before you start. 7

9 Getting to know your phone This section describes the basic functions of your phone: 9
10 Power button Hold down the key to turn on the smartphone, and when it is on to select silent, airplane or turn off the device. Short press in active mode to switch the smartphone to standby mode. Short press in standby mode to exit standby mode. Menu button Press to display a list of additional commands on the current screen. Home button Press to return to the home screen from any application or screen. Hold down the key to view recently opened applications. Return button Press to return to the previous screen. Volume control button Press the upper part of the key to increase the volume, and the lower part of the key to decrease the volume. 10
11 Getting Started Follow the steps in the illustrations below to insert the SIM card, battery and microsd card. Charge the battery fully before using the phone for the first time. eleven
12 Note: To charge the battery, connect the charger to a standard household AC outlet (220 V, 50 Hz). If the smartphone is turned on, the battery charge status will be displayed on its screen. Unplug the charger after fully charging the battery. 12
13 Smartphone home screen 1. The notification panel is used to display notifications about various events and the status of the smartphone. 2. Desktop (home screen) is used to place widgets, shortcuts, folders, icons of frequently used applications and documents. thirteen
14 3. The toolbar contains the following elements: making calls and accessing the call log; access to the list of contacts; access to the main menu; transition to work with SMS and MMS; a browser to view web pages on the Internet. Touch screen control To control your smartphone using the touch screen, you can do the following: 14
15 1. single press is used to enter text from the touch keyboard, select on-screen items such as program icons, menu items, soft buttons, etc .; 2. long press and hold is used to open the parameters of an item, item or input line; 3. Move is used to move around menus, options, text, images and desktops; touch your finger to the screen and, without lifting your finger, slide in the desired direction; 4. dragging is used to move an element across the screen; touch the desired item with your finger, hold it for some time and, without lifting your finger from the screen, drag to the desired place or in the desired direction; 5. pinch is used to change the scale of items on the screen; using a pinch, you can, for example, reduce a photo to view it in its entirety; to pinch, touch the screen with two fingers and, without lifting them from the screen, bring them together; 6. reverse pinch is used to change the scale of items on the screen; using a reverse pinch, you can, for example, enlarge an area of a web page in your browser to read small text; To perform a reverse pinch, touch the screen with two fingers and, without lifting them from the screen, spread them apart. 15
16 Turning your smartphone on and off Check the presence of a SIM card in your smartphone and make sure the battery is charged. Hold down the power key to turn on your smartphone. To turn off your smartphone, hold down the Power key to display a list of commands. Select "Switch off" and confirm your choice by pressing the "OK" button. Standby mode control and unlocking the screen The device consumes less power in standby mode. The device switches to standby mode automatically after a certain period of inactivity, which can be set in the smartphone settings. To manually put your smartphone into standby mode, press the power key. To exit standby mode: 1. Press the Power key to turn on the device screen. 2. Drag an icon to unlock the screen or open the desired application. sixteen
17 Note: If you have locked your smartphone using a pattern, screen unlock code or password, you will need to enter it to unlock. 17


18 Notification panel To open the notification panel, drag it down. Essential Smartphone Status Indicators 18

19 Main types of notifications 19

20 Keyboard The keyboard will appear on the screen automatically after pressing the text input field. 1. Press to enter capital letters. 2. Tap to switch between keyboard layouts. 3. Tap to switch between input languages. 4. Tap to customize the input method and switch between optional keyboards. twenty
21 Making a call Press to open the dial pad. Enter a phone number or press and select a person from your contacts list. You can also choose a phone number in the text of the message, email. letters or on a web page. To answer an incoming call, drag the icon to the icon. Note: In order to configure a convenient interval for turning off the screen in call mode, you need to do the following: Press, then press the touch button "Menu" and go to Settings-Voice call settings-screen off; the default is 5 seconds. 21
22 Attention! Emergency calls! The ability to make emergency calls depends on the quality of the cellular service, the operator's or service provider's policies, local laws and regulations. Do not rely solely on your device to make emergency calls. Sending messages Tap to open the Messaging application. When you add a photo or audio file, the text message is converted into a multimedia message. You can also save MMS message attachments. 22
23 Internet To view web pages, click on the icon. At the top of the browser window there is a line for entering the address of a web page. Click on it and enter the address of the web page you are interested in, then click the button. The requested page will be loaded. 23
24 Take photos and videos Tap to open the Camera app. In photo mode, select an object on the camera screen to focus on. Click to take a photo. In video recording mode, select a subject and press to start recording. 24

25 Installed applications A large number of applications are already installed in the Beeline Smart smartphone. To access them, press the main menu key. 25

26 26

27 27
28 Third Party Software Huawei Technologies Co., Ltd. and OJSC VimpelCom are not the copyright holders of third-party software and applications that come with this device. Huawei Technologies Co., Ltd. and OJSC VimpelCom do not provide any guarantees for third-party software and applications. Huawei Technologies Co., Ltd. and OJSC VimpelCom do not provide support to customers using third-party software and applications and are not responsible for the functions of such software and applications. Service for third party software may be interrupted or discontinued at any time. Huawei Technologies Co., Ltd. and OJSC VimpelCom cannot guarantee that content and services of third parties will be supported during the period of their provision. Third party service providers provide content and services through a network or transmission channel not controlled by Huawei Technologies Co., Ltd. and OJSC VimpelCom to the full extent permitted by applicable law, Huawei Technologies Co., Ltd. and OJSC VimpelCom declare that the companies do not reimburse and are not responsible for the services provided by third-party service providers, as well as for the suspension or termination of the provision of third-party content or services. Huawei Technologies Co., Ltd. and VimpelCom OJSC are not responsible for legality, 28
29 quality and any other aspect of the software installed on the device, or for downloading and transmitting third-party content (text, images, videos or software). Customers fully assume the risks, including the risks of software incompatibility with this device, which arise when installing software or downloading third-party content. This device uses the open source Android operating system. Huawei Technologies Co., Ltd. and OJSC VimpelCom made the necessary changes to the system. Therefore, this device may not support all the functions supported by the standard Android operating system, or it may be incompatible with third-party software. Huawei Technologies Co., Ltd. and OJSC VimpelCom do not bear any responsibility in the event of any of these situations. Personal data and its security Use of certain functions or third-party applications may result in the loss of your personal data or the fact that this data becomes available to others. We recommend that you take a number of appropriate measures to protect your personal and confidential information. 29
30 It is recommended to lock the screen and create a password or pattern to unlock it. Periodically back up personal data stored on your SIM / USIM card, memory card, or device memory. If you plan to use a different device, make sure that all of your personal data has been moved or deleted from your old device. If you are worried about viruses when you receive messages or letters from an unknown recipient, you can delete them without opening them. If you use your device to surf the Internet, avoid visiting sites that could pose a security risk to your tablet to prevent theft of your personal information. If you use services such as Wi-Fi or Bluetooth, set passwords for these services to prevent unauthorized access. If these services have not been used for some time, it is recommended to disable them. Install and regularly update antivirus software, and check your device for viruses. Make sure third party apps are from trusted sources. We recommend installing software updates 30
31 for your smartphone, as well as official updates for installed applications. Some applications require location data transmission. As a result, third parties may find your location information. Your device may provide diagnostic information for third-party applications. Third party vendors use this information to improve their products and services. Battery Pack Do not allow the battery pack to come into contact with conductive materials such as keys, jewelry, and other metal objects. This can cause a short circuit, injury and burns. Do not expose the battery to excessive heat or direct sunlight. Do not place the battery near heat sources such as a microwave oven, oven, or radiator. Do not dispose of used batteries in a fire. The battery may explode if overheated. Don't try on your own 31
32 Modify or refurbish the battery. Do not insert foreign objects into the battery, or immerse it in water or other liquids. This can lead to fire, explosion and other dangerous consequences. In the event of a battery leak, do not allow electrolyte to come in contact with the skin or eyes. If electrolyte gets on your skin or eyes, rinse immediately with clean water and seek medical attention as soon as possible. If the battery is deformed, discolored, or overheated while charging or storing, stop using the device immediately and remove the battery. Continued use of a damaged battery may result in electrolyte leakage, fire or explosion. Do not allow children or pets to chew or suck on the battery. It could cause damage or explosion. Do not deform or puncture the battery. Do not drop the device or battery. The device or battery may be damaged if dropped onto a hard surface. It may 32
33 cause a short circuit or overheating. Replace the battery if talk time and standby time are significantly reduced. Dispose of used batteries according to local regulations. Charger For devices plugged into the mains, the socket must be near the device and easily accessible. When the charger is not in use, disconnect it from the power supply and this device. Do not drop the charger or hit it. Do not use a charger with a damaged cable. This could result in electric shock, short circuit, or fire. Do not touch the power cord with wet hands. Do not pull on the power cord when unplugging the charger. This could result in a short circuit, breakdown, or electric shock. If the charger has been spilled with water or other liquids, or used in an elevated room 33
34 humidity, contact an authorized service center to check the device. Make sure the charger meets the requirements of clause 2.5 of the IEC / EN standard and has been tested and certified in accordance with national or regional standards. Connect this unit only to products bearing the USB-IF label or devices that meet the requirements of the USB-IF program. Accessories Use only original accessories approved for use with this model by the device manufacturer. Failure to do so could void your warranty, violate local codes and ordinances, and cause other dangerous consequences. Check the place where you purchased this device for the availability of approved accessories. Package Contents Smartphone Beeline Smart Rechargeable battery Charger USB cable Stereo headset User manual Warranty card 34
35 Specifications 35
36 1. The speeds shown are available in UMTS / HSPA + mode and are theoretical maximum. Real speeds depend on the terrain, the density of the surrounding buildings, the congestion of the cellular operator's network, the parameters of the tariff plan and other external factors. 2. The amount of memory installed in the device is indicated. The amount of memory available to the user may be less, since part of the memory is used for the operation of the operating system and the placement of system files. The amount of memory available to the user may vary depending on the software configuration of the device. 36
37 37
38 38
39 Protecting the environment Do not dispose of your device and its accessories (if any), such as power adapter, headset, or rechargeable battery, with general household waste. Please dispose of your device and its accessories in accordance with local laws and regulations. At the end of their useful life, the device and its accessories must be handed over to a certified collection point for recycling or proper disposal. 39
40 Legal Information Copyright Huawei Technologies Co., Ltd All Rights Reserved. Trademarks, and are trademarks of Huawei Technologies Co., Ltd. Android is a trademark of Google Inc. The Bluetooth word mark and logos are registered trademarks owned by the Bluetooth SIG, Inc. Huawei Technologies Co., Ltd. uses these trademarks under license. Other trademarks, product, service, and company names mentioned in this manual belong to their respective owners. The Beeline Smart smartphone was produced for OJSC VimpelCom by Huawei Technologies Co., Ltd. Reproduction, transmission or distribution in any form of this document or any part thereof without the prior written consent of Huawei Technologies Co., Ltd. and OJSC VimpelCom are prohibited. The Beeline trademark and the Beeline logo are trademarks of OJSC VimpelCom. The logo is a trademark of the SD Card Association. 40

41 Certification information Subscriber radio station model Beeline Smart manufactured by Huawei Technologies Co., Ltd. complies with RF standards. 41
42 Produced by order of OJSC VimpelCom by Huawei Technologies Co., Ltd. Address: PRC, Shenzhen, Longgang, Bantian, Huawei Industrial Zone Tel: Website: Certification Information (SAR) This device meets the exposure limits for radio frequency energy. This device is a low power radio transceiver. This device has been designed to comply with international directives regarding exposure to radio waves. These directives were developed by the independent research organization International Commission on Non-Ionizing Radiation Protection (ICNIRP) and contain acceptable limits for safe exposure of humans, regardless of age and health status. Specific Absorption Rate (SAR) is used to determine the level of radio frequency energy emitted from wireless devices. The SAR value is determined under laboratory conditions with the highest certified transmit power. The actual SAR of the device while operating may be well below. 42
43 This is because the device is designed to use the minimum power required to establish a network connection. The SAR limit in Europe is 2.0 W / kg averaged over 10 grams of tissue. The highest SAR value for this device is within the specified limit. The highest SAR value reported for this device type when tested at the ear is W / kg, and when properly worn on the body, W / kg. Import and Export Regulations Customer must comply with applicable import or export rules and regulations and obtain all necessary permits and licenses to export, re-export or import the device described in this manual, including software and technical data. Telephone subscriber service from a mobile phone "Beeline" from a landline phone. 43
Getting to Know Your Phone English Thank you for choosing the HUAWEI Y5c HUAWEI Y541-U02 (hereinafter referred to as "Phone"). Read the basic information first. Press and hold
Y600 Quick Start Guide Dual SIM Your mobile phone supports dual SIM, which significantly reduces power consumption and extends the standby time.
English Additional Information Thank you for choosing HUAWEI P8 lite ALE-L21 (hereinafter referred to as the "Device")! Read the Quick Start Guide included in the package
Quick Start Guide Getting to Know Your Phone Thank you for choosing the HUAWEI honor 4X Che2-L11 subscriber terminal (hereinafter referred to as the "Device")! Familiarize yourself with the basic functions before you start
ZTE Blade Q Lux Smartphone Quick Start Guide 1 LEGAL NOTICE Copyright 2015 ZTE Corporation All rights reserved. No part of this publication may be extracted, reproduced,
HUAWEI MediaPad X1 7.0 4G Quick Start Guide Thank you for choosing the HUAWEI MediaPad X1 7.0 4G Tablet. With MediaPad X1 7.0 4G, you can: Browse the Internet Make calls
Quick Start Guide Thank you for choosing the HUAWEI MediaPad X1 7.0. With MediaPad X1 7.0 you can: Browse the Internet Make calls Take photos and videos Play
Getting to know your phone English Thank you for choosing a Huawei smartphone! Familiarize yourself with the basic functions of your new device before you start. Press and hold the power button to turn on
Quick guide Getting to know your phone Thank you for choosing ERGO SmartTab. First, a few words about basic functions: To turn on your phone, press and hold the power button. After
Dual SIM Your mobile phone supports two SIM cards, which significantly reduces power consumption and extends the phone standby time. Please note the following restrictions:
3C Lite Quick Start Guide Dual SIM Your mobile phone supports dual SIM cards, which significantly reduces power consumption and extends the standby time.
G700 Quick Start Guide Dual SIM active in standby mode Your phone supports dual SIM active in standby mode, which significantly reduces power consumption and increases time
Y6 Pro Quick Start Guide Getting to know your phone Before you start, familiarize yourself with the basic functions of your new device. Press and hold the power button to turn on or
HUAWEI Y330 Quick Start Guide Getting to Know Your Phone Thank you for choosing the HUAWEI Ascend Y330 smartphone. Please read the information below before starting. Power button
Y530 Quick Start Guide Getting to know your phone Thank you for choosing a HUAWEI smartphone. First, a few words about basic functions. Press and hold the power button to turn on your phone.
What's in your mobile phone package 1 Your phone package includes: Mobile phone Battery Charger USB cable Headset User manual Safety information
Benefit M1S ARK Phone Quick Start Guide 1 1. Your phone 1. Keys and connectors 2 Power key Hold down to select phone modes: silent, airplane, or off.
GR3 Quick Start Guide Getting to know your phone Before you start, familiarize yourself with the basic functions of your new device. Press and hold the power button to turn on or off
Quick Start Guide English For More Information Visit http://consumer.huawei.com/en/ to download the user guide for your product, see answers to frequently
ARK Benefit M1 Phone Quick Start Guide 02/07/2014 1 Safety Information Do not use your device at petrol stations Do not use your device while driving
Y625 Quick Start Guide Dual SIM Your mobile phone supports two SIM cards, which significantly reduces power consumption and extends the standby time.
Getting to Know Your Phone Thank you for choosing a Huawei smartphone! Familiarize yourself with the basic functions of your new device before you start. Press and hold the power button to turn on the device.
Y520 Quick Start Guide Supports 2 SIM cards in standby mode Your phone supports 2 SIM cards in standby mode, which significantly reduces power consumption and prolongs operation
RugGear RG129 Quick Start Guide Read and save these instructions. 11 This user manual is based on the default settings in the mobile phone. For uploading, downloading
G525 Quick Start Guide Supports Dual SIM Standby Your phone supports dual SIM standby simultaneously, which reduces power consumption
HUAWEI MediaPad T1 7.0 3G Quick Start Guide 1 Introducing the HUAWEI MediaPad T1 7.0 3G Thank you for choosing the HUAWEI MediaPad T1 7.0 3G Tablet T1-701u (hereinafter referred to as
4C Pro Quick Start Guide Getting to Know Your Phone Before you start, familiarize yourself with the basic functions of your new device. Press and hold the power button to turn on or
HUAWEI Y330 Quick Start Guide Dual SIM Standby Your phone supports dual SIM standby. Can't use two SIM cards at the same time
Quick Start Guide Quick Start Guide Quick Start Guide English Getting Acquainted with Your Device Before you start, familiarize yourself with the basic functions of your new device. To
Y6 Quick start guide For more information Read the quick start guide that came with your device. Please visit the website http://consumer.huawei.com/en/ to
HUAWEI MediaPad T1 10 4G Quick Start Guide 1 Introducing the HUAWEI MediaPad T1 10 Thank you for choosing HUAWEI MediaPad T1 10. Press and hold the Power button to turn on / off
4G Quick Start Guide 1 Help System Thank you for choosing the HUAWEI MediaPad 10 Link (hereafter HUAWEI MediaPad). For more information download the Guide
G6 LTE Quick Start Guide Getting to Know Your Phone Thank you for choosing a HUAWEI smartphone. First, a few words about basic functions. Press and hold the power button to turn on your phone.
Honor 3C Quick Start Guide Dual SIM Standby Your phone supports dual SIM standby. It is not possible to use two SIM cards at the same time for
User manual for Xiaomi Redmi 7 smartphone for Rumikom online store customers Thank you for choosing Redmi 7 To turn on the device, press and hold the power button. Follow the instructions
Quick start guide For more information Read the quick start guide that came with your device. Please visit the website http://consumer.huawei.com/en/ to download
ZTE Geek Quick Start Guide 1 LEGAL NOTICE Copyright 2013 ZTE Corporation. All rights reserved. No part of this publication can be extracted, reproduced, translated.
Quick Start Guide Getting to Know Your Phone Thank you for choosing a Huawei smartphone! Familiarize yourself with the basic functions of your new device before you start. Press and hold the button
HUAWEI G6 Quick Start Guide Getting to Know Your Phone Thank you for choosing the HUAWEI Ascend G6. Please read the information below before starting. Microusb port Front
861F 4G Wi-Fi Router 300 You Know What You Can! www.mts.ru You know you can! Controls 1 2 3 4 5 Power button Display Micro USB input WPS button Reset button 4 2 3 1 5 1 Display indicators
Honor 3X Quick Start Guide Dual SIM Standby Your phone supports dual SIM standby. It is not possible to use two SIM cards at the same time for
Portable Charger AP007 User Manual Introducing the Portable Charger AP007 The Portable Charger AP007 (hereinafter referred to as "Charger AP007") is
User manual for Xiaomi Mi Mix 3 smartphone for Rumikom online store customers Thank you for choosing Mi MIX 3 Press the power button for a few seconds to turn on your smartphone. Further
ARK Impulse P1 Smartphone Quick Start Guide 1 1. Your Smartphone 1. Keys and Connectors Power Key Hold to turn off or restart the device, select Sound Profile, and more
Quick Start Guide Appearance 2 3 5 4 Battery indicator Solid green: The battery is charged. Flashing green: The battery is charging. Lights up red: The battery is exhausted. Power button Press and hold
Quick Start Guide English Additional Information Read the Quick Start Guide that came with your device. Visit the website http://www.hihonor.com to download the manual
Wireless headset bb-mobile User manual model: micron-3 Introduction 3 1. Getting started 4 1.1. Delivery set 4 1.2. Appearance 5 1.3. Control elements 6 1.4. Turn on / off
EMUI 4.0 User Guide 1 About this document ... 1 2 Getting started ... 2 Locking and unlocking the screen ... 2 Notifications and status icons ... 2 Buttons ... 3 Home screen tips ...
P8 lite More information Read the quick start guide that came with your device. Please visit http://consumer.huawei.com/by/ to download the user manual
P7 Quick Start Guide Getting to Know Your Phone Thank you for choosing the HUAWEI Ascend P7 smartphone. Please read the information below before starting. Press the power button,
USER MANUAL Lunas.TV-1 FTV1S00101 lunas.tv EN GETTING STARTED WITH THE DEVICE Thank you for choosing the Lunas.TV-1 portable mobile digital terrestrial television receiver (hereinafter referred to as the “Device”)!
Safety, Regulatory, and Legal Information Safety Precautions This document contains important information about the safe use of mobile devices. Some information is not relevant
Quick start guide Getting to know your phone Before you start, familiarize yourself with the basic functions of your new device. Press and hold the power button to turn on or off
Contents 1. Note 2. Components 3. Device appearance 4. Start and stop 5. Desktop 6. Buttons 7. System settings 8. HDMI 9. Install, uninstall and launch applications
User Guide 2 Legal Notice 2011 Google Inc. All rights reserved. Google, Google stylized logo, Android, Android stylized logo, Nexus, Nexus stylized logo, Nexus
1 2 1 4-way navigation key In standby mode, access to preset menu items; in menu mode, switch between menu items 2 Volume key In standby mode, to adjust the volume
G620S Quick Start Guide Getting to Know Your Phone Thank you for choosing the HUAWEI Ascend G620S smartphone. Please read the information below before starting. Press the power button,
MOBILE INTERNET DEVICE idx9 3G 3G QUICK START GUIDE Thank you for choosing a Digma product. Before using this device, please read the manual carefully.
HUAWEI MediaPad T1 8.0 4G Quick Start Guide 1 Introducing the HUAWEI MediaPad T1 8.0 4G Thank you for choosing the HUAWEI MediaPad T1 8.0 4G. Press and hold the power button to turn on,
User manual Dear user, Thank you for choosing this dual SIM smartphone. For correct operation of the device, please read the manual
Quick Start Guide Getting to Know Your Phone Thank you for choosing the Honor 6. Please read the information below before you start. Press the power button to make
Warning Before using your smartphone, please read the safety information. The operation of the device is guaranteed only when using a Beeline SIM card. 1 Contents
(Click on the image to enlarge)
1. Beeline TV set-top box TV remote control with decoding of buttons. It is useful for subscribers who are looking for information and want to set up Beeline TV. I'll make a reservation right away, this manual (manual) was written for those who first picked up the remote control from the Motorola console
2.
To see which package is currently connected, change the package of Beeline channels or add additional channel packages, click the button Menu, then with the key To the right Down scroll to Channel packages and press the button OK.  You can see the available channel packages on the screen, navigating with the buttons Up down according to the menu, select the channel package you are interested in and press the button OK... Now you can view information about the package or connect the required channel package by selecting it and pressing the button OK.

3. Viewing the account status of Beeline TV. In order to see the state of your personal account, you need to press the button Menu, then with the key To the right follow to the position "", then with the key Down scroll to "Account balance"

Next, select with the keys Up down"Account balance" and click OK button. If you are connected + to, then the account status will be displayed as a single balance, for example, like mine. Here you can pay with a VISA card directly through the attachment or see the personal account number and pay in any convenient way.

4. Interactive services Beeline TV. This is not a simple cable TV, it is an interactive digital TV. It has Yandex weather, exchange rates, exact date and time; watching video from Rutube; social networks Facebook, Twitter, Vkontakte, Odnoklassniki; sea battle game; sports news from Rambler.
All this can be used with the remote control directly on your TV screen. Push Menu and the key To the right to the position "Interactive". Select the service you need with the keys Up down and press OK.


5. Recording of TV programs. There are several ways to record programs. For example, simply by clicking the button Recording on the remote control while the program is broadcast. In this case, the program will be recorded from the very beginning, provided that you watch it first and did not switch the channel while watching, otherwise from the moment you press the key Recording... This was the first way.
You can also schedule a recording of a TV show, which will be tomorrow or in a week (up to two weeks in advance). You can also schedule a cycle of TV programs, suppose recording a series, each episode of which will be recorded automatically. For example, "Kvartirny Vopros" on NTV, will be recorded on the hard drive of the Beeline set-top box every Sunday at 12 noon, regardless of whether you are watching another channel or even your TV has been turned off.
6. Scheduling the recording. To schedule a recording, you need to enter the menu by pressing the button Menu, scroll with the key To the right to point Recording and scroll with the key Down to the item "Configure recording". Push OK and start planning the recording of the program you need using the navigation buttons (Up, Down, Right, Left)  Choose navigation buttons desired menu item and press OK
  Using the same principle, select the desired gear and program the entry with the key OK. If you did everything correctly, the inscription "Recording is scheduled" will appear

7. Changing the recording parameters. To cancel the recording or edit the recording parameters, enter the "Scheduled" menu  Find a scheduled recording.
the entry you want to delete or edit with H aviation buttons and select it with the button OK  Now you can delete a scheduled recording, adjust the recording parameters, record everything (meaning all programs with this name that will be broadcast in the future, for example, either record one episode of a series or record all episodes)

8. Viewing recorded TV programs. Go to the menu, use the navigation keys to select "Watch recordings"  Select the desired entry and press OK

9. Channel settings. With Beeline TV, you can tune the channels you need in the desired sequence. Go to the menu and select "Settings" 
Tune channels Mark the desired channels with Navigation keys and 
click OK on the item "Save", now you can make sure that when scrolling through the channels are displayed in the order you need, for this select the item "Arrange"  Use the navigation keys to move through the channel list and
click OK on the arrow indicating the direction where you want to move this channel.


10. TV program is right in the menu of your TV, you don't need to buy it at the kiosk, you don't need to search the Internet. Go to the set-top box menu and select "TV program"  A description of the program can be viewed directly from the TV program.
(movie), set up recording. To do this, move through the menu Navigation keys, select the desired gear with the key OK  Here you can see
information about actors, description, customize recording.

11. Prefix settings. The settings menu allows you to customize the aspect ratio for your TV, customize the soundtrack for navigating through the menu, adjust the audio transmission format, select the style of the TV program, and much more. Those who have reached this point of the article will figure out the settings for a couple of times.

12. Parental lock. You can block access to children to view the channels you do not want by setting a password on the channel. How to do this is described in a separate article.

That's all, I tried to briefly and meaningfully tell you about the main opportunities in Saratov. There is a setup video here. Leave questions and comments in the comments. Connect friends and acquaintances at a discount and with your benefit.
Lesson 1.
Lesson 2.
That's all for today guys))
 Solving the problem with the missing brush outline in Photoshop
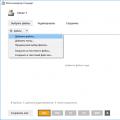 Technical details of PSD files
 Free download various watercolor textures with stains