Undressing a girl in Photoshop. How to undress a girl in photoshop undress a girl in photoshop
Here is the final image for this tutorial.
Ever wondered how a giraffe would look without blemishes? If so, then this tutorial is for you! Today, we'll show you how to strip a giraffe and remove stains. And also how to turn giraffe stains into clothes and arrange them on the ironing board. Sounds tempting, let's get started!
Lesson materials:
Step 1. Let's start this tutorial by creating a new document in Adobe Photoshop. Document size is 2200 x 3200 pixels at 72 ppi. Fill your document with white.

Step 2. First of all, let's create a simple background. You can create your own more interesting and layered background, pick up some old wallpaper, or you can use the savannah landscape.
We will be using gradients and filters. Unblock background(Background) - Right click on the background and select Layer from background(Layer from background), click the button Add layer style(Add a layer style) small icon at the bottom of the layers palette. Apply these layer styles Color overlay(Color Overlay) and Gradient overlay(Gradient Overlay). Use the settings as in the screenshots below.


Step 3. Create a new clean layer above the background layer by clicking the button Create a new layer(Create a new layer) at the bottom of the layers panel. Select a large, soft brush and paint a smudge in the center of the document.

Step 4. Create a new layer above the layer where we applied the brush and go to the menu Filter - Rendering - Clouds(Filter - Render -Clouds). Now for this layer we will apply the following filters. Blur - Motion Blur(Motion Blur) as well Blur- Gaussian blur(Gaussian Blur).
Add a layer mask to this blurred layer by clicking on the icon at the bottom of the layers palette Add layer mask(Add Layer Mask). Make the layer mask active and fill it with a mirrored black to white gradient across the bottom of the document.


Set the blending mode for this layer Soft light(Soft Light).
Step 5. To give a vignette effect, select the menu - Filter - Lens Correction(Filter- Distort- Lens Correction) and adjust the settings for vignetting Effect and Midpoint(Amount & Midpoint).

Step 6. Merge all created layers. Let's make the right side of the background lighter because the light source will be directed to the right. Enter the mode Quick mask(Quick Mask Mode) Q key or icon at the bottom of the toolbar on the left. Select a linear gradient from black to white and drag it from the left edge of the document to the right. The left side should turn pink. Make the quick mask inactive (click the same icon or the Q key again).

Step 7. After exiting the quick mask mode, you will have a selection like in the screenshot below. Let's use the settings now Levels(Levels). Go to the menu Image-Correction-Levels(Image- Adjustments-Levels). In the settings window, move the gray marker to the left. You can also add some noise to the background layer. We will do this in the menu Filter-Noise-Add Noise(Filter - Noise - Add Noise) and set the effect value to 4, the distribution is uniform (Uniform).

Step 8. Insert a picture of a giraffe. To separate the giraffe from the background, select Polygonal lasso(Polygonal Lasso Tool). You can use other methods, but this one is pretty easy and convenient. Click in the silhouette of the giraffe to set the starting point. Keep clicking on multiple endpoints for subsequent segments. To close, click the margins of the selection at the starting point.

Step 9. Click the Refine Edge button to improve the quality of the selection edges.

Step 10. Use the following settings. Click OK and invert the selection in the menu Selection-Inversion(Menu - Select - Inverse). Now clear the selected background area in the menu Editing - Clear(Edit- Clear).

Step 11. To retouch and improve the color balance of the giraffe image, choose from the menu Image-Correction-Shadow / Highlight(Image-Adjustments -Shadows / Highlights) and apply the following settings.

Step 12. Add new adjustment layers above the giraffe layer. To do this, click the adjustment layers icon in the bottom menu of the layers palette. It will be Levels(Levels), Color balance(Color Balance) and Selective color correction(Selective Color). After creating these layers, select all these adjustment layers (make them active) and right-click in order to select the option Create Clipping Mask(Create Clipping Mask). Apply the settings for each adjustment layer as in the screenshot below. For layers Levels and Selective color correction you need to apply a black and white gradient on the layer mask. How exactly is also seen in the screenshot below.

Step 13. Load selection for white stripes with tool Magic wand(Magic Wand Tool) Everything may not be selected at once, click several times until all the white stripes are selected. Then select the menu Selection-Modify-Extend(Select-Modify-Expand) by 1 px. Pay attention to the tool settings in the screenshot.

Step 14. Duplicate the giraffe retouch layer and fill the selected stripes with brown color on the duplicated layer and name this layer " Purity of the skin layer". The original giraffe touch-up layer will be needed in future steps, but for now, make sure the original layer is below the duplicate. Brush(Brush) with a hardness of 0% (hardness) and while holding down the key Alt, activate the tool Pipette(Eyedropper Tool) and find the correct color next to each stripe.

Step 15. You should get something like the result in the screenshot below. You can fill the white areas with color step by step. The brown color for the stripes will come in handy for a more accurate and accurate result.

Step 16. To remove streak marks, use the tool Patch(Patch Tool). Drag a selection onto a clean and textured area of the skin. When you release the mouse button, the pixels from the selected area will retouch the area that you selected with the patch. Repeat these steps to retouch all stripes.


Step 17. You will get a giraffe without its characteristic coloration.

Step18. Adjust the layer with " Clean skin» Eraser(Eraser) with soft edges so that it blends neatly with the original giraffe layer below.

Step 19. Touch up small imperfections in giraffe's skin with tools Patch(Patch Tool) and Spot Healing Brush(Spot Healing Brush Tool).
Choose a brush size in the options bar of this tool slightly larger than the area you want to fix. It is more convenient to work this way, because you can cover the entire area with one click.

Step 20. Now we can change the skin color and add some contrast. Let's use adjustment layers for this: Gradient map(Gradient Map), Levels(Levels) and Black and white(Black and White). Create for these layers clipping mask(Clipping Mask) relative to layer " Clean skin"and apply the following settings.

Step 21 Insert the ironing board image, it does not require any changes or adjustments.

Step 22. Go back to the Giraffe layer and duplicate it one more time. From this we will make a jacket for the giraffe using a new copy. Add a layer mask to this layer and erase the head and legs areas on the mask.

Step 23. This is the shape of the future jacket.

Step 24 Shape the jacket using a transform. Go to the menu Edit-Transform-Warp(Edit -Transform -Warp)

Step 25. Filter Plastic(Liquify) from the filter menu will help you create a flat effect for the jacket. Use a large brush size for the tool Deformation(Forward Warp Tool) to fix large areas and small brush sizes for details like legs or creases.


Step 26 Now the giraffe's skin looks like a jacket in its shape.

Step 27. Apply a free transform Ctrl+ T to the jacket, make it shorter and stretch it horizontally a little.

Step 28 Select the top part of the jacket (above the ironing board), cut out this part and paste it on a new layer. Using free transformation Ctrl+ T, pull it vertically as in the example below.

Step 29 Apply a perspective transformation in the menu

Step 30. Cut out a section of the jacket above the top edge of the ironing board and copy it to a new layer (layer 20 in the screenshot). And again pull the top of the jacket vertically.

Step 31 Apply the perspective transform again in the menu Edit-Transform-Perspective(Edit- Transform - Perspective).

Step 32 Make the top layer of the jacket active. Use a layer mask to delete the top part of it like in the screenshot. Also try to simulate the shape of the wrinkles.


Step 33 Draw a white line with the tool Line(Line Tool - Radius about 13px) on a new layer above the jacket layer. Apply filter Blur-Gaussian Blur(Gaussian Blur) with a 10 px radius.

Step 34 Change the blending mode for this layer to Overlapping(Overlay).

Step 35. Copy the neck area from the original giraffe layer and paste it on a new layer below the ironing board layer. Flip it vertically and adjust it against the jacket. Next apply a layer style Gradient overlay(Gradient Overlay). The settings are below.


Step 36. In the final part of our work, we will create shadows for the giraffe and ironing board. Load the selection on the layer with the original giraffe (Ctrl + click on the layer thumbnail), Create a new layer below from all the visible layers of the giraffe and fill the selection with any color.

Step 37. Let's transform the created shadow. Go to the menu Edit-Transform-Distort(Edit- Transform- Distort). Move the top edge and bottom left corner left and down. Try to combine the shadows and legs at the desired points. Erase with an eraser to fix the shadow of the feet in the center.

Step 38 This is the result of our transformation.

Step 39 Set the parameter Fillings(Fill) 0% and opacity(Opacity) about 20% for the shadow layer. Give this layer a layer style Gradient overlay(Gradient Overlay). Make the Quick Mask (Q) active and fill the layer with linear gradient like in the example below.


Step 40 Click the icon Quick mask(Quick Mask) and apply Gaussian blur(Gaussian Blur) on the selected area on the shadow layer.

Step 41 Duplicate the shadow layer and apply the filter Gaussian blur(Gaussian Blur) with a Radius of 50 pixels, and also change the Opacity of the layer to 70-75%.

Step 42 Create a shadow for the ironing board using the same method. Load the highlight of the ironing board and jacket. Fill with any color on a new layer. For this layer Fill(Fill) 0% Apply a layer style for this layer Gradient overlay(Gradient Overlay) with settings like giraffe shadow. Blur the layer 10 px. Gaussian blur(Gaussian Blur). Duplicate the blackboard and jacket shadow layer and apply the filter Gaussian blur(Gaussian Blur) with a lot of blur, and also change the layer's Opacity to 75%.

Our work on the lesson has come to an end and I think you will get something similar to this!
Final image
Photoshop is a special computer program for editing and editing images. As usual, Photoshop is used to eliminate imperfections in appearance, to create a beautiful background, to acquire captivating photographs by overlaying different results.
You will need
- Photoshop program, the presence of the initial skills for using the program, the image of a girl.
Instructions
1. The selected image should be opened through the Photoshop program, after which it is desirable to duplicate the layer and add brightness to acquire an intense picture. It is easier to undress a girl who is in a swimsuit closer in the image, because it only requires a few steps.
2. After improving the brightness of the photo, you need to erase the swimsuit on the girl's body with a soft brush. This manipulation is performed on areas with existing clothing by pressing Alt + Click.
3. On the erased places, you need to impose any chest that can be easily picked up on the Internet. At this stage, the choice of the size, shape and other features of the female body part takes place. The image with the selected breast should be opened, and then soft paint over each area of the breast. With the support of the Shift + Ctrl + I keys, it inverts the selection, and with the support of Ctrl + V, the breast of the 2nd girl is copied on the initial image.
If you are creating collages in Photoshop, you need to be able to combine different images in one picture. This can be done by various methods, we will analyze a particularly primitive of them.

You will need
- - computer
- - Adobe Photoshop program
Instructions
1. It turns out, first start Photoshop and open the images that you need to combine. In this case, we need to place the deer in the background.

2. Now hover over the image with the deer, hold down the Ctrl key and drag the image onto the background image. The deer image is displayed as the newest layer. Now press Ctrl + T and resize the deer to fit the surroundings, and place it where you want it.

3. Then select the Eraser Tool and working on the top layer with the deer, erase the excess. To do this, it is more cool to enlarge the image (Ctrl ++), so as not to lose details and, as it is allowed, to clean the layer correctly.

4. The result is pretty good, but if you want, you can work on the lighting, add shadows, and thus better fit the deer into the environment.

Related Videos
Note!
The object does not invariably fit perfectly into the environment. In order to fit it as much as possible to the environment, use the image settings in the Image - Adjustments panel.
Useful advice
For more comfortable and fast work with an eraser or a brush, it is better for you to use a graphics tablet, rather than a mouse.
Related Videos
Note!
The quality of the image directly depends on the expert's utilitarian skills, because when “undressing” a person, it is very important to observe the proportions and initial forms of the body. Excessive improvement or metamorphosis of body parts leads to a negative perception of the audience.
Useful advice
The available functions allow you to fit the breasts in size to the image of the first girl, so that she looks realistic on the body. It is also appropriate to merge the layers so that discrepancies in the color of the body and the new breast are not invisible. The transitions must be smooth and inconspicuous, which is achieved by selecting the shade of the core skin. In this example, the subsequent undressing of the girl takes place. For example, in place of the panties, there is an erasure and overlay of naked buttocks or pubis. That is, every kind of bikini area is selected according to the taste of the photographer, and then copied to the start area of the first image.
I decided to undress the girl, and it seems to me I coped with this task.
Open the image: File - Open (ctrl + o) (file - open)
Duplicate the layer (Layer - Duplicate Layer) (ctrl + J). Add a little brightness Image - Adjustments - Levels (Image - correction - levels) (ctrl + L) set the values to 23 1.34 233
Step 1. Getting rid of the swimsuit
Take the Clone Stamp Tool with a 9-13 soft brush, I chose 13
holding Alt + Click select the skin above the swimsuit and begin to carefully paint over the swimsuit. It should look like this
Step 2. Overlay body parts
Choosing a breast for a girl, since there are a great many of them on the Internet
Opening the image: File - Open (ctrl + o)
Go to Edit Quick Mask Mode (Q button) and select a soft brush
We begin to paint over our breasts gently and neatly
Exit the mode (Edit in Standard Mode, button X), press Shift + Ctrl + I (invert selection, icq may open) or go here
Press Ctrl + C, and while opening our working document press Ctrl + V, i.e. copying our breasts.
Apply Ctrl + T to the layer, that is, transform it to the desired size. Oh how I like to do it
Now draw an imaginary (or you can draw it in a new layer) line from the solar plexus to the throat. And set our chest to divide it into equal halves, relative to this line. For convenience, the chest can be positioned on the line of the former swimsuit.
Now go to Brightness / Contrast (image - correction - Brightness / contrast)
and change it until it completely merges with the original skin.
In my case, they turned out to be -48 -17
Select the Eraser Tool (eraser, eraser E) with a soft brush and a hard brush of your choice, I chose with a soft one. And gently erase the edges.
We get the following
Press Ctrl + U or go to
We start to pick up the color. I got the following settings
Press Ctrl + B or go to
We bring it to complete merging with the original skin. I got the following settings
You can play more Brightness / Contrast (image - correction - Brightness / contrast) for complete similarity.
Set the chest layer Opacity to 90%.
The result of Step 2 ..
Step 3. Bottom part.
We do everything the same as in step 2. There are also enough photos with intimate hairstyles on the Internet.
Result of Step 3
Merge all layers Shift + Ctrl + E or
Make a copy of the layer Ctrl + J
Apply Gaussian Blur to the resulting copy and set the layer type to Soft Light. Reduce the Opacity (transparency) of the copy to 50%. That's all.
My result is as follows
HM. It turned out pretty good! The girl was stripped =)) thanks for your attention!
P.S. Girls, do not take this lesson to heart, we are just learning photoshop =))
 Solving the problem with the missing brush outline in Photoshop
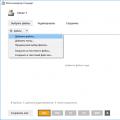 Technical details of PSD files
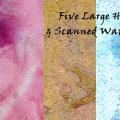 Free download various watercolor textures with stains