Is it possible to reflash a wifi router. TP-Link TL WR Router Firmware - How to Download and Update with Your Own Hands. Connecting to the router
Hello dear readers of the inforkomp blog. So, as you understood from the title of the article, today I want to return to the topic again: wireless access point settings. To be more precise, I want to talk about: how to flash a router and why to do it. I will show the process of resetting the software using an example Wi-Fi router Dlink Dir-300. But, if your router model differs from the one shown here, it's okay, the process itself is the same, except that only the design of the settings window and the name of the menu items will differ.
Why did I decide to write specifically about the firmware of the router? First of all, the idea to write an article about router firmware update but not how could not get together and do it. The second reason is that lately, many acquaintances have begun to be interested in me in this particular question: how to flash a router, what to press and what firmware to use.
As a rule, many users initially try to update it before. For example, when buying or setting up a new device, I personally check the firmware version and, if possible, update it to the latest version. And you know what, for probably more than a year my router has been working and has never frozen.
I believe that updating the firmware on the router is a must. The very meaning of the updates is that the developers, releasing new firmware versions, correct all the shortcomings and errors that could appear when working with the Internet and the router. Moreover, the process of flashing the router itself is very easy.
Therefore, if you have serious problems with Wi-Fi, then after reading the article, be sure to try to reflash the WI-Fi router.
Why reflash the router
Well, there can be a lot of reasons to flash a router. Here are a few of them:
- 1. The most commonplace reason is updating the firmware for stable and high-quality Wi-Fi signal operation;
- 2. Not a single device catches the Wi Fi signal;
- 3. The message that the smartphone and computer is constantly on;
- 4. An Internet cable inserted into the WAN port is not visible or not detected;
- 5. Constantly disappears, then a Wi-Fi signal appears; etc.
In general, there is simply a huge amount of a variety of problems with which the firmware of the router will help to cope.
Preparation and selection of firmware
IMPORTANT!!!
- Choose your firmware carefully. Make no mistake in identifying the hardware version of the device;
- Disconnect the Internet cable from the router, leaving only power and connection to the computer;
- You should only flash the router using a network cable, which we connect to any port of the access point (except WAN), and the other side to the computer's network card. You cannot update the router software using WiFi;
- All settings, passwords and logins will be reset to factory settings. What, after the update will have to be configured again;
- Do not turn off the access point during the firmware;
Well, let's start by determining the revision of the router and downloading the required firmware. In order to find out the hardware version, we need to turn the device over and look at the sticker with technical information. I have it" H/W Ver.: B5" And " F/W Ver.: 1.2.94"Therefore, whoever has the same revision or B6, then download the firmware here: link.

For those who have Dlink dir-300 NRU B7, download the update from this linkby selecting the desired version. For owners of routers with revision B1, B2, B3, download . If you have a different router, then go here, and in the list that appears, select the device you need with the corresponding revision. Then, going to the folder " Firmware", which contains the latest firmware version in the form of a "bin" file.

Now, by clicking on the file, save it to your computer.

Once again, be careful with the choice of firmware version. Because if you try to install the firmware that is required for revisions B1-3 on a router from revisions B5-7, it may break it. And it will be possible to restore its performance only in the service center, paying a certain amount for this.
D-Link Dir 300 router firmware
As always, with any setting, first, using the technical data (password, login) indicated on the sticker. If you accidentally forgot your password, then you will need.

The web interface window of our device will open.

To start updating the firmware of the router, you need to go to the following menu items: " System» -> « Software Update».

In the firmware update menu, by pressing the button " Select"we will be required to find the downloaded file and open it. If the name appears next to the select button, then everything is in order. To start the process, click on " Refresh».

All that is left is to wait for the firmware update to finish and reboot the router.

The next time you enter the settings, use the standard password and check the current version of the software.

Also, do not forget that all settings are abandoned. Therefore, be sure not to forget. Leave comments if you have questions or need help finding the right firmware.
Firmware update for D-Link Dir 300 router
It is far from a secret that every router, like many other devices, has built-in non-volatile memory - the so-called firmware. It stores all the most important initial settings of the router. The router leaves the factory with its current version at the time of release. But time flies fast, new technologies, related equipment appear, developers identify errors and make improvements to the operation of this router model. Therefore, for the correct operation of the network device, it is simply necessary to periodically update the firmware to the latest one. How to do it in practice on your own?
Manufacturers of network equipment by no means prohibit, but rather, on the contrary, they strongly recommend that users update the set of firmware on the router. But remember that if the upgrade process of your router fails, you definitely lose the right to free warranty repairs - that is, you perform all manipulations with the firmware at your own peril and risk. Therefore, approach these actions with due attention and seriousness. It is highly desirable to take care of an uninterrupted stable power supply for the router and computer. Be sure to unplug the network cable from the WLAN socket. If possible, connect the router to the PC using an RJ-45 wire, as flashing via a wireless network is fraught with trouble.
Now let's try to update the BIOS on the router together. Two scenarios are possible.
Option 1: Firmware update without saving settings
First, let's take a closer look at the simplest method for flashing a router. After the firmware update process is completed, your router will return to its default settings and you will need to re-configure it to suit your conditions and needs. As an illustrative example, we use the router of the Chinese company TP-Link. The algorithm of actions on routers from other manufacturers will be similar.
- First of all, you need to clarify the identification data of your router. This is necessary to find the latest firmware. We turn the router over and on the back of the case we see a plate with the name of the device model.
- Next to it, the version of the hardware revision of the router is necessarily indicated. Memorize or write it down. Remember that firmware for one revision is incompatible with hardware of another revision.
- We go to the official website of the manufacturer and in the section "Support" we find the most current firmware file for your model and hardware version of the router. We save the archive on the computer's hard drive and unpack it, extracting the BIN file. Avoid downloading from incomprehensible resources - such carelessness can lead to irreversible consequences.
- Now in the address bar of the browser, enter the current IP address of the router. If you did not change its coordinates, then by default it is most often 192.168.0.1 or 192.168.1.1 , there are other options. We press the key Enter.
- An authentication window appears for logging into the web interface of the router. We type the current login and password, in accordance with the factory settings, they are the same: admin. Click on OK.
- Once in the web client of the router, first of all we move to "Additional settings", where all device parameters are presented in full.
- On the advanced settings page in the left column we find the section "System Tools", where we go.
- In the expanded submenu, select the item "Firmware Update". After all, that's what we're going to do.
- We press the button "Overview" and open File Explorer on your computer.
- We find the previously downloaded file in BIN format on the hard drive of the computer, select it with the left mouse button and click on "Open".
- We make the final decision and start the process of flashing the router by clicking on "Update".
- We patiently wait for the upgrade to finish, the router automatically reboots. Ready! The BIOS version of the router has been updated.


Option 2: Updating the firmware while keeping the settings
If you want to keep all your own settings after updating the firmware on your router, then our manipulations with the network device will be a little longer than in Option 1. This is due to the need to backup and then restore the current router configuration. How to do it?


As we have seen together, updating the firmware on the router on your own is quite realistic and very simple. Even a novice user can easily upgrade the firmware of a network device. Most importantly, be careful and think carefully about the possible consequences of your actions.
Hello, in this video, let's deal with the issue of flashing a Wi-Fi router, but before we start, it would be reasonable to find out why the router should be flashed at all? I do not often set up Wi-Fi routers, so I turned to a familiar specialist in this matter. She works in a company, a provider of local and Internet networks and is engaged in setting up network equipment.
And here are the most common problems that arise, after which you have to reflash the router:
Disabling Wi-Fi
Router freezing
The DHCP service does not work, by automatically configuring the network connection
VPN connection not established
Slow data rate
Therefore, if you have encountered similar problems, then it makes sense to reflash the device, personally, when I get a new router, I immediately reflash it, it's like updates for Windows, they should always be fresh!
Well, let's get started!
And before I start, I will say one thing, everything that I will show further, you do at your own peril and risk, and if you listen and watch carefully, then there should be no problems.
I will be flashing a TP-LINK Wi-Fi router, model TL-WR841ND, this is how it looks. First of all, we look at the reverse side of the router, here we are interested in the address of the web interface for configuration, login and password. Usually web interface address 192.168.0.1 or 192.168.1.1, again, this address can be viewed in the settings of the network connection through which the router is connected to the computer. We just look at the properties of the gateway address, I have it 192.168.0.1, enter this address into the browser, enter the login and password and get into the web interface for managing the router.
If you can’t enter the web interface, you may have already changed the router’s IP address, login or password, so you can simply reset the settings by holding the Reset button on the router for 10 seconds. But if you didn’t configure it, then it’s better not to do anything, but turn to specialists who set up the equipment, because after a reset, all settings will become factory settings and nothing will work!
For me, in the status tab is displayed:
Firmware Version: 3.14.19 Build 130122 Rel.43330n
Hardware version: WR841N v8 00000000
Now, according to the version of the equipment, you need to download the latest firmware for it, for this we can type TP-LINK in Yandex, in search of the official website of the developer, here tp-linkru.com go to the site \ Support \ Downloads \ Product type: wireless equipment \ Model : TL-WR841ND \ Version: v8 \ Search .
It is extremely important to download the firmware specifically for your router, because if you install the firmware for another device, you can get dressed and go to the service center! Let's check this again. Although I have the WR841N equipment in the web interface, and on the WR841ND device itself, it is possible that the firmware was installed here for the WR841N, but I used to trust what is written on the device itself. Although the web interface indicates model No. TL-WR841N / TL-WR841ND, it means that these devices are similar and the firmware should fit, but I still choose the model that is indicated on the rear panel of the router.
We find the latest version, download it to the computer and unzip it, as a result we have a file with the extension .bin, this is the firmware.
Before starting, I advise you to take screenshots of the previous settings, just in case, so that in case of a reset, you can reconfigure. If you have Windows 7, this can be done using the built-in program psr - problem screen recorder, I talked about it in one of the lessons. Start \ Run \ psr \ Options \ Number of snapshots stored 100 (this is the maximum) \ Start recording\ and it is desirable to go through all the tabs of the web interface. Let's check if the screen shots are recorded, everything is fine.
Let's also go to System Tools\Backup and Restore\Backup\config.bin– this file stores our settings.
Now we can start System Tools \ Firmware Update(it is advisable to connect the device to an uninterruptible power supply before flashing so that electricity does not suddenly disappear, in no case reboot it when the firmware is being updated, and it is also desirable to disconnect all patch cords, except for the one connected to the local machine) \ Select file \ Update \ Yes \ Next, the router will reboot
My settings are saved, if you don't, then go System Tools\Backup and Restore\Select File\Restore
If it doesn't work, then use the created screen shots file and restore from it!
And finally, if you have updated the firmware to the latest version, but the problem has not disappeared, or others have appeared, try installing an older version, as it happens that the new firmware is not yet stable and may contain errors.
Every router(from English. router- router) is an independent device with its own operating system, similar to the one installed on your computer, only “sharpened” for networks. In simple terms, the operating system is one large program consisting of many small programs - modules. Why is it called firmware? The thing is that the software of the router - the firmware - is, as it were, sewn into the permanent memory of the device. Accordingly, the procedure for installing a new firmware in the ROM of the router is called flashing , and the microprogram itself - firmware .
Why flash a router at all?
Over time, firmware-firmware is improved, optimized, individual modules are updated. A newer version of the firmware may add new features that were previously available in hardware, but not implemented in software, and the stability of the router may improve. Sometimes it happens that with the firmware that comes on the router from the factory, the device simply refuses to work normally - a vivid example is D-Link DIR-615K1 And D-Link DIR-615K2. And the normal version firmware for D-Link DIR-615 K2 came out only 14th in a row.
In which case it is necessary to flash the router and in which not?
It is only necessary to flash the router if it is really necessary. For example, the router is unstable, freezes, loses the network. Or in the event that the new firmware contains technical changes that you really need in this particular case - for example, VLAN support or a DLNA server. If your router works stably and its work suits you, you don’t need to flash the router!
Is flashing dangerous for the router itself?
Yes, router firmware procedure is dangerous
- in case of any failure, or if the power supply is lost at the time of the router firmware - in the best case, you will have to restore the old firmware, and in the worst case, this can lead to the complete inoperability of the router.
Also, the wrong choice of firmware can lead to disastrous consequences. Each revision of each router model has its own firmware. Firmware from one router to another usually does not fit. The exception is the so-called universal firmware, which go to a separate type of chip, which in turn can be used on different models of routers. Therefore, before flashing, be sure to make sure that this firmware is suitable for your router model.
Where can I find the firmware for the router?
Usually, firmware for routers posted in the public domain on the official website or FTP server of the manufacturer.
Firmware for D-Link routers- link .
Official firmware for ASUS routers- link .
Unofficial firmware for ASUS routers- link .
Firmware for Zyxel routers
- link .
Firmware for TP-Link routers
- link .
Firmware for NetGear routers
- link .
Firmware for Linksys routers
- link .
Firmware for Sagemcom routers
- link .
Flashing the router - step by step instructions:
Step 1. Download the firmware and unpack it to the root directory of the disk C:\.
Step 2 Be sure to check that the power supply of the router is well kept in the electrical outlet. If possible, it is desirable to provide the router with uninterrupted power. It is also desirable to disconnect the provider's cable from the WAN port of the router.
Step 3 We go from the computer to the web interface of the router. In the vast majority of cases, the address of the web interface of the router is http://192.168.1.1
, for D-Link routers - http://192.168.0.1
. Access login - admin or Admin, password admin or Admin, or 1234
or an empty string. If you can’t log in - read this article -.
Step 4 We are looking for the system settings section in the web interface of the router. Depending on the manufacturer and localization, this section may be called Tools, System, Maintenance, Administration Maintenance, Administration, or Management. This section should contain an item - Software update - it can also be called differently: Firmware upgrade, Software update, Firmware update. Here, as a rule, there is a button for selecting the firmware file - Browse or Browse, using it you need to select the firmware file that you downloaded and unpacked. After that, you need to click the Update or Upgrade button.
Step 5 Router firmware is a fully automatic operation, you just have to wait until the software is installed and the router reboots. After the reboot, you will only have to check the router settings and connect the provider's cable to the connector WAN.
Beginning of the article:
Strange as it may sound, but flashing a router with an alternative OpenWRT firmware is no worse than flashing a router with an updated official firmware from the website of your device manufacturer. The same errors and / or random, unpredictable events can occur here as when updating the software version from the manufacturer's website.
You downloaded the wrong firmware, i.e. not for your device. It may happen that during the firmware, your lights will be turned off, etc. But I hope that you do everything right and you will not have unexpected surprises with electricity.
We flash the router with the latest firmware from the manufacturer's website
Important. Before flashing the router with alternative firmware, you must download and install the latest firmware from the website of your device manufacturer. When I first flashed my router, I didn’t do it, and then for a long time I couldn’t understand why, after flashing the alternative one, I couldn’t enter the web interface of the router. The router pinged on 192.168.1.1, but there was no web interface (the firmware was uniquely with a built-in web interface). Dancing with a tambourine solved this problem, but we do not want this to happen to you. So, first, be sure to update to the latest official firmware from the website of your equipment manufacturer.
Important. The connection with the firmware must be mandatory through the network cord, and not through Wi-Fi.
Later, after flashing the router to an alternative one, you will be able to access your devices via Wi-Fi without any problems, after appropriately configuring the router. But for the firmware, you need to communicate with the router via the network cable! Otherwise, your router will most likely turn into a "Brick".
So, go to the website of the manufacturer of your router and download the latest firmware version. Here, too, it is important not to make a mistake with the model and revision of the device.
For TP-L ink TL-WR1043ND ver.1.8 the latest firmware from the manufacturer's website can be downloaded here. The firmware is in the archive - first unzip it.
We go to the web interface of the “Experimental” router along the path “System Tools”, “Firmware Update” and click the “Browse” button.
In the window that appears, specify the path to the latest official firmware of your router and click the "Open" button.

And then the Refresh button.

A warning window will appear asking you if you really want to update the firmware - we agree.
![]()
The firmware process will begin, we are waiting for its completion. The process takes about 3 minutes. After updating with the factory firmware from TP-Link, you can go to the web interface of the router at 192.168.1.1 with the login "admin" and the password "admin".

Download alternative OpenWRT firmware for your router
Important. Depending on the model of your router and its hardware, in particular, due to the small amount of memory for the firmware, it may turn out that the alternative OpenWRT firmware may not have a web interface. Therefore, before downloading and flashing your router, find out on the forums about the presence of a built-in web interface in your OpenWRT firmware. Of course, for firmware without a web interface, when mounting an external USB drive, a web interface is made. But this is another case, requiring a more in-depth understanding of the process, knowledge of special commands, the use of appropriate programs, and this is no longer included in the example we are considering. For the TP-Link TL-WR1043ND router, the OpenWRT firmware has a built-in web interface. And further, we will only talk about routers for which a web interface is already built into the alternative OpenWRT firmware.
Important. Factory name must be written at the end of the firmware name - this indicates that this firmware can be flashed via the Web interface from the official firmware of your router manufacturer. It is also important not to make a mistake with the choice of firmware and revision for your device.
For routers, download firmware from wiki.openwrt.org/toh/start

Scrolling the mouse wheel down, and finding the manufacturer of your router, click the appropriate link


In the next window, specifying the path to save (for example, the local drive "C"), click the "Save" button again.

For your device, the download link and path to it will most likely look different. But I think by clicking on various links on this site, or searching for information on the Internet, you will still download the firmware you need for your equipment.
For TP-L ink TL-WR1043ND ver.1.8 latest firmware OpenWRT, at the time of this writing, can be downloaded from here. The firmware is in the archive - first unzip it.
Flashing the router with alternative OpenWRT firmware
The firmware of the router with alternative firmware is no different from the firmware of the router with the official firmware.
Go to "System Tools", "Firmware Update" and click the "Browse" button to specify the path to the firmware.

In the window that appears, select our alternative firmware and click the "Open" button.


A warning window will appear about updating the firmware - we agree.
![]()
The firmware process begins, let's go while pouring coffee for ourselves ...

The process for TP-Link TL-WR1043ND lasts quite quickly, but it is still impossible to judge the completion of the firmware process by the burning LEDs of the router. Therefore, we wait 3 minutes and drink coffee.
After 3 minutes, to check the completion of the process, run the command line and check the ping by entering the command ping 192.168.1.1 and pressing Enter. If the firmware process is completed, you will see the response of the router as in the figure below. If you are too lazy - you can not do it, and after 3 ... 5 minutes, immediately try to connect to the router through the browser.

Note. After flashing the router, after even 5+ minutes from the start of the firmware, I couldn’t immediately enter the OpenWRT web interface. Changed different browsers - the result is zero. I don’t know why it happens this way - but it’s a fact (I flashed the router several times for various reasons, and it has always been like this). And it is treated simply - we pull out the power cord from the router and after a few seconds we connect it back.
We type in the browser 192.168.1.1 and get to the home page.
![]()
Congratulations, you correctly flashed the router!
 LibreOffice - multifunctional office suite
 Download program 7zip. Programs for Windows. How to use the context menu in Windows
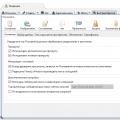 Mozilla Thunderbird (mail client)